Building detailing
So I'm new here, and to modeling. I've always been more of a 2d artist(photoshop/illustrator work from photo manipulation and web design, to logo/t-shirt design and everything in between). I did some CADD work for my uncles company for a bar here in downtown Atlanta, as well as a wall casing for the Smithsonian Presidents' Museum in Washington D.C. As payment for that, his company gave me a copy of 3dsmax 2009.
But anyway, basically I've been learning the ins and outs from troubleshooting over the last 2 weeks. I did a basic billboard I was using for a CS:S map I had been working on, but felt I needed to advance my scope. I used the billboard basically as a test run to see how workflow goes, and basically learn simple building/uv mapping and unwrapping/texturing and so forth. Well, after doing that, I began on this piece. It started out as a simple panel for a building detail, then has blossomed into what I think I'll turn into a building scene. Everything was built off my first panel(what is seen has been copied and such to create more length to the piece to accompany the remaining portions of the building to come).
Well, I've said enough. Time to show the work. Any crits and comments are very much welcome. I know I'm no pro or anything. Poly/tri count is NOT important to me, basically just using this as a learning tool.
The basic panel I built first before refining:

The original piece I created, copied to show how it tiles, as well as showing the new detail:

My current progress, nearly completed molding around the top of the building to come(with some basic V-ray light setup and render):
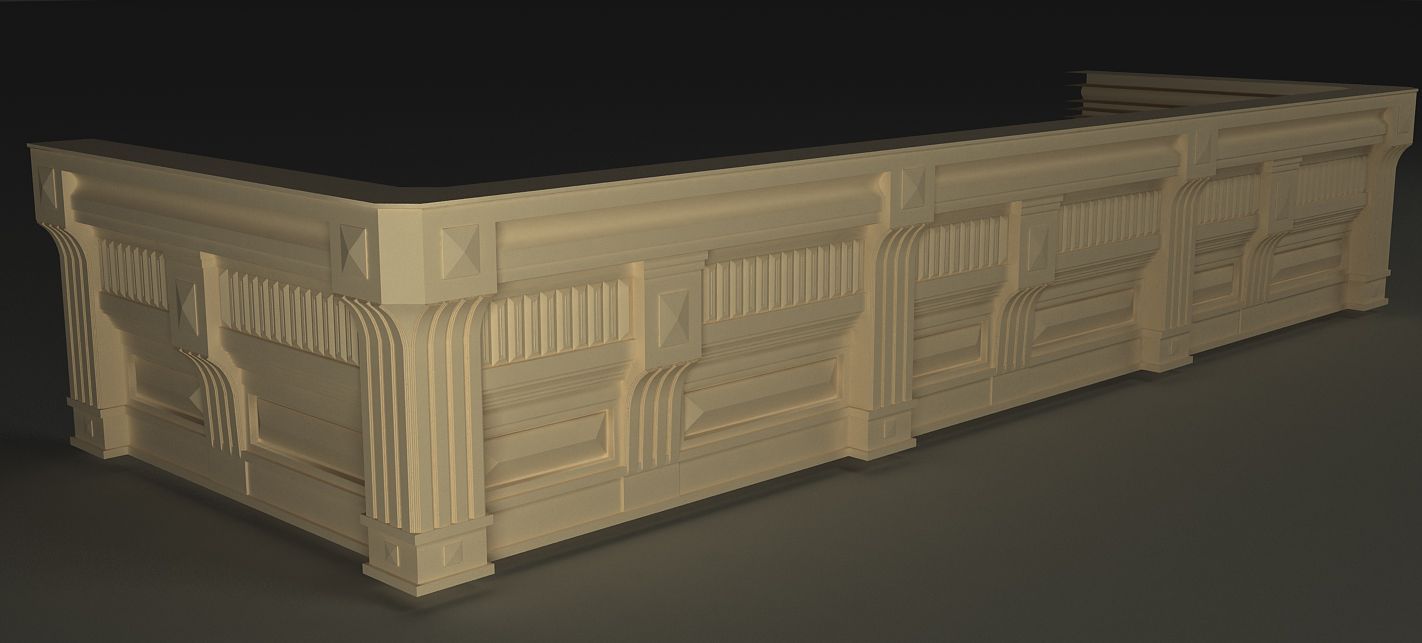
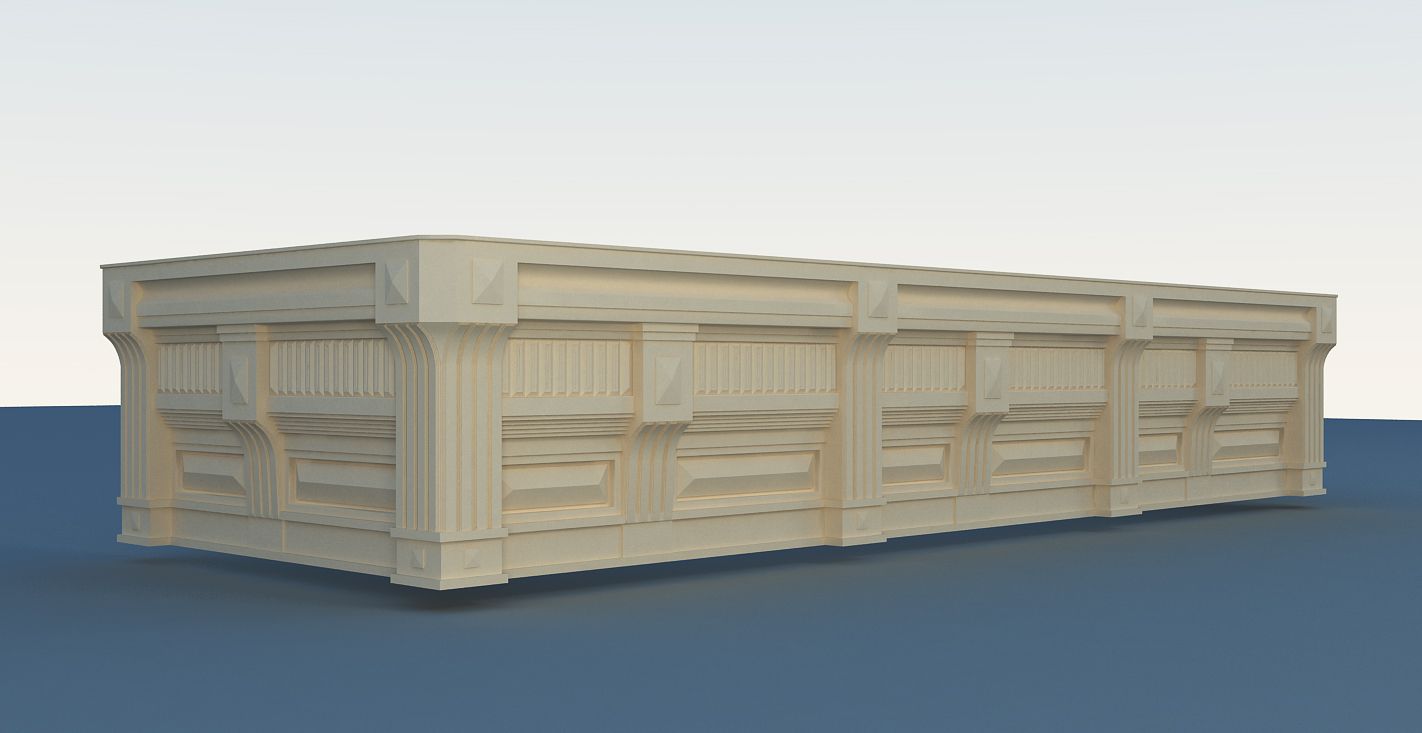
And a second V-ray render, this time with a sky backdrop to possibly show it a bit better:
I'd love any comments and crits, no matter how harsh. I'm still just learning, so I'll take any and all advice.
But anyway, basically I've been learning the ins and outs from troubleshooting over the last 2 weeks. I did a basic billboard I was using for a CS:S map I had been working on, but felt I needed to advance my scope. I used the billboard basically as a test run to see how workflow goes, and basically learn simple building/uv mapping and unwrapping/texturing and so forth. Well, after doing that, I began on this piece. It started out as a simple panel for a building detail, then has blossomed into what I think I'll turn into a building scene. Everything was built off my first panel(what is seen has been copied and such to create more length to the piece to accompany the remaining portions of the building to come).
Well, I've said enough. Time to show the work. Any crits and comments are very much welcome. I know I'm no pro or anything. Poly/tri count is NOT important to me, basically just using this as a learning tool.
The basic panel I built first before refining:
The original piece I created, copied to show how it tiles, as well as showing the new detail:
My current progress, nearly completed molding around the top of the building to come(with some basic V-ray light setup and render):
And a second V-ray render, this time with a sky backdrop to possibly show it a bit better:
I'd love any comments and crits, no matter how harsh. I'm still just learning, so I'll take any and all advice.
Replies
If its just "low poly" and you plan to texture directly on it then good luck with unwrapping it :P
looks nice and modular, you could unwrap one section and duplicate/mirror it to hide repetition.
Nothing in life is that sharp, though, and rounding off corners even slightly gives it a more natural look. Not to mention that there would be nothing for highlights to reflect off of on the edges, so they wouldn't look very sharp in the way that a sword does, for instance.
But honestly, with a solid LP cage on this, itll bake nicely. Those smaller surface details will be fine, and the larger ones should be geometry anyway. What I would say is chamfer those real hard edges. Doesnt need to be much, but just enough to catch some light. And a few of your smaller details probably wont transfer or read enough in game, but thats all part of the learning process.
As for making it modular, depends on the scalability (word?) of your building set you want. The more seperation, the more you allow a designer to mess with the flow through no fault of their own. So if you are happy for this detailing to be thrown around in pretty much every circumstance, I'd say leave it as is, but if you want it to very rigidly only ever be the top trim of a building, make sure that's reflected in your meshes.
Yeah, I'm still working on the 1 spot, I just threw a couple pieces together to present the idea a bit better. I do have about half of the edges chamfered, still have more to do, but don't want to make them all where they bake in the same way either. I have quite a bit more sub-d than what's really noticeable in the render, I just haven't done too much with it.
Those 4 extrusions are inset upon each other, and the edges will be beveled a hair also, eventually. Is there any other area that will obviously not bake correctly into the normal? The detail inside the channels in the middle have an inset detail, which has a different height, but I'm not sure if it's quite enough to come out nicely. Hopefully it is, those took a bit of playing around with to look just right.
I'm still learning, so any other tips are always welcome. As for the posts about the "sharp" edges, I haven't gotten to any smooth/chamfering on a large majority of the area, only a few select edges thus far that I knew what I wanted right away. I'm still tweaking some areas before I do anything too permanent just in case I need to go back without clipping too many poly's and re-creating them.
And then that means on the pilasters, the same goes, because it's a .25 inset with a .25 extrude, repeated to create 3 planes. They could be easily created by a box with large chamfered edges on the left and right...thus still a perfectly flat, diagonal plane. Correct?
Should I build and texture just the corner column by itself, and break it away from the flatter sections? The way I had it pieced together in the image of the whole section was just copied the section I built, rotated it, attached it at the corner verts, then created polys to fill in the sections between the curves and upper portions of the corner columns. The issue this presents, is it requires the combination of 2 sections.
If I removed the large column from my main section, and made it an asset of it's own, I think it will fix the issue all together, would that be the correct way of thinking? This would make me have to make 1 more texture map, but that's not bad. I'd have 1 for end columns, 1 for flat sections, and 1 for middle columns.(if aything that I just typed out made any sense >.<)