Modelling & Texturing Environments

polycounter lvl 17
I've decided to learn to make environments but, I'm a bit unsure how to go about making them.
I'm doing this small toilet stall set to try and learn some of the techniques involved.
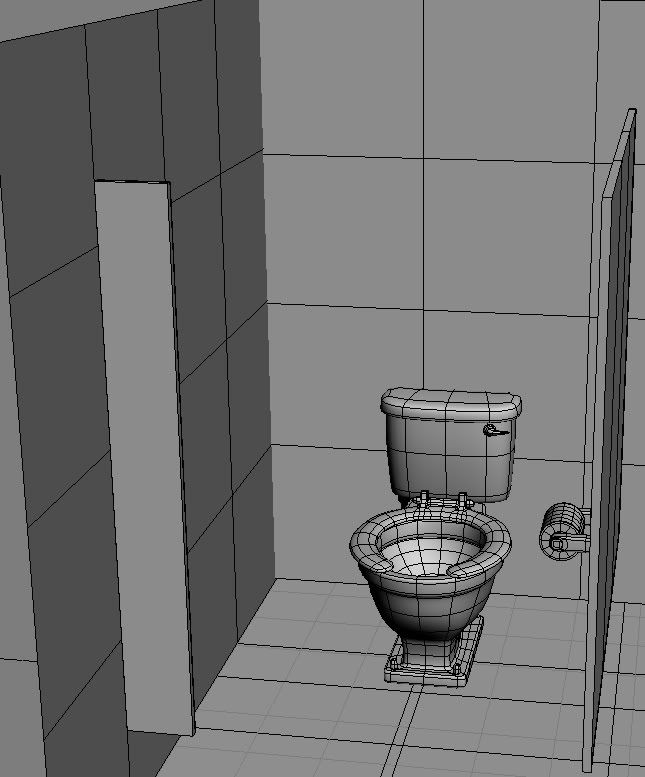
I understand how to make the objects in a scene (the toilet seat, toilet paper and whatever other props are going to be in there. BUT how do i go about making the walls? I could do it like i make any object. just model, map, and texture. Though that seems okay for just this, but if i were to do the entire washroom it sounds pretty silly. This is sort of the method I used for a set i had to do for school.(image below) all the walls of the tavern were mapped and textured like I texture any other model.

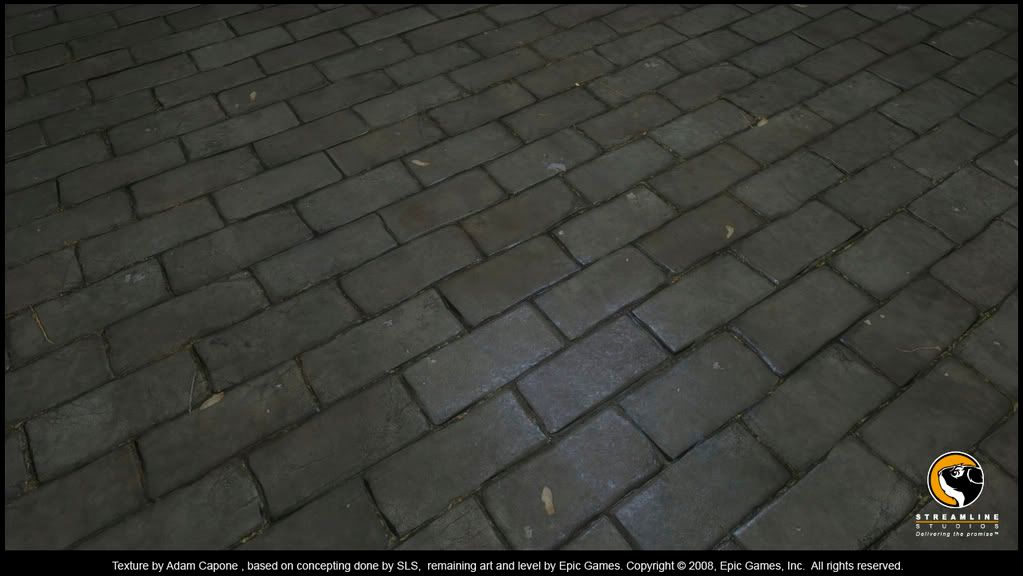
considering the level of detail that is present in just one brick, i assume most games usually use tiled textures for walls. However they still manage to get different looking strains and cracks on them.
So, how exactly should I be going about doing this.
I've been unable to find any tutorials on making an environment like the millions of ones showing workflows for making characters, cars or other objects. If someone knows of one , please share")
I'm doing this small toilet stall set to try and learn some of the techniques involved.
I understand how to make the objects in a scene (the toilet seat, toilet paper and whatever other props are going to be in there. BUT how do i go about making the walls? I could do it like i make any object. just model, map, and texture. Though that seems okay for just this, but if i were to do the entire washroom it sounds pretty silly. This is sort of the method I used for a set i had to do for school.(image below) all the walls of the tavern were mapped and textured like I texture any other model.
considering the level of detail that is present in just one brick, i assume most games usually use tiled textures for walls. However they still manage to get different looking strains and cracks on them.
So, how exactly should I be going about doing this.
I've been unable to find any tutorials on making an environment like the millions of ones showing workflows for making characters, cars or other objects. If someone knows of one , please share
Replies
As you said most games use tileable textures and there are many different methods to break up the repetition. One of the "older" ways is using vertex coloring. There's also multitexturing for some games as well as just using light and shadows to break it up. Another way of breaking things up is using geometry. Like putting a modeled brick sticking out of the textured brick wall.. or just putting planes with a dirt texture hovering right above the ground.
Depending on the tileable texture you could also play around with flipping and rotating the UVs.
Uhm.. well.. I dont know all the tricks but there sure are plenty.
For unreal they like to use multiple normal maps. First they have a "real" normal map that fits the texture and then they have this "dirt normal map" that gets apparent when you get closer. If you can get your hands on Unreal Tournament 3 or Gears of War you can check it out in the editor that comes along with the game.
Also, there's less and less BSP/CGS (whatever the editor you're working with calls basic building blocks) in games these days, so more and more items are actual 3d meshes than editor-based "building blocks."
http://wiki.polycount.net/CategoryEnvironment
Crits about the scene:
- Trim the brick edge on the right you can't expect maps to handle sharp corners like that. Sure you can pack on some pretty expensive maps that will help, or you can just slap some trim on it or turn that corner into a support beam that runs floor to ceiling. Considering it looks like stairs are running up that wall? As good as any place for a major support beam.
- The 1950's retro beer poster, has to go. Too clean, wrong era. There are a lot of things you can stick on the walls to give the place character.
- The support beam in the corner, is next to a "painted into the texture" support beam, looks bad and doesn't make sense from a construction stand point. There needs to be more beams at regular places, 2nd floors don't hold themselves up.
- Spend some polys on the support beams on the ceiling it will help to close in the space and add some detail and very little cost.
http://boards.polycount.net/showthread.php?t=44123&highlight=decal
i picked up ut3 yesterday and looked around in the editor a bit...some of tile textures are confusing..but i'll figure it out....
oh and vig, thanks alot for the crits on the tavern. But thats jsut a really old set i made. I'm working on the washroom stall right now. it might be easier for me to work with something a bit smaller.
anyhow, i've started working on it...i'll post my progress soon.
OH,...and guys....i was thinking...i would make the set more or less inside max,...and then pretty much transfer it part by part into unreal.....
is that a logical aproach to this or is it normally done differently
To get some difference out of them you can texture each side uniquely and build the piece symmetrical and that way you will be able to flip it and get a different facing texture to break up the repetition.
2 walls makes 4 unique looking walls ect... Think about doing this with other pieces that have faces that face the walls, like support beams. It will help cut down on textures and props you use. Hope that helps sorry if that seemed really obvious already its often over looked.
http://wiki.polycount.net/3D_Tutorials/Modeling_Bathroom_Tiles
If you want to get more involved with breaking up repetition in the original diffuse/spec/normal, you could use the grime pass in conjunction with the following:
Make 2 wall textures that line up fairly well, but with different details in different areas. (Darker bricks in different spots, different chips, some grime). Then create a random black and white mask texture.
Create 2 UV sets. The first is for your brick textures. Let's say you scale the 1st set of UVs so that a 10 meter expanse gets the brick texture(s) repeated 5 times.
Now set up a second UV set for the mask, and scale the UVs so that it tiles at a different preferrably odd/fractional interval. Maybe something like 6.5 repetitions per 10 meters should work. In your shader, hook up the two diffuse/spec/normal materials, as a composite/blend type material, and use the black and white image to mask between them. So brick texture 1 will be displayed where the black is, and brick texture 2 where the white is. Since the mask and the diffuse/spec/normal (DSM) maps tile at different intervals, you shouldn't see details popping up at even intervals with the DSM maps as they are being masked in and out between the two sets.
If you wanted to get ambitious and add a third UV channel for grime at a different tiling interval, it would be tough to notice any tiling repetition. But your shader would also be getting fairly expensive. I'd only use this on very large surfaces such as terrain or really massive walls.