Home 3D Art Showcase & Critiques

[Finished] Overgrown Crash Environment - UE4

interpolator
Online / Send Message
rexo12 interpolator
Starting a new environment to further practice foliage skills and general environment art. Aiming towards a dense forest scene with a single central prop (Tree + Capsule) as the focus. I intend for this to be quite a long term project, given its scope and also the fact that I am in the middle of my semester and so will not have a whole lot of time to dedicate to it. I'm almost approaching it more as a sandbox to try new stuff out than a focused environment study - but we will see.

So, this is the scene, as it stands currently. 
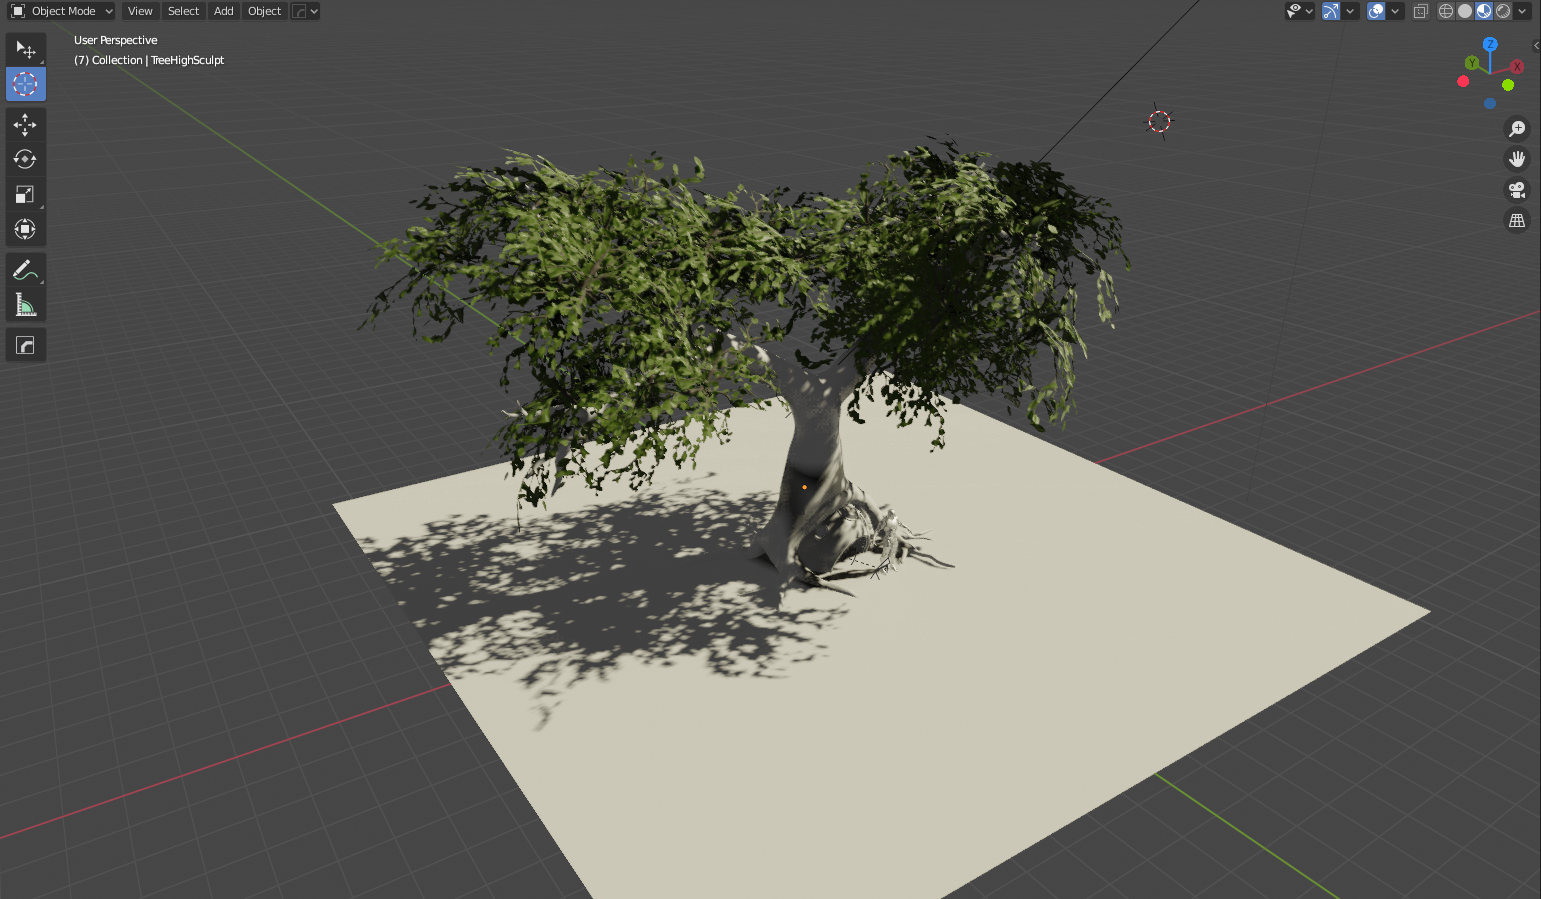
This is my first proper try doing any kind of large foliage like trees - I have done them in the past but was a bit lazy about how I made them. As such, this was my first experience wrangling with the workflow for trees and foliage and I must say at times it felt like performing a bewitching ritual.


I started with the main trunk and branch structure, Subd-modelling a base-mesh and then sculpting over that. I struggled a lot with figuring out how the branches were going to work, before I realised that I was approaching this from the wrong angle, where the usual process of blockout-to-detail doesn't really apply. I unfortunately didn't take any screenshots of my early attempts but they were quite goofy.


So instead I sculpted some leaves.

And then some branches.


I textured both and baked them down into cards to use on the canopy. I ran into an issue baking multiple texturesets in SD, where they'd overwrite each other (marmoset was just not an option due to the HP polycount), so I had to recombine the leaf and branch textures in Photoshop using MatID masks.

Which leaves us with this crown, using this tutorial from the wiki. The final tree has ~15,000 tris and 2 texturesets. I intend to use matlayering for the trunk once in-engine. The crown is probably a little too full but I think, given that it's supposed to be viewed from below, I want more coverage rather than less.

I did try to do some vertex-weight shading stuff with the branch cards but I couldn't get something that looked nicer than straight smooth-shading, so If anyone has any tips or pointers that would be much appreciated!


I also made mid-poly variants of the branches to place by hand once in engine, so that it's not all 2D cards.

I am, of course, absolutely looking for feedback on this as it's my first attempt at foliage of this scale. So if you have any comments on canopy scattering, branch structure, etc etc, fire away.

Replies

  • rexo12
    Online / Send Message
    rexo12 interpolator
     The mandatory Hard-Surface component of the project: A little crashed capsule that the tree has grown around. Loosely based off the Vostok capsule, but I have taken significant liberties with its layout (Some may recognise the DSKEY/AGC - don't tell the nerds).
    It's still feeling a little empty/underdetailed, so some advice on how to fill it would also be appreciated. I'm trying to hold off on filling it with hanging cables every which way, as I'm not too sure of the capsule's final orientation yet.
  • rexo12
    Online / Send Message
    rexo12 interpolator
    I also went and did some photoscanning for smaller foliage, again as my first real attempt at making some. The process was surprisingly straightforward and I'm quite happy with my final result.Ferns seem to me to be the "Hello World!" of foliage, so they were my plant of choice for this. The scan was a bit dirty but I only really cared about the depth information on the surface of the leaves themselves as they'd be baked down to an orthographic projection anyway.

    I did really want to try cross-polarisation for this project so I could retrieve specular information from the subject, as it's something i've been chasing for a while, but I just couldn't get enough light onto the subject to shoot at a low enough ISO. I think I really need some more serious lighting hardware, or a better sensor, or nicer lens, or a combination of all 3, before that becomes a viable technique.


    I did have to do a fair bit of work by hand to remove the background of the scan, so i should look into better ways of handling that - such as maybe offsetting the backplane during photographing so I can just box select and delete irrelevant points once reconstructed.


    Some final renders. Quite happy with this, considering how fast and painless it all was.

  • rexo12
    Online / Send Message
    rexo12 interpolator
    Update! Started bringing everything into the engine and fitting the scene together.

    I went and sculpted over the tree trunk a little more to make the vascular shapes more intense, so that the shape is retained when a material is applied.


    The tree has a couple of different bark materials vertex blended together for variation, along with a world-aligned moss texture distributed along the up vectors and tweaked with vertex paint to help mask up unavoidable UV seams. The bark is also tessellated. Wondering if I can perhaps use some kind of painted vector map to contour the textures even more.

    I also (as you can see) began painting the capsule. Nothing terribly fancy here.


    I'm unsure about the splotchiness of the leaf litter shadows - i'm hoping it's just the Preview baking and low lightmap resolution, otherwise i'll have to tweak it some more. I'm also not sold on the global fog, which I will probably remove in favour of localised fog particles later on.


    Thank you! Feedback welcome :)

  • Nuclear Angel
    Offline / Send Message
    Nuclear Angel polycounter
    You should really add some triangles to your crashed pod thing, the circular shape is very jagged right now. I would say add at least 1 subdivision, maybe more for the shapes that have a clear contour. 
  • Ashervisalis
    Offline / Send Message
    Ashervisalis grand marshal polycounter
    Yeah, more geo is needed for the circular part for sure.
  • teodar23
    Offline / Send Message
    teodar23 sublime tool
    About the shadows, you can try enabling contact shadows.
    And yea the fog is not ideal, maybe a landscape in the distance
  • cello8080
    Offline / Send Message
    cello8080 polycounter lvl 4
    very cool concept :) looking forward to seeing this progress
  • rexo12
    Online / Send Message
    rexo12 interpolator
    Thank you all for your feedback! I have updated the polygon density on the outer ring as suggested. The fog is also gone.
    Textures are not yet transferred as I'm still dealing with some new UV/lightmap/bake errors that seemed to show up with the new geometry (why wouldn't they?).

    I went for a walk recently to collect some scans and reference photos for Plants I Would Like To Include. Some results:
    These are just plants/features I found interesting. I'm particularly interested in Pines at the moment, as i'm trying to put together another tree and need to know how the branches are structured. This project will turn me into a botanist yet.

    The scans:
    A big (!) rock, probably useful for mid-ground/backdrop dressing.

    Some smaller rocks, I will separate them and use for smaller dressing, such as underneath the root splits on the main tree.

    I was also looking for something to replace the current dark dirt material i'm using, as i need something moist and freshly overturned, but it was quite dry when I went out so the soil was pretty sandy, and I didn't find anything suitable. I did try to do the material in Substance Designer but was struggling quite a bit to get the look I wanted.

    Thank you!

  • KW_Arts
    Offline / Send Message
    KW_Arts polygon
    I love how the materials work in co operation with the lighting. the concept is super fascinating as well. Perhaps you should some more colour variation to the fern and tree leaves as right now they seem a bit too flat? 
  • rexo12
    Online / Send Message
    rexo12 interpolator
    hello, had to put this on hold for a while - and probably longer still - but here's what I have managed to make time to do:

    Processed the rocks and started placing them - quite happy with how they turned out honestly.


    Also did some more painting on the capsule. I dislike how the couch is coming out - and I realise a simple empty chair is not telling a very compelling story. Have half a mind to rework it and diverge from the reference a bit so it looks a bit more appealing.


    And a fern tree type thing from my reference photos.


    Thank you!
  • rexo12
    Online / Send Message
    rexo12 interpolator
    Finally back to working on this! I spent a bit of time reworking my concept to make the interior of the capsule a bit more intriguing in the composition. This involved a bodybag prop and associated cabling and support machinery, to make the area a bit busier.


    Some fancier photos:

    I think the green and red lights are important highlights to bring the details out in the scene but I can't really justify them thematically.

    How are my materials? I'm struggling a bit to get the definition I would like, and usually get when I do single prop projects like weapons and such. Something about working on an environment makes me lose that focus, and so any tips for overcoming that would be really helpful.

    Next I want to get some grass foliage out so I can really start filling in the forest surrounding it, as It's been too bare for too long.

    Critique welcome, Thank You! :)


  • shabba
    Offline / Send Message
    shabba polycounter lvl 15
    Hey @rexo12 !
    Cool idea, hopefully you don't mind me offering some feedback. I'll paste all the comment boxes from the image to the post as well.

    So here is what I gather is "The Story":
    • "A little crashed capsule that the tree has grown around. Loosely based off the Vostok capsule"
    • In your image, there is a disconnect between the two. Your pod looks like it just got placed here, and didn't "crash" or have the tree grow around it.
    • you should tell the story of its crash through some kind of terrain damage/trench showing the path the pod took to its final resting place
    • add moss and build up the dirt around it  to make it look "seated" and fit with the age of the tree
    • detail the pod so that it looks like its been exposed to the elements for the 20-30 years its been out here for the tree to grow that big around it.
    • add some terrain build up under and around the pod, to make it look like there was an impact on the ground, and that over time debris/leaves/etc. rotting and turning to soil, would build up around this, and give it an embedded feel
    • [When referring to the image with tree growing over rock] - look at the way the two objects feel together, the age and exposure to the elements is unified across both. The moss you see on the tree, is also similar to the moss you see on the rock.
    • Give the pod interior some love, add in details - this is your chance to tell the story about the person who crash landed here. How long were they in the pod, did they struggle, where is their body? What did they bring with them as that would be probably some of their most precious belongings, and tell a lot about your main character
    • Even if you don't add those compelling narrative components, at least add more detail. I'm not really sure what I'm looking at when I see what you added for the interior. Make it relatable.
    • Overall I agree with your lack of material definition, but without looking at ur maps and checking to see what kind of materials your aiming for against their proper pbr values I cant really suggest much. Watch out for overly "dusting/dirting/rusting" everything on an object, especially in Painter b/c you will be influencing the gloss as well, and even though there may be very little albedo contribution, the metal has become a dielectric and will no longer sing like a metal.

      Hope some of these feedbacks help! Would be awesome to see another update. Keep at it! And I'd heavily use reference for the types of details you are trying to replicate. And then be very critical of your own work, and develop the skillset of a personal critical eye. 

  • rexo12
    Online / Send Message
    rexo12 interpolator
    @shabba Hey, thanks so much for your reply! It's really nice (not to mention helpful) to see this kind of effort put into a detailed critique :).

    I see what you mean about unifying the wearing between linked objects. I am planning to use creepers/vines over the top of the tree/capsule as layering but I think i will do another material pass as well. I do also plan on making the crash trench (behind the pod) deeper and more detailed - broken roots and so forth. I was also thinking about moving the central control panel so that the open hole in the bodybag is more visible - my intended 'occupant' for the capsule.

    This is very valuable and I thank you again for taking the time to do this sort of write-up.
  • rexo12
    Online / Send Message
    rexo12 interpolator
    Working to address points in the critique I have been given.

    First up was reworking the crash trench. I put together a Grain POPnet in houdini to simulate a base mesh to work off of:
    Which is triangulated from a VDB and sculpted and decimated/baked and so forth, which gives us this trench and dirt buildup in-engine:
    The trench is probably too deep still and needs to be better sculpted into the landscape around it so that's something to iterate on soon - I think maybe it needs to have a longer tail and some more irregularities in the collision (bouncing and rolling on impact, etc.), and then an erosion pass over the top.

    Also scanned a collection of vine leaves to use later, The bottom left leaf did not co-operate with the scan so I've had to drop it from the atlas.


    Delighting/processing this was a lot more difficult than I anticipated - removing specular is a lot harder than shadows it seems. I also had to do a little bit of cut and pasting to patch up errors in the scan.
    These leaves are used in part for the creeper cover on the ground around the scene.

    Also got around to processing some older fern photos I had using the multi-angle scan workflow in substance, which was my first time using the workflow. This was sort of so-so - The resolution was not great as I had the focal length too wide which is something to be aware of in the future. You can see this atlas being used in some plants in earlier screenshots.
    (Crop error was painted out in PS outside of SD)


    I have also spent some time reworking materials in and around the capsule, as well as re-using a couple of props to fill it out just a little, but these changes won't be immediately obvious yet. I have generated a few ideas for more detail to put inside it, which I will be working on soon.

    Thank you!
  • rexo12
    Online / Send Message
    rexo12 interpolator
    Have spent some time trying to fill out the mid-and-back ground of the scene to start to bring it together. Put together a pine tree to use as a background asset, although it does seem to clash with the centrepiece a little. Have also bit the bullet and used some Megascans assets, notably on the background grasses and various rocks and stumps you can see.

    I want to change the skybox, as It's out of scale with the scene and is actually not a very realistic sky, However I also want to keep the nice green skylight bounce that it offers. I've tried different skybox's with SLS captured cubemap but the disparity tends to be too great, so I'm unsure of what to do. Thinking I will get some billboard backdrop elements and also add some clouds.

    Lighting is unbaked at present because no matter what I do, I can't seem to get anywhere near a reasonable bake time. (Took 4 hours for 0.5% on 11 cores yesterday - even on preview). If anyone could look at my lightmass settings for further optimisations I could make that would be appreciated:

    However my suspicion is that the scene is too large to fit into memory anymore and so the slowdown is because my system is constantly going to swap, particularly as assigned cores only seem to hover at 40% utilisation or so (and the resource monitor records 1000 hard faults a second).

    Is there any way to check the size of the scene going to lightmass? The swarm logs note an Embree build of 19GB or so which would be larger than the 16GB I have, but I'm not sure if that's actually what is being passed to lightmass.


    In other news, have been working on a High poly for a Hasselblad 500 EL to go inside the capsule:


    And Have also been making a vine mesh to cover the capsule and unify it more with the tree.
    I've actually had to remake this (including sculpting) something like 3 times now because I kept making mistakes syncing my object placement between blender and unreal engine. An unfortunate waste of time.


    I'm settling on putting a deadline for myself on this for about end of february - early march, as after that point the time I will have to work on these projects will be greatly reduced again and I never intended for this project to go on for so long - i'm frankly getting fatigued!

    Thank you!
  • teodar23
    Offline / Send Message
    teodar23 sublime tool
    Hey, good progress.
    Regarding the baking i suggest making the lightmass importance volume a lot tighter around your scene, i would say to just encompass a few meters around the tree. Then reset your lightmass settings with the default and do a test bake with the preview option selected. See what it does and go from there. Dont just crank every setting up to 11 and go downwards. Of course you are going to run into memory issues. Another thing you can try is the gpu lightmass baker, if you have a decent gpu.
    Regarding the detailing of the interior, i agree with other people saying that the interior of the capsule is a bit lacking but dont overdo it. Dont waste time making a milion little details in high poly then baking them and unique texturing them. That will take forever and of course you will get burned out. Instead try to work smart and create some quick assets that look decent at a reasonable distance. Unless you plan on doing some really close shots of the interior, there's no point in spending a lot of time on it. To me the exterior shots are more important, thats where the story lies.
    Good luck.
  • valentin_baguirov
    Offline / Send Message
    valentin_baguirov polycounter lvl 3
    Some cool things about that scene, if I could suggest anything maybe take a look at Half life 2 episode 2 advisors pods crash sites and how they made them easily readable and easy to understand. Probably not the best but still cool.

    Im still having a hard time understanding how that capsule landed so precisely inside the tree arch and just sits there so nicely.

    Another cool idea could be a skeleton? Not sure about that one but it could definitely reinforce your current point of interest if you decide to put it inside the capsule or you can put it in a way that makes you think that the person crawled out of it injured and died shortly afterwards.
  • JamesBrisnehan
    Offline / Send Message
    JamesBrisnehan polycounter
    Maybe your lightmaps are too high res? What does it look like when you look at the scene with lightmap density view on?

    There are websites where you can download free HDRI sky textures like https://hdri-skies.com/ if you are looking for a sky without lots of trees. The skies are all going to be blue, but you can tint it green with a HSV node or something if you're doing an alien planet.

    So the story is that the capsule crashed first and then the tree grew on top of it over the course of decades?
  • rexo12
    Online / Send Message
    rexo12 interpolator
    Hello again, thanks for all your input :)

    Yes, the intention was for the tree to have grown around the capsule after it had settled, rather than hitting the bulls-eye perfectly. I realise in hindsight that making one side of the tree thicker/denser as its source root would better communicate this, a la this image:
    22 Trees Growing Around Objects  Now Thats Nifty  Tree growth Growing  tree Nature tree

    I did manage to get bakes done - I am now working with stationary lighting (and I got a bit of extra memory). I do think the entire problem was just down to lightmass running out of memory and having to go to swap constantly, as bake times are now back to the sub-hour mark for preview builds. My lightmaps were generally not huge - I think only a few assets go above 256 or even 128, with most between 4 and 64.

    I reworked the crash trench to be longer and show a more turbulent impact, and have also included detailing in the form of stumps, debris and some puddles. I have also included fog in the form of particle billboards, in order to create a hazy/heavy atmosphere at distance without uniformly obscuring detail close up. It may be a bit too intense at present.


    Finished the vine mesh as well.

    I did think about a skeleton at one point! However it was frankly probably outside of the scope of this project. I don't really have any experience with character modelling and my anatomy knowledge is zero. It's absolutely on my list of things to learn, just not for this project unfortunately. I am still going to revisit that interior centrepiece, as it's not up to scratch yet.

    Thank you all for following along and providing your input, it's very encouraging :)

  • JamesBrisnehan
    Offline / Send Message
    JamesBrisnehan polycounter
    I think the reason why some of us are a little confused about the timeline of events in your story, is that everything looks different ages. The tree growing around the capsule looks roughly 100-150 years old, the weathering on the capsule looks maybe 10-20 years old, and the path of destruction looks a year old at the most. The broken tree stumps don't look to have 100 years of decay and regrowth, and the trench has a distinct lack of dead leaves and fresh grass that makes it look like the soil was ploughed very recently. Also all but one of the fallen trees is missing. . . which is confusing in it's own way.

    Completely covering up the trench with plant life might not work either, and would just hide all of the sculpting you've done there. Hmm, . . there must be a happy medium between realistic regrowth, and visual clarity for the sake of the story. . . but I'm not sure what that balance might look like. Sorry.

    If you decide to further age the capsule to match the tree better, I found some reference that might help. Look up images of a place in Belgium called 'The Chatillon Car Graveyard'. From what I've read, the cars were in that forest for about 70 years, so if you double the amount of rust and decay, you can get your capsule looking the same age as the big tree.


    Also, glad to hear your light bakes are working again.  :)
  • teodar23
    Offline / Send Message
    teodar23 sublime tool
    Ok, much better but 2 things:
    AO is very strong and it kinda ruins the nice lighting. Its actually the color correction that makes it pitch black so either turn down the ao intensity or the cc contrast.
    The capsule is worn very evenly and doesnt have any directional or localised wear and grime. You could add moss or dirt with vegetation on the top side of the capsule and maybe do small spots where the rust hasnt completely taken over the material. Also, it would have been partially swalowed by the ground over time. So the ground should blend a bit with the capsule. Right now it looks like someone dug a hole in the ground and placed the capsule there. Most probably dirt would have gotten inside the capsule so there would be a chance for vegetation to crop up in there...
  • rexo12
    Online / Send Message
    rexo12 interpolator
    @JamesBrisnehan Great reference, thank you. I will take a look at it.

    I think when developing this scene I had given an age to the capsule of around 20-30 years. I wanted to communicate growth or renewal, in as much as the capsule tears apart the (older) forest around it, and then new growth develops, incorporating it into the environment. Secondary to that I think is the question of what was or is occupying the capsule when it arrived, and what happened to it.

    The best course of action is to age the capsule (and trench and so forth) further rather than de-age the environment, which I'm fine with doing.

    @teodar23 Interior vegetation is a good idea...

    I did experiment earlier with some moss planes earlier on top of the capsule but I could not get something I was happy with, In the meantime I have done another pass on the texture to add some directional dirt.
  • valentin_baguirov
    Offline / Send Message
    valentin_baguirov polycounter lvl 3
    rexo12 said:
    Hello again, thanks for all your input :)


    Looking times better with that vine growing on top, now it mkaes a lot more sense. Also for a scene like this I would expect the light bake on production to take like 20 minutes with a small static lighting scale, but maybe im missing something. I know that my colmar map bakes on production with big lightmap resolution in like 30 minutes and my PC is far from crazy.

    About the skeleton: studios usually wont make you model those, but rather provide you with one already, so I wouldnt worry about it too much, unless you wanna tell peeps that you made everything in the scene from scratch.
  • rexo12
    Online / Send Message
    rexo12 interpolator
    Hello, updates.

    Finished and baked out the hasselblad. I may do more passes on the materials as it's probably not at the level of wear appropriate yet, but i'm always wary of going overboard on that stuff.


    My thinking is that, being positioned where it is, most of the wear the items inside the capsule will receive will be in the form of dust and some oxidisation, from ambient moisture and wind blowing in through the portal, not necessarily really intense scratching and peeling and all that for plastics and painted materials.

    I am also reworking the capsule seat so I can remove the bodybag prop, as I've instead decided to fill the space with a birds nest and eggs, which I feel better matches my original narrative goals for this scene.

    Composition wise it's probably better too, as I can have the focal point (the nest) meet the leading line created by the window and associated light, rather than the bodybag which had its focus in a really awkward spot.


    Besides that, I have reduced the AO intensity and radius (which was definitely far too intense looking at those older screenshots), and also added a couple of subtle lights directed at the trunk of the tree to reduce some overshadowing.


    Just to address the reply above, I had set out originally attempting to use all my own props, partly as an exercise in practicing foliage and also building my own library. Seeing as i've already started using external library assets it wouldn't be a problem, but I still feel I should do as much as possible myself.


    Thank you!
  • rexo12
    Online / Send Message
    rexo12 interpolator
    Nest and Eggs are done.
    Nest is just constructed by a whole lot of cards mapped to an atlas of twigs and thatch. I find it doesn't read very well at distance which may be something to do with my normals - I still haven't got the whole bent normals thing fully understood. I have also turned off mipping for this particular material which helps somewhat (In lieu of proper LODs).

    Beyond that I have added a little bit of vegetation to the interior of the capsule and also replaced the skybox with something more suitable.

    Thank you.
  • rexo12
    Online / Send Message
    rexo12 interpolator
    Hello. I think I am finally calling this finished. Thank you all for following along, it's been quite difficult but also very rewarding. 

    Some renders (also on my artstation: https://www.artstation.com/artwork/Po54LL):


    Little self-eval of things I was satisfied with and things I wasn't over the project:

    Good/Satisfied:
    - Managed to do some real foliage work, in particular tackling trees.
    - Brought an original scene from minds-eye to render successfully - a first for me, and part of the entire reason i started doing this stuff.
    - Continued to practice lighting and composition in bright scenes - not relying on dark tone/contrast to carry a model through obscuring detail.
    - Developed a photogrammetry workflow for non-tileable surfaces - atlases and 3D models.

    Not so good/needs improvement:
    - Optimisation kinda went out of the window. In a sense this is good as i think in the early stages of the project I was worrying far too much about optimisation and it was dragging the quality of my work way down. My goal is to produce truly realtime environments however, which means targeting 16.6ms frame time alongside looking presentable.

    - Interior of the capsule still didn't come out exactly as I would have liked. I think given how cramped it is a lot more thought needed to be put into composition and how it was going to be lit. Which leads to my next point:

    -Blockouts and concepting is something I need to work on a lot. A realisation I made with this project is that, for the amount of reworks I did, my initial versions of each object may as well have been blockouts. I think with a proper blocking stage I would not be trying to rush my modelling through just to make sure what I'm doing is going to work in the scene, and so I wouldn't need to rework or completely remake as much on future iterations. "Finishing it up in texturing" must be my equivalent of "fixing it in post".

    -This was also less of a photo finish and more of an exhausted stagger over the line, but I expect that will just be something that improves with practice.


    Thank you very much to everyone who provided their input over this project, it has been invaluable.

  • teodar23
    Offline / Send Message
    teodar23 sublime tool
    Good progress and excelent insights, man!
    Take a well deserved break then get cracking on the next thing :)
Sign In or Register to comment.