[wip] Lily Elsie, Real-Time Studies
interpolator
Latest:
Lily's Companion!

------------------------
Hey Polycounters, here I'll be documenting my cloth, skin, and hair work. This project is intended for practicing new workflows and to level up my realistic material builds in ue4.

Hair Study:
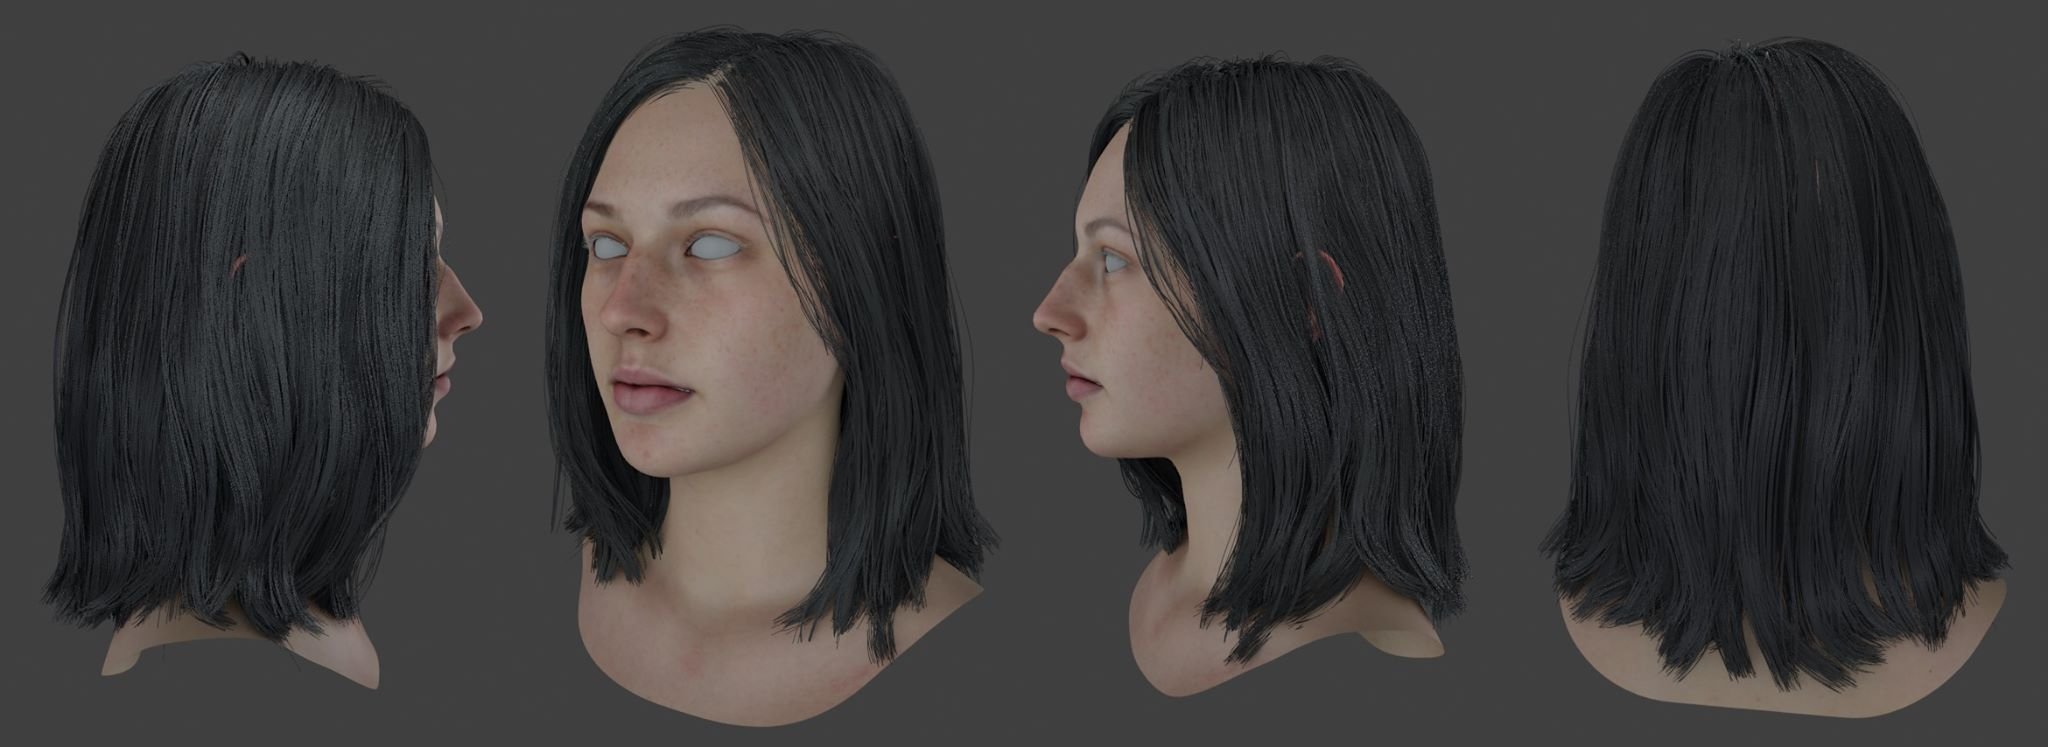
I wanted to give the Hair Particle system a shot in Blender. Along with the Sculpting tools, the features are promising but still need a little more loving to compete with other apps (namely Zb and Xgen). Although Blender's Particle system seems to run smoother, crashes less, and is more user friendly, it's hard to live without Xgen's bundle of modifiers and expression editor. Sub clumping and randomization of clumps is the biggest feature I'm missing, I'm having trouble making the hair ends look natural. You can especially tell this from the lower back of the groom (Unless someone knows about a sub-clumping feature that I'm missing?).
I'm going to move over to Xgen and scratch this groom altogether. It doesn't fit the Victorian theme that I seem to be heading towards anyways. However, I did learn a lot from this groom build!
Note: I am using a 3dScanStore head. I'm comfortable going from RAW scan to game ready build, so I'd like to focus more of my time into other areas I feel less proficient in. I do need to practice more on my sculpting and texturing of the face/body, but that's for another day.
Although it does feel that other niche skills are more attractive to studios now that scans are being heavily incorporated into the pipeline; that doesn't subtract from the importance of knowing facial anatomy!
Lily's Companion!
------------------------
Hey Polycounters, here I'll be documenting my cloth, skin, and hair work. This project is intended for practicing new workflows and to level up my realistic material builds in ue4.
To Do:
Hair Cards
Hair Shading (Plug and Play?)
Skin Shading (Reference Mike Project)
Marvelous Designer Garment Sim
Hair Cards
Hair Shading (Plug and Play?)
Skin Shading (Reference Mike Project)
Marvelous Designer Garment Sim
Refine Garment and Build Textures
Monkey Build
Monkey Build
Cloth Study:
Here is the blouse work so far. Built in MD, now refining in Blender. I've been messing around with the new Cloth Sculpt brushes, they are fun albeit a bit buggy. I'm now tackling the lace embroidery workflow. PS to build Mask, Zbrush to extract/detail, and bake down to be tileable. Inspired by Moa Alfredsson's Marmoset post
Here is the blouse work so far. Built in MD, now refining in Blender. I've been messing around with the new Cloth Sculpt brushes, they are fun albeit a bit buggy. I'm now tackling the lace embroidery workflow. PS to build Mask, Zbrush to extract/detail, and bake down to be tileable. Inspired by Moa Alfredsson's Marmoset post
Hair Study:
I wanted to give the Hair Particle system a shot in Blender. Along with the Sculpting tools, the features are promising but still need a little more loving to compete with other apps (namely Zb and Xgen). Although Blender's Particle system seems to run smoother, crashes less, and is more user friendly, it's hard to live without Xgen's bundle of modifiers and expression editor. Sub clumping and randomization of clumps is the biggest feature I'm missing, I'm having trouble making the hair ends look natural. You can especially tell this from the lower back of the groom (Unless someone knows about a sub-clumping feature that I'm missing?).
I'm going to move over to Xgen and scratch this groom altogether. It doesn't fit the Victorian theme that I seem to be heading towards anyways. However, I did learn a lot from this groom build!
Note: I am using a 3dScanStore head. I'm comfortable going from RAW scan to game ready build, so I'd like to focus more of my time into other areas I feel less proficient in. I do need to practice more on my sculpting and texturing of the face/body, but that's for another day.
Although it does feel that other niche skills are more attractive to studios now that scans are being heavily incorporated into the pipeline; that doesn't subtract from the importance of knowing facial anatomy!
Replies
While delving deeper into this character, I've steered into the early 20th century as a large source of my inspiration. The fashion and design of the Edwardian Era is filled with lace and flower motifs, although alluring are a bit intimidating to tackle as a 3d model. I'll be basing the model loosely off of an Edwardian Era actress named Lily Elsie. Namely her hairdo.
Cloth Study:
I decided to redo the shirring pieces of the garment entirely, I wasn't happy with how the 'ruffles' turned out originally. I combed through online tutorials and found this helpful tutorial from MD. The key takeaway is to use a combination of elastic, low particle distance, and a dense volume of garment to nail down the ruffles. The fabric properties also play a tremendous role in how your garment lays.
Lace Texture:
For the lace texture, I did a simple hp to lp workflow as explained in the previous post. I plan to continue with this workflow for the rest of the lace pieces on the garment (Collar and Sleeve lace). I'd like to take what I learned and apply a similar technique to filigree and armor trim. I'll play around with that on my next project. Feel free to take a look at the lace timelapse video.
Jewelry Build:
I especially had fun with the jewelry. Platinum, diamonds, and pearls were some of the popular materials used in early 20th century jewelry. Lots of repetitive patterning, so this workflow relied heavily on the 'array' and 'simple deform' modifiers. I use the addon, 'Speedflow' extensively to help speed up my process. I highly recommend it! Along with that, I suggest using hotkeys and pie menus to maximize modeling time over "searching through menus" time. I've got a jewelry timelapse video too, let me know what you think.
Hey Kanga, thank you! That groom was built using Blender's hair particle system. I'm going to be moving back to Maya XGen for the new groom for her head. Blender's system isn't quite there yet due to the lack of depth in the modifiers/expressions.
@Kanga
Hey all, in this post we'll be diving into the Straw Hat and Flower builds, featuring [Timelapse + Tips] videos and insight into some unique workflows!
Straw Hat Build:
To get an idea of how the highpoly model was built, check out the Straw Hat timelapse video. Once the high/lowpoly was built, i was ready to bake. During the bake process, I transferred an ID map and Albedo. These two maps helped facilitate in masking and height,roughness,color offset, which made high frequency detailing a breeze.
Next was to texture the linen undergarment. Instead of using a costly Alpha Blending Shader to make it semi transparent; I transferred the straw albedo to the garment UVs and mixed the garment/straw albedo to fake transparency. Note: I'm using Eevee and Blender's Shader Nodes to tweak the textures.
Flower Geo Build:
While researching flower workflows, I picked up a couple unique approaches into building the petals and mashed them together. I never thought of incorporating physics simulation to build a flower till stumbling upon a tutorial by Jen_Banzon. I hope to learn/experiment more with out of the box workflow approaches. Shoutout to CGMatter and Ian Hubert for inspiration! (Check 'em out for workflow revelations)
Here is the Flower timelapse video
Flower Material Build:
I've been meaning to learn Designer and thought this was a perfect time, a petal texture isn't too ambitious and I wanted to get my feet wet with procedural texture generation. I first ran through Allegorithmic's beginner playlist and applied their best practices to the Petal .sbs build. I highly recommend having Designer in your tool belt, the ability to build procedural textures for your model is invaluable.
I highly recommend checking out his plugin - https://gumroad.com/l/hairtool. Non destructible workflows are the way to work and Bartosz takes full advantage of CVs to make the grooming process much less of a headache.
See more high res photos on my artstation here.
Inspiration - Lily Elsie, an Edwardian Era English Actress and Singer.
Here's a glimpse into the early iterations and finally some progress shots of the hairdo. I was learning a lot in the early build and continued to paintover, adjust, and study more references.
Progress Timeline
Final Card Build
The plugin, HairTool comes with an integrated Baking scene which makes life even more simpler as a grooming artist. Here's the alpha card lineup for the hair build.
I tried my hands once at haircards, which went pretty bad and everybody pointed me to xgen in maya...but I don't have access to maya :'D
So maybe blender is the solution
@Andrew_Karpuxa Thanks Andrew! Yes, I'm using the HT Material. It's a great hair shader with Anistropy and SSS. All i did was throw in some Vert Color variation to the node graph.
@SopheeJay Thanks Sophee!
@Pav3d Thank you Pav!
@JuniWonderland Thanks Juni! Yeah, I first started in Maya to build cards. Then I learned about CV based editing for geo and the HairTool plugin makes use of CVs well.
And the hat workflow was really damn clever, I know how to do that In zbrush, but not in a non destructive manner so I need to learn Blender it seems.
@Nuclear Angel
If anyone has any solid resource recommendations for primate anatomy, please let me know! Cheers
He also needs a name! Any suggestions?
Below are the quick pose tests and the new upright pose
Next on my to do list is:
-Monkey Retopo, Unwrap, & Bake
-Monkey Texture + Fur System
-and finally a simple rig.
Then the monkey should be ready to join Lily Elsie for some final screenshots!
Wrapped up the Monkey's Lowpoly + Bakes. Began skin texturing and felt he needed a high detail skin pass. About to rebake and wrap texturing. He really needs some fur, he's looking like an alien!