Home Technical Talk

Blender - Rigging a PSX model and exporting it to Unity?

node
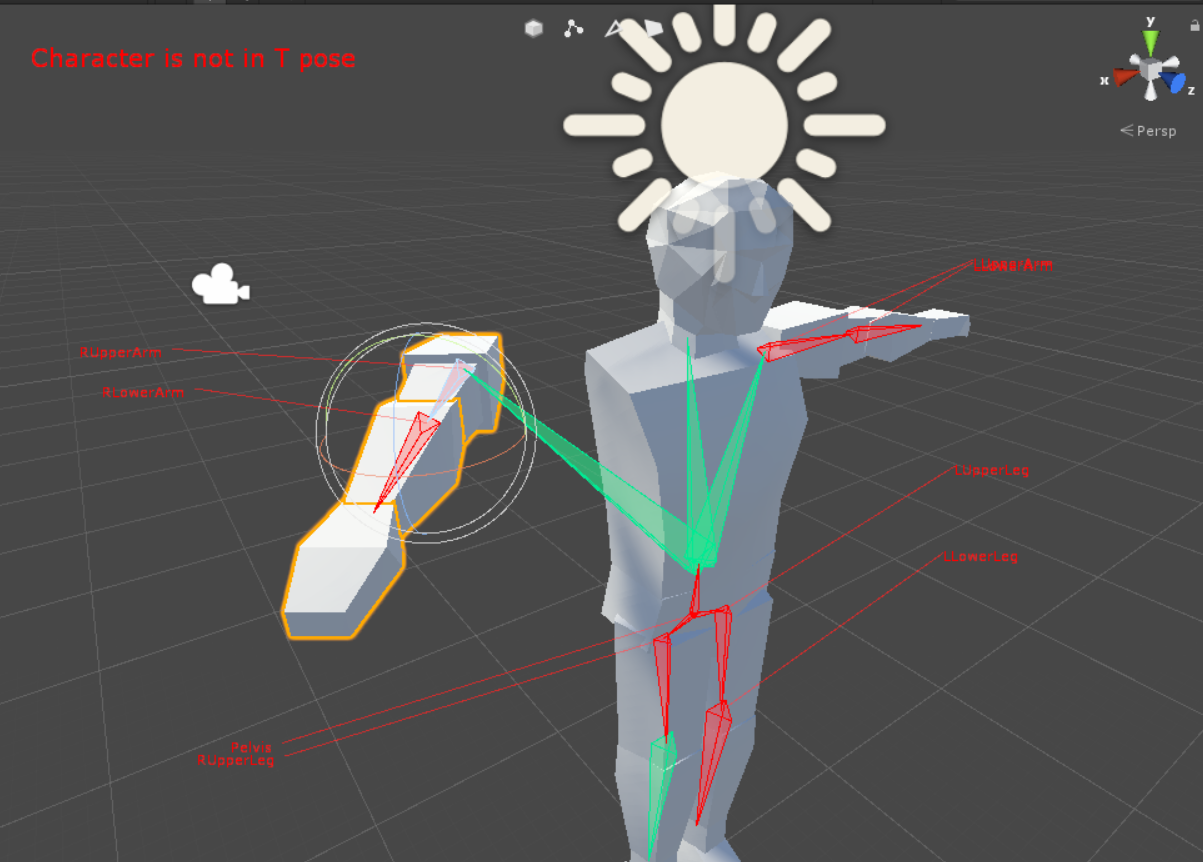
So the title basically, I'm trying to rig a psx-model based character (the blocky ones with separated limbs), but I'm having some problems with the rig. So, first, once I got the armature ready, I was parenting it with the mesh via CTRL+P ---> Bone, and everything worked fine INSIDE Blender. However, when I imported the model to Unity, the rig was a mess. I was not able to rotate limbs, since every single one rotate in their own axis. Also, all parts were still...separated (ironic.jpg), so...yeah.

I saw some videos were they used CTRL+P --->Armature Deform, Automatic Weights, but this does not get the effect of "separated" parts, as Bone do. 

So...is there any recommendation on what could I do? Something I could look to  e x p a n d  my weak knowledge?

I'll leave some images down below:
Inside Blender, with Bone as parenting mode

Inside of Unity, failing, as me taking decisions:
Replies

  • pior
    Options
    Offline / Send Message
    pior grand marshal polycounter
    Work the other way around : start with some default/popular Unity character, research how people deal with it in Blender, and build around that.
  • Yeudielcc
    Options
    Offline / Send Message
    Yeudielcc node
    pior said:
    Work the other way around : start with some default/popular Unity character, research how people deal with it in Blender, and build around that.
    Well...I've been investigating about rigging other models and they do pretty much the same, except almost everyone select Automatic Weights. I've found just one tutorial with a similar model as mine (https://www.youtube.com/watch?v=srpOeu9UUBU), but he uses Bone as parenting method, which is causing problems to me.

    I'll see if reducing the weights of each bone do something similar, the model can't have any smooth bending.
  • RN
    Options
    Offline / Send Message
    RN sublime tool
    Yeudielcc said:
    I'll see if reducing the weights of each bone do something similar, the model can't have any smooth bending.
    Looks like you'll get through it on your own. 

    Luckily what you're trying to do with this PSX/N64 style segmented character is very easy. You won't even have to go into Weight Paint mode. 

    Delete all vertex groups from your mesh, then parent it again to the armature and on the parenting dialog select Empty Groups instead Automatic Weights. Now you can unparent the mesh from the armature (keeping the skinned mesh parented like that is a Blender convention, it's not a requirement AFAIK).  
    Now in the mesh edit mode you'll select one vertex from a limb, press Ctrl+L to select all connected vertices and in the vertex groups panel, assign them to the appropriate group using 1.0 (100%) weight. Do this for all limbs and you're done.

    Edit: looking at your model, it looks like some limbs are not entirely segmented, in which case you'll need to assign different vertices of the same limb to different groups, like the top vertices of the leg go to the thigh bone and the bottom vertices of the leg go to the shin bone, using the Assign and Remove buttons on the vertex groups panel to manage this hard skinning. I suggest going to Weight Paint mode later and doing a Normalize All operation just in case you accidentally assigned the same vertex to several groups.
  • Yeudielcc
    Options
    Offline / Send Message
    Yeudielcc node
    RN said:
    Yeudielcc said:
    I'll see if reducing the weights of each bone do something similar, the model can't have any smooth bending.
    Looks like you'll get through it on your own. 

    Luckily what you're trying to do with this PSX/N64 style segmented character is very easy. You won't even have to go into Weight Paint mode. 

    Delete all vertex groups from your mesh, then parent it again to the armature and on the parenting dialog select Empty Groups instead Automatic Weights. Now you can unparent the mesh from the armature (keeping the skinned mesh parented like that is a Blender convention, it's not a requirement AFAIK).  
    Now in the mesh edit mode you'll select one vertex from a limb, press Ctrl+L to select all connected vertices and in the vertex groups panel, assign them to the appropriate group using 1.0 (100%) weight. Do this for all limbs and you're done.

    Edit: looking at your model, it looks like some limbs are not entirely segmented, in which case you'll need to assign different vertices of the same limb to different groups, like the top vertices of the leg go to the thigh bone and the bottom vertices of the leg go to the shin bone, using the Assign and Remove buttons on the vertex groups panel to manage this hard skinning. I suggest going to Weight Paint mode later and doing a Normalize All operation just in case you accidentally assigned the same vertex to several groups.
    Actually, I ended up doing what you say. It works really fine now. But thanks anyway!
Sign In or Register to comment.