Mountain Path Materials Breakdown

ngon master

Finished project here.
I won't be going too deep into details, I'll mostly just be showing my general structure.
I really want to stress: Even though I'm tessellating and displacing with my height-maps, it's optimized enough to be done at run-time. Depending on how high I crank the tessellation factor and distance, I can run this scene at above 100fps.
I really want to stress: Even though I'm tessellating and displacing with my height-maps, it's optimized enough to be done at run-time. Depending on how high I crank the tessellation factor and distance, I can run this scene at above 100fps.
Goal of this project:
This project was purely for practice. With this project, I wanted to:
- Show that I can render my Substance Designer materials in an environment. (One of the main complaints I've received on my portfolio from people in
the games industry is that it mostly consists of Substance Designer
materials rendered on spheres)
- Reaching a comfortable level of making realistic materials in Substance Designer.
- See how far I could take an environment with only materials.
Overview:
I started by listing a variety of materials I wanted to practice and looked up some vague references. After that, I started consolidating and figure out what type of environment I was looking for (what could contain the most materials I was aiming for) and the scope of the project.
I wasn't too picky in the beginning with my references, exact themes and color pallets. Mostly just enough to get a grasp of the variation of materials.
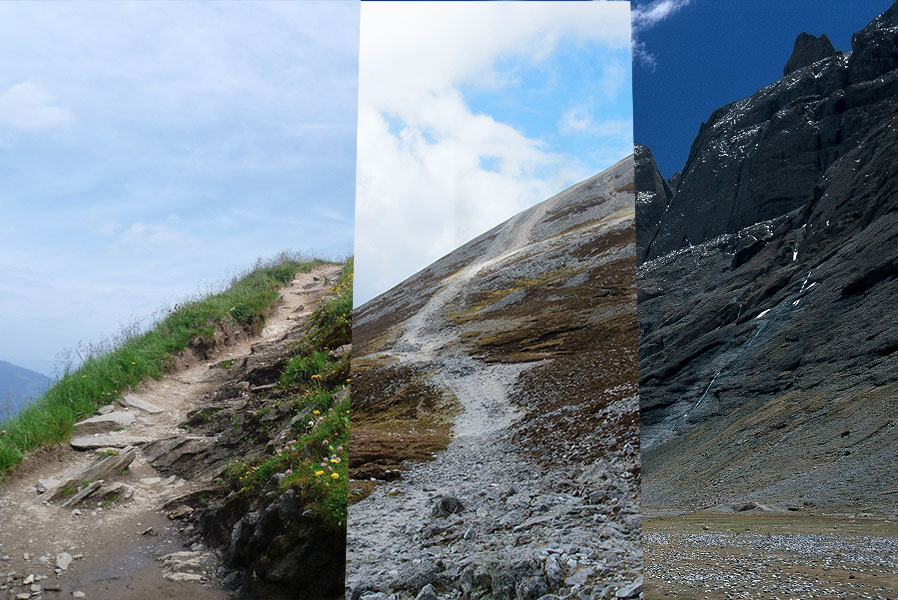
My main focus in the beginning was to structure the fundamentals in my Substance graphs and test new techniques. It wasn't until a while into the project that I started to settle for a more consistent, desert look of all my materials. I was able to adjust and correct most materials to this, though some had to be completely reworked or scrapped.
When I had assembled a few materials, I started bringing them into Unreal and test out different material set-ups, displacement and tessellation techniques.
Lastly, I iterated and adjusted the color, roughness and the height values to be consistent.
I used Marmoset to check my materials when I was working on them through out the project.
Credits:
Since I've been scolded before for being a bit lacking in my crediting, I'll try to be as comprehensive as possible.
One major inspiration for this project was Josh Lynch's Middle-earth: Shadow of War Level Material Breakdowns.
Thanks to Kyle Horwood for introducing me properly to Substance Designer in the Substance Challenge here at polycount. Thanks to Josh Lynch for mentoring me during this project (via thementorcoalition). Thanks to Ben Wilson for his speed-videos in Substance Masters Vol. 1 and thanks to Jonas Ronnegard for putting together the Substance Masters Vol. 1. Thanks to Daniel Thiger for his gumroad materials. Thanks to Vincent Gault. And thanks to Wes McDermott (because Wes).
I also looked and took inspiration from other artists, such as James Lucas, Eric Wiley, Rogelio Olguin, Chris Hodgson (who demoed a bit of Substance Designer at FutureGames a while back), Nick Williams, Javier Perez, Angel Fernandes, Gustav Engman, Vincent Dérozier.
That's it for Substance Designer... I think... What about Unreal? Thanks to the Unreal documentation and Unreal forum, I guess? Oh right, thanks to Tilmann Milde for his lighting academy.
And last but not least, thanks to Pontus Karlsson who's the head 3D teacher at FutureGames and helped me start this project.
Substance Designer:
When I worked in Substance Designer this time around, I approached it a bit different from what I usually do. I knew from the start that I was going to create multiple materials that were going to be used alongside each other. This means that I want to keep my materials consistent, so I tried to make my graphs as modular as possible.Dirt Base:
I made a dirt graph to use as a base for some of my materials:

By referencing this graph in my other materials (instead of re-creating it in every material), I could edit and change
the shapes, hue, etc, in this one graph and keep all dirt values
between all materials cohesive.
I went through several iterations of dirt. I settled with this one, as I feel like I got a good mix of busy and flat areas.
I used different noises to define large and small shapes in the dirt. I used a Histogram Range to flatten out all the height values to around 0.5 linear (all the other material height values are in relation to this).
The directional warp I used in this graph is one I built with the pixel processor, very similar to this one.
Rock shapes:

I made a basic 'Rock Shape' graph with several exposed parameters (inspired by Daniel Thiger's and Ben Wilson's work). This way, I could create several instances and get several different shapes and still keep a consistent look.
I spent a lot of time and iterated on the graph's functions throughout the project, because I was using it a lot. The main parameter feature are two gradients that can be rotated that cut into the rock shapes, creating big slopes.
I made a similar graph for pebbles, which looked about the same but more rounded.
Grass, Moss and Roots:


When I worked with the grass and moss, I often made tufts with a Splatter Circular node. This way, it got a lot easier to generate large sheets of grass and moss.
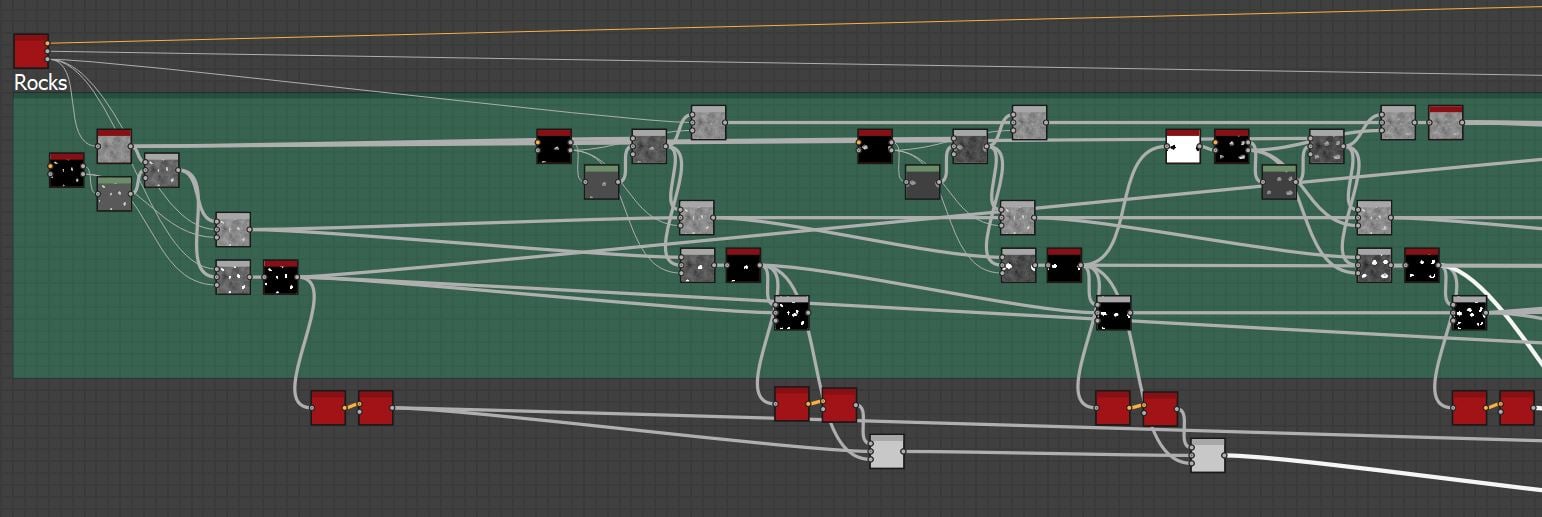
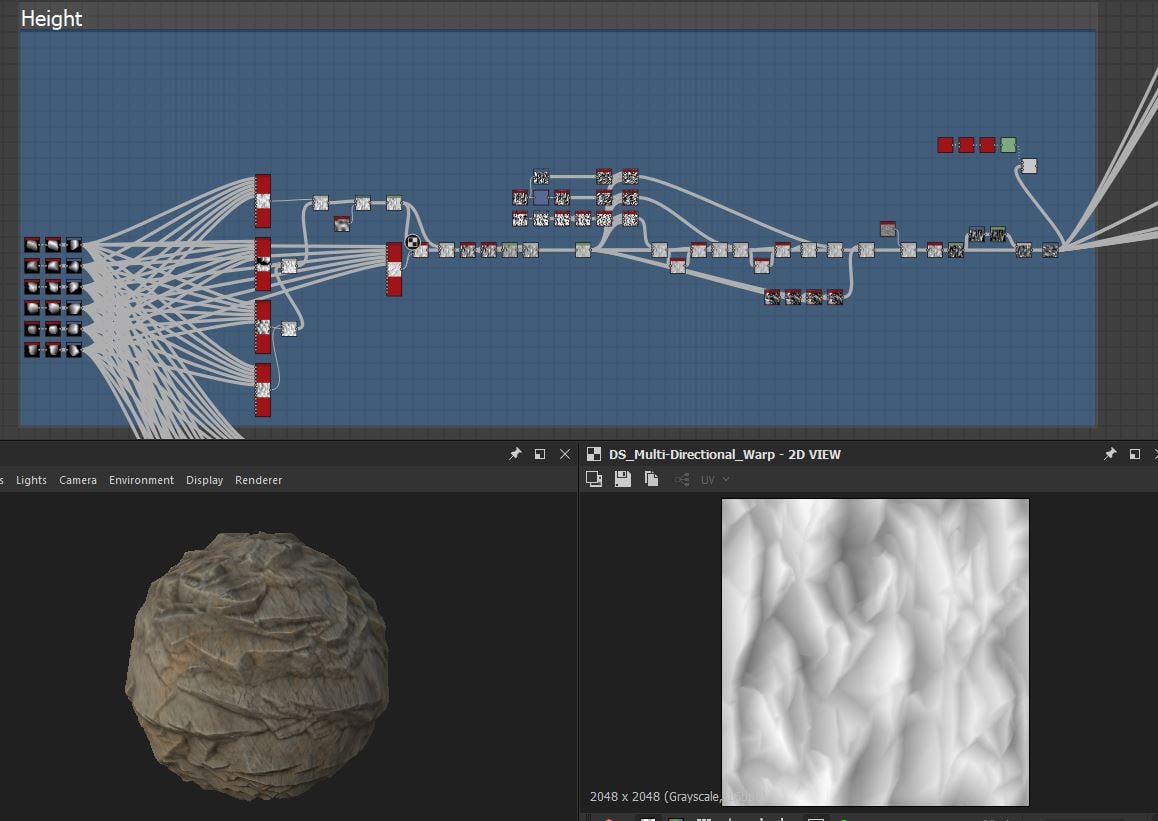
Rock generator:
Another utility graph I made for spreading out and deforming the basic rock shapes:

The initial Tile Sampler takes a mask input and a vector map input (so I can control where the rocks are generated). I then warp and add different noises to make the basic rock shapes more varied and realistic looking. I also have several exposed parameters for positioning, scale, variation and masking.
I really want to highlight how I made the directional details on the rocks, because I used the same method several time over in the other graphs.
I scale and blur the 'GrungeMap002' and '003' a bit, rotate it with a safe transform to make three different variations of both noises, and then I use my multi-directional warp to conform the noise to the rock shapes. I made three masks with a 'flood-fill' and two 'flood-fill to grayscale', with no overlapping between the three masks to make sure that no rock had more than one directional noise blended over it.
I scale and blur the 'GrungeMap002' and '003' a bit, rotate it with a safe transform to make three different variations of both noises, and then I use my multi-directional warp to conform the noise to the rock shapes. I made three masks with a 'flood-fill' and two 'flood-fill to grayscale', with no overlapping between the three masks to make sure that no rock had more than one directional noise blended over it.

Again, I also made a generator for pebbles very similar to this. The bigger difference was that I skip out on some noise details and that it defaults to generate smaller but a higher number of shapes.
Rubble:


 Every time I blended in new rocks into the height map, I extracted a mask where new rocks are added and add it to a "master-mask". That mask feeds into the next rock generator, to avoid overlapping rocks and pebbles.
When I masked out for the smaller rocks and pebbles, I beveled the mask to create a gradient (black where the large rocks sit, whitest around the base of the large rocks ranging to gray-black further away from the large rocks). This way I could control the flow of the smaller shapes and make them
gather around the larger rocks (instead of spreading them out at
random).


After the rocks and pebbles where placed, I added some grass straws, roots and twigs.
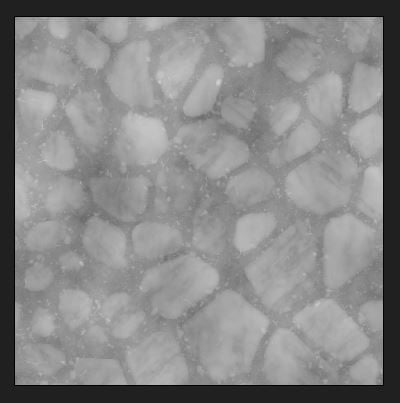
The approach for the cobble material was very similar, but instead of of the largest rocks being generated from my rock generator, I generated a cells-like pattern. I and then treated the cells-like pattern the same way I did the rock generator, warping, sloping and blending over directional noises.

Same thing with the gravel, except that I skipped the larger rocks entirely.
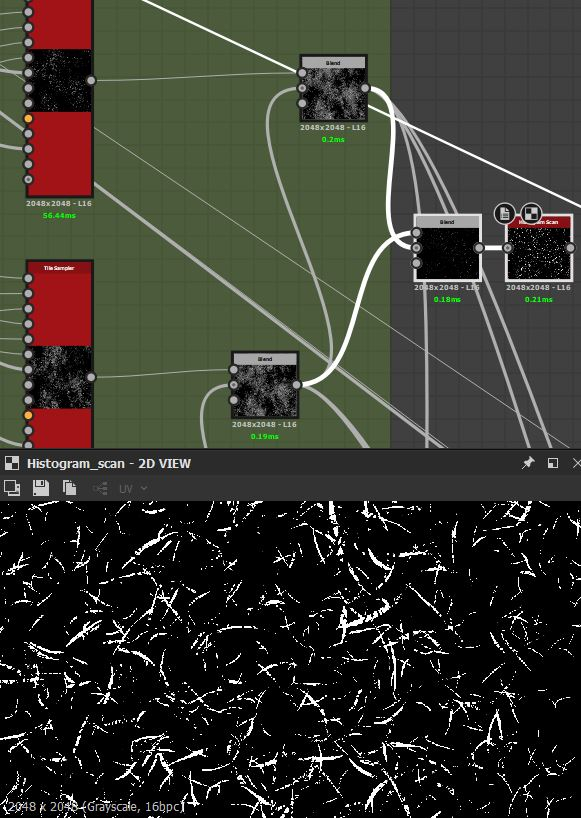
Grass:

I made the grass material by using the grass straw shape and the tufts
as inputs into several tile samplers and blended them together with 'max
(lighten)'. The tile samplers has a grunge-map in the mask and scale-map
input, to create empty dirt patches as shrink the straws around the exposed areas. I also did this with some moss
strands that I blended in underneath the grass straws.

Since I used multiple tile samplers for both the grass and moss, I could
extract masks of each of them from the combined grass height map (I did this by subtracting the old height result from the new height result and running it through a strong histogram scan). I
used those masks to add color and roughness variety among the straws, moss strands and clovers.

When the grass, moss and clover shapes are combined, I blend it on top of the gravel material (I used the gravel and not the basic dirt, because I wanted some pebbles, roots and twigs and not just plain dirt).

Something I noticed when experimenting with moss and grass was that it looked super flat when under direct lighting. This was because every single shadow completely disappeared with the AO, even those that should be cast underneath the straws and clovers.


I fixed this by multiplying the Base Color with the Ambient Occlusion (and I did it extra much underneath the clovers to make them pop above the rest of the grass).
This would be viewed as a cardinal sin in PBR, because the Albedo shouldn't contain any lighting information. But our current game engines can't simulate these shadows that would exist in reality.

Mountain Rock

I ended up using my original rock shapes and a few tile samplers to make the macro-shapes and a very similar method to the rock generator for the micro-shapes.
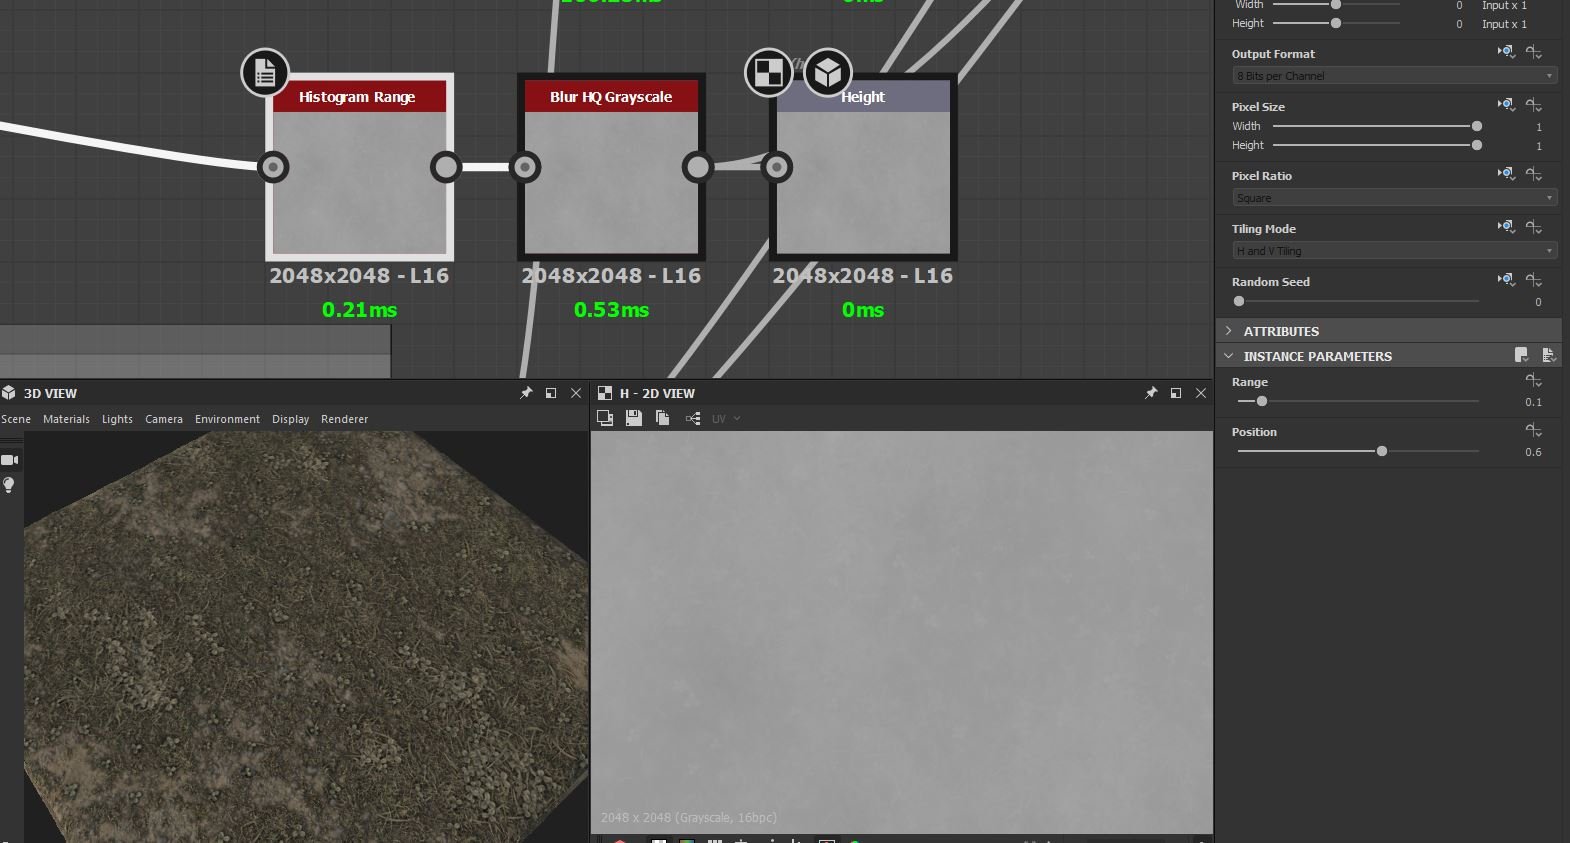
Consistent height-map:
As I've mentioned before; It was important to keep a consistent height value between materials. Otherwise the displacement was going bonkers.

I controlled my final height map values with a Histogram Range, in all materials. Keeping in mind that 0.5 linear is the basic dirt, materials such as grass needed to be a bit lighter than that.
Hey, are you reading this?
Hey, are you reading this?

Textures:
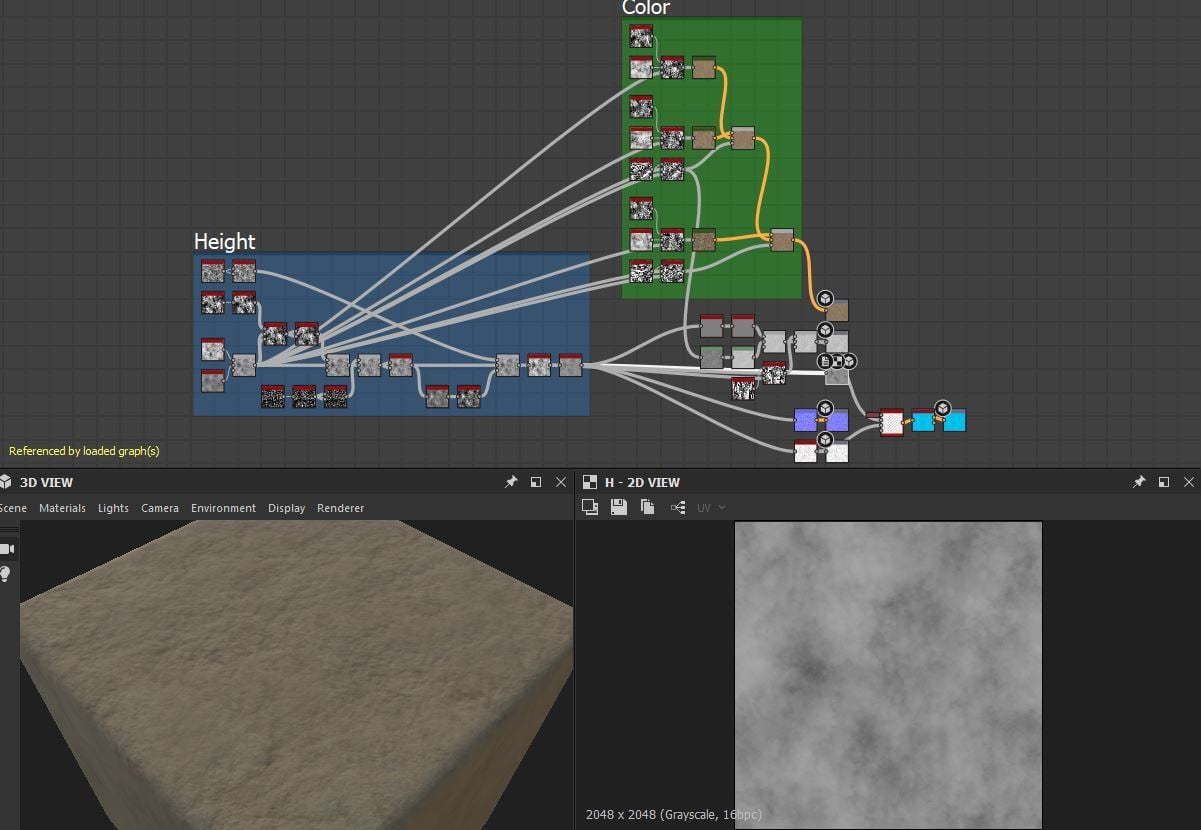
Since I was going to bring the materials into Unreal, I knew I had to use the Metallic/Roughness workflow.
I didn't need a metallic texture. A Specular texture, however, let me control slight differences in specular values and proved very useful to push the definitions between dirt, rock and grass.
I ended up needing two different height maps to blend my materials in Unreal, one for displacement and one for the actual blending process. The one I use for displacement has gray values around 0.5 (I found that this wasn't good for height-blending in Unreal, which was why I included a second one), while the one used for blending the materials are very polarized white and black.

Packed:
I wanted to keep the number of textures as low as possible. I ended up with three texture maps packed like this:
- Base Color (color in RGB and Height in Alpha)
- Normal map
- HRAS (Height Mask in Red, Roughness in Green, Ambient Occlusions in Blue and Specular in Alpha).
- Base Color (color in RGB and Height in Alpha)
- Normal map
- HRAS (Height Mask in Red, Roughness in Green, Ambient Occlusions in Blue and Specular in Alpha).

Also worth noting, I use 2048x2048 textures for this entire project.
Unreal:
I made 'Material Functions' for each sub material, to make the master landscape material more foreseeable.

I have two input parameters in my material functions that I multiply
together, to control the UV/tiling. I assign these values in my
landscape material, one functions as a global UV scale and the other one
for individual material tiling.
Landscape Material
I blend my material functions using a regular layer blend with one
empty layer (I read somewhere that this was a fix for potential black
spots), two 'weight blended' layers and three 'height blended' layers.

Tessellation:
The tessellation is controlled by distance from the camera (a parameter decides what is close and what is far away) and two intensity parameters (one for close, one for far away). Cranking the distance and the intensity up means lower performance.
Distance Lerping:
I noticed that my mountain rock material, from a far distance, looks a bit strange and repetitive. So I added an additional, larger sized texture sample and lerp between the two sizes depending on distance from the camera.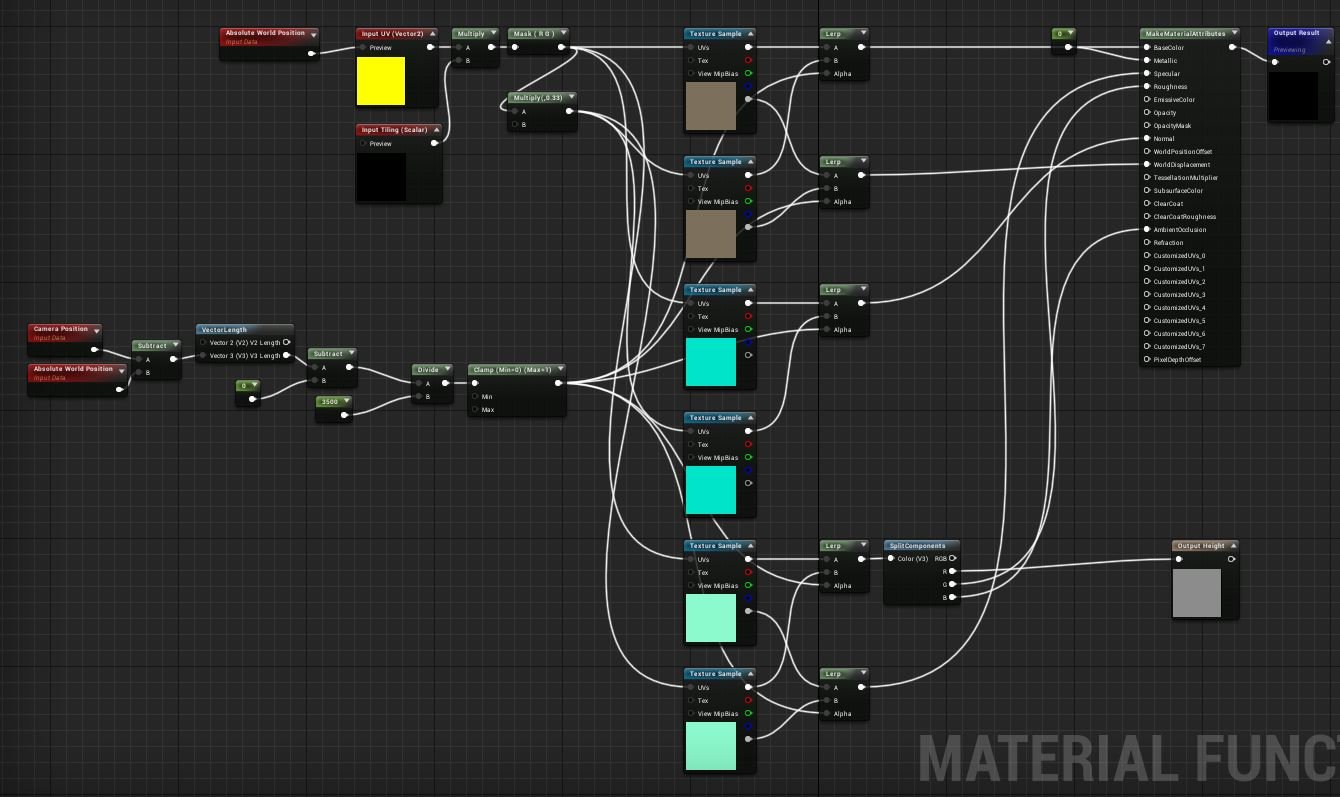
Lighting:
If anybody has a question about how I set up the lighting in the scene; Check this video out. Tilmann knows this stuff way better than me.
If anybody has a question about how I set up the lighting in the scene; Check this video out. Tilmann knows this stuff way better than me.
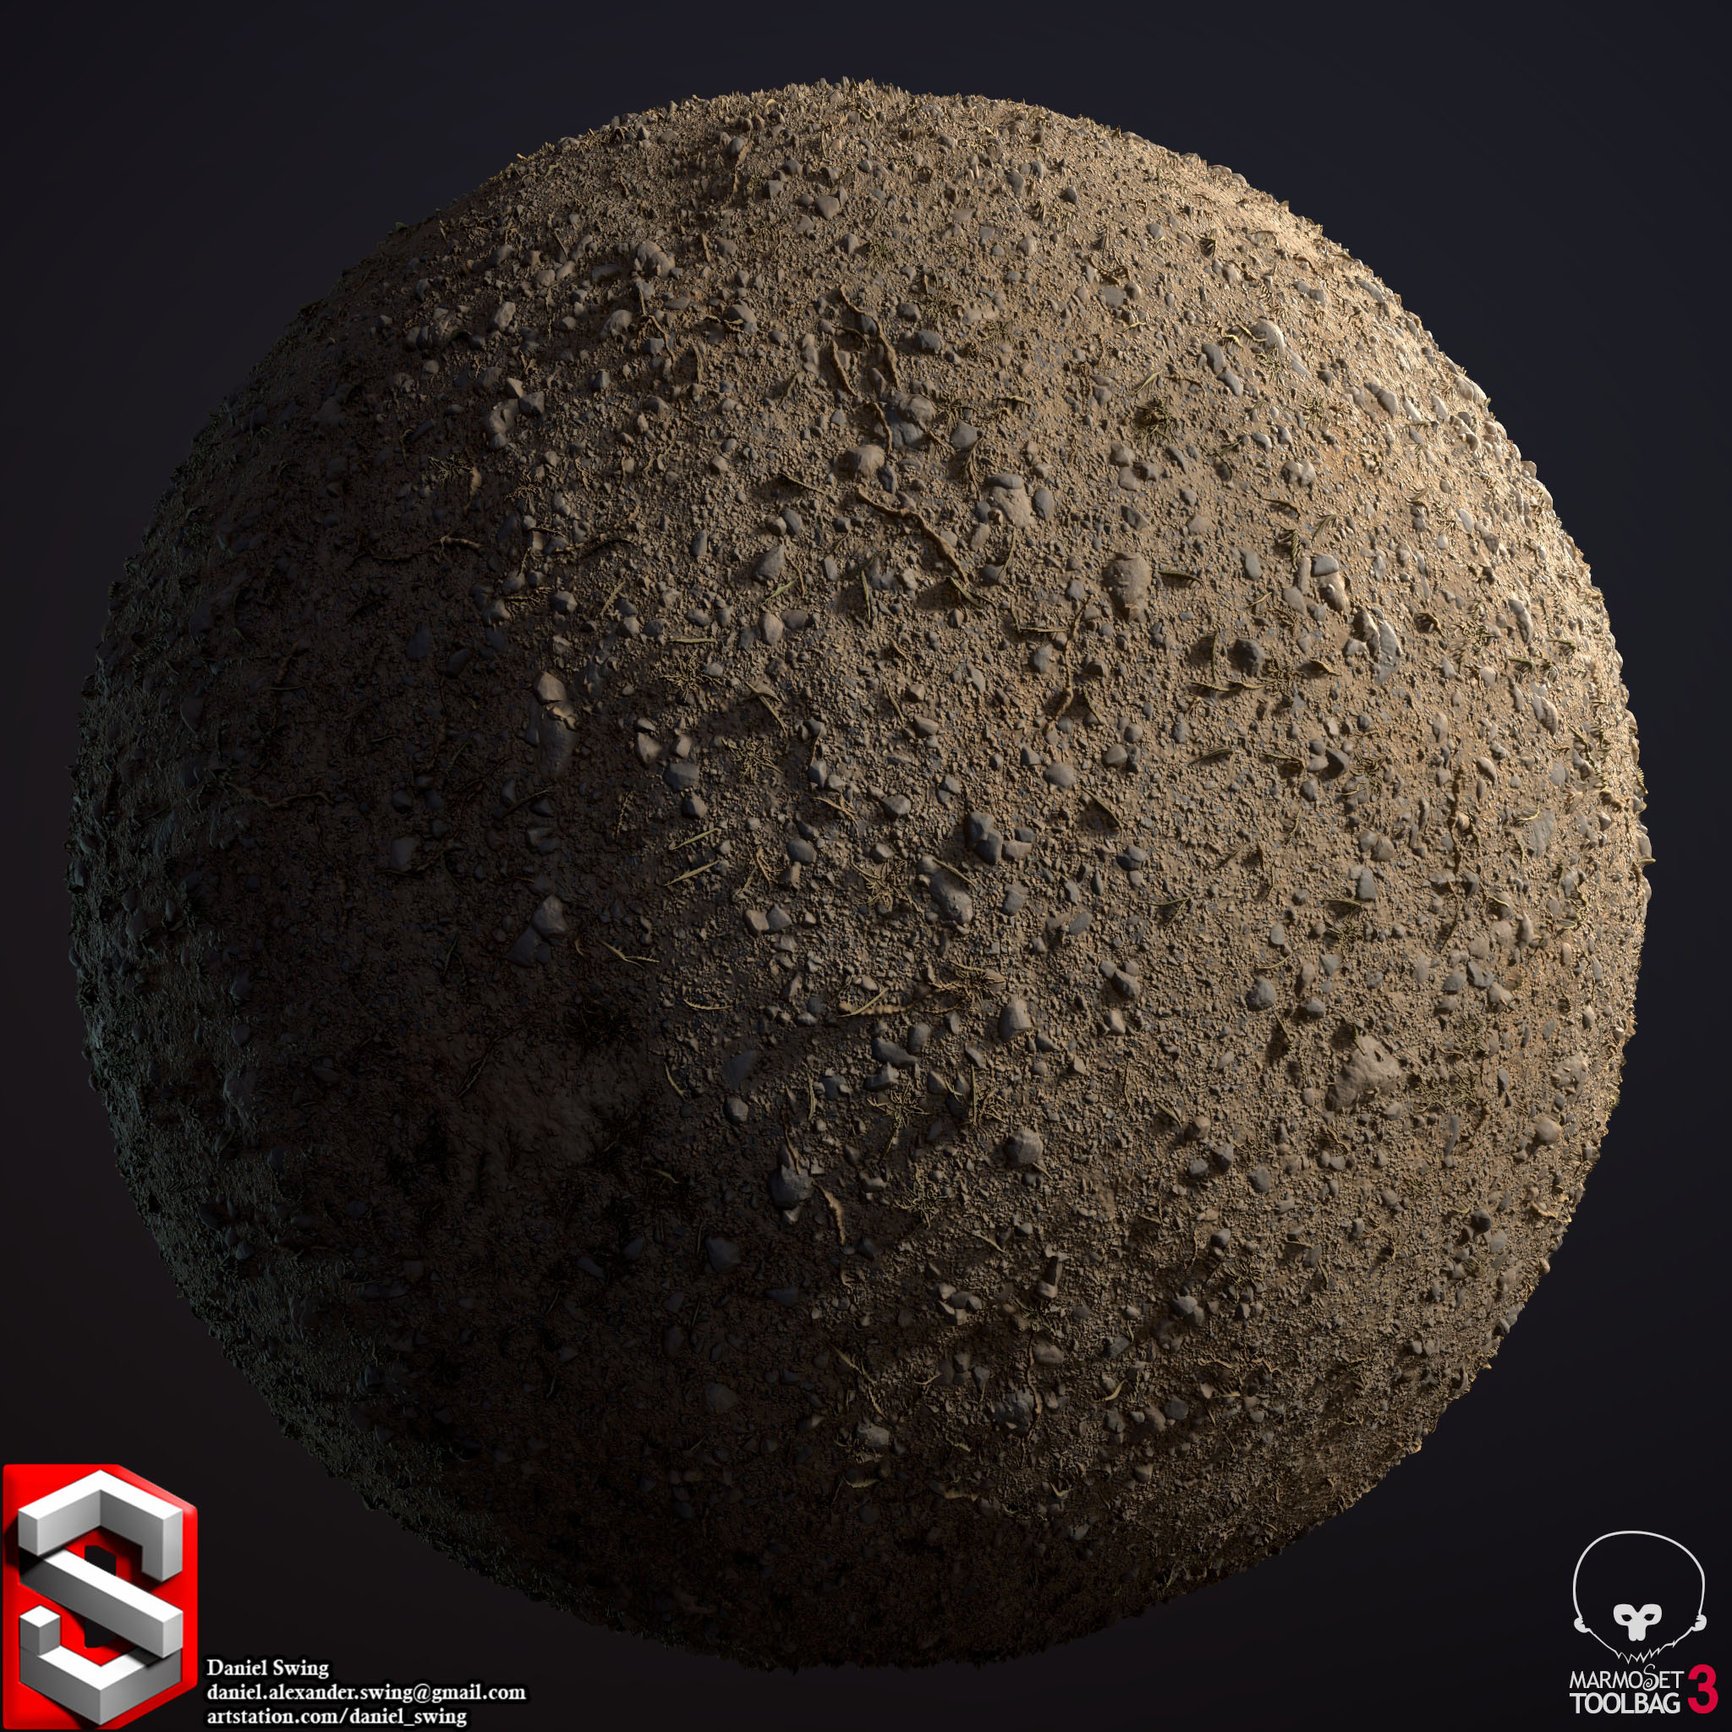
Marmoset Renders
To round this out in an ugly manner; I know that some have asked me about how I set up my Marmoset renders.
I export separate textures from Substance Designer (I don't use the same packing of textures in Marmoset as I do in Unreal).
I export separate textures from Substance Designer (I don't use the same packing of textures in Marmoset as I do in Unreal).

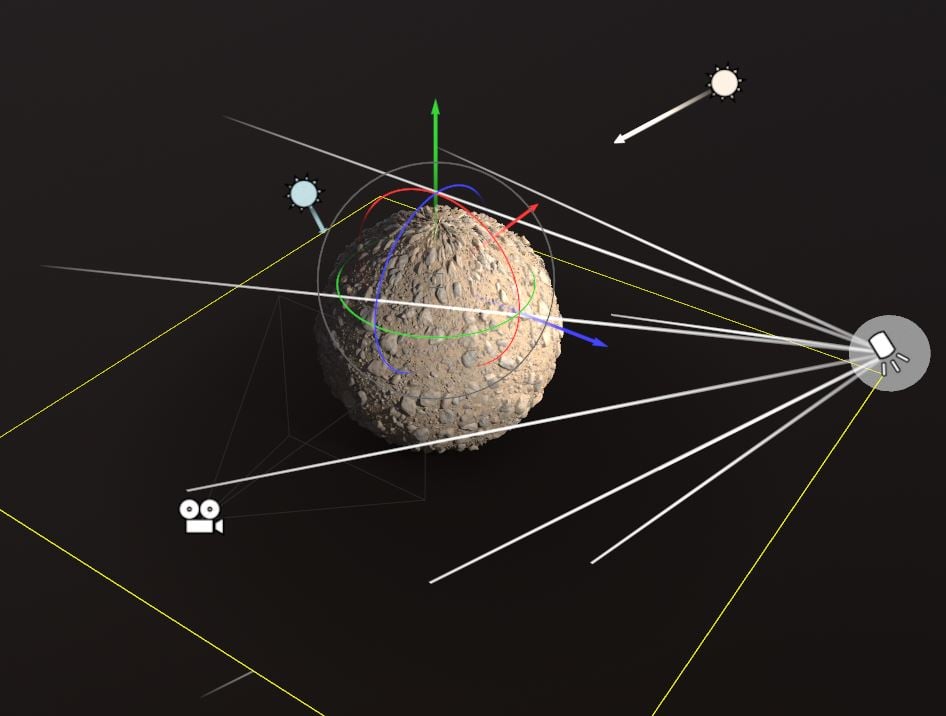
I often use three lights (+ the HDRI as a base control). First, I lower the
Sky brightness into something very dim (decides how the darkest shadows should look).
I add the main light and angle it so that it hits slightly from the front, top corner. It should light up about half of the visible side of the sphere. I adjust the brightness and width to get a soft fall-off.
The second light is angled to almost directly oppose the main light, to add a glancing, slight highlight to the otherwise darkest side on the sphere.
And the third light is placed at the same side of the main light and angled to add a slight highlight at the top.
And the third light is placed at the same side of the main light and angled to add a slight highlight at the top.
I often adjust the camera settings slightly; notch up the contrast and
saturation a bit, make the depth of field blur out the edges slightly.

I hope this was readable and useful to someone. Feel free to ask questions or give feedback on both the writing and the content (especially if you know a better solution than I presented or something important I didn't touch upon at all).
Anything I missed and should add?
Anyway, thank you for reading.
Replies