[FINISHED] Ancient Egyptian Rock

polycounter lvl 7
Hey there Polycounters, it's been a while since I posted, altought I still sneak around watching some of the projects that go around, great stuff as always!
I am here to show you my next project and hopefully get some feedback
The ideia for this project came after I finished my Feudal Japan Challenge and it came as a way of developing my skills overall, but mainly to focus on the texturing side of it and make a single Prop or small diorama look nicely polished.
To achieve this I decided to pick a Concept Art I found on Artstation from AC: Origins (I always loved AC concepts), because not only it is a good challenge to improve my sculpting and texturing skills but also because I found out quite recently that I actually really love to create art that reasembles ancient stuff, there is something beatiful in recreating the worlds from our history!
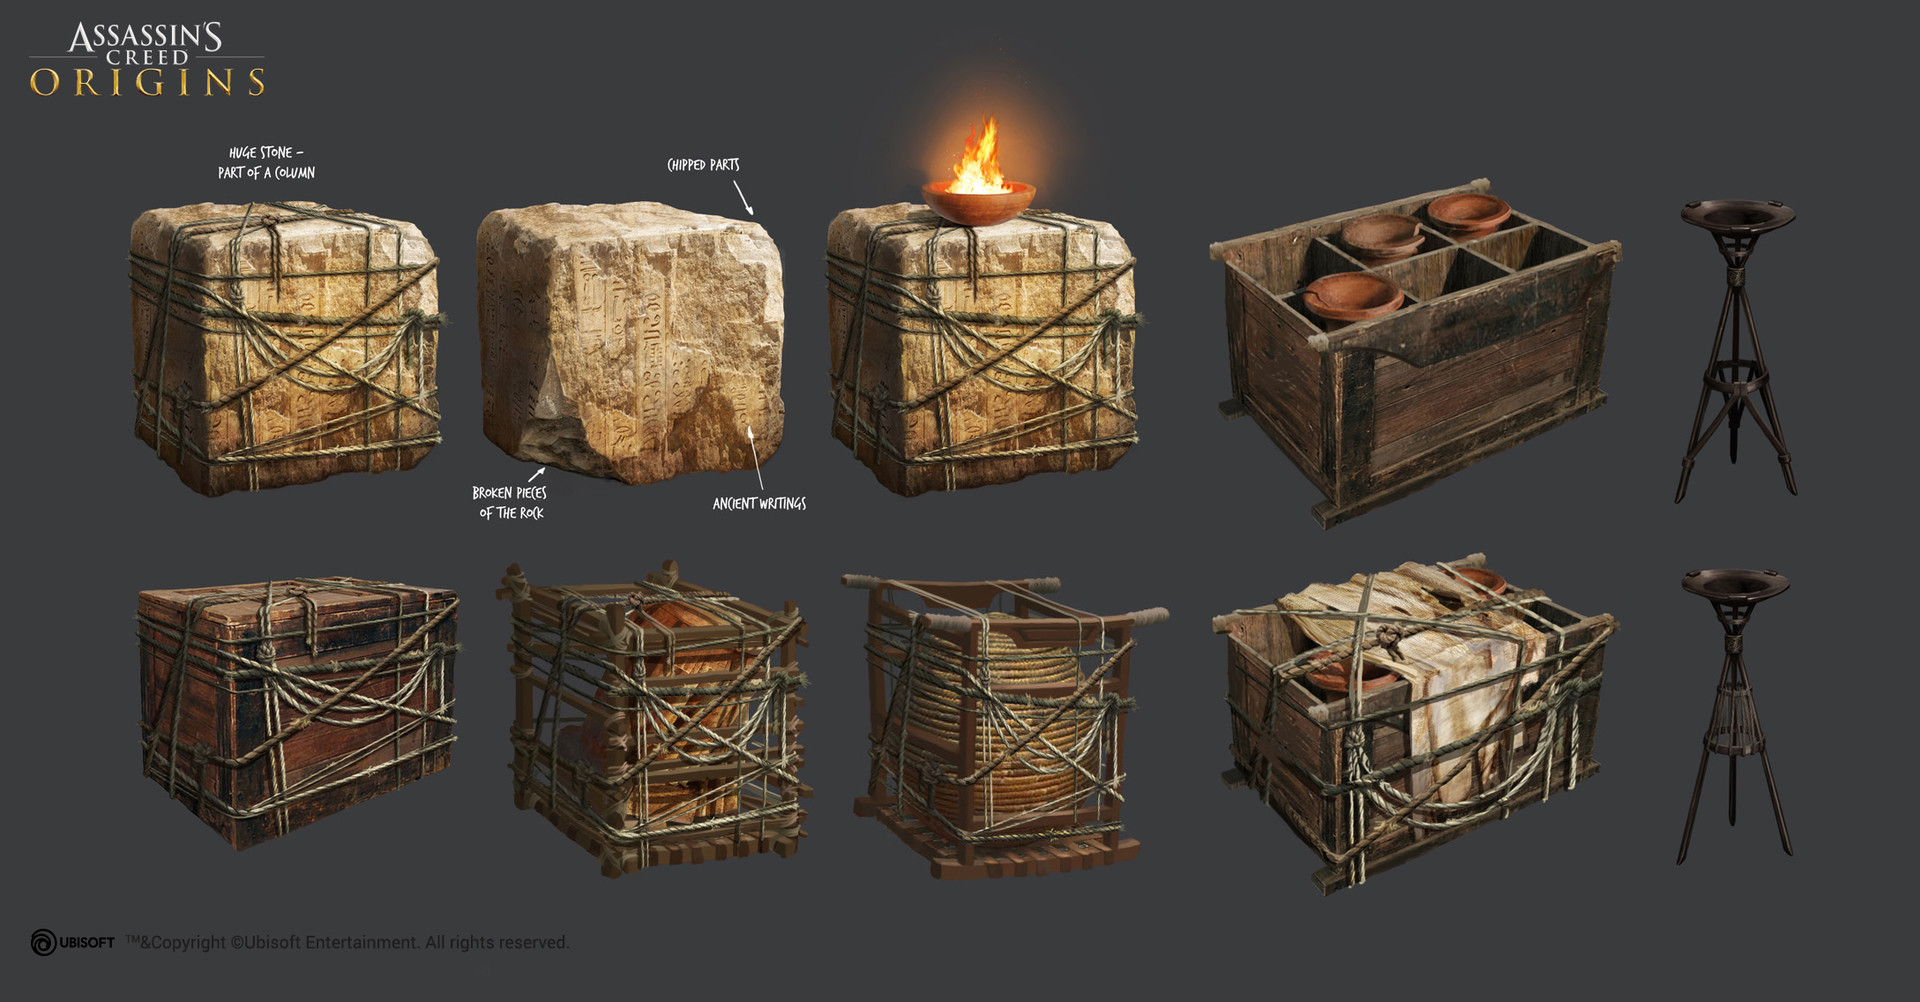
This is the concept I picked, from the very talented Erin Abeo:
I decided to make the big boulder/rock because not only I am saturated of working with wood (I did work with a lot of wood in the Artstation challenge) but also because I really like the story it might tell (was this a special rock they found somewhere and even them at their time didn't knew what it was? Was it the beginning of it all? Who know)
Here is what I have to show at the moment - High Poly - The Ropes are the ones from the Low Poly just added them in the HP to give some context. The Rock and creamic bowl were scultped in ZBrush using a really simple blockout exported from Maya):


Low Poly meshes inside of Maya. It is a little bit High Poly, but in this case since it is a portfolio piece I will not be bothering too much about optimization:


Low Poly with HighPoly bake and the Hieroglyphics applied, which were created in Illustrator and that were added in Painter by painting a mask in a fill layer:


Right now I am creating some Damaged rock procedurals inside of Substance Designer to later apply in the damaged areas to better fit the decay that is happening in the concept piece. I will probably also create some alphas to paint by hand and give further uniqueness to the asset.
Critiques and Feedback would be really appreciated, bring it on!
I am here to show you my next project and hopefully get some feedback
The ideia for this project came after I finished my Feudal Japan Challenge and it came as a way of developing my skills overall, but mainly to focus on the texturing side of it and make a single Prop or small diorama look nicely polished.
To achieve this I decided to pick a Concept Art I found on Artstation from AC: Origins (I always loved AC concepts), because not only it is a good challenge to improve my sculpting and texturing skills but also because I found out quite recently that I actually really love to create art that reasembles ancient stuff, there is something beatiful in recreating the worlds from our history!
This is the concept I picked, from the very talented Erin Abeo:
I decided to make the big boulder/rock because not only I am saturated of working with wood (I did work with a lot of wood in the Artstation challenge) but also because I really like the story it might tell (was this a special rock they found somewhere and even them at their time didn't knew what it was? Was it the beginning of it all? Who know)
Here is what I have to show at the moment - High Poly - The Ropes are the ones from the Low Poly just added them in the HP to give some context. The Rock and creamic bowl were scultped in ZBrush using a really simple blockout exported from Maya):
Low Poly meshes inside of Maya. It is a little bit High Poly, but in this case since it is a portfolio piece I will not be bothering too much about optimization:
Low Poly with HighPoly bake and the Hieroglyphics applied, which were created in Illustrator and that were added in Painter by painting a mask in a fill layer:
Right now I am creating some Damaged rock procedurals inside of Substance Designer to later apply in the damaged areas to better fit the decay that is happening in the concept piece. I will probably also create some alphas to paint by hand and give further uniqueness to the asset.
Critiques and Feedback would be really appreciated, bring it on!
Replies
Meanwhile I am finding some kind of a problem and I am trying to wrap my head around a solution for this.
What is happening is that I am testing out how I wil be applying my Rocky noises to the damaged areas, or more precisely, how will I masked them perfectly.
This is the Rock with the bake only:
This is the Rock with a Noise applied to the damaged areas and right now I am using the curvature to mask out the damaged areas from the straight ones which is what causes me a problem, altought it kinda works, those straight areas are not perfectly masked and that way the noise will be in the wrong places sometimes. Of course I could correct that by hand, but wanted to know if there is the chance to do this in a faster fashion, maybe baking some kind of a different map in Designer?!
My second option is to just mask everything by hand, which actually gives me a good result in the larger areas, but the problem starts when I have to go into smaller "holes" and shapes also, this option is way more time consuming and in case I have to make any major changes to the asset it will brake everything apart and I will have to redo it from the beginning. Once again, just trying to find a faster way to achieve this goal and still keep the same quality
Any ideias will be appreciated, even if they look crazy!
In the future, when sculpting in ZBrush, you could turn on vertex colour painting when chipping away at your model, thus painting the damaged areas a different colour, and then bake out a colour ID map.
The ideia of doing that in ZBrush actually came to my mind, but it was too late in the process, and also, the way I sculpted the rock I am not sure that it would have worked very well, but in the future I will have that in mind for sure
As a quick update, I change a little bit the strategy and I think it works well enough for now at least! I decided to expose the normal intensity in the noises I created inside of Designer and this way, intead of using the height channel in Painter I am using a "material" only on the normal channel of ther layer, and then I am using the same noise as a mask to give some variation and I use a paint over it that removes the noise from the undamaged parts, after that I added another paint filter to remove the damage from some areas to give some rest to noise and make it more pleasing to the eye.
Here is a comparasion between te rock without the noises and with the noises:
It is a little bit more blurry in this screenshots than it is in my viewport for some reason, but you can still get the point
I am back, being occupied with some professional work and an Art Test for a Studio in the last weeks I had to pause this project for a while and now I have time to come back to it again!
In the meantime I kept working on the normal map of this piece, mainly giving it a damaged look overall to fit the mood of the concept, not while I added some variation to the heavy damaged chipped areas but also added some smaller damage to the Hieroglyphs and some kind of sandy rock surface to the most well preserved areas of the rock. I think that for now I will me moving on to the roughness and later to the Albedo (I will probably come back to the normal again) and meanwhile, any feedback would be really appreciated as always!
In the meantime I made a base roughness and color pass to get the general feeling to the rock, the colors are more grounded to the match the real world reference, as the concept is very saturated in comparation. I will now do some fine tuning to this base color to get it exactly where I needed and after that I will start to add some unique details and hand placed wear and tear to make it unique!
As always, C&C is very welcomed!
As always, any C&C is very welcome! Also, don't pay any attention to the bowl and rope materials as they are only place holders for the moment, I will give them the love they deserve for sure!
in the meantime I was able to finish the rock block texture, at least for a first pass and I will probably do some polish and small changes when I have everything closer to a finish look. The last thing I added to the rock was basically some dirt sitting on top of it and also some kind of aged leaking coming from the top, like if it had some rain or humidity going down the sides, just to break up the assets a little bit.
I also started to do the rope texture from scratch in Designer, I want it to be well detailed and have a cool variation so I will be dealing with this material like if it was a standalone material in designer to be presented in the portfolio by itself. As I was experimenting with the rope I tried to use displacement in the rope material, and it does give an extra point to the look of the asset, so I am thinking about using it for the final renders since this is basically a portfolio "hero prop" and optimization is not required, as long as I don't go crazy and keep in mind that this is still a game asset!
I could have made the ropes by hand of course, but I think that it is both slower and less accurate so I prefer this workflow better, work smarter not harder!
For the textures it is easier, and you probably already figured it out, but it is basically a tileable texture, and the UV's are made without needing to be inside of the 0-1 UV space like you would do in modular environments or something like that.
By the way, I am using big textures because as I said before this is a portfolio piece and I am going mainly towards art quality and not optimization, but still I am keeping a reasonable texel density, in this case everything is around 1024 per meter (I think that is the texel density used in VR and maybe even some AAA games of today, not sure though.
*Edit*
In case you want to find out more about the nHair dynamic ropes in Maya, here is a very cool tutorial, all you need to do after learning how to do it is mess around with it and adapt it to what you need to create:
https://www.youtube.com/watch?v=Y0kcIT_DuHE&feature=youtu.be
I did some extra detail work on the rock textures, mainly in the damage and dirt/weathering pass, following some really cool feedback from some of my ex-colleagues, really great guys!
Besides that I was also able to put some work on the ceramic bowl and get it close to a more finish look (I just noticed with this fast renders I took that maybe I need to tone down the dirt in the ceramic a little bit as it is very noisy right now). I was also able to work a little more on te rope texture, but I will still be coming back to that again, closer to the end!
Meanwhile I added the flames to the bowl like in the concept and added some kind of burned down coal, which is using a texture I created really fast in Designer just to help sell the piece more.
Hope I have the time to finish this asset this week to move to the next one!
Check my artstation for more screens, and as always, C&C is very welcomed!
https://www.artstation.com/artwork/mq6P8a