RIGGING A SPAULDER AN EASY WAY : A simple way to rig Shoulder Armor
polycounter lvl 10
Hi, this is an English rewrite of my Japanese Blog post, about a simple idea on how to rig shoulder armors.
The original blog post can be found here(Japanese). http://polygonomicon.blog111.fc2.com/blog-entry-179.html
Since it seems to be somewhat handy to some people, I decided to rewrite it in English, so we could share.
I use Softimage as my main tool, but I believe this trick could be put into use in any other 3D software around.
-Premise
Animating a character with shoulder armor is often tough.
The armor gets in the way of the arms, and often clips in to the chest, shoulder and the arm it self.
The shoulder has a great range of movement, and especially in action moments, characters often swing their arms up high, and the shoulder armor gets in the way almost all the time.
-Trial and Error
I always had a thought that there must be a better way to solve this problem other than to brute force "fix every frame manually" when ever you find these clippings.
If there was a way to rig the armor so it avoids these clippings automatically, it would make the life of the animators much easier.
Doing complicated collision detection and physics was not really in my skill set, and seemed too complicated for the matter.
I had a hunch that a simple solution using a few constraints or expressions should do the trick, but was not sure what exactly.
So I started blindly testing out various methods that came to my mind.
Failure case : parent to shoulder bone
Failure case : parent to Arm bone
Failure case : parent to a bone with blended rotation of arm and shoulder
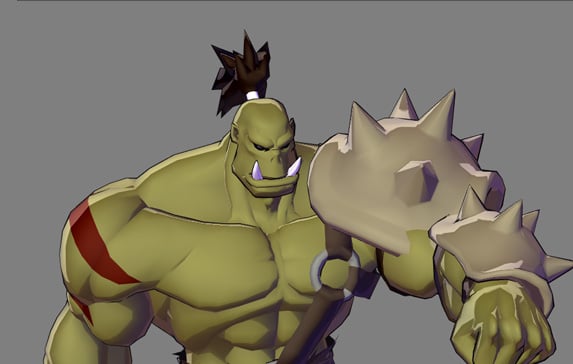
This one was better than the others, but still a lot of clipping happening, so not good enough.
-Solution
So, a few months passed while I was doing other things, but it was always in the back of my mind.
One day I had a sudden flash of an idea to use a "look at" constraint with an up vector in a way I never tried before.
And it turned out to work brilliantly for my case, and not only that, gave me a lot of insight and new ideas about rigging.
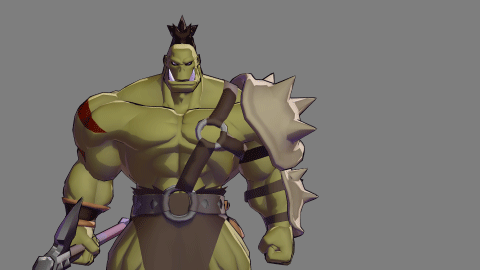
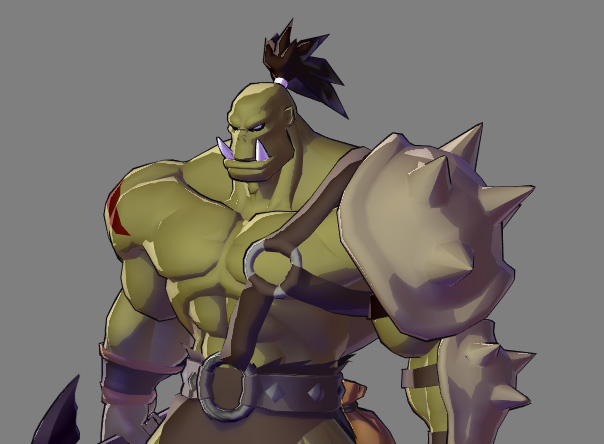
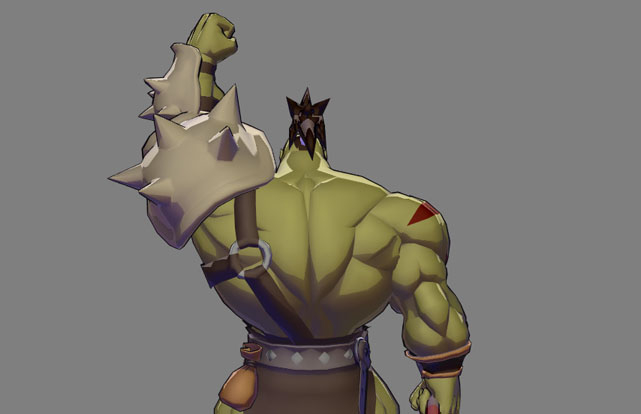
Success case : Using the trick in this article
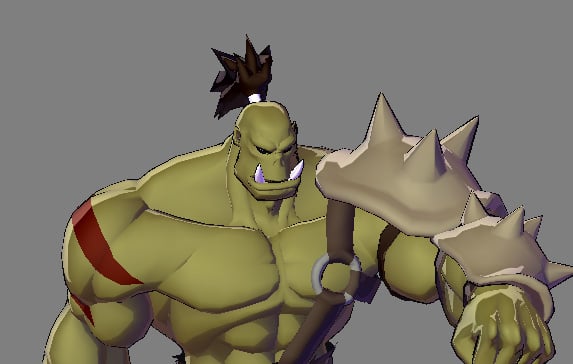
You may see that the armor no longer clips through the arm nor the chest.
Example in motion:
See how swinging the arm back and forth does not cause any clipping.
The Spaulder automatically moves out of the way when needed.
-How to set it up
As mentioned in the title, it is actually very simple and easy to set up.
One "look at" constraint and a few extra bones does the trick.

Here is a step by step procedure:
1: Place a target bone(or a null or whatever) as a child of the upper arm, anywhere in between the shoulder and elbow.
2: Place a bone to control the Spaulder, as a child of the clavicle bone, somewhere in between the chest and the shoulder.
3: Apply a "look at" constraint on the Spaulder bone, pointing towards the target bone.
4: Set the "up vector" towards the Chest bone, or any possible target in the middle of the torso.
Here's how it works.
Since the Spaulder bone is placed somewhere in between the chest and the shoulder, and the target bone is in between the shoulder and the elbow, making the Spaulder bone "look at" the target will make it rotate to an angle in between the rotation of the shoulder and the arm.
And the biggest point here is that the "up vector" is pointing towards the center of the torso.
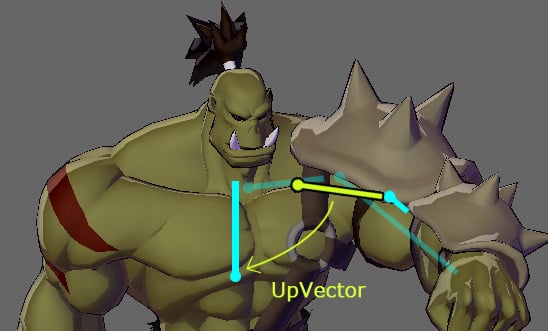
Because of this "up vector" the Spaulders inner side always rotates to face the middle of the torso,
resulting in a twist that avoids clipping in to the chest.
When the arm is raised forward, the Spaulder will twist to a natural position giving space so it does not interfere with the body.

The "up vector" facing the center of torso, twisting the Spaulder
-Known limits and how to avoid them
Of course, there is never a perfect solution for everything, so depending on the shape or size of the Spaulder,
it may not work in all situations.
Also, if the pose of the characters is too extreme one, it may not be enough to avoid clipping.
For example, if you raise the arm way up clipping is still unavoidable.
In these cases, you may still need to manually tweak the position of the Spaulder.
To do so, having an extra bone as a child of the bone with the "look at" constraint may come in handy.
Skinning the Spaulder to this child bone and adjusting the position could fix the problem when needed.
-Adjustments
By tweaking the placements of the Spaulder bone and the Target bone, you can get differing results of the angle and position of the Spaulder.
The more the Spaulder bone is nearer to the arm, the angle will get steeper and almost parallel to the arm.
This is useful if the Spaulder is a type that is more attached to the arm than the shoulder.
Also, Placing the Spaulder and the target further from each other will make the Spaulder "sink" in to the shoulder more.
It depends on what you are trying to achieve, so you may have to adjust the placements untill you get it just right.
-Deriving from this technique
This technique using the "look at" and "up vector" turned out to be very useful in various cases other than controlling shoulder armors.
As a substitute twist bone:
Like I mentioned above, placing the bone with the "look at" constraint nearer to the arm will make it more
parallel to the arm, but with the "up vector" preventing it from twisting with the arm.
So in this case, you have a twisting arm bone and a non-twisting parallel bone to the arm.
You can combine these two bones rotations to get an intermediate rotation that can be used as a twist bone.
3dsMAX's Biped's upper arm twist function flips all the time, making it virtually unusable to me, but applying this idea and doing the twisting with additional rig objects proved to be very practical, at least in my cases.
Using the rotation values:
With this type of shoulder armor that is more attached to the shoulder and less to the arm,
I used expressions with the rotation value from the "look at" bone, to control the rotations of the armor.
Since the "up vector" is in effect, the rotation values of the bone change to be much more predictable and understandable.
Using these rotation values with MIN, MAX ans ABS within the expressions gave me a much more controllable result.

-Summary
I am pretty sure that the "look at" constraint and "up vector" functions could be found in any modern 3D animation tool.
And because basically that is all you need, I believe this method can be replicated on any 3D software such as Maya, 3dsMAX, Blender, and of course, Softimage.
Adding to that, like the twist bone adaptation, it seems there are many other various ways to capitalize from this function.
I never thought a single, and such a basic function like the "look at" constraint could bring me this far, providing many solutions and ideas to the workflow.
It shows how much depth there is to the art of rigging.
Even the simplest function could be expanded to greater use, if you utilize it in the right way.
Can't wait to find out more.
Of course, I am not a Rigging Specialist or anything, so this well may be a super well known basic technique that I happened not to ever come across.
Even so, I feel that it might come in handy to some specific people, such as me, so I decided to share it with everyone.
I hope this article was worth the time, and I will be very happy to know if anyone found it even somewhat helping.
Feed back is welcome.
-Next goal
My next goal is to find a way to easily control the loincloth so it does not clip with the legs.
(Any thing other than cloth sim)
If anyone has any good ideas that you don't mind sharing, I will be very thankful.
And sorry for my rusty English. I hope it is understandable.
Cheers.
Replies
a bone looking at some point in the leg so it rotates when the leg is up
Thanks for your interest! Hope to see someone utilizing it sometime.
@SergioSantos
Yeah, That's what I am currently trying, but I am not still completely happy with it.
Having two legs to consider makes things pretty complicated.
I shall keep trying until I find a good solution that is stable.
@RN
Hi, Thanks for the Question! And it is a good one!
Yes, there is a critical angle that causes flips when the armor bone is pointing 180 degrees away from the up vector.
But so far, it has not caused any problems for me, since that angle is not a very natural arm position.
Since you need to lift your clavicle in order to make your arm reach that angle, it almost always escapes the problem
automatically.
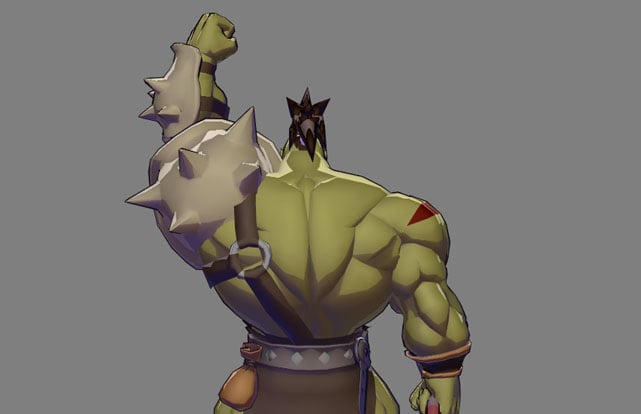
If you force the angle to the flipping point, it does flip, like you mentioned.
But whats great about this solution, is that the flipping actually benefits you,
making the armor slip out side to make some room.
With out this flipping, the shoulder armor may clip through the head.
Instead, it slides around the shoulder to the back, moving out of the way.
And here is an example in actual use in one of my animations.
You can see that the shoulder armor is more on the back of the shoulder, and not getting in the way or clipping through the head.
I'm sure no one wants those spikes crushing in to your own skull when you are swinging your arms up!
I hope I was able to answer you question.
Secondary, i had met your japanese blog a bit of time before and was really amazed by your models.
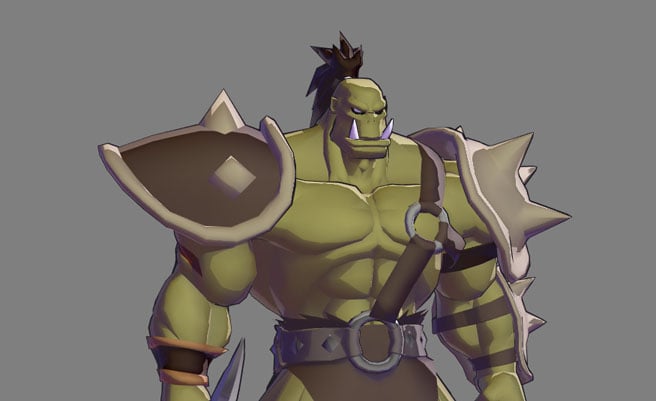
And for that reason, i would be super interested in seing their topology please. OR even better if you would be willing to show how you model them. I do my own models but can't figure out to model proper shoulders, where you get seemingly awesome deformation. Btw i love your orc but even more the slimmy guy on your blog ( .
Anyway keep up the great work.