Basic UV Unwrapping problems

polygon
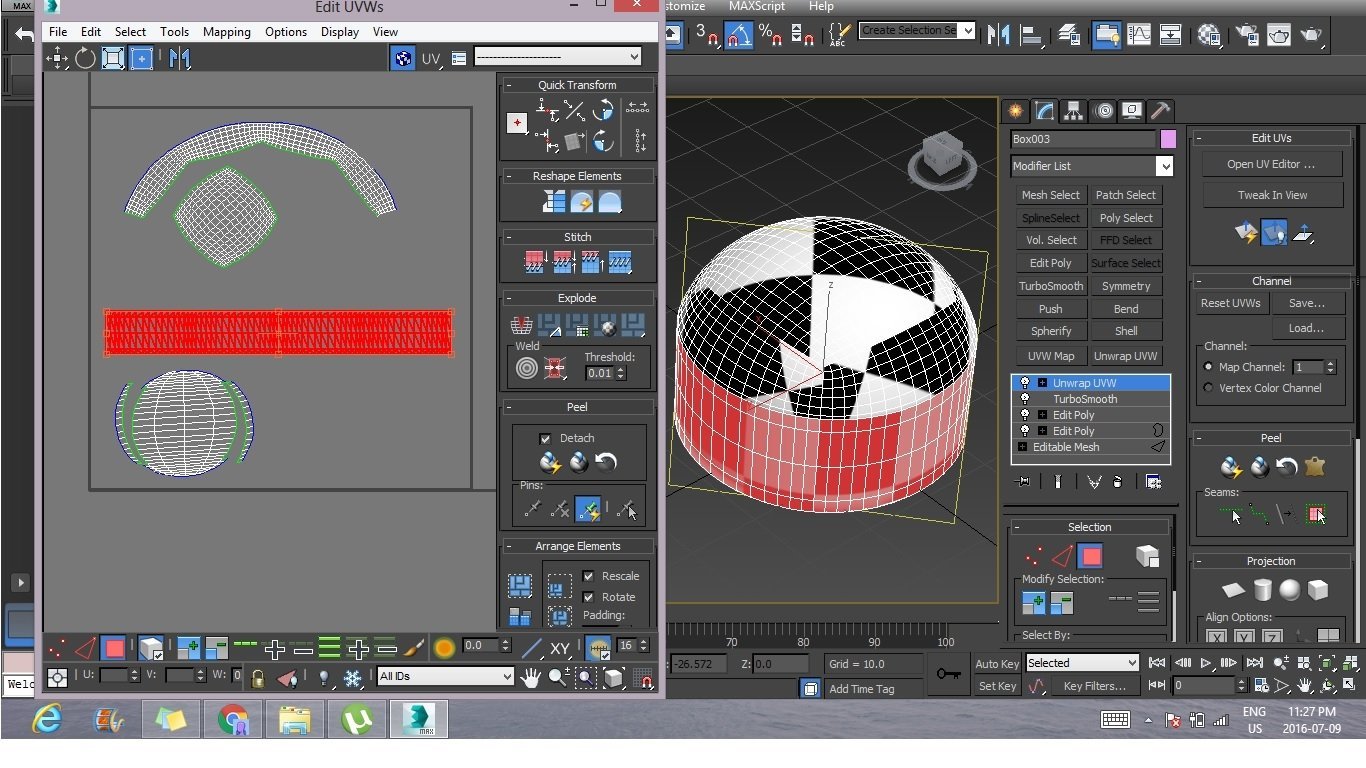
Disclaimer - I'm a total noob. I tried my hand at unwrapping a silo sorta shape made with an extruded quadsphere. Tried 2-3 different ways...none are really working. What am I doing wrong? I basically made seams, selected the area up to the seams, pelted then relaxed. See images below:
Try 2:
Try 2:
Replies
Anyway, long story short, I'm going to soldier through that video but I'm definitely missing a lot of back explanation. Do you have any quick tips you could write down for me? If not I understand, these are really noob questions so far - thanks for responding at all!
Here is what I do to unwrap manually...
1. Have an object that needs unwrapping
2. Create seams, either with the simple seam tool or point-to-point (visible in both your screenshots the "Peel" rollout), until the model has been manually divided by the blue lines, creating separate islands. Map Seams are green, Pelt Seams are blue, you care for the blue ones here.
3. Go to the polygon subobject mode if not already. Select a polygon in any island. Then click "Expand Polygon Selection to Seams". It's right there next to the seam tools.
4. A whole island should be selected now, up to the blue border. Now click the "Pelt Map" button. It's right next to the "Expand" button too. This puts you into the UV editor.
5. Here you can Pelt, or Relax, or both, or neither. Do which you like, but Relax (by polygon angles, there are settings there) does the trick for me majority of the time. Then Confirm.
6. Do this for every island separately. In the case of your model, you need to do it three times. You can move the islands around how you like, or not at all.
7. When all this is done, you can use some way to "Pack UVs". You basically let Max pack them as tightly and efficiently as it can manage, can also bring them all to scale.
8. Profit! The advantage of this method is that it should work reliably for most-every model that you might have to UV, even the weirdly curved ones.
I just went and created one "Oil Tank" primitive, it's in the Create tab, under Extended Primitives. I went to UV-edit it (Unwrap UVW modifier) and its default seams were exactly what I wanted to suggest to you, so try and create one and look at its seams in Unwrap UVW. The top and the bottom are fine with having triangles in them; triangles are only very problematic if the UV terminates directly upon them (look at the default UVs for a sphere primitive for an example of this). Dont need to Relax these circular islands, but if you do, some settings may cause them to spin out. The remaining island is the middle cylindrical one, which goes around the object. You can easily relax that. You can even divide it into more pieces instead of just one; you get more seams, but it might pack more efficiently, it's up to you to figure out when this would be a good idea.
I hope this helps! If you feel like it, I'm curious to see how it worked out for you.
Basically, unwrapping is all about understanding the trade-off between seam placement and distortion. And the ability to make logical choices based on the particular forms of the objects being unwrapped. There is a lot more flexibility in this trade-off if you intend to use 3D painting and/or tri-planar projection as your texturing method.
But for the object in question I would planar map the dome shape and cylindrically map the remaining cylinder shape. Also, delete any unnecessary geometry that won't be seen. There may be some distortion on the dome shape which you can use the relax tools on to alleviate.
Unfortunately, most learning resources these days are video as opposed to written.
This is a very old thread but might help you grasp some of the basics:
http://forums.cgsociety.org/showthread.php?t=7598
http://wiki.polycount.com/wiki/TextureCoordinates#UV_Map_Grids
This is my current fav:
Regarding your UVs, I helped write this UV overview on our site: http://quixel.se/tutorial/uv-mapping-for-the-suite/
It might be worth a read if you're interested. I can help you out a bit more if you have any questions after reading.