Normal Map Question
Hi everyone,
I'm working on normal mapping and improving my technique, but I'm confused on a particular issue I'm having. I would really appreciate someone explaining this in as simple a way as possible.
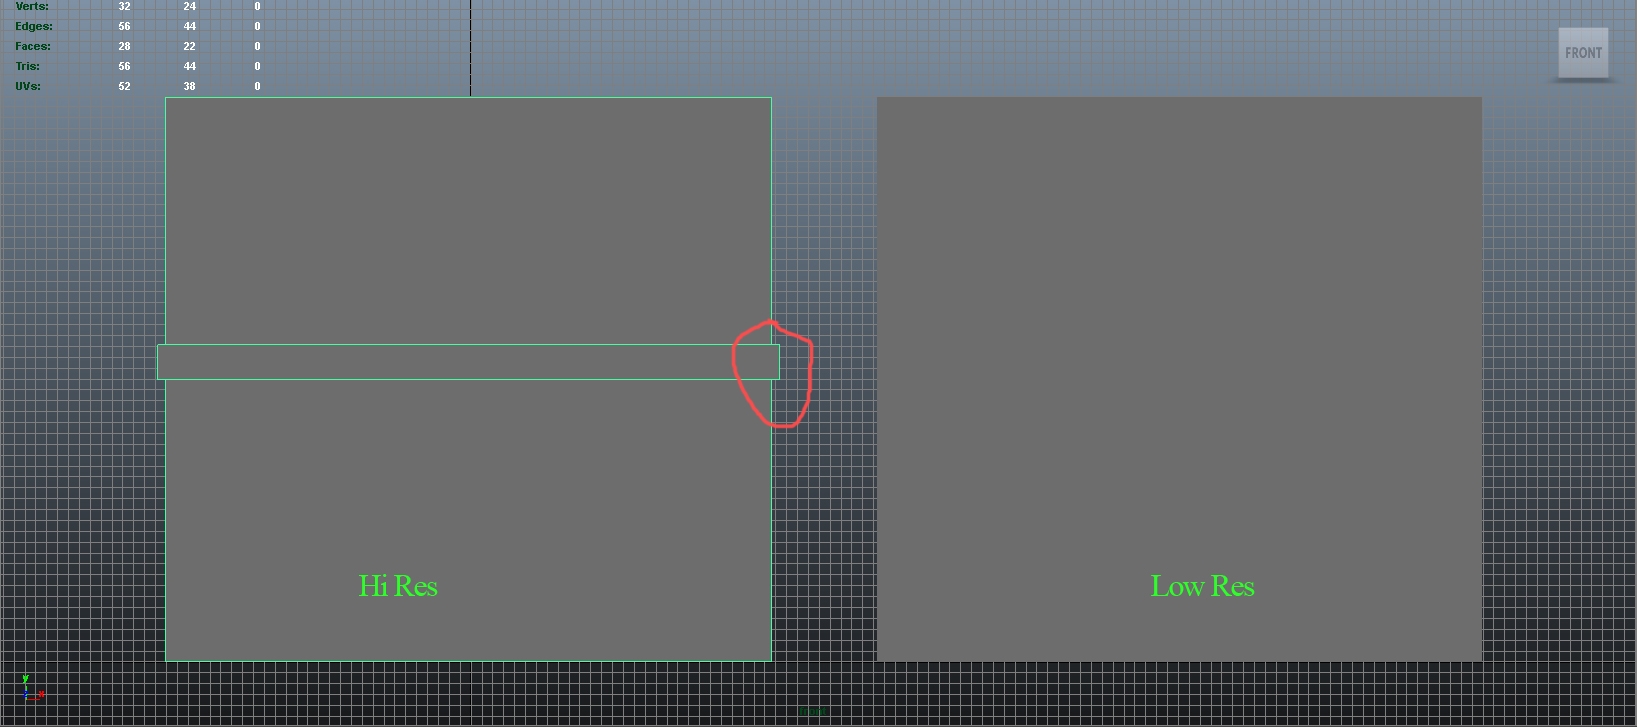
So I have a "Hi-Res" mesh on the left and a Low-Res on the right and I'm wanting to bake the Hi-Res into the Low.
You'll notice that the mesh juts out slightly (circled in red).

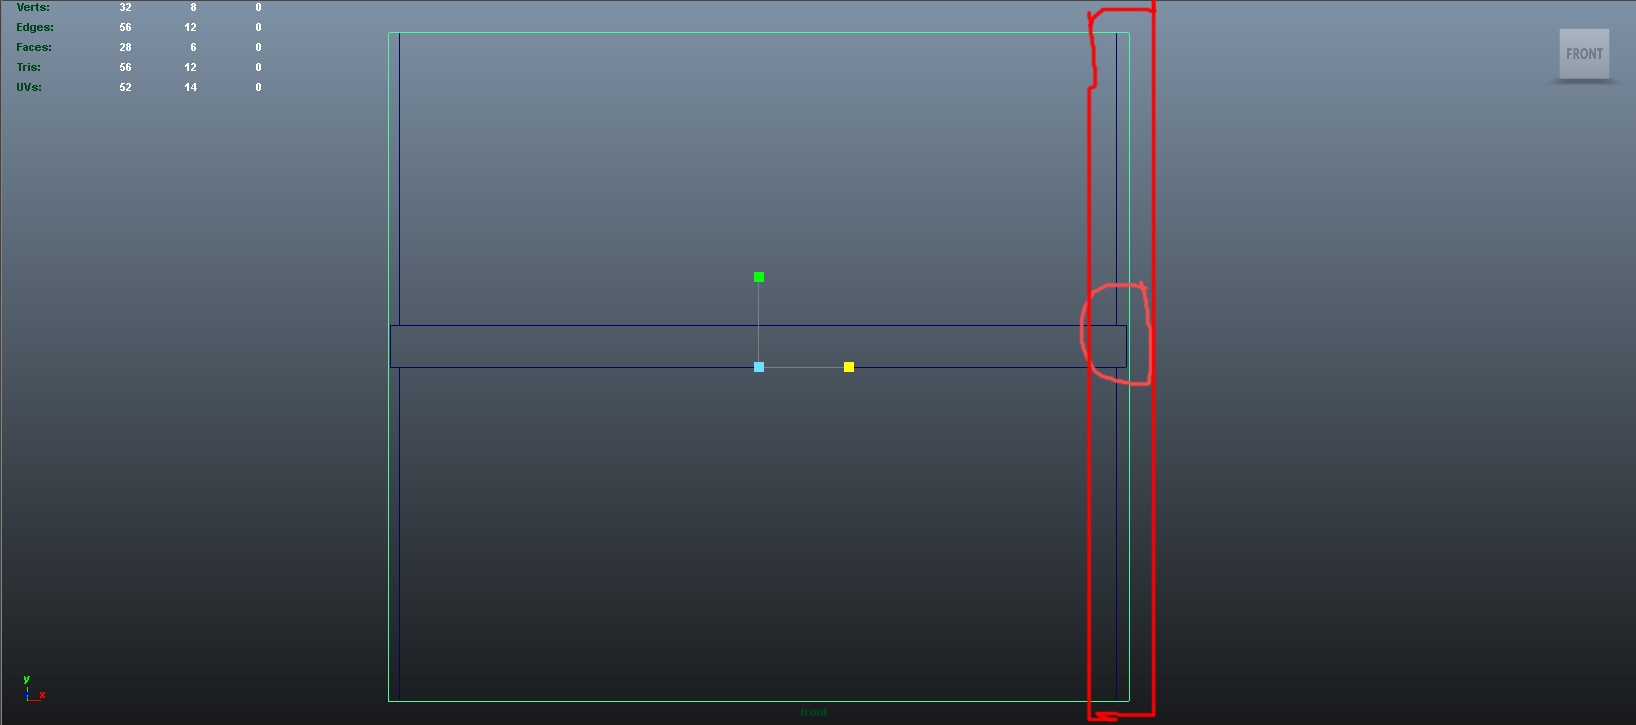
Now I bring the low-res over the hi-res as a cage.

So here I've kept the edge that juts out circled and then the rest of the space that from this view is nothing, basically just an empty gap that has nothing for a normal map to read. When I bake this out I get artifacting in the normal map.
So my question is do I need to make the shape closer to the "Hi-Res" (I know this is a poor example but it gets the point across) or is there something else I'm missing? Even making the cage close to the original shape I still get artifacting even if the mesh is slightly different. Ex. if the edge that juts out was rounded in the hi-res, but squared off in the low res.
My next thought, is this just something I'll need to fix in the normal map itself or is it a baking issue?
Thank you in advance for any help.
I'm working on normal mapping and improving my technique, but I'm confused on a particular issue I'm having. I would really appreciate someone explaining this in as simple a way as possible.
So I have a "Hi-Res" mesh on the left and a Low-Res on the right and I'm wanting to bake the Hi-Res into the Low.

You'll notice that the mesh juts out slightly (circled in red).

Now I bring the low-res over the hi-res as a cage.

So here I've kept the edge that juts out circled and then the rest of the space that from this view is nothing, basically just an empty gap that has nothing for a normal map to read. When I bake this out I get artifacting in the normal map.
So my question is do I need to make the shape closer to the "Hi-Res" (I know this is a poor example but it gets the point across) or is there something else I'm missing? Even making the cage close to the original shape I still get artifacting even if the mesh is slightly different. Ex. if the edge that juts out was rounded in the hi-res, but squared off in the low res.
My next thought, is this just something I'll need to fix in the normal map itself or is it a baking issue?
Thank you in advance for any help.
Replies
The fix in this situation is to have your low res face coincide with the high res face and have the extrude fall 'outside' of the low res.
A note, normal maps don't bake height info, they bake angle info. You have no angle information in your extrude because there isn't a bevel on the edges, so your normal map will only have a sliver of detail where the extrude edges are.
Imagine in this: If I was stood in front of you with a pencil in my hand pointing level and directly at your eyeline, you wouldn't be able to tell how long the pencil is, it would just look like the end of the pencil to you, if i tilted the pencil slightly, you would be able to gauge how long it is because now you have some angular information . It's the same with normal maps, if the angle of the inner mesh is perpendicular to the cage that is casting the rays, there is no angular information being shot back so even slightly beveling your extrudes helps loads.
You gotta make sure that the cage also supports the underlying geometry, with objects so low poly, you need to set that up optimally so its not too tight, and offers adequate and equalized ray distribution.
So it's ok to have the hi-res hanging outside the low res when baking certain details? Yeah I'm aware this is a poor example for there being no bevel or any additional detail on the extruded piece, my primary question is more just the logistics on how to setup the baking to reduce artifacting.
Glacierfox, I'll provide a better example when I get back from work this evening. I appreciate the detailed response and it makes perfect sense. I think Quack! was on the right track in that I have "gaps" from the low-res to the hi-res so if I tighten the cage and let the extrude sit on the outside it should remove that information. Like I said I'll re-post a better example with normal maps this evening and test out the suggestion.
Ideally, your low res will match your high res as close as possible and be coincident with each other. If you can't match it exactly, then you need to figure out what is the best position for your low. In this case, matching the major faces and letting the extrude lie outside the low.
Hi-res now has beveled edges and some half spheres to give more depth.
Side view with cage on right
Side view wireframe with "large" cage with extruded edges incased below is the normal map result I get with that.
You can see on top of the mesh there is a lot of what I consider artifacting. Seems it's confused on how to display the information. As well as the edges of the extruded portions from the side and front views.
Now with a small cage:
Normal map result:
As you can see this map came out much more clean and it seems to have worked. It looks like still at the corners there is some distortion, but when display on the model itself is not noticeable.
Far left is the one with the large cage and far right is the one with the small cage. Thank you for the tips both of you. I think it's clicked now how I can tweak the cage to get more detail and less errors. If you notice anything else please let me know and thanks again.
Have you baked the normal map directly from Maya? I'm actually a Maya user but I've never actually bake maps using it. Have you tried Xnormal or that new Handplane Baker release just to compare?. That's how I do my normal maps. I'm slightly confused as to how you've used the cage there but don't worry about it, I've never used Maya for such things.
The cage seems to work differently in different programs it seems. If you place mesh areas outside of the cage in either Xnormal or Handplane, it simply fails to trace and you get large errors.
I hope I'm not patronizing you or anything but I'll just try to explain a couple of things.
The generated normal map, by design, is 'working' to alter the surface normal at a per pixel level. Basically just making one big illusion over the surface of your mesh. As Quack said, you need to make sure the low poly matches your high poly as close as possible, obviously negating the high detail areas that would require a lot of extra geometry.
The reason it needs to match as close as possible is because you want the normal map to extenuate the areas that aren't in your low poly. Of course you do! Why would you want a normal map other wise?.....but all of the areas without any detail like the flat areas of your box, need to also be traced. Even though there is no detail there, the baker is still shooting out rays between your high and low poly and tracing the distance in between them. Essentially, the closer your low poly is to your high poly, the less error prone it will be, because there's less area and weird angles in between your meshes for the rays to bonce from. With a normal map, you've only got a limited amount of depth to work with before the illusion is broken or you get strange errors where the normal make baker is trying to compensate by attempting to achieve angles that are impossible given the low poly nature of the object.
If your fancy it, have a go of this and see what the results are like. Download either Handplane baker or Xnormal (both free) and watch a quick tutorial, it literally took me like 5 mins to learn how to use either program, very simple.
With these two programs you need you low poly, your high poly AND a cage mesh file. The red is cage, the black is your high poly and the green is your low poly. Just try setting them up like that in Maya and export them. Put them in the right slots in either program and then bake.
Remember that wit these programs, your cage has to encase the both your low and high poly or they simple wont be traced. I actually thought that was the case with Maya too.
My opinion is (and I may be wrong haha) that the reason you are getting those strange edges on the extruded parts in the normal is because, even though the actual extrude you have made is beveled a bit, the vertical corner on all 4 attached sides are not. The cage seems to be bouncing rays around those harsh 90 degree edges and then bouncing them back at skew angles to the closest cage face making the hard edge all blurred in the normal map. Obviously its negated a bit when you make the cage smaller as there is less space for the rays to bounce around and give you that error.
If it wasn't a box and was just a plane I'd do't think you'd get that error because there no harsh edge to supply the error.
If i was making that low poly shape this is what I'd do.
1;
-use just a single plane
-Unwrap it
-Put a high poly bit of geo where i want my extrude or details
-Put it through hand plane with a simple cage
-Attach 4 of them together into a cube with two more flat planes, this way I've save texture space and I get no errors at all on the corners.
2;
-Use a single plane or the whole mesh, your choice.
-Unwrap it
-Work on the flat UV NDo in photoshop in 5 mins with the rectangle tool there's not baking or ray firing to go wrong here. What you paint is what you get.
That's just my take on it and I barely get any errors,
I don't think you're patronizing me at all. I appreciate the layman's terms and detail as I'm very out of practice.
I actually generated this normal using the latest version of Xnormal, but I did not however use a separate cage. I've assumed the low-poly was the cage. So if the cage needs to encase both the low and high poly, what would ideal positioning be for the low-poly? As shown in my previous example the low-poly seems to have gotten all the detail from the high-poly with very little distortion, from what I can tell, letting the extruded detail sit outside of it.
I'll put your suggestions to the test as well, and I'll check out a tutorial for Xnormal just in case I'm missing something.
Right, so in Xnormal , you can actually import a separate cage file into the program or you can quite easily generate a cage file in the program itself.
--- In regards to where to place your high poly and low poly, look at the image above. In my opinion this is how you should set it up. The green is your low poly and the black is the high. The Red is the cage. ---
The reason you're getting detail at all in Xnormal is because you aren't using a cage file. That's what confused me, because if you put the cage inside the mesh in Xnormal it will fail to trace. When you changed the position of the low poly to the inside of the bevel, you moved it closer to the actual size of the high poly, giving you better results, but you'd still get slight errors because you simply have no actual set cage. Your low poly needs to match the average proportions of your high poly. The extruded detail needs be outside of the low poly and and any 'inward' extrusions you might create need to be inside. For this asset, simply don't change the size of your low poly. The box shape should lie exactly on top of the high poly version with only the extrusions poking out from the sides.
When you don't use a cage in xnormal it seems to just apply a preliminary cage for you automatically but you have no control over its distance, so it could be too far away or even too close. The low poly ISN'T your cage, although you do actually create the cage from your low poly object. The cage needs to have exactly the same topology and vertex count as your low poly, so what I usually do is duplicate my low poly in 3ds max, and then use the 'push' modifier on it until it encases both the low and the high poly. You could probably achieve the same result in Maya using the extrude options or just move the faces manually as it's low poly anyway.
The cage file is basically a set of faces for the normal map baker to shoot rays from. These rays trace the distance between your high and low poly, and bake these values into a normal map for you. If you import a cage or create one in xnormal and the cage doesn't encase the whole object, those areas will fail to trace as the rays are beginning INSIDE the object. So make sure you encase the low and the high with the cage as close as possible without intersections
-- TO CREATE A CAGE IN XNORMAL
Assign your high poly and low poly in their respective slots in Xnormal.
Press the 3D Viewer button on the right side of xnormal
Make sure the 'Run Windowed' box is ticked
Press 'launch Viewer'
Press the check box on the left of the window that pops up that enables the cage to be shown. It will show up in the viewport as a transparent mesh over your low poly.
Use the slider on the top to increase the size of your cage so it encases the high and the low poly.
Save it with the button on the right and exit the viewer, the viewer will automatically assign the cage to its correct slot if you you tell it to via the box that pops up.
Press the Bake button.
--------
To import a cage into Xnormal from Maya or 3DS max you can use the SBM exporter for 3ds Max or I believe you can just import an obj or something from Maya, I rarely use my own cages with Xnormal so I can't quite remember but a quick google search will help you out with that. Handplane just allows you to import an OBJ cage file.
-----