Home Unreal Engine

[UDK] Zelda Water Shader Help

sublime tool
Offline / Send Message
Habboi sublime tool
Hey,

I have another interesting challenge for you folks on Polycount. It helps if you're familiar with the the game in the title but I'll provide a gif of a waterfall below. I'm trying to recreate this flowing water effect and I'm wondering if you can help me nail the material network down. Obviously we have a panner for the middle section but it's the pointy bits at the top and bottom that have me puzzled.
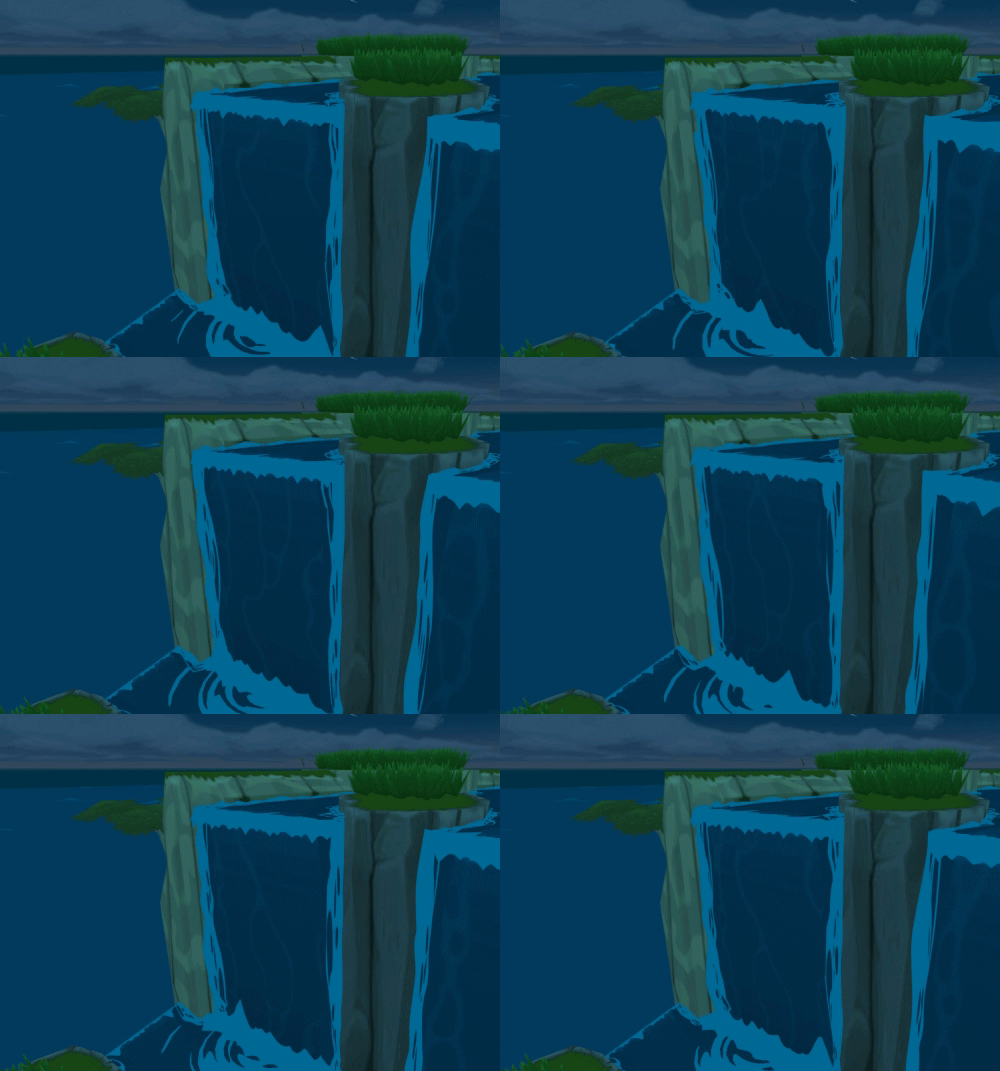
waterfall.gif

I look forward to seeing the replies.

Replies

  • gilesruscoe
    Offline / Send Message
    gilesruscoe polycounter lvl 10
    I think it's just a horizonal panner with a tiling wave texture on it layed over using another alpha plane. Vertical waves offset could be done with some kind of vert painting shader. Can't rememther the ins and outs of it, but it looks like this!:
    [ame="http://www.youtube.com/watch?v=tCbpX_lEQEU"]Beating Heart UDK - YouTube[/ame]

    Or it's just an angled alpha plane with another panner on it wedged into the edges.
  • bugo
    Offline / Send Message
    bugo polycounter lvl 17
    Hey, this is just one tileable texture for the water flow, the edges on top and bottom are just probably animated textures with alpha. The corners also have animated white water alpha going on. I dont think there's much secret about it. Specially that this game is unlit the whole way, or just vertex painted. Still lovely game, I miss it.
  • JamesWild
    Offline / Send Message
    JamesWild polycounter lvl 8
    How I'd do it:

    Panner->Rotator (or vice versa)->mask channel R->a noise/clouds texture->take one of the channels->use IF against the G channel of our UVs->white or blue.
  • JamesWild
    Offline / Send Message
    JamesWild polycounter lvl 8
    I was bored so I got out my laptop (which can barely run UDK) and roughed the edging and as a bonus the splash at the bottom.
    LCggA.png
    B65SN.png
    It's not exact but not far off.

    I'll upload the package in a bit.
  • JamesWild
  • Habboi
    Offline / Send Message
    Habboi sublime tool
    Thank you so much. You're going in the credits of my project when it's done.
  • D4V1DC
    Offline / Send Message
    D4V1DC polycounter lvl 18
    I just want to say man that the water fall you got going is still awesome, looks like a good and fun project can't wait to see more.
  • Lew
    you could always just use a flipbook texture for that true .gif feel... :D
  • Gannon
    Offline / Send Message
    Gannon interpolator
    What is the bit of code in the custom node doing? I don't quiet understand. How is it bending the U and V into a radial?

    Can you break down what each part of the equation is for? I'm mostly curious as to what the atan2 is.
  • JamesWild
    Offline / Send Message
    JamesWild polycounter lvl 8
    Atan2 takes a X and Y and returns the angle around 0 as -pi to pi. I'm also doing some addition/multiplication in there too just to get the scales/offsets right.
  • Slum
    Offline / Send Message
    Slum polycounter lvl 18
    You guys are totally overthinking the Zelda water. Those "spikes" are just two copies of an alpha mask, scrolling in opposite directions. The mask image is low frequency waves, with a few larger "spikes" in it. As the two scroll, the "spike" waves cross over, causing the bigger spikes. You can really see it if you pick a spot in the scroll and follow it with your eyes as it pans - it will reveal the two layers.

    Keep in mind, the Gamecube used very limited pixel shaders. It wasn't very fast. Computing arc tangents per pixel would likely be prohibitively expensive on an actual Gamecube.

    While that doesn't apply as much to today's graphics processors, it's a good idea to keep up the same mindset. The more reuse you can get out of your shaders, the better off you'll be. You don't want infinite different shaders for every new object or effect, for the sake of batching, resources, etc.

    If you can accomplish something with a simpler shader, do it :)
  • JamesWild
    Offline / Send Message
    JamesWild polycounter lvl 8
    You could quite easily work around the atan using a triangle fan. If you look at the slight segmentation on the ripple that's probably how they did it.
  • King Mango
    Offline / Send Message
    King Mango polycounter lvl 10
    Slum wrote: »
    You guys are totally overthinking the Zelda water. Those "spikes" are just two copies of an alpha mask, scrolling in opposite directions. The mask image is low frequency waves, with a few larger "spikes" in it. As the two scroll, the "spike" waves cross over, causing the bigger spikes. You can really see it if you pick a spot in the scroll and follow it with your eyes as it pans - it will reveal the two layers.

    Keep in mind, the Gamecube used very limited pixel shaders. It wasn't very fast. Computing arc tangents per pixel would likely be prohibitively expensive on an actual Gamecube.

    While that doesn't apply as much to today's graphics processors, it's a good idea to keep up the same mindset. The more reuse you can get out of your shaders, the better off you'll be. You don't want infinite different shaders for every new object or effect, for the sake of batching, resources, etc.

    If you can accomplish something with a simpler shader, do it :)

    QFT

    EDIT:
    OK what I would do more specifically, is use a lerp to separate the flowing water texture, and constant3V for the solid color.
    For the Alpha for the LERP, I would use an RGB texture, no alpha, and place my jagged masks in the R and G, and use the B for the edges. Pan those R and G channels into a multiply, then plug the multiply into the lerp alpha.
  • JamesWild
    Offline / Send Message
    JamesWild polycounter lvl 8
    x9el5.png
    How about this? No ifs, no atans, just one texture sample and some scrolling with a multiply for falloff, the mapping to a "tunnel" shape done by a triangle fan.
  • ZacD
    Offline / Send Message
    ZacD ngon master
    This gives me an idea for contests, we should have mini shader comps on who can do a shader with the least instructions, and who can do the best looking one with a maximum limit.
  • ZacD
    Offline / Send Message
    ZacD ngon master
    Hey guys, I did it.


    CXgHa.png

    [ame="http://www.youtube.com/watch?v=A07lyAzQ57o"]UDK - Wind Waker style waterfall material - YouTube[/ame]


    Texture sources:

    Waterfall BG
    http://i.imgur.com/evAPk.png

    Current 1
    http://i.imgur.com/Gl1ZQ.png

    Current 2
    http://i.imgur.com/lGiUj.png

    Splash
    http://i.imgur.com/Jdv9M.png

    Here's the whole material

    CBBoY.png


    He's the branch that repeats 5 times (I just copied it from JamesWild), 3 of them have different uv sets, the 2 current ones over lap and use the same UV, different speed, the top splash is 2 splashes going in opposite directions and mirrored.

    PMwXn.png


    And this is how it is all put together in the end

    WpbzZ.png


    Any questions?
  • Joopson
    Offline / Send Message
    Joopson quad damage
    It's nice ZacD, except for the parts at the top and bottom. I can notice the textures panning, where in the original, it's more "wavy" instead of "panny". If you could tweak it a bit, it would be awesome.
  • ZacD
    Offline / Send Message
    ZacD ngon master
    I believe, in the original there is a separate mesh on top of the 2 meshes going opposite directions, that causes those big bouncy spikes, but there is also the 2 crisscrossing textures like I have. I could try to add a third layer to the spikes, and tone the 2 I have down a bit, and there's also some vertex offset going on in the actual game as well. Before doing anything more to the material I'd want to jump in game, and it'd also depend on the scene I was creating.
  • Habboi
    Offline / Send Message
    Habboi sublime tool
    Hah I never expected this to continue.

    Hey James, could I be cheeky and ask how you would do the wind effects? It's a sort of single line with points at both ends. In other words it's a scrolling, fading white texture with points on each end. I'd get a video but there's not one that really shows it. You have to look up a video of gameplay.
  • JamesWild
    Offline / Send Message
    JamesWild polycounter lvl 8
    I did play Wind Waker end to end a few years ago (actually the only Zelda game I like a LOT) and I think I know the one you're talking about. Could probably pull it off with a white emissive, and two multiplied very small images. Hang on...
  • JamesWild
  • Habboi
    Offline / Send Message
    Habboi sublime tool
    Thanks man! I look forward to sharing what I've applied your shader to but there's still a few things left to do before I can showcase it.
  • Habboi
    Offline / Send Message
    Habboi sublime tool
    Hey again, sorry to be a pain but your wind effect is almost there but not there. Well in regards to speed anyway. I've messed around with the numbers but I can't get the perfect speed, flow and fade.

    Here's a video of the wind, check 5:16 in the background and I suggest you mute, loud mouth guy playing. Look behind her head for example, speed and fade.

    [ame="http://www.youtube.com/watch?v=A3N679tG8uA"]Let's Play The Legend Of Zelda Wind Waker, Part 1: History In The Making - YouTube[/ame]

    On the bright side you can scale the static mesh along the z axis to make it thin like in the vid.
  • King Mango
    Offline / Send Message
    King Mango polycounter lvl 10
    Also don't forget to oscillate the spikes in the light blue jaggies. Notice they are pulsing up and down which helps to hide the panning effect.
  • Habboi
    Offline / Send Message
    Habboi sublime tool
    Hey dudes, thought you might like to see what I applied your techniques to. Thanks again!

    [ame="http://www.youtube.com/watch?v=vMHSiYiB55s&list=UUJfNOH8nHXcs-tYZk6ZLo8w&index=1&feature=plcp"]The Magical Kingdom of Zeal (UDK) - YouTube[/ame]
  • King Mango
    Offline / Send Message
    King Mango polycounter lvl 10
    That came out really good Habboi :cheers:
  • seforin
    Offline / Send Message
    seforin polycounter lvl 17
    and not to toot your horn but you got on kotaku today

    http://kotaku.com/5914155/if-chrono-trigger-looked-like-wind-waker

    [ame="http://www.youtube.com/watch?v=RA99Wduksu4"]Scrubs "I'm Not One To Toot My Own Horn" - YouTube[/ame]
  • Habboi
    Offline / Send Message
    Habboi sublime tool
    So I did :D Consider my horn tooted.
  • JamesWild
    Offline / Send Message
    JamesWild polycounter lvl 8
    AWESOME man! Thanks for linking that.
  • warby
    Offline / Send Message
    warby polycounter lvl 18
    totally awesome motif to try and recreate i think your missing an important detail though on the top and bottom EDGE of the waterfall:

    the panner that scrolls left uses the same texture as the panner that goes right so far so good but the one that scrolls right needs to be inverted(*-1) and than subtracted (and possibly renormalized to 0-1) ! than you should get those dynamic emerging spikes that you desire !
  • JamieRIOT
    Offline / Send Message
    JamieRIOT polycounter lvl 6
    I love the scene!
  • MarkRMichaels
    Does anyone have the texture collection?

    I'm not sure if that link is still valid but I couldn't figure out how to get to the file lol
  • aku286
    Don't know if this thread is still active.

    hi, can anyone help me with texture effects around the rock/grass thingy at the top of the waterfall(i.e the foam effects of the water going around it) in OP's post? i am trying to create a river scene with some rocks in it and i need this effect for it.
  • lolko7
    Offline / Send Message
    lolko7 polycounter lvl 4
    Hi
    Links don't work. Could You James or someone else share JamesWild_ZeldaWater2.upk and JamesWild_WindWakerFX2.upk files again ?
    Greetings
  • inkajoo
    I believe this effect is done this way:
    1) Heavily blurred "wave" alpha texture (not a pure sine wave or anything, just some random fluctuations)
    2) Shader scrolls the alpha texture against itself in opposite directions and at 50% each to compose a new alpha texture
    3) Result discards everything below a certain "brightness" and uses the remaining as an all-or-nothing mask with a static color 
    4) The result is used to render decal geometry which is placed at high slope angle to the corner of top of the waterfall.  Actually, 2 of them, to create both "sides" of the ripples.  Probably using the same shader result, but flipped vertically.

    The semi-circular ripples are probably done in a similar way just with different geo and "stem" textures
  • anwar
    guys i really need ur help to make the wind and water like in wind waker . the links posted by james are not working anymore . plz any help will be very apreciated . plz provide with detailed instruction if possible as am a stranger to UDK . looking forward to hearing from u 
  • snowzrfr
    Offline / Send Message
    snowzrfr polycounter lvl 2
    Hey everyone,

    First of all, many thanks to Jameswild and ZacD for their posts!
    I managed to implement ZacD's version of the water stream in UE4:

     https://gyazo.com/2092ee3a31ec098aade6c5ffaaeb2c06

    It's still incomplete and I want to try and implement it differently from what I have now to make it look even more like the one in Wind Waker.
    I will post a link to the material and textures used later on, and if I have time I'll also make a tutorial.

  • snowzrfr
    Offline / Send Message
    snowzrfr polycounter lvl 2
    I've also created a sea water material in UE4:
    httpsgyazocomc84b2aed89a2faa9710403d983c23daa

    httpsgyazocom9c2af104e53b0e93fdc147f0b3b53554


  • snowzrfr
    Offline / Send Message
    snowzrfr polycounter lvl 2
    I've updated the waterfall material:

    https://gyazo.com/ad471c0591cdc1d6d67863606011a736
  • Vailias
    Offline / Send Message
    Vailias polycounter lvl 18
    Still active. Huh.  
    Nice beach material. :)

    The waterfall material is a good copy of ZacD's but it has the same problem now that it did then. 

    The water ripples are obviously panning against each other, even in the gifs. 

    Look at Inkajoo's suggestion above. its much closer to what is likely happening. 
    Take your wave texture, add some blur to it so there is a LOT of grey area.  Pan it against itself at differing rates, and add the result. Subtract some arbitrary amount (like 0.5 or .3 or something) from the result, then pass that into a ceiling node.  You'll get a much more organic wave feeling out of it.
  • toastwaffle
    Offline / Send Message
    toastwaffle polycounter lvl 5
    That sea water material looks absolutely sick! Would love to see the node tree of that!

    Edit:

    I tried creating something similar using Shader Forge. I'm still really new to shader creation so this took me a while to figure out haha. I had no idea how to recreate those beautiful ripples though. Here's my Shader Forge setup if anyone's interested:
  • [HP]
    Offline / Send Message
    [HP] polycounter lvl 13
    snowzrfr said:
    I've also created a sea water material in UE4:
    httpsgyazocomc84b2aed89a2faa9710403d983c23daa

    httpsgyazocom9c2af104e53b0e93fdc147f0b3b53554


    Hey sorry for the necro, but do you remenber the node you used to get the UV's to come back and forth like that? Did you use panner?
  • Jakob Gavelli
    Offline / Send Message
    Jakob Gavelli interpolator
    [HP] said:
    Hey sorry for the necro, but do you remenber the node you used to get the UV's to come back and forth like that? Did you use panner?
    Can't you just do that using Time > Sine > into a panner?
    So the Panner speed goes between 1 and -1 as a Sine curve? Then multiply it or even clamp it go change the span between whatever speed you want it to go? And in the sine change the period aswell. Should work in theory.
    May have misunderstood the question. =)
  • Obscura
    Offline / Send Message
    Obscura grand marshal polycounter
    [HP] said:
    Hey sorry for the necro, but do you remenber the node you used to get the UV's to come back and forth like that? Did you use panner?
    Can't you just do that using Time > Sine > into a panner?
    So the Panner speed goes between 1 and -1 as a Sine curve? Then multiply it or even clamp it go change the span between whatever speed you want it to go? And in the sine change the period aswell. Should work in theory.
    May have misunderstood the question. =)
    You would need to add that on top of the final coordinates instead of feeding it into the panner.
  • Jakob Gavelli
    Offline / Send Message
    Jakob Gavelli interpolator
    Obscura said:
    [HP] said:
    Hey sorry for the necro, but do you remenber the node you used to get the UV's to come back and forth like that? Did you use panner?
    Can't you just do that using Time > Sine > into a panner?
    So the Panner speed goes between 1 and -1 as a Sine curve? Then multiply it or even clamp it go change the span between whatever speed you want it to go? And in the sine change the period aswell. Should work in theory.
    May have misunderstood the question. =)
    You would need to add that on top of the final coordinates instead of feeding it into the panner.
    You don't "need" to actually. I mean ofcouse you can do however you want. But you can just append 0 and put the vector2 into the speed slot to control the speed using the sine. Felt like the most intuitive explaination to explain. Do whatever you want aslong as it works =)
    But yeah it's pretty much the same thing. Just easier to explain I guess
  • SimonT
    Offline / Send Message
    SimonT interpolator
    Hi guys, just wanted to let you know that I gave a little talk where I mentioned this thread because I was thinking about a stylized waterfall as well :)

    https://youtu.be/lAYIF0lwy60
  • Gannon
    Offline / Send Message
    Gannon interpolator
    Awesome talk, thank you so much for sharing!

    You can get the spherified Cube in Maya by taking a default cube, selecting all the edges, beveling, pushing the fraction to 1 and then upping the segments btw. Just make sure you merge the verts afterwards.
  • Seehr
    Offline / Send Message
    Seehr polycounter lvl 9
    It's even easier! you just press 3 key  in the cube and modify -> convert -> smooth mesh preview to polygon.
Sign In or Register to comment.