Fountain Modeling
Hello, Polycount! I'm currently working on making a high-poly model of this drinking fountain:

I'm a student in a modeling class, and we're making props as if they're to be used in games.
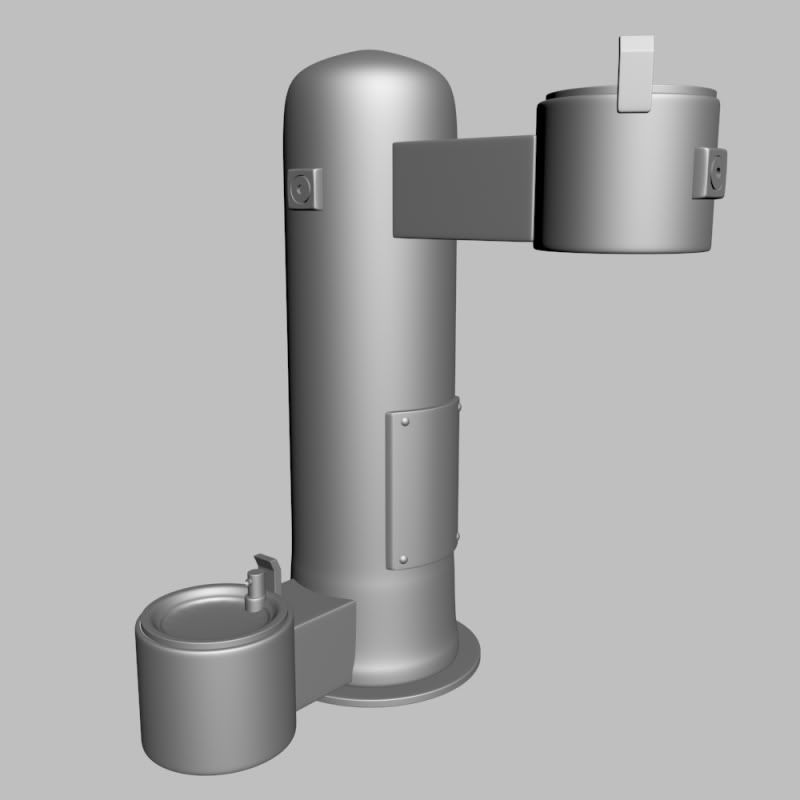
Here's a render with it with the Turbosmooth modifier applied. Do you guys have any tips?
Thanks!
I'm a student in a modeling class, and we're making props as if they're to be used in games.
Here's a render with it with the Turbosmooth modifier applied. Do you guys have any tips?
Thanks!
Replies
How's it looking? Any other advice? : )
How do I unfold something like what I have in the upper-left? I'm working at unwrapping the UVs of the low-poly model.
Anyhow, any help on the curving bit (on the faucet) would be appreciated. Here it is for reference:
Thanks again!
How's this for a UVW map? Any advice on better packing??
I just repacked this - I think it's better than last night, but any additional advice would be appreciated!!
If you do have a little xtra room at the end, don't be afraid to take some of the pieces that still have room to move around and scale them up just a bit (a bit though! watch your relative scales as you do this!) Try to make the most out of your uv space and the texture will look that much better
I'm having some trouble with inverted faces.
Everything had to be re-unwrapped for baking our High Poly models down to textures for our lows. (Yes there's still empty space I could make better use of, but some of these parts are so ridiculously small... *grumble* )
Anyhow, according to "Select Inverted Faces", these are all messed up.
(here they are in the viewport for reference)
Now, I'm not sure how to make it stop saying the faces are inverted. Do I flip them somehow in the UV window? I tried flipping the normals and...
Yeah, it just made a mess. Help me out? Thanks again, and sorry if this post seems particularly picture-heavy.
Here's the current low-poly wireframe.
Sometimes faces get inverted for no particular reason, and other times you can fix it. I see one area where you might have caused the inverted face. On the body of the fountain, there is a big flat rectangle piece extruding from it. Where the verts from this piece are connecting to the edge of the body, you are sortof 'simulating' an ngon. Maybe 'mirror horizontal' will fix this, maybe not. Here is a workaround in case it doesn't work:
UV pack does look better though! :] Although I see a circle piece in the center-rightish side of your map where the verts were not connected across.
Could you post a pic of your model with the checker material applied?
OR
Just remove the panel from the low poly and bake it down in the normal map.
Of course! Here are some checkers!
(Thanks for clearing up the stuff with the UVs, by the way.)
I just thought I would show my fountain with textures and such on it in UDK, now that i've gotten it in there...
Here's the spec. map (at least, I believe this counts as a spec. map. Let me know if I'm doing something wrong, I would really appreciate it!)
... and the Diffuse for comparison.
Thanks for all the help you've given me for this project!
The basic gist of it would be to make the metal parts have the same hue on the diffuse and specular. The diffuse would have a darker green on it, and the specular would have a lighter green. The way you have it set up right now with the green diffuse and dark-pinkish specular makes it look more like plastic.
Also you use the exact same part of a texture on a lot of the top-left objects. It has this light splotch on it that makes the reused part kind of obvious.
Thanks for that! : )