UV Mapping Help! Wings 3-D
polycounter lvl 14
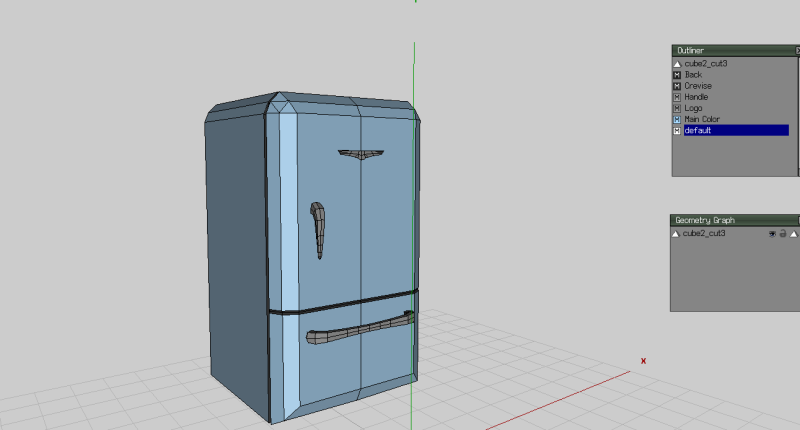
So I believe I finished my first model in which I feel I did the entire thing correctly. I made a simple retro-style fridge for a TF2 map some friends are making, and although I am slowly but surely learning about modeling itself, I now have to learn how to UV map.
I have found some tutorials here and there about how to do it with Wings 3-D, and it made slight sense to me, although the tutorials involve coloring a simple sphere, not an object with handles and other doo-dads. After I finished modeling it and putting the pieces together, I highlighted the entire object then right clicked>UVMap>Continue>Unfolding and Wings told me that;
"A closed surface cannot be mapped. (Either divide it into two or more charts, or cut it along some edges)"
So as confused as I was, I went back and started to do what one of the tutorials did; I selected the parts of my fridge, right clicked and gave them a material color (which to my knowledge is just to help organize the UV Map). Mind you, I made each part of the fridge separately, but combined them all together, via floating geometry>rightclick>combine. Since it's just going to be a stationary prop; I didn't find it an issue that nothing was connected with a boolean method. Anyways, so I would highlight the entire handle, and then name it a material "handle" etc. Then I repeated to highlight entire object>UV Mapping>Continue>Unfolding and this time it actually made a UV map although a couple parts were still not part of it, and it said the same message as earlier. I will provide screen-shots for your reference. Can anyone help?
And also, I feel like it may not be a good idea to ask this now because something tells me I should have payed attention to it from the start, but how do I specify what size I want it to be? Or rather, how do I know? I'm sure I want to make sure of that before I start texturing it for good.
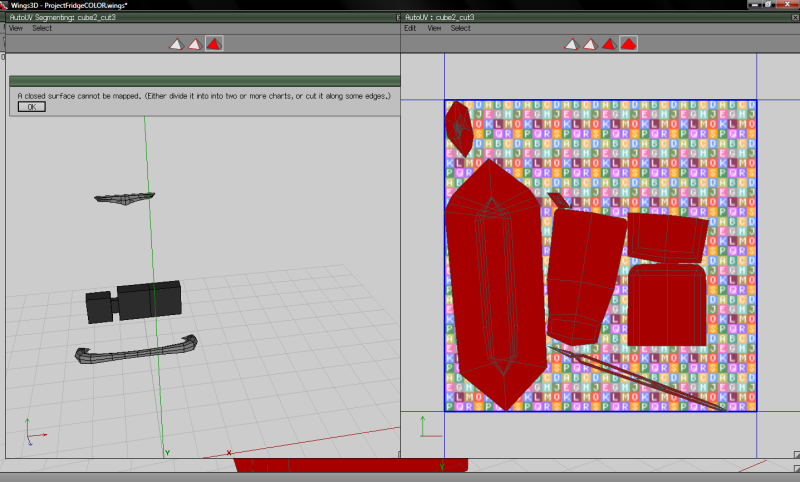
Notice not only the message and part left behind, but how strange and messy the map itself looks. I understand very little about this part of modeling so far, and I'm pretty sure that once I get it sorted out and put into Photoshop I can do well with it. I just need some help understanding it...
I have found some tutorials here and there about how to do it with Wings 3-D, and it made slight sense to me, although the tutorials involve coloring a simple sphere, not an object with handles and other doo-dads. After I finished modeling it and putting the pieces together, I highlighted the entire object then right clicked>UVMap>Continue>Unfolding and Wings told me that;
"A closed surface cannot be mapped. (Either divide it into two or more charts, or cut it along some edges)"
So as confused as I was, I went back and started to do what one of the tutorials did; I selected the parts of my fridge, right clicked and gave them a material color (which to my knowledge is just to help organize the UV Map). Mind you, I made each part of the fridge separately, but combined them all together, via floating geometry>rightclick>combine. Since it's just going to be a stationary prop; I didn't find it an issue that nothing was connected with a boolean method. Anyways, so I would highlight the entire handle, and then name it a material "handle" etc. Then I repeated to highlight entire object>UV Mapping>Continue>Unfolding and this time it actually made a UV map although a couple parts were still not part of it, and it said the same message as earlier. I will provide screen-shots for your reference. Can anyone help?
And also, I feel like it may not be a good idea to ask this now because something tells me I should have payed attention to it from the start, but how do I specify what size I want it to be? Or rather, how do I know? I'm sure I want to make sure of that before I start texturing it for good.
Notice not only the message and part left behind, but how strange and messy the map itself looks. I understand very little about this part of modeling so far, and I'm pretty sure that once I get it sorted out and put into Photoshop I can do well with it. I just need some help understanding it...
Replies
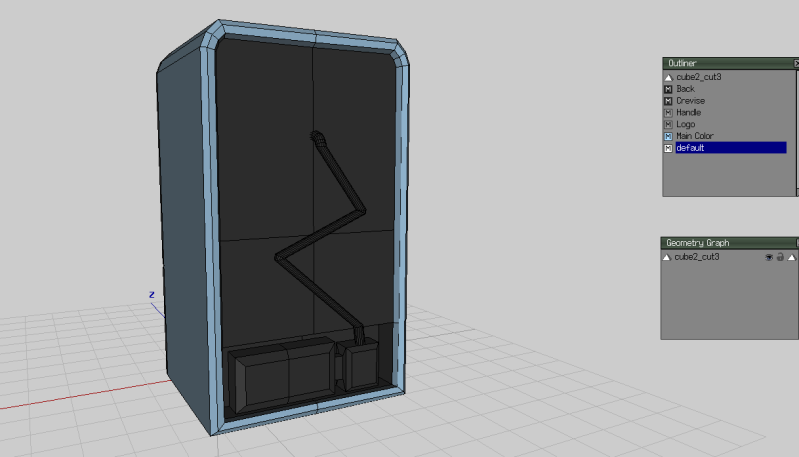
Btw, you said that this asset is for in-game use right? looks like you wasted too much tris (polys) count on such a simple object.
- tube on the back of the fridge, which most of time people can't see it. 4/3 side cylinder is enough.
- black border of the fridge's door, use a texture for it since its not gonna change any silhouette of you object when you use a texture compare to modeling it.
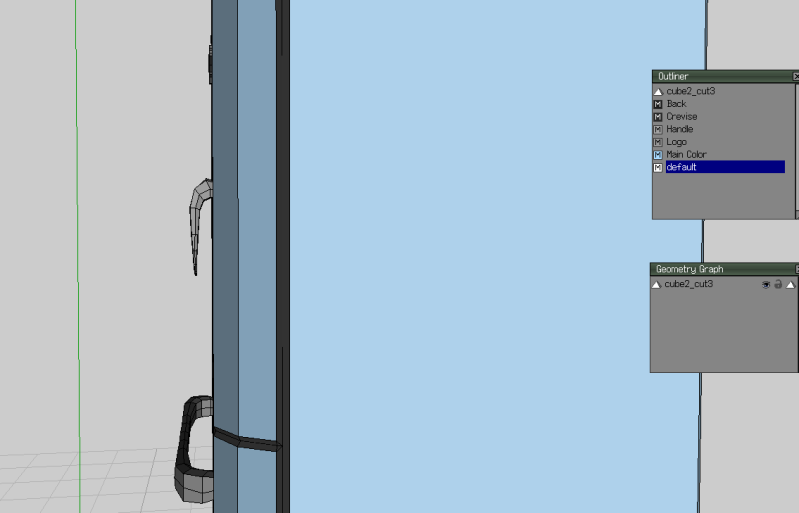
- the handle you can delete lots of edge from there and still have the same silhouette.
- if you can float an object, float it. don't inset a face just to extrude another box out of it.
- again, if the edges didn't contribute to the silhouette, delete it.
I'm telling all that because I'm sure you are out of poly budget already right? by reducing the poly counts it also make your life easier when comes to unwrapping a UV.
_Revel
Also, I figured out the problem with the UV mapping error, I simply defined an edge and "hardened" it for each material category.
But at the moment the biggest puzzle to me is the size...how do I know how big to make my object from the start? Or can it just be scaled at the end?
And as for another question about UV Mapping, What's the significance of how large the UV map is, or how large the articles in it are, or even if they are connected? I took a tutorial about UV mapping a sphere, and it made me set the sphere to three materials, connect the three parts of it in the UV map in a phallic manner, but would it have been possible to texture it if it was still in three parts? Is it just to make it easier or is there some necessity behind it?
It's the contrast between necessity and convieniance that can confuse me from time to time when it comes to modeling, animation, or texturing.
For the map size 512x512 is consider huge for object that size, you might want to reduce it to 256x256 later on. But the best thing is ask your friend who ask you to create that asset what is the budget (texture size and tris count) limit for that particular object. If he give you the number already, then you can't go wrong with it (even if you wrong at the end, blame your friend who give you the budget limit haha)
"And as for another question about UV Mapping, What's the significance of how large the UV map is, or how large the articles in it are, or even if they are connected? I took a tutorial about UV mapping a sphere, and it made me set the sphere to three materials, connect the three parts of it in the UV map in a phallic manner, but would it have been possible to texture it if it was still in three parts? Is it just to make it easier or is there some necessity behind it?"
I'm not sure what you're asking in this section. What are the 3 parts in a sphere that you're talking about? and what is phallic manner actually?
I assume what you said a "how large the articles" in that question is the UV shell (or UV island), well if that's the case you just apply a checkerboard material to that object and you can judge whether some shells in the UV coordinate are too large compare to the other or whether got stretching or not.
_Revel
In the resegment Uvmap(mid mouse button), in the new window that opens with the object, you select edges then right click and "mark edges for cut", to undo "unmark edges" the ones selected.
You also have other methods where it can automatically select and segment it by islands. Like segment by projection. Which just takes all the polygons facing certain directions and cuts them up that way. Feature detection just does what it does.
I dont really use them best to just cut it up yourself.
The Uv map itself does not have a size. To get the wireframe of a certain size in the Uv window you right click and select create texture. Just select 2048, you dont have to use that size but it just shows up the wires better.
Then you have to go into the window menu to the outliner, and then find the one that probably says auvBG, right click on that and make external or export, name it whateve you want and save. That will make it so you can open it in a paint package, and mess about with textures.
The actual size of your model is a mess in general theres always usually problems with it, but its digital it doesnt really have a size. The only real way to figure out what actual size to have your model is to import and export to where you want and then work it out yourself basically or just resize.
This was the tutorial I took, notice how he rearranges the "islands" together, and tries to connect them together or something. I just want to know the significance of that.
I see, thanks Calabi. Now, what is this about create texture? In the tutorial I took I noticed that every time the tutorial told me to do it, things would get fuzzier. Is it like a refresh or something? I also noticed that when you move stuff on the map, then click create texture it updates it.
I'm curious, is AutoUV the only way to unwrap in Wings3D?..there should be a planar/ cylinder/etc mapping method right? personally I don't like everything automated by the software, so I prefer to manually unwrap it (takes more time but make a cleaner result).
When he arrange the UV together (stitching them up), is because you want to avoid UV seams as much as possible. But another problem is UV seams is not the only things that you want to avoid when unwrapping your model. you should take notice of how it stretch the UV (border and center part, in the model the polygon all same square same size across the middle part but on the UV it's all different greatly). Therefor you should plan of how you gonna unwrap your model beforehand to minimize the stretching and UV seams.
Anyway, I'm not sure why he want to bake a blue-pink-yellow texture, usually after you finish the unwrapping process and you happy with it, all you need to do is just export the UV wire texture as a guide for you painting the texture in Photoshop. Probably he did that just for fun haha..
_Revel
I'm going to be taking care of alot of cleaning and stuff this week, so I won't have alot of time to practice my modeling. Although I did start my free 3 year educational license for Maya and 3DS Max, which I will learn about too. I don't even transfer to animation school until august, but I am trying to learn about the tools as much as I can before then to prepare myself and become comfortable using it. Wings 3D, being the first program I've used, is very awesome I have to say. I've come to like it alot, because of it's simplicity and versatility. At least for learning the basics, I must say I will always cherish it. Although that's not to say I don't look forward to learning Maya either, being as it's the "thing" right now.
If you dont mind, when I get some time to finish this model I will post it back in this thread. Your critique and advice is greatly appreciated, coming from a guy in a small rural town; a forum like this is a godsend.
Anyway why not starting to learn 3ds Max/ Maya then?..switching between apps is not as easy as it sounds, even if you comfortable at Wings3D doesn't mean you automatically comfortable using Max when you decide to learn it.
Feel free to post some more question, that's the purpose of this forum! I, too, learn a lot form this community!
_Revel
The UV gets fuzzy because you'll notice if you select and move any of the islands the wireframe is behind it. Thats basically the texture that it exported.
The stitching and the cutting things is, sometimes to get the islands in the right way the right shape, you need to unwrap each piece according the normal. Like when in object you select an island you can remap the Uv to and try one of the better ways like unfold or Uvmap Normals. Unfold just trys to fit it as best it can whilst Uvmap to the normals usually gives better shapes but you have to have islands separated according to normals. Then you can stitch those pieces back together just to make it more easier to texture.
Its not really as complicated as it sounds. I dont know how much you know. Like do you know what a UV is or its purpose?