Appleseed Ex Machina
ngon master
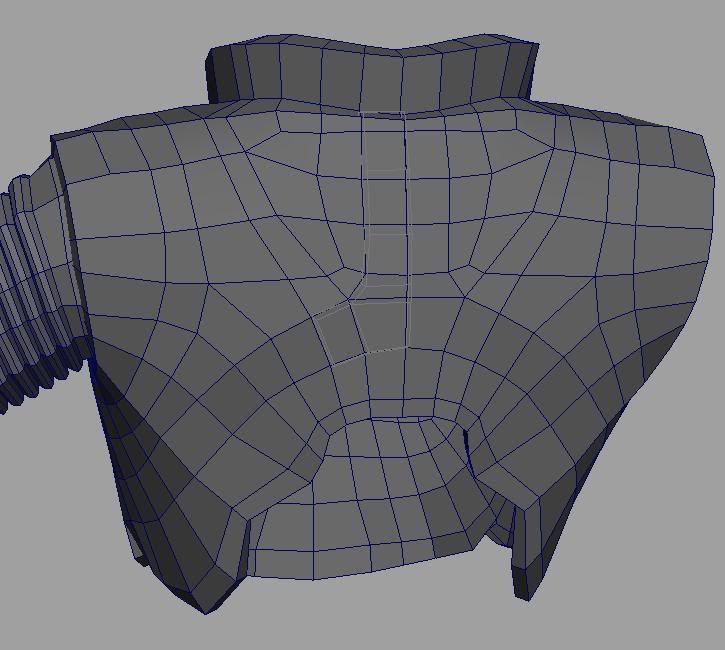
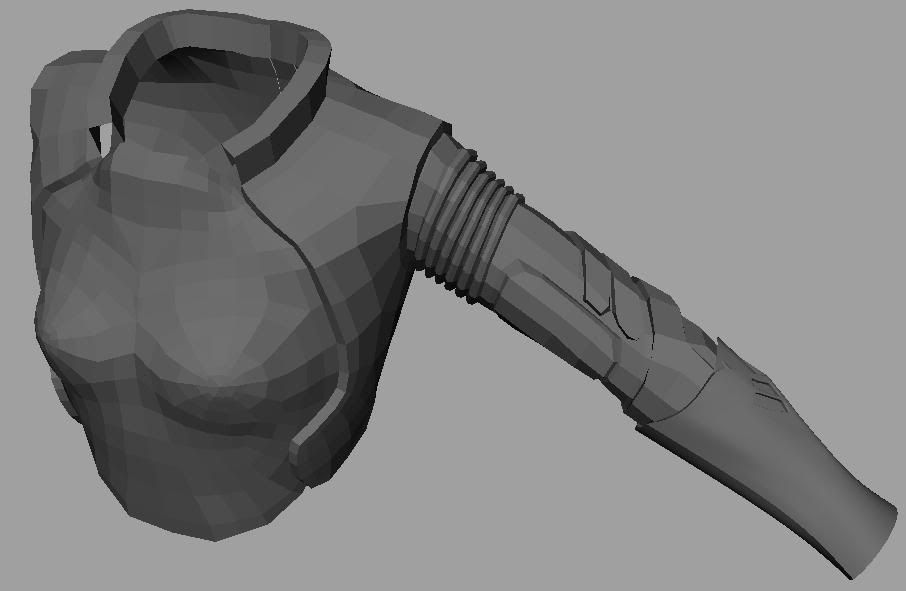
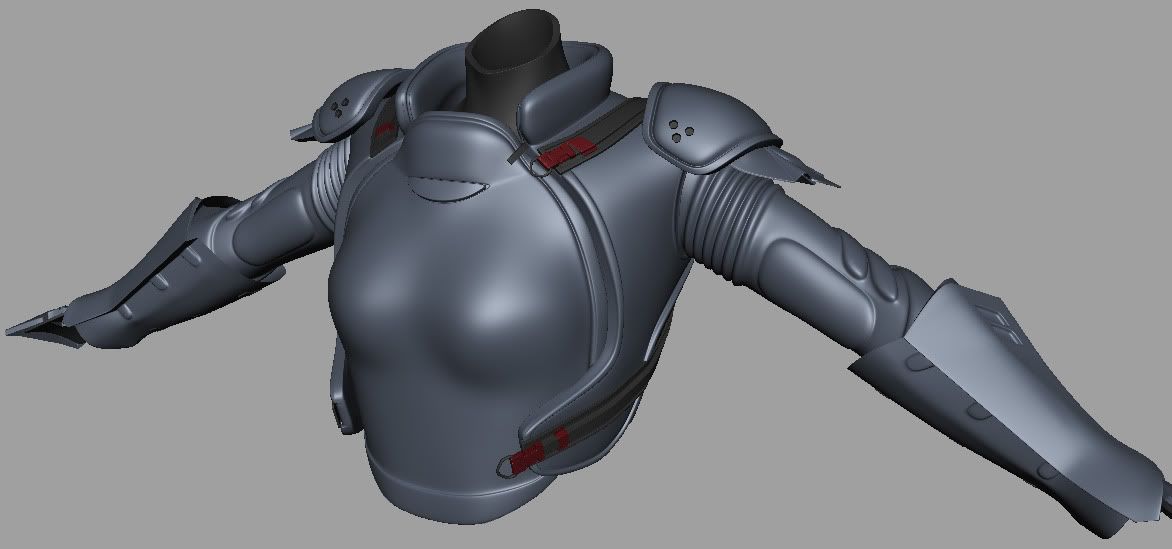
So I'm doing the combat armors as seen in Appleseed Ex Machina, thought I'd post here for critiques. This is my first go at a proper Sub-D workflow, I used to just go nuts with cutting things up with the intent of smoothing. So it took me a bit of getting used to, not adding things when I normally would and all. There's still a bit of pinching going on around some of the harder angles, but I've jacked around with them enough, and it's not terrible. I can always fix that up in photoshop if need be. (any tips on that would be most welcome, the panels bit, not photoshopping that is.)
Found a ton of nice reference shots of the toys they made, here's what I'm working towards:
and the WIP shots:
I'll be using thse for assets in Fallout 3 for fun, doing Briareos will be a little tricky on the rigging side. His proportions are much bigger than the skeleton, how feasible would it be to get 'proper' movement if the shoulders and head sat higher than the actual bones? I've never tried anything tricky like that before.
edit: hooray for surprise days off at work! and for whatever reason, my img tags didn't work before, so, fixed now.
Replies
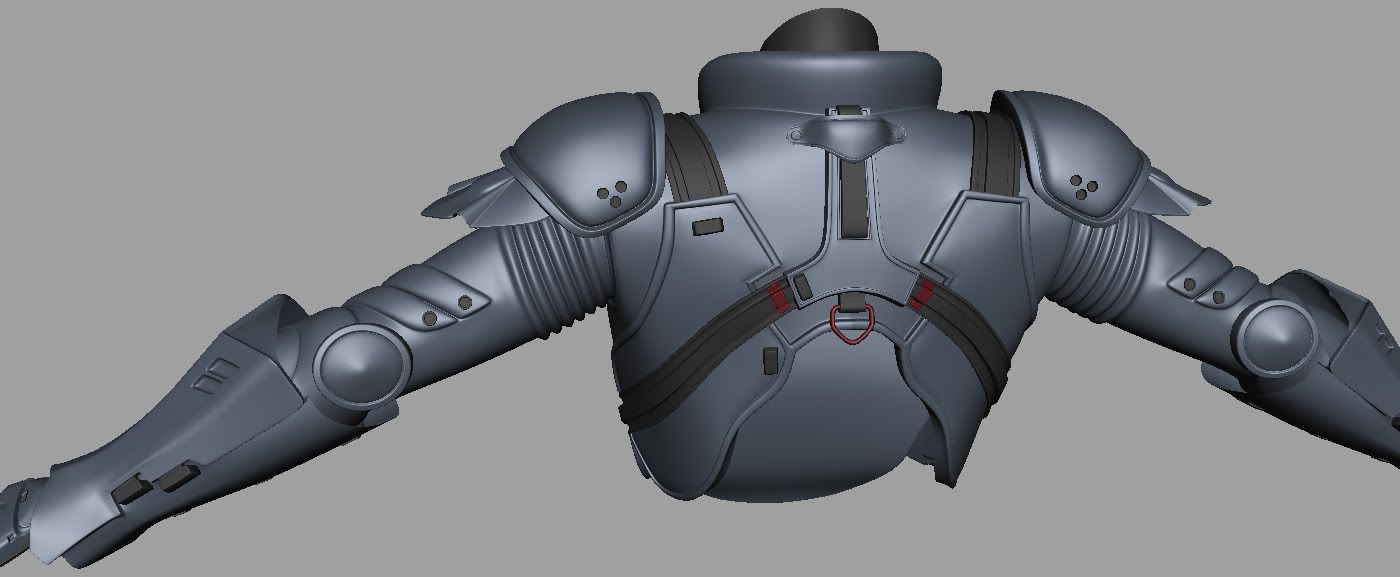
Eager for more updates, the back looks great.
I seem to have borked up my scene file a bit; Maya 2009, using a .ma file. Yesterday, I had lots of crash issues working on the kneepad. It was kind of random, but moving verts crashed nearly outright. Sometimes, just entering a selection mode would do it. Clean history, by the way.
I tried boxing the mesh, but that didn't help. Then I used the 'Optimize scene size', the thing that caught me off guard was that it removed 24 deformers. (but I don't use this often, so I don't know if that's normal.) I don't remember setting up 24 of them, just a wrap or two to help with the knee and elbow pads, but those were trimmed off the history when I was done with them. This fixed the crashing, but now I'm having trouble entering a selection mode for any mesh in the scene.
I can select the object, but not go directly into face/edge/vert selection, it just stays in object mode. If I click away, sometimes it does go over, but not always. It's also slow to pick objects, and even slower to say, select a face on a model that only has 200 or so. All the objects in my scene have this problem now, but if I create a new cube, it acts just normally.
Any suggestions? I'm likely to just export everything out as an obj and into a new scene, but that's kind of lame.l
I think her abs are a little too high which may be causing the proportions to shift up a little too much.
I just realized I never posted the final highpoly shots, so here's those. Been too lazy to get screens of the lowpoly and bakes, I feel compelled to pose the model, but I haven't rigged it yet. 2millionish faces.
Some really nice work, though. Looking forward to seeing it all baked out and textured.
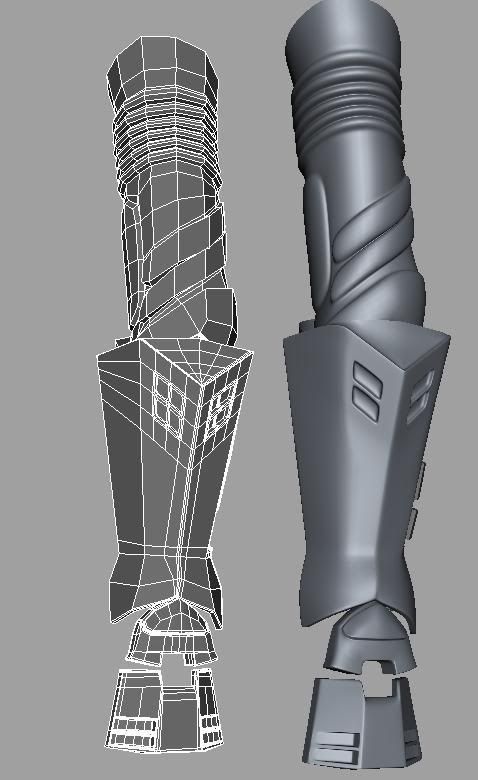
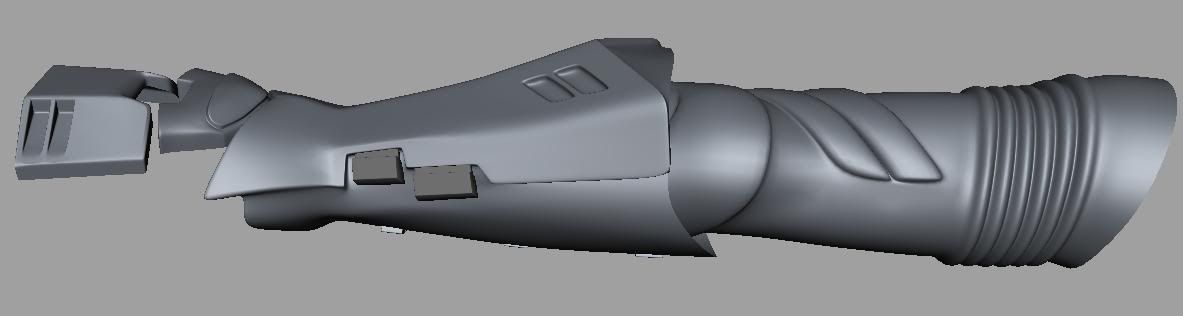
Here's a better ref pic of the rifle.
loosen that shit a bit i want to see some smothness
A fair bit of progress, I've also been helping someone rig up some SFX for their mod project. I need to fix up the handle, the groove there sucks. Also, that little notch on the lower tip of the barrel? I spent wayyy too long on that, always ended up with some pinching, so I added more horizontal loops and fixed those up; but I was really resisting doing so. Not too happy with the circle/triangle cut nearby, but what I have works.
Bitmap, I haven't gone in to relax any edges yet, do you mean the overall hardness of the model or just the inset stuff? I really dig the boxy look of the butt area.
Also, is there a way I can set AA for the Maya viewport?
Alright, done with the highpoly unless anyone spots something they'd like to point out. My apologies for the height of the floating holes, looks kind of nasty from an angle.
Ok, having problems here. I've never done highpoly bakes quite like this, so I read up a bunch today, but can't get a good result. I've got the hard edges there, UVs are split along them, and the shells separated. I've made an appropriate cage in Maya, and tossed the whole lot over to xNormal for bake testing before I move on. Even other areas like the smooth bevel-y bit on the main body are turning out bad regardless of hard or soft edges. So, what am I missing here?
Unless I really am missing the point and just need to bevel all those 90 degree angles?
Most likely, the hard edge data got lost between maya and Xnormal. I would actually recommend you to bake the normals in maya, and the AO in Xn since it's so much faster for that. (might need a cage for the AO to match perfectly tho)
Edit: Oh, and this time my Maya bake worked right off the bat for the hard angles, but not the smooth ones. Manipulating 'Search Envelope %' in Transfer Maps is supposed to in/deflate the displayed cage I thought. I'm not seeing any visual feedback on this, and I thought that's how it worked in the past.
Edit2: Turns out there's a discrepancy in my pre-vis app. Looks like it's getting binormals and tangents backwards when a couple flags are set. All is well.
Hmm, is it not possible to make custom skeletons for Fallout 3?
Model is 4.9k triangles/2048 texture. i'm feeling naughty.
Metal itself is not that noisy and the easiest way to make it look interesting is by using small details.
Check racer's tutorials here -> www.racer445.com
really good stuff and it should also cover a lot of the issues your texture has atm.
Also for the plastic, plastic in general has a high specular exponent value and a relativly strong specular.
My original plan was for a synthetic body, but it looked a bit too bland. Normally I'm a fan of minimalism, but it didn't quite come out right, so I veered towards this synth/metal hybrid look as I worked it up. (and stopped looking at references :O)
1
2
3
The first is more accurate to what I'm wanting to create. Dark base for the 'pits', lighter layer for the 'bumps', which have a nice flat/plateau look in the spec (the second image has a more rounded bumpy look). Not sure exactly how much to put into the normal map. I've tried filtering different layers of noise, but can't quite bring them together to good effect. I haven't really gone after a grunge brush on this, not sure how to get all that pixelly goodness without overlayering with the brush, y'know?
Does anyone have any insight on how to do this well?
Embossing seems to help, I might go with this.
Getting Briareos started now, the arms aren't defined yet, and I'm working on the legs right now, they need to be a bit beefier. I searched around for a while, and couldn't find many good examples of shoulder topology. I don't really need them really super defined for this, so I don't really want to go nuts with my loops just now, but was curious what you guys' thoughts on that were?
Not too worried about the groin and knees, since those will be redone when I retop for the pants, kneepad and codpiece. The arms look like normal ones to me, with the exaggerated cybermuscle stuff being floating geometry.
Here's some refs:
1
2