simple zbrush Normal map tutorial
hey all!
so lets say you are making an environment, but your meshes are looking a bit flat and polygon starved. well rest easy! I'm here to tell you that the solution is not to add more polygons, but to put about 20-30 minutes more effort and attention into your normal map.
lets have a look at some examples:
this mesh is (basically) a plane. with the awesome normal map on the left two, you can see it gains a lot of depth and loses its polygonal/flat nature as opposed to the one on the right, which has a "crazybumped" normal map.


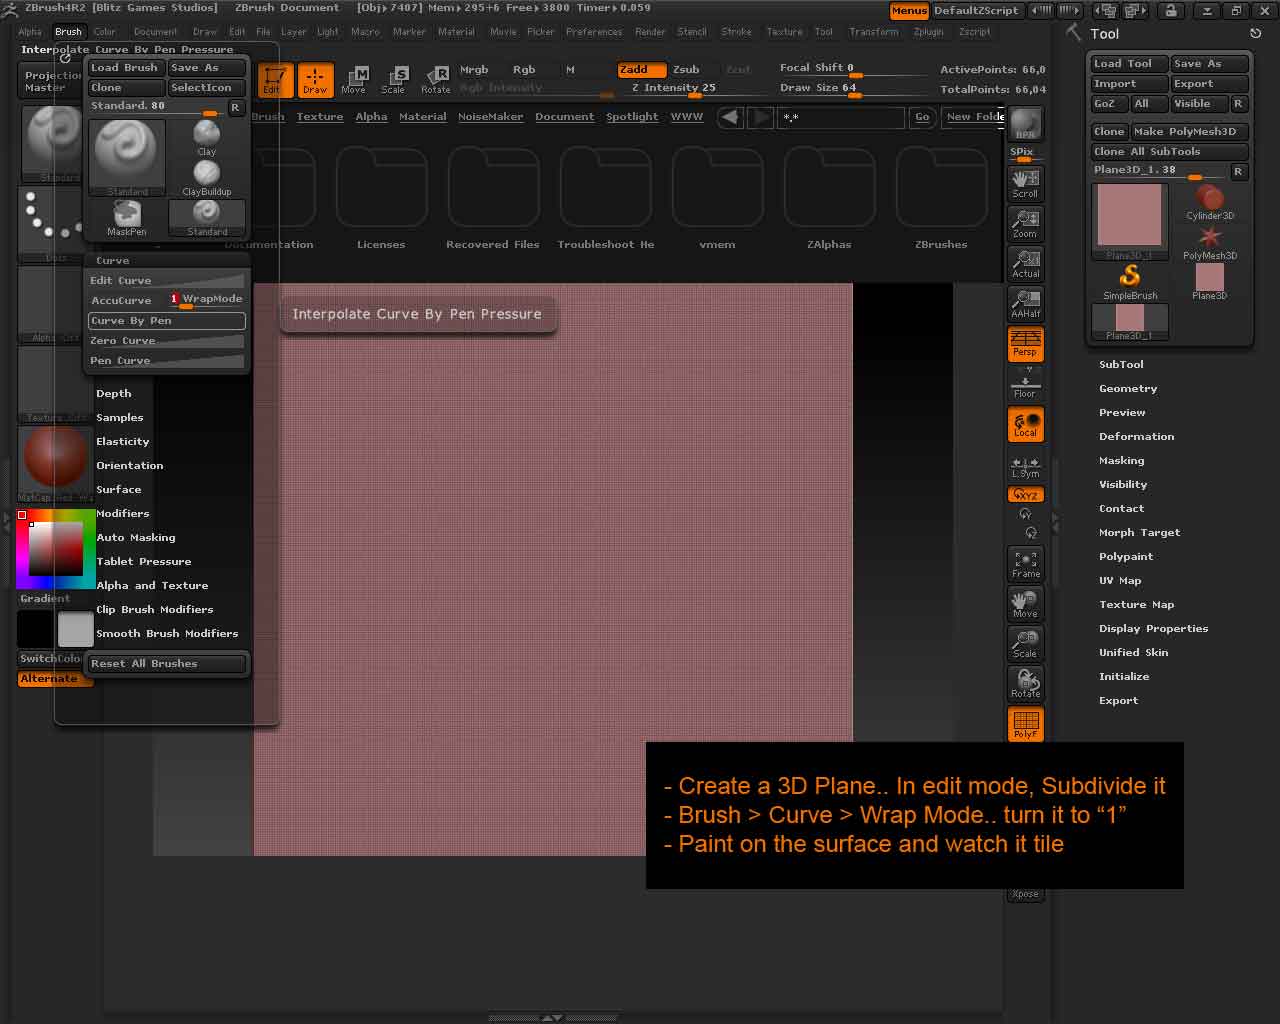
so how do we get those nice normals? EASY! get off our lazy comfortable crazybumped butts, and open up zbrush! why use zbrush rather than mudbox, or some other sculpting software? for one simple tool.... brush wrap! it makes your brush wrap from one side of the plane to the other, making instant tileable textures!
so here is my basic workflow once im in zbrush
so lets say you are making an environment, but your meshes are looking a bit flat and polygon starved. well rest easy! I'm here to tell you that the solution is not to add more polygons, but to put about 20-30 minutes more effort and attention into your normal map.
lets have a look at some examples:
this mesh is (basically) a plane. with the awesome normal map on the left two, you can see it gains a lot of depth and loses its polygonal/flat nature as opposed to the one on the right, which has a "crazybumped" normal map.
so how do we get those nice normals? EASY! get off our lazy comfortable crazybumped butts, and open up zbrush! why use zbrush rather than mudbox, or some other sculpting software? for one simple tool.... brush wrap! it makes your brush wrap from one side of the plane to the other, making instant tileable textures!
so here is my basic workflow once im in zbrush
- open zbrush
- use Plane3D tool

- import and apply your diffuse as a texture to this plane


- divide the plane up to 5 or 6

- create 3 layers (one for big shapes, one for surface separation like bricks or plaster, and one for detail grunge)
- start sculpting with claytubes! (i use a big round alpha for the "big shapes" layer, a square smaller alpha for the "bricks/plaster" layer, and mask by alpha described later for the detail/grunge layer)


- import your diffuse as an alpha

- apply mask from alpha (this will be your grunge/detail layer)
- inflat(e) to around 10-15


- downrez back to division level 1

- create NormalMap (tangent turned off, adaptive turned on, smoothUV turned off, flipG and flipB turned on, switchRG and flipR turned off)

- clone NM
- export your normal map from the texture tab (on the left side of your screen)
")
- make money
Replies
the idea is to get more separation of surface, more feeling of volume. my brick example i guess wasnt the best, but i have gotten better results with the zbrush workflow than the photoshop/layer/crazybump method, and for me it doesnt take much extra time. this is just to present people with an alternative