SAS character Dave Archer
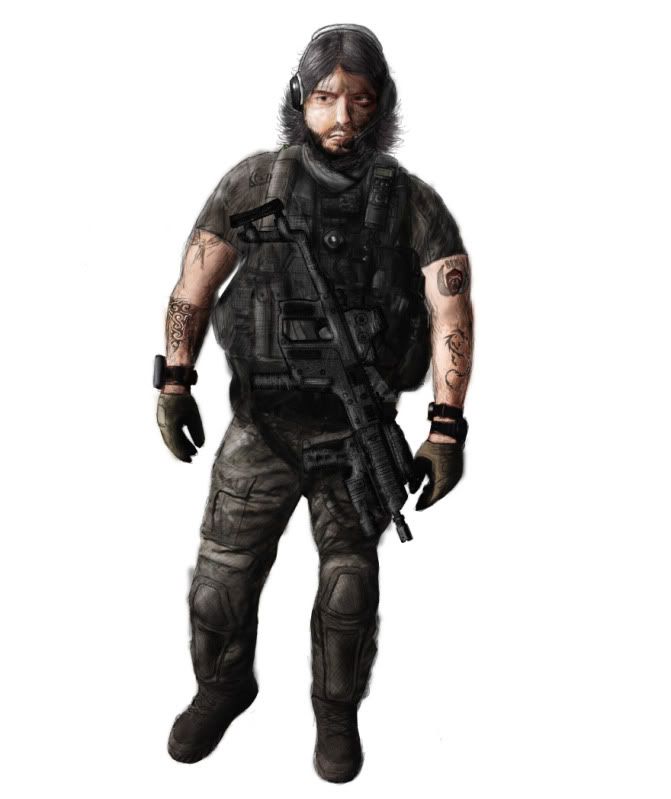
This character WIP is for my FYP which is basically to create a Special Forces character for UDK display. The design process has been long and tricky since I had to find a unique look for a type of character that has become so common. In the end I took a lot of inspiration from war hero Willie Apiata and characters from films such as hurt locker and so on.
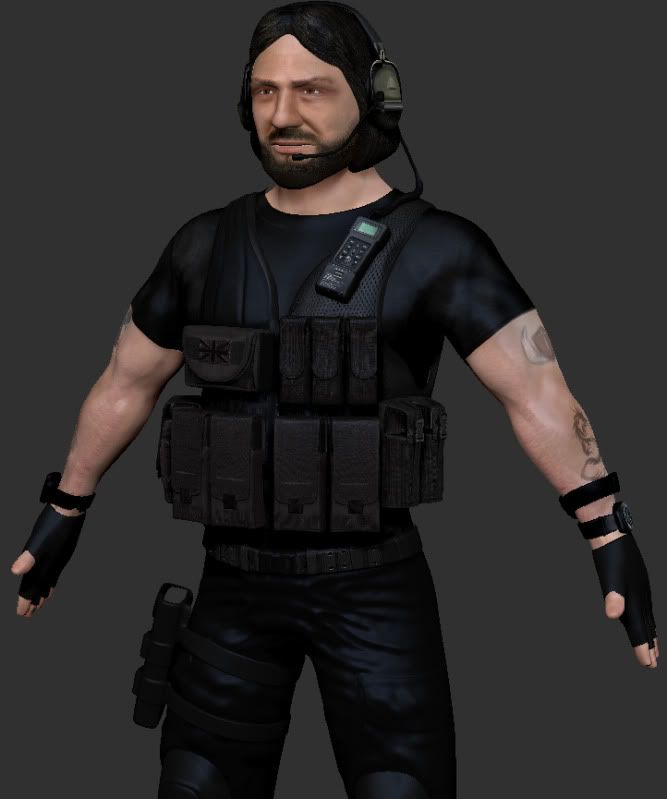
I tried to put a lot of work into the base mesh as I struggle to scale things in zBrush but as you can see there is lots that needs improving so maybe someone would be kind enough to provide some crits on the sculpt so far? I just find I can use as many references as I like but eventually if I don't have second opinions I end up missing things other people would notice.

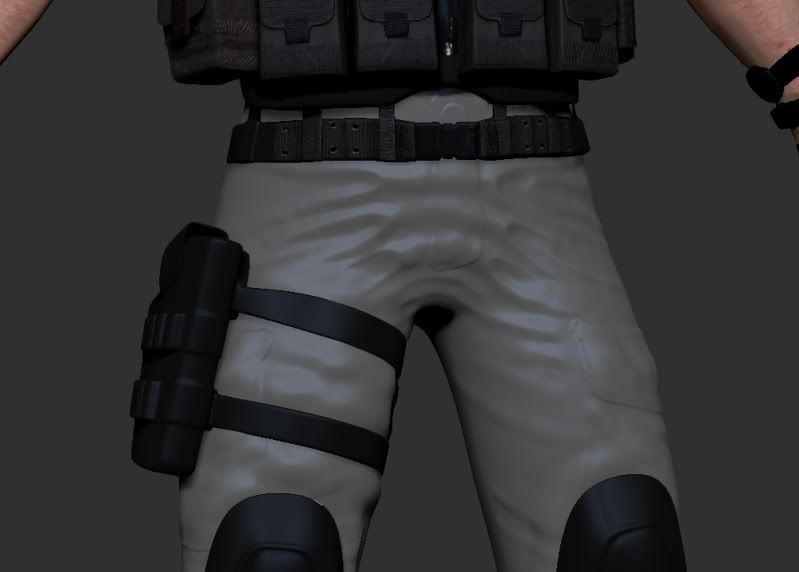
One thing that I am quite overwhelmed by is creases in trousers. Its so easy to fall for the trap of guessing how they would look, trying to get them to look natural is something I find very tricky especially when areas are going to be tighter such as the side-arm holster.
I know it needs a lot of work with the muscles and creases so thank you kindly for any crits, advice or paint overs.
Replies
Cheers for the advice. Some parts like the boots haven't been sculpted on yet with this W.I.P so the same thing with some of the poly paint such as the tattoos. I don't like sculpting without much colour but I also like to clean up the colours once all the shape is there. So hopefully once I get all the creases in the fabric done you will see the tats a bit better.
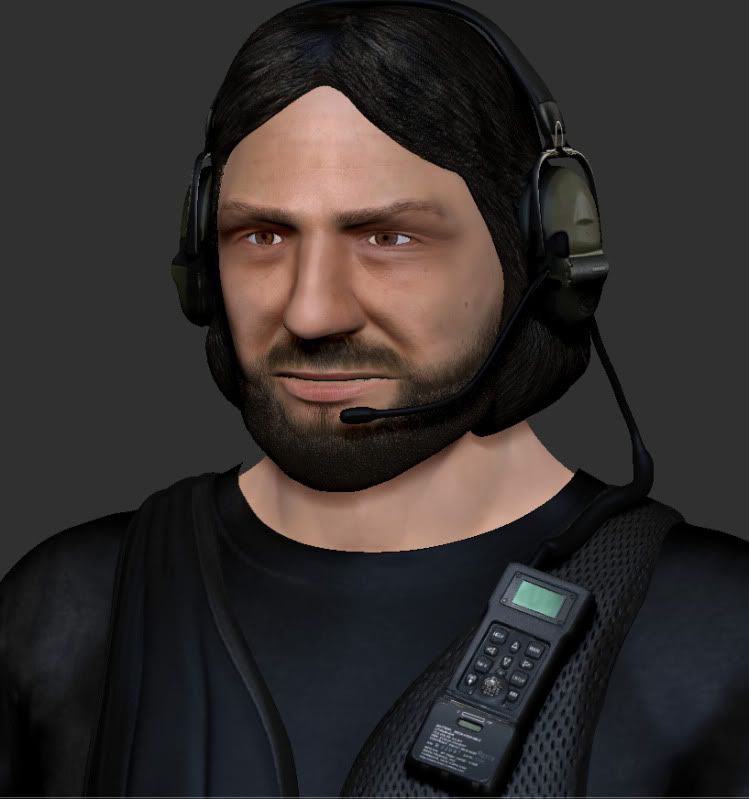
That half sane look you were talking about, that's exactly what I am after. I want him to have that kind of thousand yard stare they talk about in Full Metal Jacket. I like what you suggest about making him look more messy, I will have to find some references of muddy combats.
Don't worry too much about the hair and beard at the moment because they are due for hair planes once I finish this sculpt. I will need those to give it the flicks. Hopefully once the hair planes are done it will help support that rugged look I'm after too.
Thanks very much, I did do the concept it took awhile to get a unique look for him given what he is. It started with all the stereotypes with loads of armour and covered up faces but I learned that the more skin is showing the more room there is to get the player to relate to him like COD captain price, instantly memorable for his handle bar moustache. I'v seen some insane work on here, would love to get it up to standard.
Well what do you know?http://images.smh.com.au/2010/01/22/1058922/apiata300-300x368.jpg
Nah, most Operators will grow their hair out and a beard to help blend in with the local population when it's required.
Anyway, back on topic.
How long do you have to work on him for your FYP?
I think there are some proportional issues you might want to sort out before getting into the details and texturing.
The main things I notice are his head is too big, torso too short and his fingers are too stubby.
This is pretty relevant workflow, as it is a military character, and it should help.
http://www.amc.ro/uploads/sessions/1_Diver/AMCpixelfactory_Sessions_01_Diver_EN.pdf
And there are a few videos to go with it.
http://vimeo.com/36692844
Anatomy is something you really have to master if you want to be a character artist. And don't get me wrong, I still have a lot of trouble with it and a lot to learn myself.
Of course, make sure you finish your character if you don't have a lot of time left. Just make sure to apply a stronger focus on anatomy for your next character.
I Hope this hasn't come across the wrong way. I hope it helps!
You need to go back and look at your proportions and get the anatomy correct. Then from there move on to the outfit.
Check out sites like 3DSK and find a model for reference. Then stick with it. You'll never understand the human body without proper reference and lots of observation.
That seems a bit vague, lots of references were used in creating this character, what one persons sees another might see more clearly. I can't really learn if someone says "the proportions are off", you know where are they off, how are they off and what really looks correct.
I was kind of hoping for a paint over, I know lots of people here have their own things to do but they really are the most useful way of explaining how something is wrong. At this stage I am still learning so I need to be persistent on getting the right advice.
The head was too wide so I bought it in, and reshaped the neck to suit, this also helps give the squarer shoulders you probably want in a hero character.
The upper arms were too round and big, so I bought them in a bit too. And I also painted (although quite faintly) the direction the muscles should go for the forearms.
The hands I stretched out and relaxed to give natural look.
I dropped the waist and knees, which in turn makes the torso longer.
I also cut away at the trousers to show where folds should go and stop the silhouette from being so tube like. You can probably find more realistic examples though.
In terms of using human reference, It helps to model on top of photos to get these proportion issues sorted, the hands, the head width, and the torso to leg length were clear examples of where it doesn't seem like you followed it too closely. When sculpting, work with reference of the area your working on open and constantly compare. In ZBrush, use image plane (under texture) or even spotlight and line it up with your sculpt so you can know how accurate you are being.
Hope this helps.