The BRAWL² Tournament Challenge has been announced!
It starts May 12, and ends Oct 17. Let's see what you got!
https://polycount.com/discussion/237047/the-brawl²-tournament
It starts May 12, and ends Oct 17. Let's see what you got!
https://polycount.com/discussion/237047/the-brawl²-tournament
WIP environment props/character models
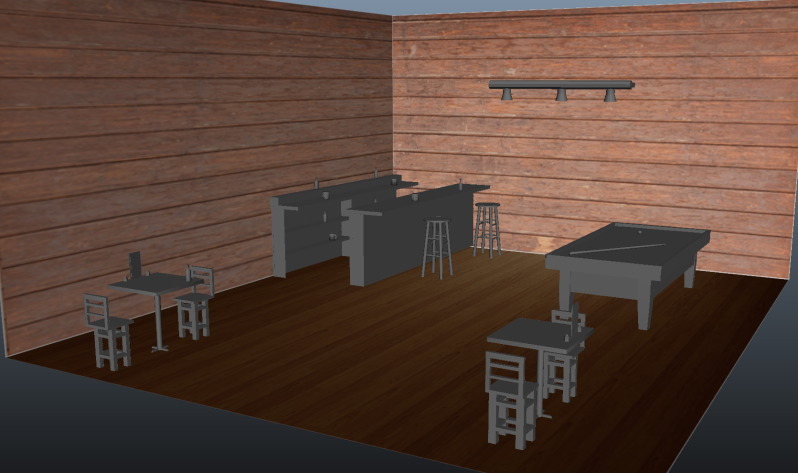
I wanted to share some stuff that I've been making in my class. I've never done environmental stuff before and decided that for this semester I would be an environmental prop modeler.
Comments and criticism are welcome.


Comments and criticism are welcome.


Replies
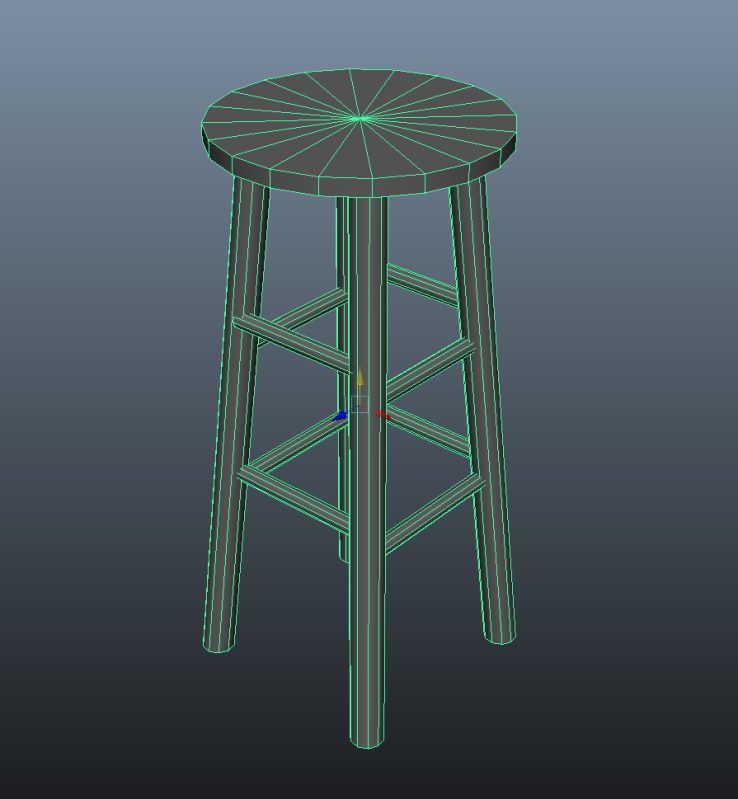
I will assume the chairs (not stools) are placeholders, if not I'd suggest getting a new concept.
Also, could we see your concept (if you have one)?
I was thinking the same thing about the tables associated with them. North Carolina eh, what school?
I need to redo the chairs anyway, so they are free to go. This was supposed to be the props for a pub scene and every pub-like place I've been to has had tables and chairs.
If by concept you mean the material I used to base my material off of, I used http://robcarroll.carbonmade.com/projects/3467105 as the reference for the bar and I looked at pictures of the furniture to help get an idea of what is supposed to look like and then modeled using height and width numbers that I found online.
I'm going to Western Piedmont Community College. I don't know about the other programs here, but the Simulation and Game Development program is pretty nice.
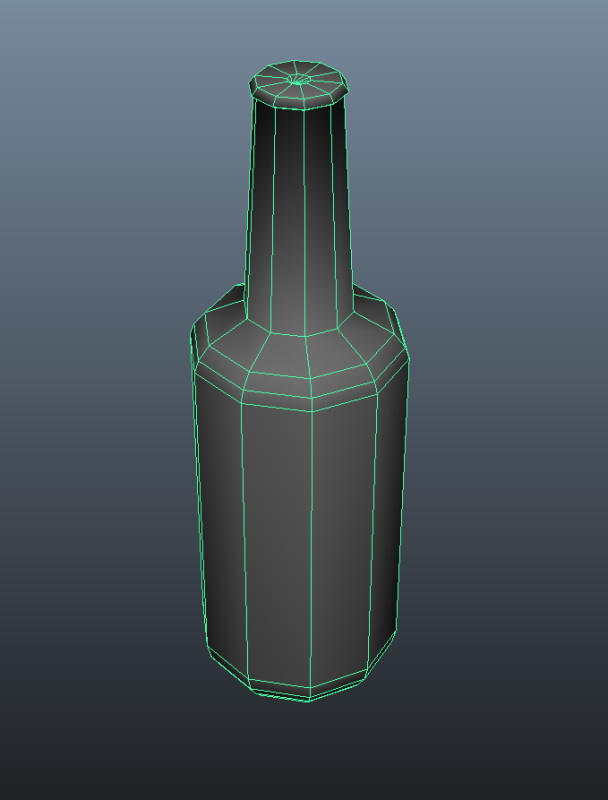
Always, Always, Always add more sides to your cylinders before you start beveling the horizontal rings. This is a ludicrous amount of polygons for a beer bottle unless it's some sort of cinematic hero object or a melee weapon, and even then, it's going to read poorly because you are using a 12-sided cylinder for the base (which is more than fine for a regular game-asset beer bottle) but then using multiple-loop bevels on the transitions between the neck and the bottom.
The proportions you've got there are a bit off from most beer bottles, which is OK if it's some sort of novelty-beer bottle brand but trying to sell that kind of stuff is hard as hell - it's a lot easier to make something that looks like the normal, everyday stuff than to sell something that looks realistically distorted - IE, making wood panels is a lot easier to sell than selling vinyl with a wood veneer painted on. Finally, you really do not need to be modeling the bottle hollow as you've got at the top there, but if you are, that bottle is way too thick.
Between that and the wacky, fun-house proportions of your other props I think you really need to post your reference photos here immediately. If you do not have reference photos, that's your first problem - you need to get some.
If you do have reference, I want you to continuously look between the ref images and your images and find the inconsistencies. Feel free to take screen grabs and overlay them over the ref photos if that helps you improve your observational skills.
Looking at the full scene, it becomes very obvious you have not properly trained your eyes to spot the differences between your reference and the work you're creating.
When I say reference, by the way, I'm not saying blueprints and measurements - while these are certainly useful, your innate art skills (as opposed to your 'color-between-the-lines-and-tracing) skills will improve much more the more you use photographic and real-life reference to better train your eyes to examine and break down forms and shapes.
The human model was just for size reference. My friend found it online and sent it to me. It's called max_for_maya or something.
I started with an iron dagger. The references for it were extremely helpful, I think it was a screenshot from skyrim.
Next I made a gladius and used pictures from google images as my references. It's not exactly the same, but it's close. The tri count is much higher than I could have made it, I just wanted to put more detail into the handle. I'll probably take that stuff out when it comes time to actually put it in a game.
After the gladius I made a hammer. It was supposed to be like the war hammer/maul's from world of warcraft, but I couldn't find any references that were good enough for me to work off of. It ended up being a massive one-handed hammer instead of the 2-hander that I was aiming for, but I'm sure I could find a game where it would be believable.
Following mister hammer was a kite shield. It was easy enough to start out, but there was some trouble after I got done working on the front of it. The texture was pretty simple to make too. I think I'm starting to get used to UV mapping and texturing.
The last thing I made for this project was a dein nomos look-alike. I didn't get to make it as exact as I would have liked due to time constraints and frustration, but overall I like it.
C&C is still very much welcome. I look forward to you guys ripping me apart!
edit: The full album for my work can be found at photobucket
your props aren't quite matching up with one another, a few are cartoony, one is realistic-ish, and they don't really resonate.
With your next update, I think you should post your references along with the things you're working on, so we can give some more detailed feedback.
Also, this might sound jackassy, but I think you could find a billion and 1 better models to use the show off your models for size reference with. Even a properly sized Biped would be more efficient.