The BRAWL² Tournament Challenge has been announced!
It starts May 12, and ends Oct 17. Let's see what you got!
https://polycount.com/discussion/237047/the-brawl²-tournament
It starts May 12, and ends Oct 17. Let's see what you got!
https://polycount.com/discussion/237047/the-brawl²-tournament
Tremulant's Work Thread
Hello Gents! This will be a thread to keep all of my work over this coming year in once place. Glad to be back on Polycount after a long sabbatical. Looking forward to your juiciest crits:)
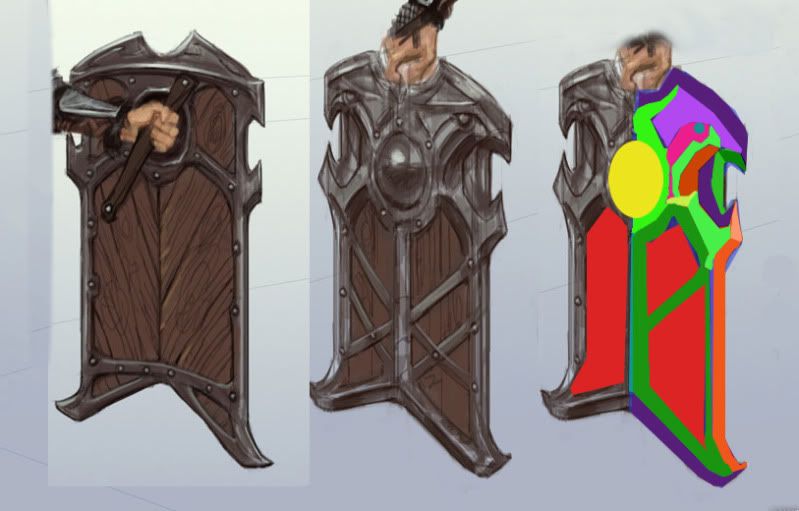
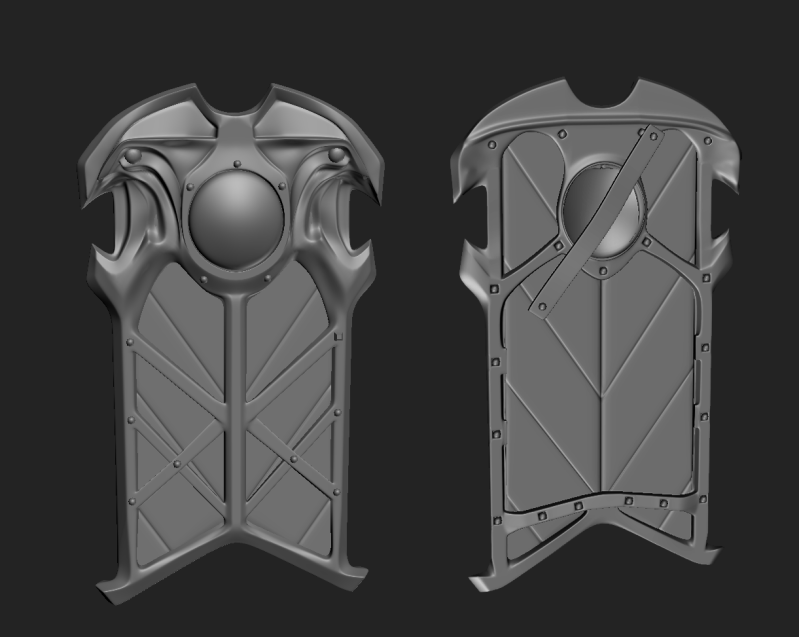
First up is a shield I'm working on from a Bethesda Skyrim Concept. Will be putting it in Engine once I get the Creation Kit. Taking it into Zbrush now, for some wear, and wood grain. I included a shot of the conept plus, my process of working out the complicated bits. Anyone else do this? I found it helpful. Any different approaches you guys may have taken?
UPDATE- Most Recent shot here--

Concept by Bethesda -


First up is a shield I'm working on from a Bethesda Skyrim Concept. Will be putting it in Engine once I get the Creation Kit. Taking it into Zbrush now, for some wear, and wood grain. I included a shot of the conept plus, my process of working out the complicated bits. Anyone else do this? I found it helpful. Any different approaches you guys may have taken?
UPDATE- Most Recent shot here--

Concept by Bethesda -


Replies
... i have a little question , how you sclupt every part from your object alone ?
and how did you make those edge flat they look awesome
Hope that helps!
Need your opinion. Do you guys prefer the detailing on the metal?
I am pretty blocked on what might look good. Any ideas? I was thinking about just adding a little bit of wear on the center circle and a little more throughout and calling it done. It feels like it needs some more interesting details to me though...(It's for skyrim, so I wanted to keep that style detailing.
http://img52.imageshack.us/img52/8439/shieldcomposite.png
Low Poly Wire
Marmoset
3ds Quick Max Normal Test
Is there more of a problem with the triangles in the center of the shield? Is some of this caused by the way the unwrap is done? Why am I getting this result in Marmoset?
Why aren't the other parts of the model like the wood, eyes, and rivets even baking into this one? Maybe a cage problem? Lastly if you notice, the front diagonal metal crossing bars are getting baked into the back. I'm thinking this is a cage problem too.
I'm going back now and reworking the low poly to add more geometry to the center parts.
Thanks for your help dudes!
The sculpt is looking awesome
Ferg, I tried flipping the Y channel to no avail. I think I had way more problems than I could have imagined!
Respawnrt, Thank you so much for the paint over! I'm just getting a feel for how many polys I need to make a good bake, and you are right I probably could cut out some more. I cut a decent amount from the middle, as you have shown on your paint-over, and was successful to a degree, but there was only so much I could do without screwing up my unwrap. I think I need to keep on moving on it and I will do a better job with each asset that I make in the upcoming posts. I also love your creamy explosion job on the paintover
Endzeit: I will post a wire in a bit
What does your normal map look like?
Are you baking in max with a cage?
As respawn said you are using a ton of geo that won't be seen by the player. Always have confidence In your normal map.
Comments and other request below---
Quack: My groups aren't set by islands. I posted the normal map below with some places that I am spotting errors circled for my own use. I baked it using Xnormal. I notice that I am going to need to make the cages myself in 3ds max. I am having to kind of do the bake blindly since the highpoly is too high to bring into 3ds max. I am thinking about brining in a decimated version to match it up better though.
Lastly, I have already unwrapped at this point, so I don't know if I want to backtrack so much as I am really far off schedule as it is. I am thinking I will just try to do a better job of this on the next asset I make in here.
Normal maps
Low Poly without maps - Smoothing errors circled
Highpoly Unsmoothed Wire-
Quick question for you, or anyone else who wants to chime in. If you look at my normal map you can see that the wood grain is much more deep and pronounced in one side, and almost nonexistent in the other. Any Idea why this is happening?
I bet that if you use the cage instead of the ray distance it will fix your soft normals problem.
[edit] Just realized that your uv groups were just flat planes. The areas you are getting crazy smoothing is because the transition between the two parts is too hard. You need to smooth that out. You can add more geo by chamferring the edges a bit. This will increase your vert/tri count a bit, but is worth it. OR you can break your uv map at the hard angles that are giving you errors. Many times angles of 80-90 degrees can cause issues and need to be broken. Good luck!
Here is a marmoset update with the normals cage. Also a just-for-fun render with some BLOOM! Hehe.