Need help with UDK hatching material
Hi So I'm playing around with the UDK material editor to come up with a hatching shader. Here is what I ended up with.
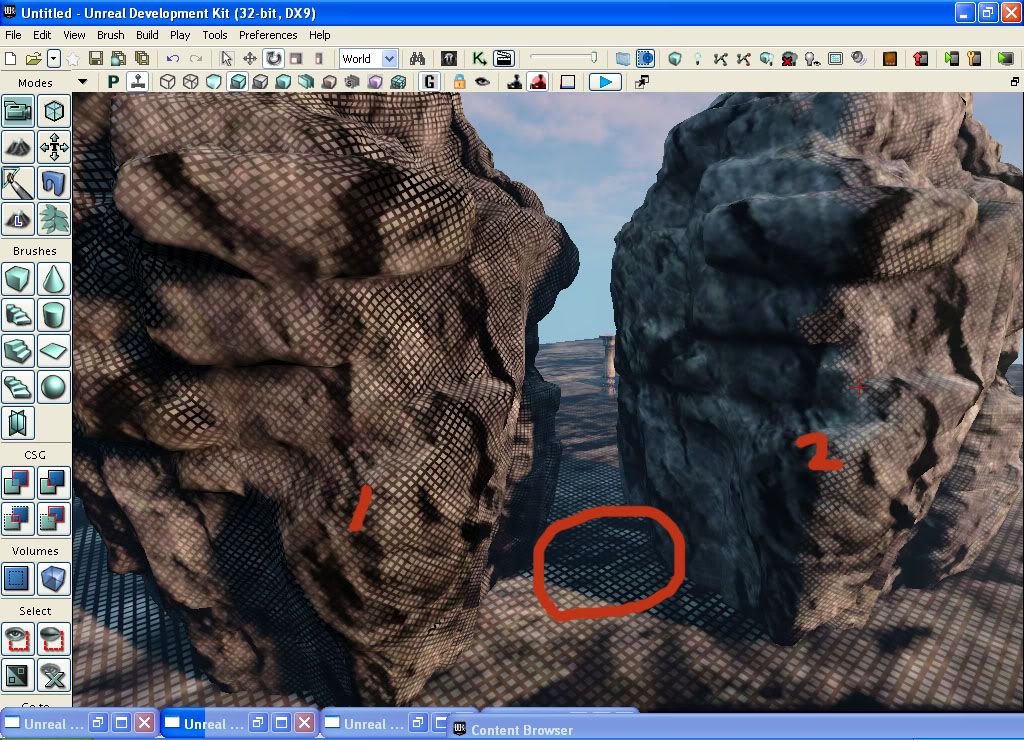
I increased the UV tiling to make it easier to see the first one has the hatching texture multiplied on the shadowed areas while the second one only has the hatching effect on the parts where light hits.
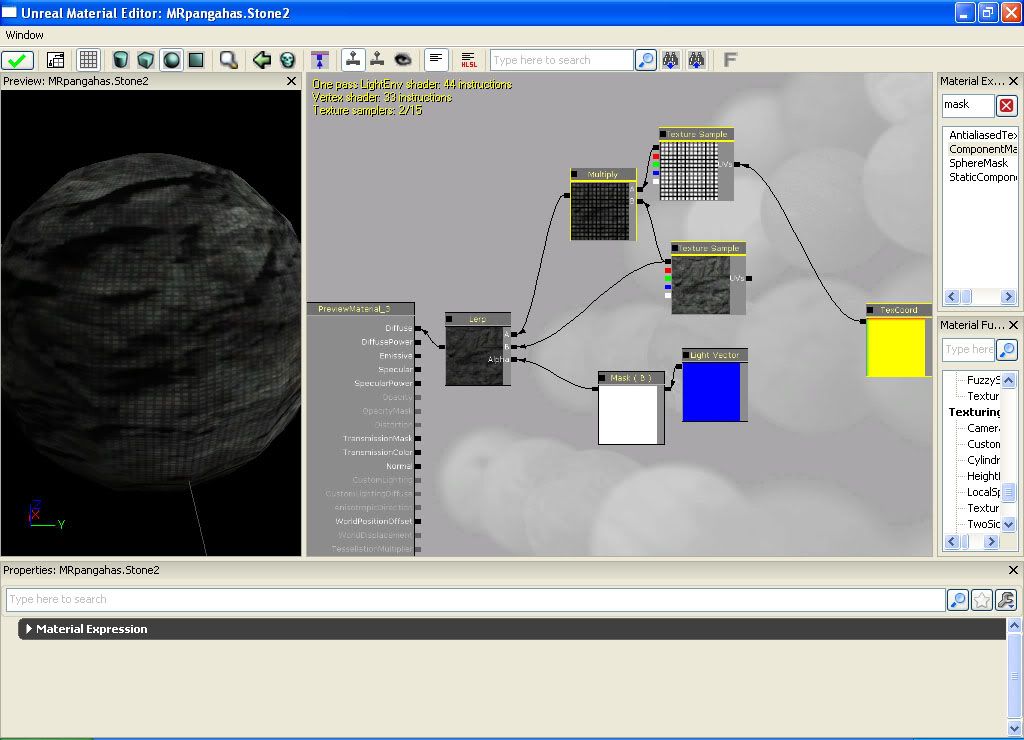
Here is how it is setup.I'm kind of new to this so I'm not entirely sure if I'm doing it right.
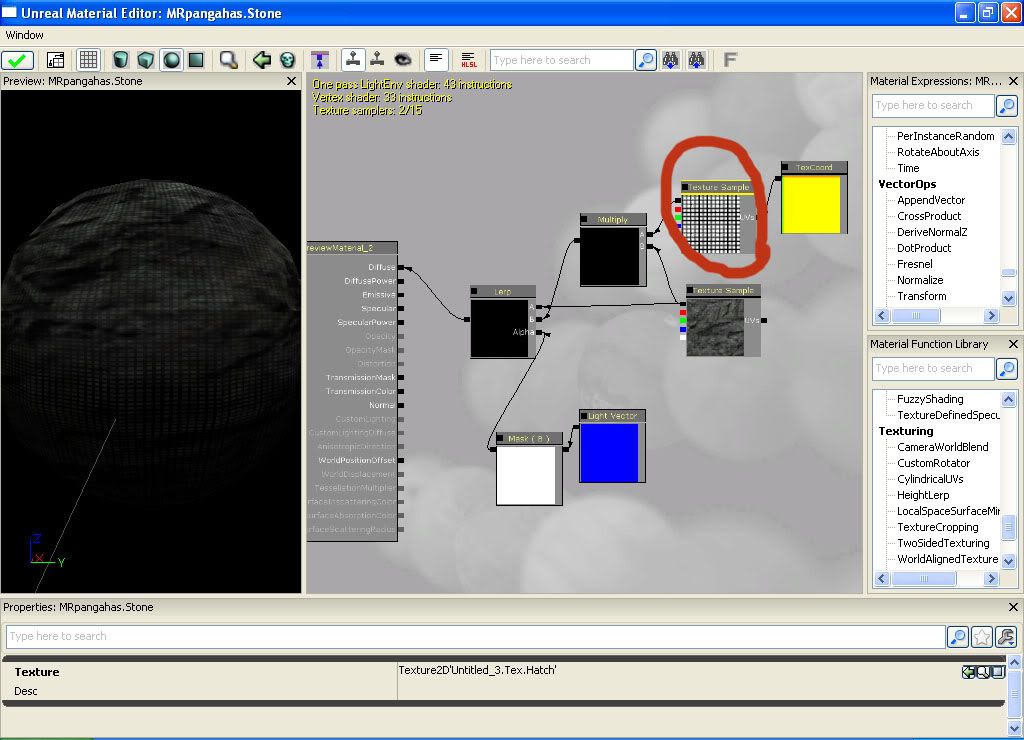
For the hatch texture I quickly made one in Photoshop deleted the white parts and saved it as png. when I imported it I did not check the options encircled thinking it would make the texture transparent on those part I deleted.But apparently when I applied it, it is still not transparent(circled part on screenshot 1)
So my question is how do I make the alpha for that texture?what am I doing wrong?What node do I need to add?
One more thing I can't seem to figure it out but I want my hatching texture to not appear on parts that are lighted but only on the shadowed areas..Number 2 basically but in reverse. Would Anyone with more experience with UDK materials kindly help me with this? I would be using this for a scene I'm planning to make.

I increased the UV tiling to make it easier to see the first one has the hatching texture multiplied on the shadowed areas while the second one only has the hatching effect on the parts where light hits.
Here is how it is setup.I'm kind of new to this so I'm not entirely sure if I'm doing it right.


For the hatch texture I quickly made one in Photoshop deleted the white parts and saved it as png. when I imported it I did not check the options encircled thinking it would make the texture transparent on those part I deleted.But apparently when I applied it, it is still not transparent(circled part on screenshot 1)
So my question is how do I make the alpha for that texture?what am I doing wrong?What node do I need to add?
One more thing I can't seem to figure it out but I want my hatching texture to not appear on parts that are lighted but only on the shadowed areas..Number 2 basically but in reverse. Would Anyone with more experience with UDK materials kindly help me with this? I would be using this for a scene I'm planning to make.

Replies
[ame="
The Alpha issue is showing up because your Alpha is an Alpha being treated like a texture. It's not being fed into any masking options. You already have your Lerp node's Alpha occupied with the Light Vector node.
What your currently have is a 'masked diffuse' in terms of color information, what you're asking (from what I understood) was a localized Alpha masking from the Light Vector? In which case, switch out the Light and your texture nodes.
Hmm, I'm not sure about the shadow masking part, you might need a custom solution. However, did you try inverting your light vector? Will that change anything? Careful however, since pending on what type of tangents you exported with can cause issues as UDK could show up the seams if you invert you light vector.
Secondly, I think it really depends on the style you're aiming for. I personally would have created two different hatch effects and put them up via a Screen Position node, so that when the camera moves, the hatch effect doesn't seem frozen on the surface.
If you could post up some references as to what style exactly you're going for, I'm sure peeps will have a better solution.
As for the style and the effect yes your correct I want it to look like the traditional hatch and sketch effect like the video you posted except that I only want the hatching to appear on the shadowed areas multiplied to the diffuse texture.
The pencil sketch texture for this I did post process in photoshop but this is basically the style I'am aiming for.
If you want hatching JUST where the shadows are what you'll want to do is:
use the full light vector, not just the blue component. multiply this by -1. Take the dot product of that inverted light vector and your object's normal map if it has one, if not use 0,0,1.
Use a Constant Clamp node to the output of that dot product. Plug this into the alpha slot of a lerp node.
Plug your scaled hatching texture into the B slot of the lerp, and a 3 vector set to 1,1,1 for the A slot.
Multiply the output of the lerp by your diffuse texture and plug that into the diffuse slot.
Note that this will only account for form shadows of the object. It will not place the hatching in self shadowed areas, or in areas which have shadows cast on them, as the method by which those shadows are calculated occurs outside the object shader level.
IF you need hatching across a certain brightness level of your whole scene, a post process material may be a better way to go, though the hatching won't line up with the object's form. It would just be projected in screen space.
Could make this work a bit better for you.
Just do a light and normal dot product, put that into the alpha, and swap the a and B nodes on the lerp.
Its not likely going to be perfect, but its what I can figure out at the moment.
Thanks a ton to you guys now I can finally work on the scene.
here's the result:
halftoneShader_07112010 by sprunghunt, on Flickr
Also to do the outlines it's probably easier to do it using a post process using the depth buffer to find the edges.
here's a thread with a shader network for generating outlines:
http://eat3d.com/forum/dvd-reviews/oniram-udk-lighting-and-post-processing-review
I'm new to this material node thing so would this allow me to multiply the tone effect on my diffuse?Can it be done simply by plugging it in the diffuse node? or does it have to be somewhere between your node setup?