Trololo Work Flow

polycounter lvl 16
Hey kids!
Thought Id write up my process of how I painted this piece.
I typically struggle with perspective a lot, so I wanted to integrate some small tricks using 3D in this to make sure I didn't fail too hard. I recently watched a tutorial from the badass Barontieri, and he actually used way more 3D stuff than I had typically seen before.
He designed a robot and pretty much did a quick model then painted over it directly in Photoshop to get perfect perspective. I wanted to do the same, but with the bridge. I feel like as long as there is one element in the image that has great perspective, the rest of the image is just gravy and you don't have to worry about it as much, particularly with organic stuff like hills, rocks, plants, characters, etc.
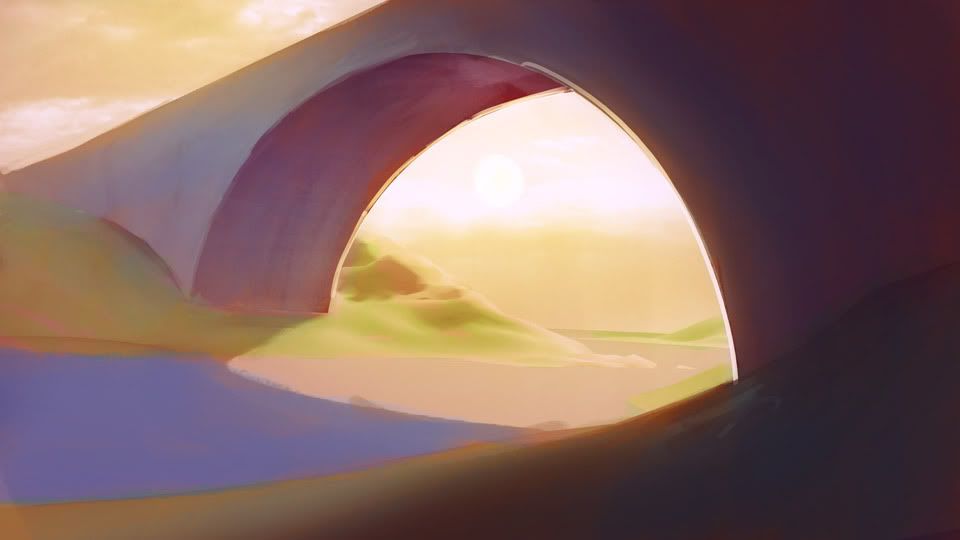
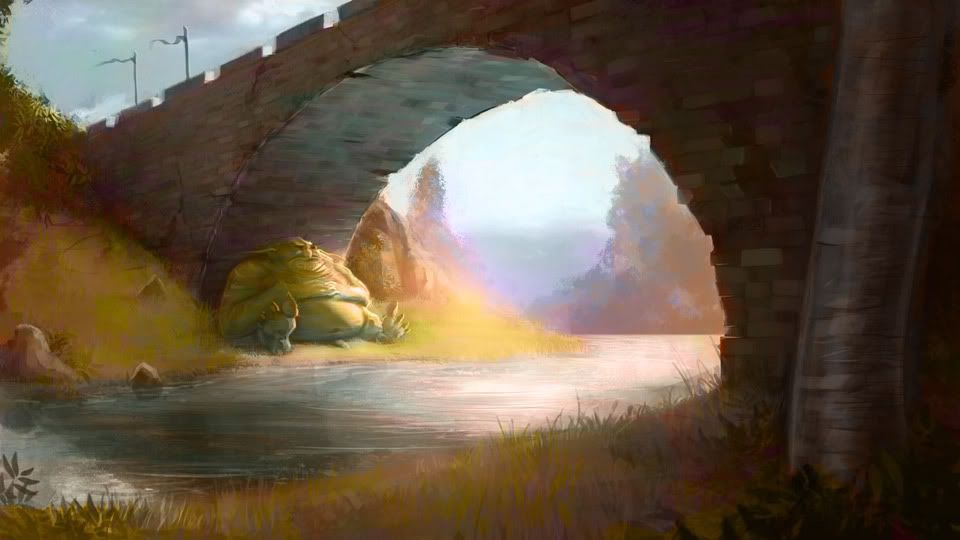
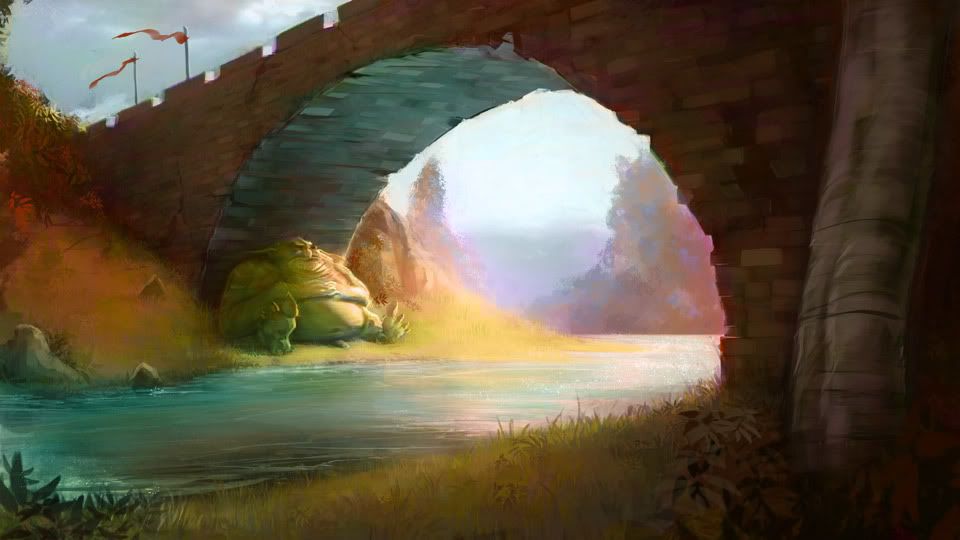
Here's the final image:
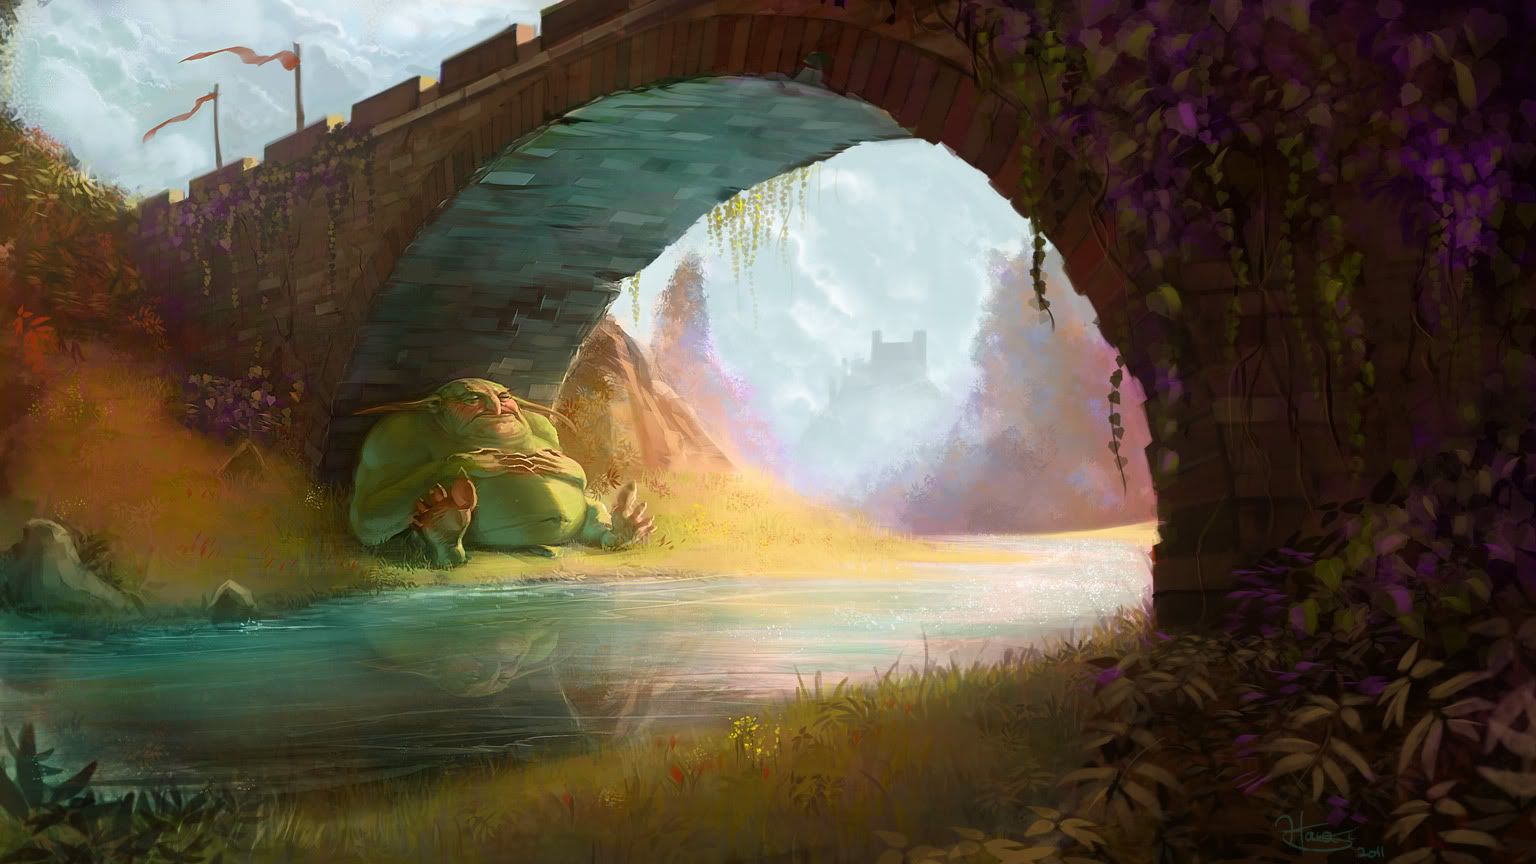
Now to break it down.
The first step was getting a little inspiration. The two amazing artists Hamsterfly and Jen Zee gave me some ideas for content and color.
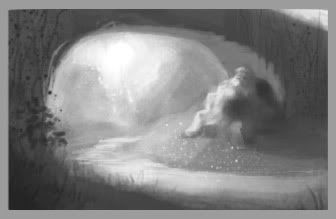
I just did a little thumbnail sketch to get the composition and lighting right. I had already decided I wanted to paint a troll under a bridge relaxing on a peaceful autumn day.
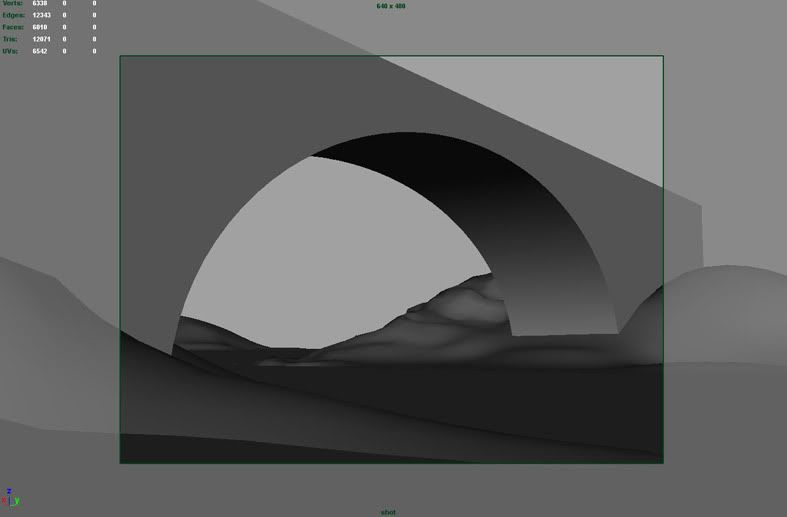
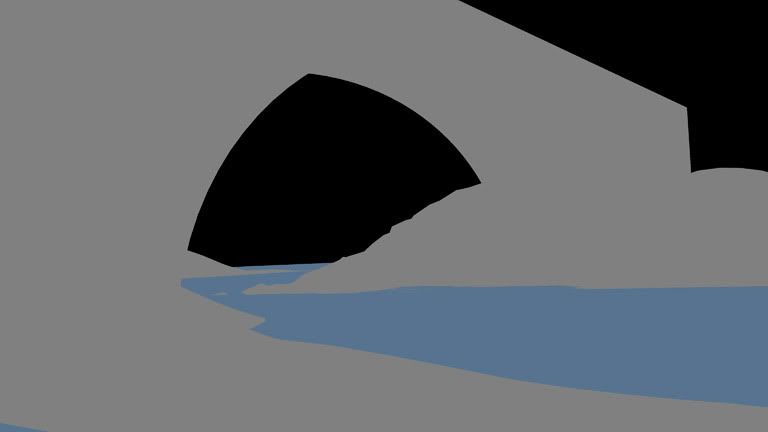
Second, I went into Maya and just did a really rough model of a bridge and a couple planes with sculpt geom to get shapes down and figure out the layout to get the composition to fit my thumbnail. Made a camera, moved it to its right spot, and locked all the attributes so I didn't accidentally move it later.
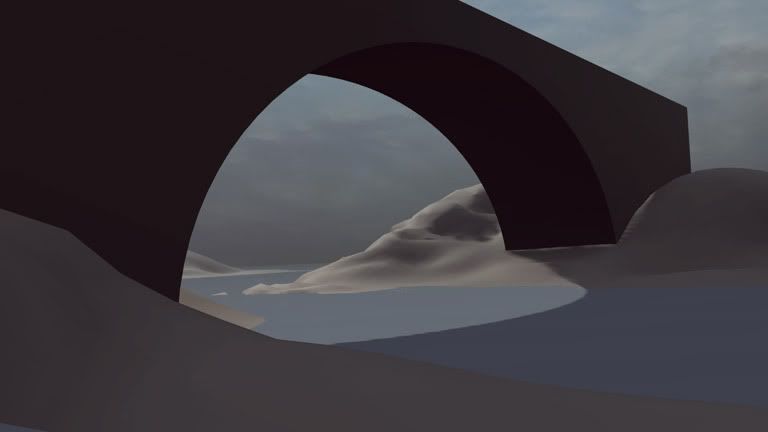
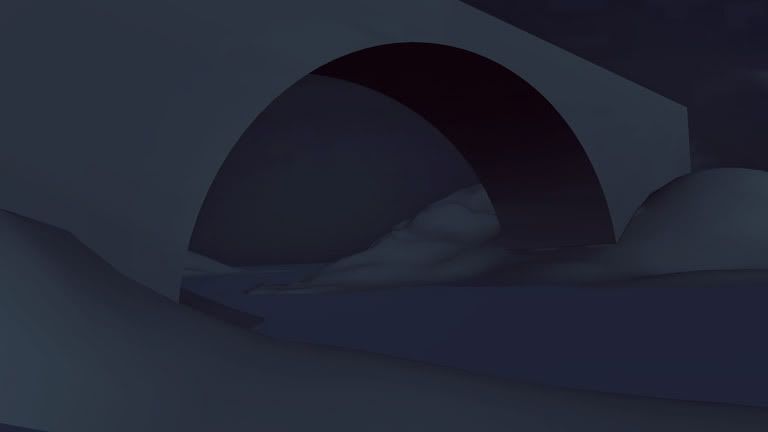
I then exported into our engine here at work just to get some really basic screenshots. I tried to get my camera similar to how it was in Maya. I didn't really care about getting a 100% perfect angle that matched Maya flawlessly, I really only did this just to get an easy block out. Saved out a couple versions for a super basic lighting pass and an easy selection to delete the sky so I could paint it myself.
Once I brought all those in to Photoshop, I just threw down a crap load of color, not being to strict on anything at this point. Only spent like 5-10 minutes on throwing colors down.
Don't mind that some of these are flipped horizontally, I have that bound to a quick key cause I'm constantly flipping to check for errors.
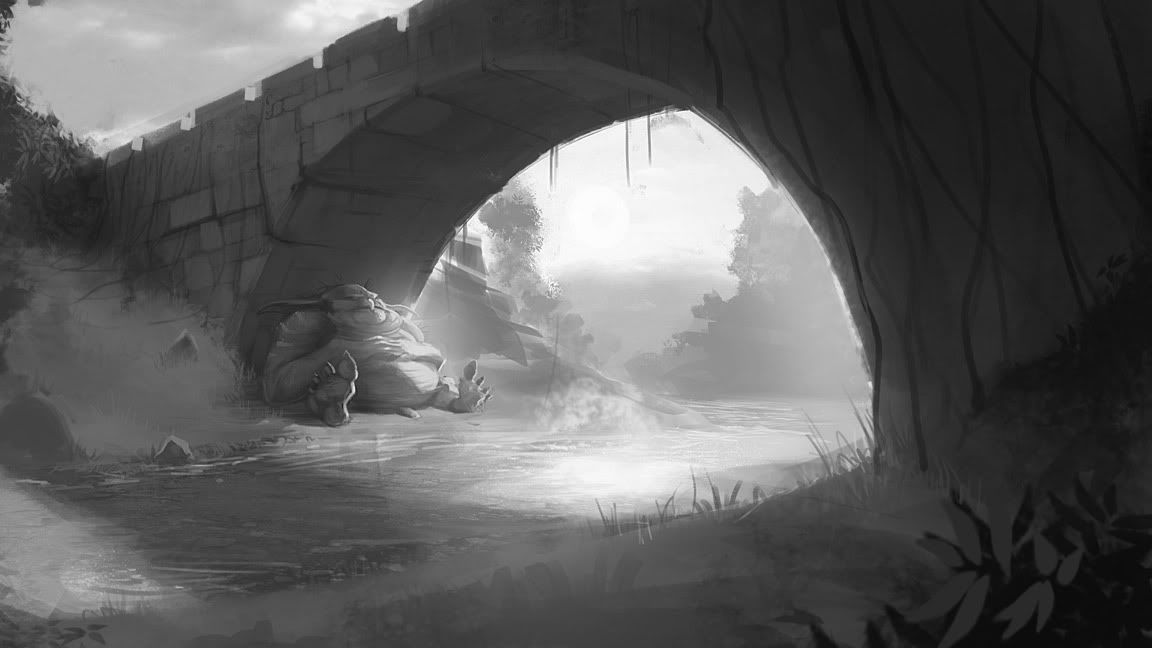
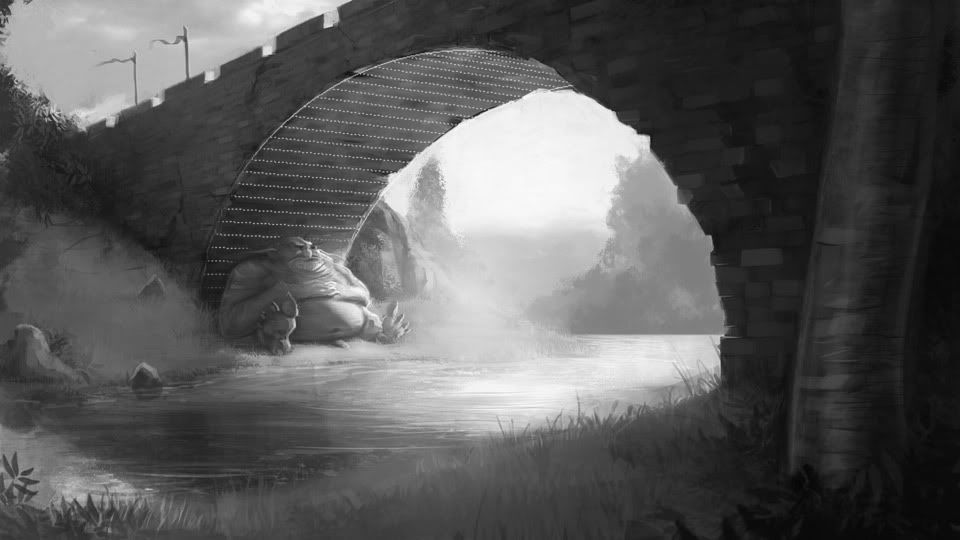
For the past several project I've done, I find myself working with values first before jumping into color. I have no specific way I work when I paint, I just do whatever I feel and just make sure the end product looks okay :P. I decided to jump back into grayscale and just painted away like crazy.
There arent a whole lot of tricks here, just paint, paint, paint, paint, paint.
I didnt like the bricks I was painting in for the bridge, so I went to CGtextures.com, grabbed one, pasted it in and skewed it to generally fit the perspective. I then painted over it so it didnt look like a photo.
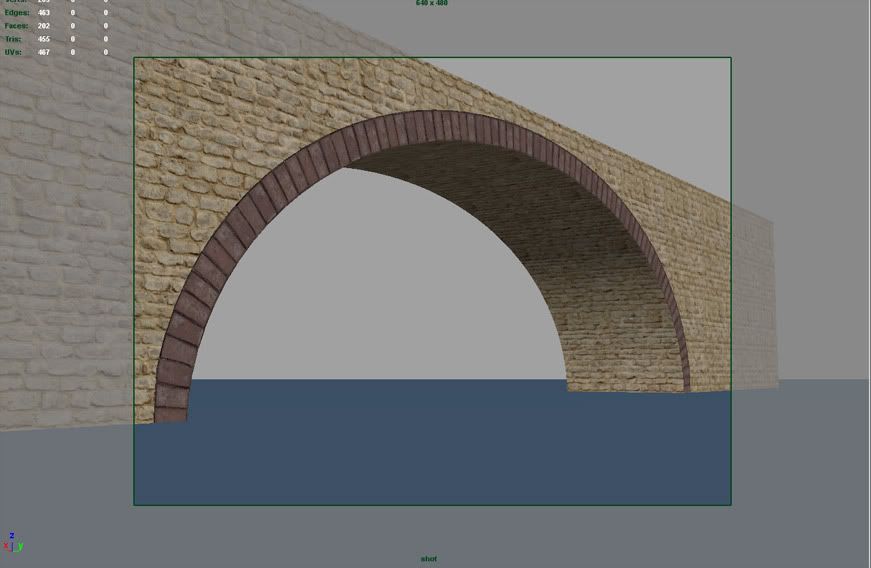
The perspective was also wrong, so I went back into Maya and grabbed a screenshot of the wire frame and pasted it over my painting.
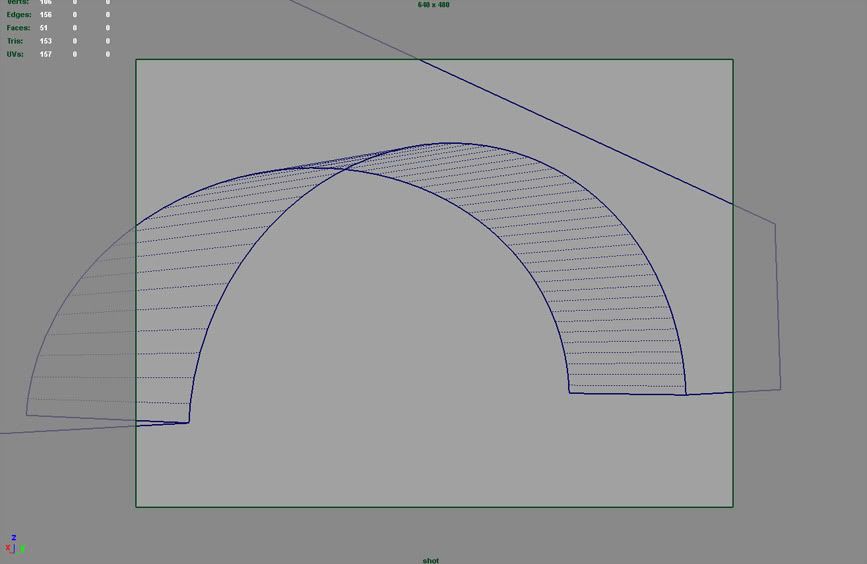
Took the wire frame, set it to Screen mode, adjusted it a bit, deleted the excess, then put its opacity down to like 5% (made it much more opaque for this screenshot). That way I could just barely see the wireframe for the perspective guide w/o it distracting me too much.
I then took my previous colors and threw them over the top of my grayscale painting in Color blending mode. I usually jump between Overlay, Soft Light, Hard Light, Linear Light, and Color to figure out which works best.
Now that I had most of the meat and potatoes in, I just added more paint, paint, paint. Mostly just working straight on a new layer and merging it down every 20-30 minutes. Lately Ive found myself working with fewer and fewer layers. I find that too many layers just bogs the file down and is really unnecessary.
I think working with fewer layers comes with confidence, I used to have hundreds of layers in my files. Sometimes you still need to preserve some stuff, though, and Ill just make a new layer and merge visible so I dont get rid of some color tweaking layers I had.
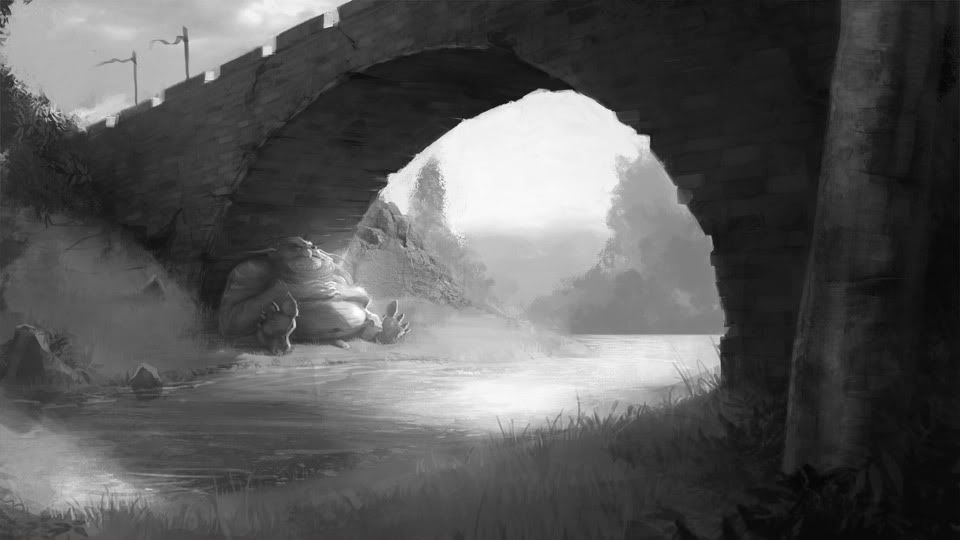
I got a critique that the bridge had no arch support, so I went back into Maya to cut in an edge loop around the bottom part of the bridge and laid out the UVs and threw a brick texture on there. It was a huge time saver to just do this in Maya and copy + paste a screenshot into Photoshop. Trying to paint the perspective on each of those bricks would have been a nightmare and huge time sink for me.
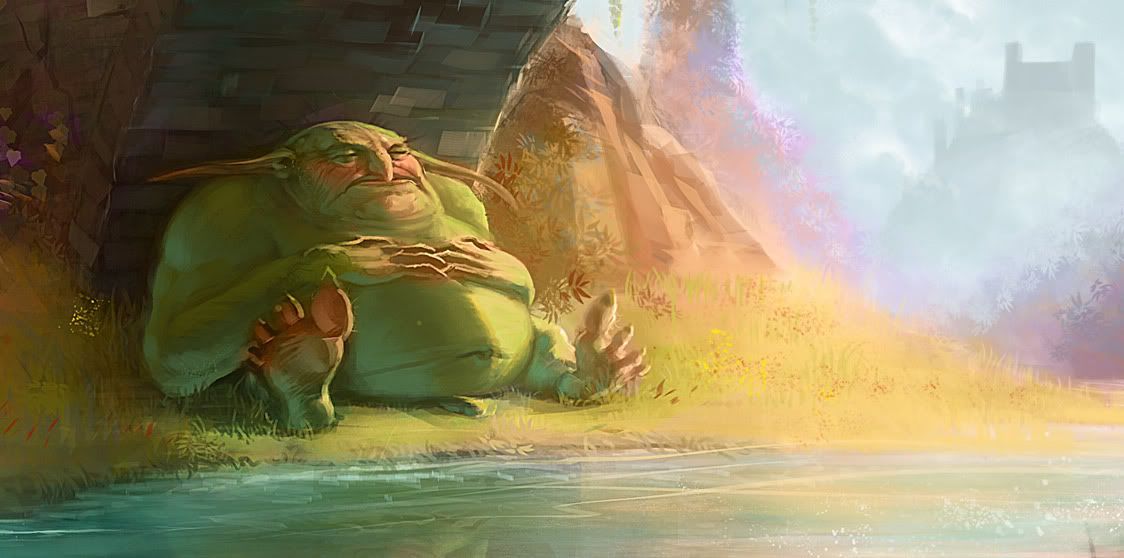
From here to the end, it was just a lot of rendering smaller details, adjusting colors, and a slight sharpen pass masked to only appear near the troll (for more focus). That brings us to the final image again!
Overall I feel this was a very informative project. Taught me a good way to grab quick screenshots to make easier edits without guessing on perspective the whole time.
Hope some of you find this useful!
Thought Id write up my process of how I painted this piece.
I typically struggle with perspective a lot, so I wanted to integrate some small tricks using 3D in this to make sure I didn't fail too hard. I recently watched a tutorial from the badass Barontieri, and he actually used way more 3D stuff than I had typically seen before.
He designed a robot and pretty much did a quick model then painted over it directly in Photoshop to get perfect perspective. I wanted to do the same, but with the bridge. I feel like as long as there is one element in the image that has great perspective, the rest of the image is just gravy and you don't have to worry about it as much, particularly with organic stuff like hills, rocks, plants, characters, etc.
Here's the final image:
Now to break it down.
The first step was getting a little inspiration. The two amazing artists Hamsterfly and Jen Zee gave me some ideas for content and color.
I just did a little thumbnail sketch to get the composition and lighting right. I had already decided I wanted to paint a troll under a bridge relaxing on a peaceful autumn day.
Second, I went into Maya and just did a really rough model of a bridge and a couple planes with sculpt geom to get shapes down and figure out the layout to get the composition to fit my thumbnail. Made a camera, moved it to its right spot, and locked all the attributes so I didn't accidentally move it later.
I then exported into our engine here at work just to get some really basic screenshots. I tried to get my camera similar to how it was in Maya. I didn't really care about getting a 100% perfect angle that matched Maya flawlessly, I really only did this just to get an easy block out. Saved out a couple versions for a super basic lighting pass and an easy selection to delete the sky so I could paint it myself.
Once I brought all those in to Photoshop, I just threw down a crap load of color, not being to strict on anything at this point. Only spent like 5-10 minutes on throwing colors down.
Don't mind that some of these are flipped horizontally, I have that bound to a quick key cause I'm constantly flipping to check for errors.
For the past several project I've done, I find myself working with values first before jumping into color. I have no specific way I work when I paint, I just do whatever I feel and just make sure the end product looks okay :P. I decided to jump back into grayscale and just painted away like crazy.
There arent a whole lot of tricks here, just paint, paint, paint, paint, paint.
I didnt like the bricks I was painting in for the bridge, so I went to CGtextures.com, grabbed one, pasted it in and skewed it to generally fit the perspective. I then painted over it so it didnt look like a photo.
The perspective was also wrong, so I went back into Maya and grabbed a screenshot of the wire frame and pasted it over my painting.
Took the wire frame, set it to Screen mode, adjusted it a bit, deleted the excess, then put its opacity down to like 5% (made it much more opaque for this screenshot). That way I could just barely see the wireframe for the perspective guide w/o it distracting me too much.
I then took my previous colors and threw them over the top of my grayscale painting in Color blending mode. I usually jump between Overlay, Soft Light, Hard Light, Linear Light, and Color to figure out which works best.
Now that I had most of the meat and potatoes in, I just added more paint, paint, paint. Mostly just working straight on a new layer and merging it down every 20-30 minutes. Lately Ive found myself working with fewer and fewer layers. I find that too many layers just bogs the file down and is really unnecessary.
I think working with fewer layers comes with confidence, I used to have hundreds of layers in my files. Sometimes you still need to preserve some stuff, though, and Ill just make a new layer and merge visible so I dont get rid of some color tweaking layers I had.
I got a critique that the bridge had no arch support, so I went back into Maya to cut in an edge loop around the bottom part of the bridge and laid out the UVs and threw a brick texture on there. It was a huge time saver to just do this in Maya and copy + paste a screenshot into Photoshop. Trying to paint the perspective on each of those bricks would have been a nightmare and huge time sink for me.
From here to the end, it was just a lot of rendering smaller details, adjusting colors, and a slight sharpen pass masked to only appear near the troll (for more focus). That brings us to the final image again!
Overall I feel this was a very informative project. Taught me a good way to grab quick screenshots to make easier edits without guessing on perspective the whole time.
Hope some of you find this useful!
Replies
good job overall it came out quite nice.
I love the fact that you utilized both 3d and 2d tools.
Limitless fk'er.Hahhaa.
You dont have any particular tricks for blending do you?
The color, this is my favorite "style" you'd say. It's like, magical and fantastic, makes me drown in my own thoughts.
This is really, really awesome. I put this in my inspiration folder. Thanks for making it, and 10x more thanks for the informative tutorial.
Calabi: I don't have any particular tricks, no, but I can tell you that I never use the smudge tool. Some people swear by it, but I just have all my brushes set to pen pressure opacity jitter and paint. I'll also use a very, very large 0% hardness airbrush to pop in some larger chunks of soft lighting.
Also is that a troll penis I see poking out underneath his stomach?
cheers !
Thanks
MakeCG: No I haven't had it published anywhere.
Perfectblue: Yeah, here's a link to the DVDs http://www.thegnomonworkshop.com/store/product/347/Character-Design-Pipeline
If you look at the mid-right screenshot with the red BG, that's where he's taking 3D screenshots and starting to composite + paint over it in Photoshop.
top work!
jeffro: We gave each other an air brofive from each others' desks
BelgianBoolean: I use a small set of custom brushes. The most important one I've lately been using is Barontieri's palette knife brush. The others are a general round textured brush, square brush, and a huge 0% hardness airbrush for general glow / mood.
If anyone wants a link to his brushes set I'll try to Google it and find it.
I don't use the Photoshop standard brush as I feel like that gives an amateur photoshoppy look to your paintings.
Wahlgren: I apologize, I will send my servobot to sweep up the remnants of your brains.
Thanks guys!
He actually has several brushes I'm sure he's found from other random brush sets. When I was going through his brush set he actually had about 5-6 brushes I've used for a loooong time. The chain, the circle thing, a 400 large grunge brush, and a few others.
The nicest thing from the set for me was his palette knife. Simple yet amazing.