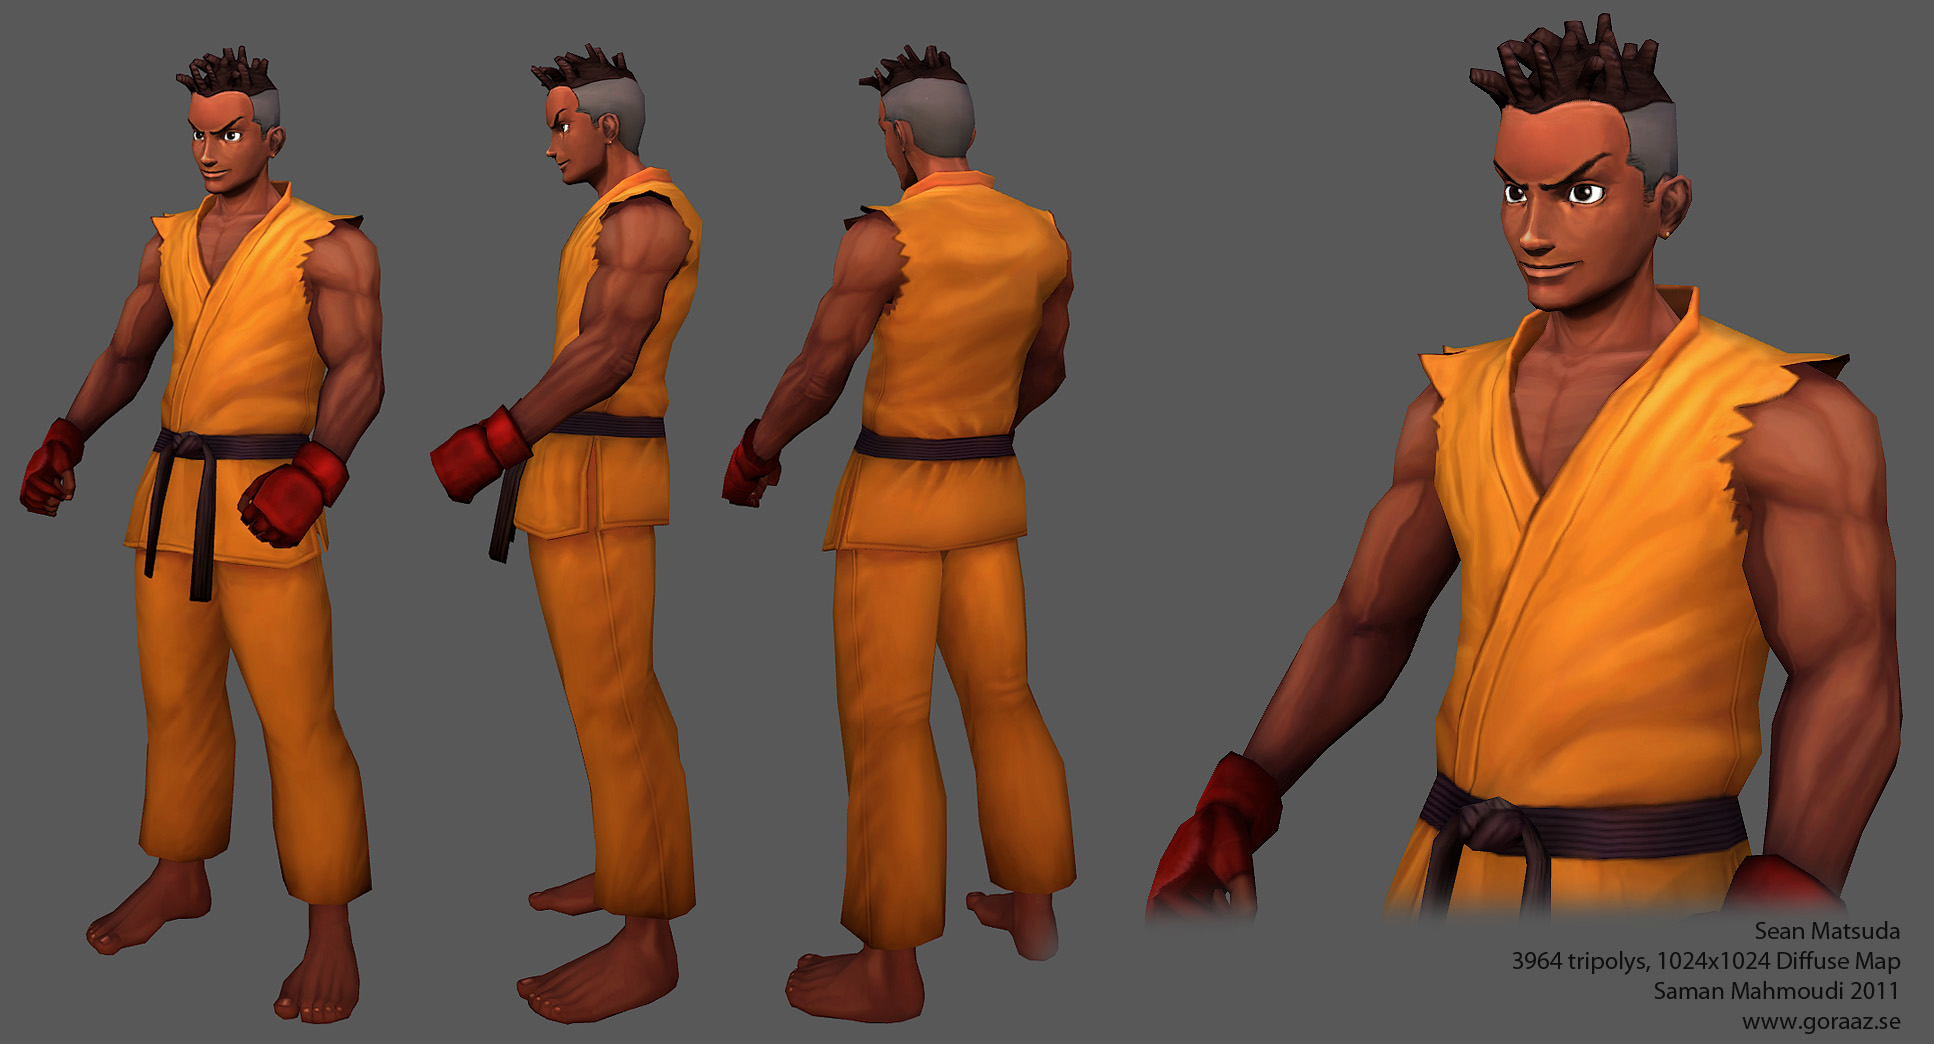
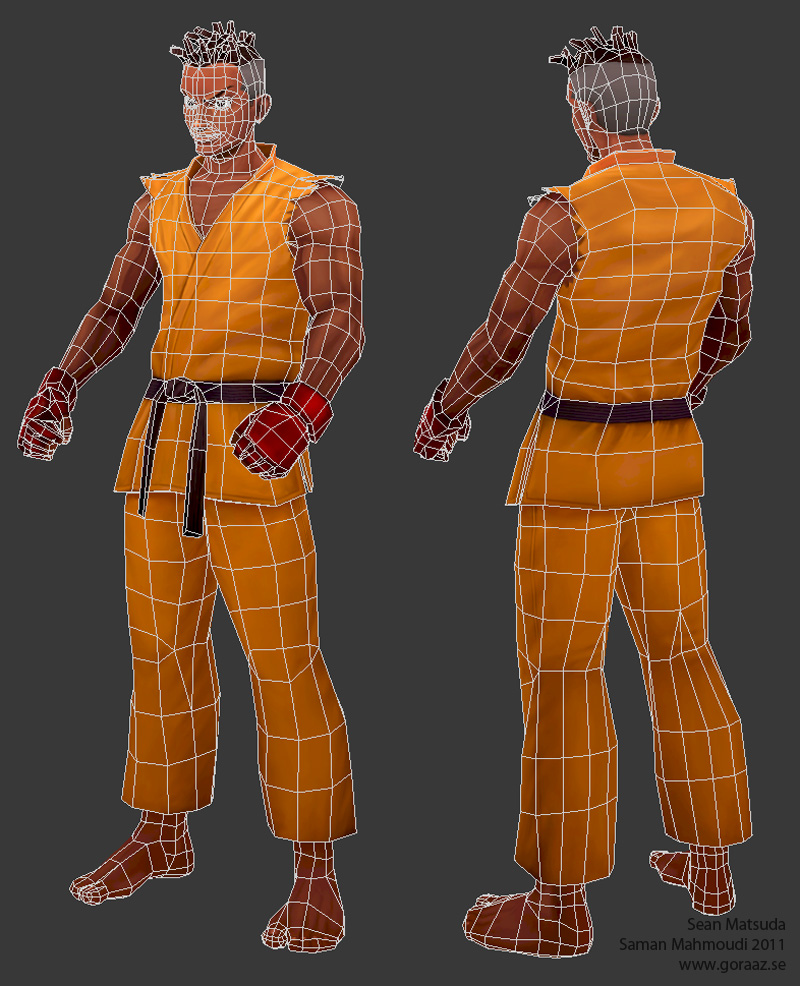
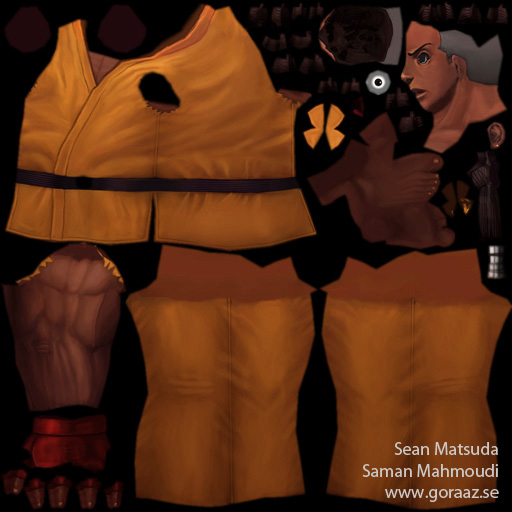
A few guys asked me to make a tutorial for my hand-painted characters. I've made one now along with a new character; Sean Matsuda from Street Fighter 3. I figured you guys might be interested in seeing my workflow as well so I'm sharing the tutorial with you. I've been learning a lot from the guys here at PC and I want to share the knowledge. Enjoy!
Cool workflow, thanks for sharing man. Not sure how i feel about ripping the concept art and painting over it, but the results are good! I really like how much the tutorial goes into theory advice as opposed to step by step rules -- teach a man to fish, etc.
My only critique on the texture is that the big pillow shading from the bake is a little bit too evident -- I think you should pull out some of the lighter tones on the folds on the legs that face the same towards the light source as the chest does. The same could be said for the shadows -- shouldnt the shadow under the chin be just as dark as the shadows on the forearms?
@Emar: Thanks, man! @Sekutto: Thank you! @Suprore: Thanks for the feedback. The notion was to have the sunlight hit the head/shoulder area the hardest so the rest of the model won't have as bright highlights. I do agree about the shadows under his chin though. I'm fixing that. @frell: Thanks, glad you like it. I'll put up a small workflow tutorial for the muscles as well.
@frell: I used Photoshop and Deep Paint 3d. I'm not familiar with 3d coat but painting straight on the model is a must in my opinion. Only sticking to photoshop will slow you down a lot. DP3D may be old but it's still great. I'm not sure if they're still updating it though. Might be better to check out the other programs if you're new to DP3D. @Jessica Dinh: Thanks, you're welcome!
@sketch81: Thanks! @dustinbrown: Yes, I have to fix that. I noticed that before but thanks for reminding me. @frell: I don't use any special brushes. I use the default round one sometimes and a square one at other times. I use very high transparency when painting in highlights/shadows(about 4 or 11 strength in DP3d). @Marshal Banana: The technique is basically the same. In this case the lighting is more dynamic than an ambient occlusion lighting. I didn't render it with a skylight either so you won't be getting those nice shadows in the corners.
I think it's useful for making spec-maps too(as shown in one of Pior's tutorials). You can get a head-start by using a high-spec material like I've done with the hair and bake the lighting. I haven't done that myself but I think I will next time I'm making a current-gen model.
Seems like the domain is down. I'll look into it. @frell: I paint in both programs. It's much easier to paint in DP3D in my opinion though because you can see the result straight away. @Massbot: Thanks, You're welcome!
@Kyuzo: Thanks, hope it helps! @Pickle: Thanks! @haikai: Thanks a lot. Yeah, I'd like to see how other people work too. I loved the little workflow pics you did with one of your characters.
There are of course better tutorials than mine out there but I figured that it wouldn't hurt to share the stuff that wasn't covered in the ones I've seen. The tutorial seems to have helped some people here and that makes it more than worth it. I added lots of info I got from you and shotgun in the tutorial as well. Thanks again, man!
So many neat tricks in here, painting the concept art onto your base mesh before starting the texturing is a fantastic idea - that's something that I certainly don't intuit as an environment guy. Great work and tutorial!
Thanks a lot, guys. Glad people still find this tutorial useful(Only saw jrmauri's reply about 5 months later). @Razgriz: Some people may have a problem with "ripping off" the concept by putting it on top of the model and then texture it from there. The point of me doing it however is because it makes it a whole lot easier to follow the concept's form and structure and not just because of the painting colors and so on. I don't see any harm in doing it this way, as long as credit is given to the artist in question and you make sure you're only using it as a guide and not copying it entirely.
That makes sense, I was thinking more from a studio perspective, being able to collaborate with concept artists like that to save time and adhere to style consistency, etc etc - I can certainly see how it could be an issue with personal portfolio work, without any citation or credit given to the original artist.
I figured I would post this here instead of creating a new thread for it. I recorded a time-lapse of a bust in case you're interested in my work-flow;
[vv]43722819[/vv]
Replies
My only critique on the texture is that the big pillow shading from the bake is a little bit too evident -- I think you should pull out some of the lighter tones on the folds on the legs that face the same towards the light source as the chest does. The same could be said for the shadows -- shouldnt the shadow under the chin be just as dark as the shadows on the forearms?
Great tutorial, wish you would have went more into painting muscles, I have so many problems with lighting/shadows my forms come out funky.
@Sekutto: Thank you!
@Suprore: Thanks for the feedback. The notion was to have the sunlight hit the head/shoulder area the hardest so the rest of the model won't have as bright highlights. I do agree about the shadows under his chin though. I'm fixing that.
@frell: Thanks, glad you like it. I'll put up a small workflow tutorial for the muscles as well.
@Jessica Dinh: Thanks, you're welcome!
@dustinbrown: Yes, I have to fix that. I noticed that before but thanks for reminding me.
@frell: I don't use any special brushes. I use the default round one sometimes and a square one at other times. I use very high transparency when painting in highlights/shadows(about 4 or 11 strength in DP3d).
@Marshal Banana: The technique is basically the same. In this case the lighting is more dynamic than an ambient occlusion lighting. I didn't render it with a skylight either so you won't be getting those nice shadows in the corners.
I think it's useful for making spec-maps too(as shown in one of Pior's tutorials). You can get a head-start by using a high-spec material like I've done with the hair and bake the lighting. I haven't done that myself but I think I will next time I'm making a current-gen model.
@frell: I paint in both programs. It's much easier to paint in DP3D in my opinion though because you can see the result straight away.
@Massbot: Thanks, You're welcome!
@Pickle: Thanks!
@haikai: Thanks a lot. Yeah, I'd like to see how other people work too. I loved the little workflow pics you did with one of your characters.
There are of course better tutorials than mine out there but I figured that it wouldn't hurt to share the stuff that wasn't covered in the ones I've seen. The tutorial seems to have helped some people here and that makes it more than worth it. I added lots of info I got from you and shotgun in the tutorial as well. Thanks again, man!
@Razgriz: Some people may have a problem with "ripping off" the concept by putting it on top of the model and then texture it from there. The point of me doing it however is because it makes it a whole lot easier to follow the concept's form and structure and not just because of the painting colors and so on. I don't see any harm in doing it this way, as long as credit is given to the artist in question and you make sure you're only using it as a guide and not copying it entirely.
[vv]43722819[/vv]