The BRAWL² Tournament Challenge has been announced!
It starts May 12, and ends Oct 17. Let's see what you got!
https://polycount.com/discussion/237047/the-brawl²-tournament
It starts May 12, and ends Oct 17. Let's see what you got!
https://polycount.com/discussion/237047/the-brawl²-tournament
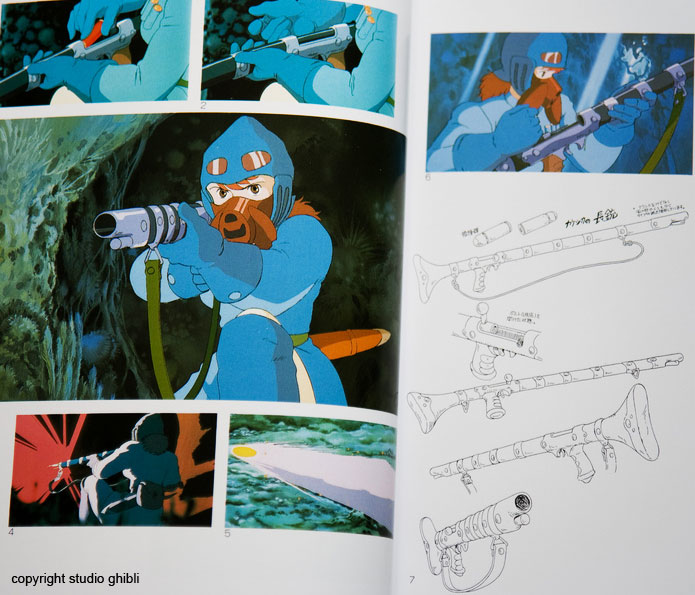
Nausicaa Rifle
Hello, polycount !
First an intro: I have been making casual 2D games for way too long, and have comitted to developing a portfolio that will get me hired at a "real" game studio. Last time I worked on a 3D realtime game was in the PS2 days, so much of the texturing and shading techniques are new to me. Having decided that full on current gen character art is a huge chunk to bite off, I have decided to start with props, while I learn the ins and outs of 3d realtime models.
since my hero is Hayao Miyazaki, I am using Nausicaa as my inspiration, starting with the main character's rifle:

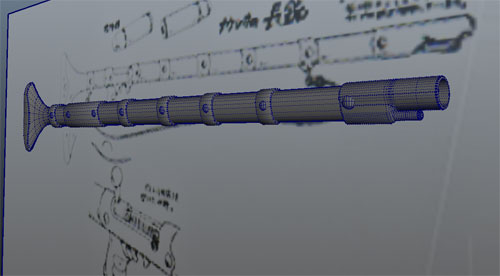
here is the result of the first 4 hours ( hi poly)

I'll keep posting updates as I go. Any critiques and feed back welcome, I need to improve!
First an intro: I have been making casual 2D games for way too long, and have comitted to developing a portfolio that will get me hired at a "real" game studio. Last time I worked on a 3D realtime game was in the PS2 days, so much of the texturing and shading techniques are new to me. Having decided that full on current gen character art is a huge chunk to bite off, I have decided to start with props, while I learn the ins and outs of 3d realtime models.
since my hero is Hayao Miyazaki, I am using Nausicaa as my inspiration, starting with the main character's rifle:

here is the result of the first 4 hours ( hi poly)

I'll keep posting updates as I go. Any critiques and feed back welcome, I need to improve!
Replies
the breach is complete but there are some surfce/lighting artifacts
from where I cut the profile of the breach hole out...
lots of extra verts there, bad quad flow leading to visible faceting on the polys, and serious uglieness when smoothed.
...any pointers on how to tame those? Must I manually surround these with edge loops? Seems tedious, maybe a better solution exists..
also, I noticed that Maya's Transfer Maps can transfer the diffuse maps when baking to low-poly geometry -is this common to do for game prop textures?
Might not be practical for most, but i've done something similar in maya for quickly getting some base color schemes down. Prolly wont do it again, but it was good to try at least
Any other helpful suggestions to avoid being boring?
Are you using Smooth Mesh Preview to make your high poly? Tons of edges set up like that aren't easy to tame if you are or aren't. With smoothing and proper edge flow, the shape would be much easier to manage.
As for transferring textures from high to low in Maya, I've only ever done that to transfer simple patterns if I want to mimic warped shapes not present in my low poly. But no, probably not common.
-cleaned up the edges on the breech
It looks better, but I see a few small flaws.
Do you think the breach mesh is good enough to move on from?
I'm going to start the grip next
(unless everyone sees obvious crucial flaws in the above)
So It looks kinda slopppy. any particular areas that I should target for cleanup?
I think they were saying it's boring because it's a simple gun. I think you just need to add your own details in.
more geometry detail on the gun, about ready to move into mudbox for weathering details.
would it be useful to model the wood grain for normal mapping, or is there a more efficient approach?
or am I totally wrong here?
Had trouble exporting mudbox error-free, due to NURBS, N+gons and reversed normals.
I spent a couple of hours correcting these in Maya. I'll be keeping those in mind next model. Now it imports cleanly.
My question now is, is this sort of thing best sculpted in mudbox by going piece by piece, or would open the whole model in mudbox and go to town ?
plus another 6-8 getting it to import correctly into mudbox.
any tips on good details to add? I am stuck thinking of random scratches and dents...and wondering what will/wont show up well in the normal map
----
I feel like I spent too much time iterating from Maya to Mudbox to diagnose problems with my mesh.
I modeled using booleans,extrusions and other operations that tend to lead to bad polys.
The problem that cropped up the most was 2 faces sharing more than 1 edge (which I assumed was cause by an n-Gon)
All the triangulation and Mesh > Cleanups did not seem to eliminate these.
Some times I had to give up and recreate the piece from scratch, being more careful with the underlying geometry.
In any case it was a bit tedious and left me wondering :
what workflow, tools or scripts do you use to ease the Maya to Mudbox transition?
Or does everybody just 'know' what not to do eventually?
also, I notice that my maya models are coming in really small compared to the default examples in Mudbox.
Is this bad? how should this be addressed?
I think My UVs are a bit imprecise, espcially where metal meets wood. the bands suffer a lot compared to the grip. I am finding that the finest details aren't translating too well -getting pixely- also at these edges. My guess is it's the narrow ammount of area in the UV map at those edges. Would this be the kind of thing you allow more room for in the UV map?
You may want to give the Averaged Normals thread a read. As previously suggested, soften up the edges/angles of your floating geometry details, they're barely visible in your normal map. Don't be afraid to add a few more edges here and there, the rings for the strap are distracting with the black space.
I think it's looking better, but I have a few areas to fix:
based on the averaged normals thread I think I'll adjust the hi poly version to give less 90 degree edges at the butt and barrel.
as for that sections of the breach I think it just needs cleaner UVs...
things seems to be breaking whenever the polys come to a capped cylinder.
also I'm pushing 1.2K polys on this one...seems like a lot.
now I have something that looks decent in Unity:
I started several threads to diagnose various problems:
some confusion about the look of Maya vs xNormal bakes as viewed in Maya vs Unity
Bad UVs lead made things look Better in Maya, worse in Unity. Also discsussed here
Also a discussion of UV best practices inspired by this old thread
I have learn a ton of useful stuff so far.
Now to finalize the bolt and strap.
It seems to make sense to model it with a flat shape, since it's basically a ribbon.
But how should I go about baking a normal map for this?
How do I ue a flat peice of geo for a cage over somehting just slightly 3-D?
what would you do?
update. Strap and Bolt modeled and mapped.
It's been a long slog but I have all the aprts working well now -diffuse,normal and specular, working in Unity.
But it looks to...meh. Any ideas to improve?
I have a mind to put a pin in it and move on...
I'd hate to go back and redo the UVs again, since it took a while to get nice, uniform unfolding, and also means recreating all the maps. Also, this thread
speaks to the idea of not going too overboard wiht optimizing your UV space.
But I hear where you are coming from. let's say I did revise the UVs: I suppose the approach would simply be to scale everything up about 105-110% and try to fit it all tightly?
The anime art is a flat dark blue, but Miyakzaki's paintings depict the rifle as wood colored...i tried to split the difference and go for blue dyed wood, but I can see how it may confuse. ...
I was originally working at 2048x2048 but I scaled down to a more realistic size. here is the set of 512x512 maps:
diffuse
specular
normal
unity view
Glad you like it! I still feel like a noob when it comes to current gen mapping. My only hope was that the thread be informative.