Modular Seam Problem
polycounter lvl 14
Hey guys, I was steaming through this project until I hit this little bump.
I currently have a 2048x2048 modular texture.
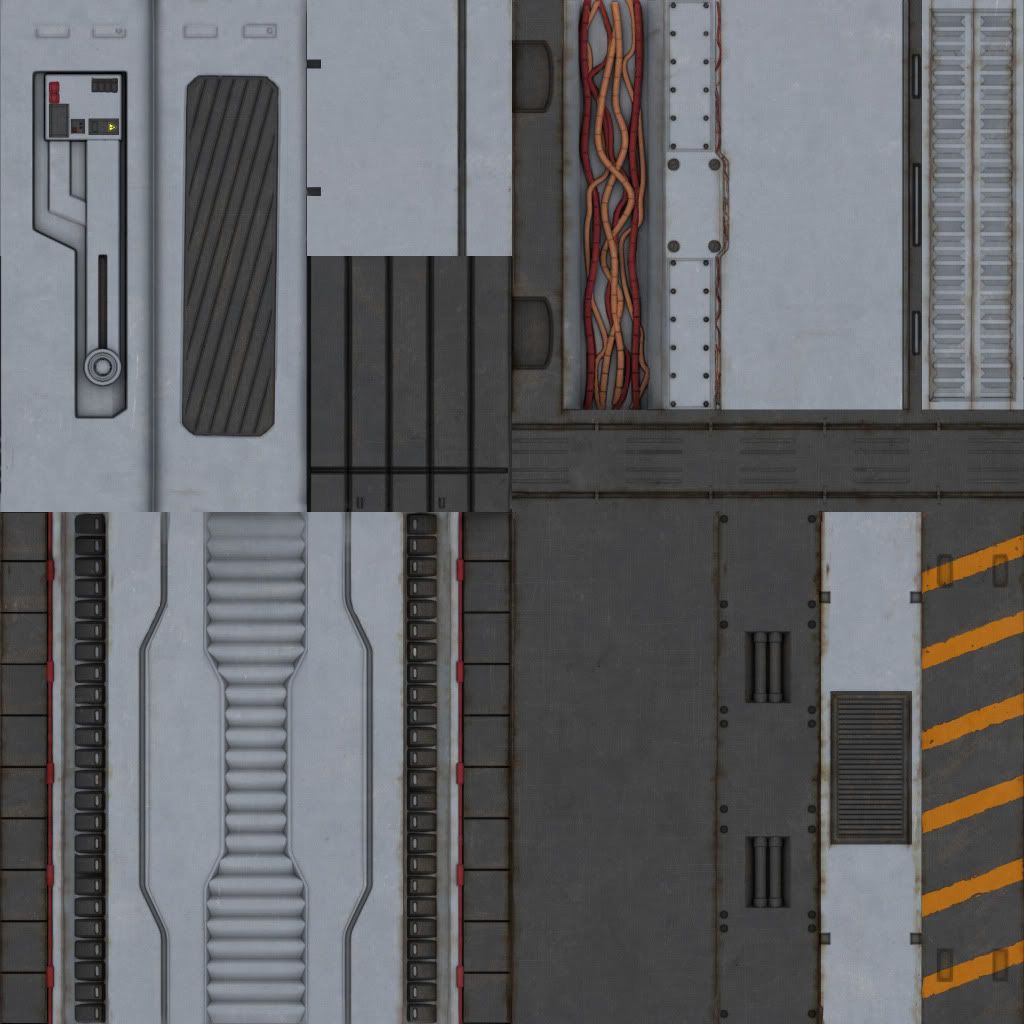
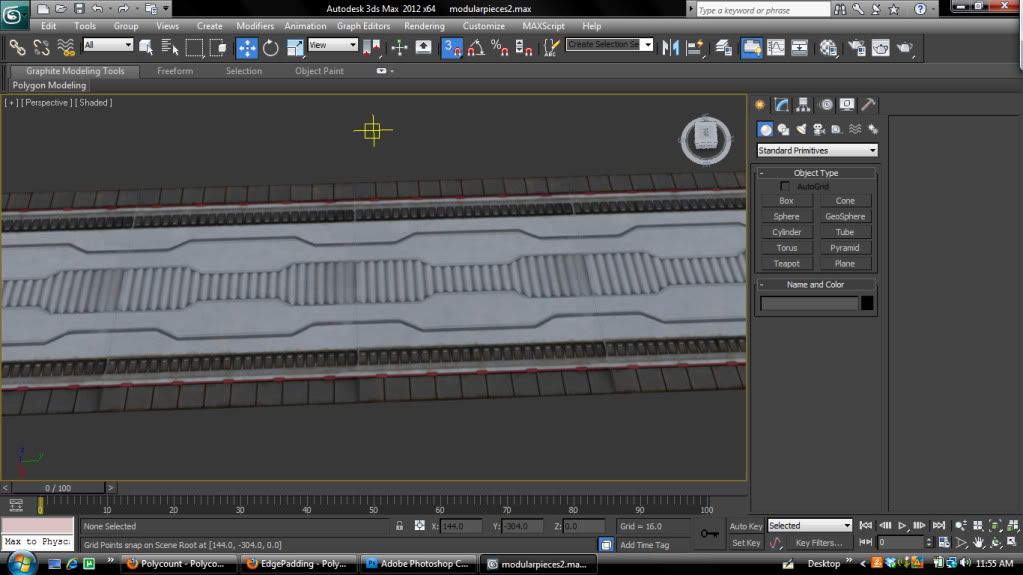
I have made sure all individual pieces tile with themselves(edit I submitted the wrong file and this one might not but I have to correct one on my computer), but when put them together I get tiny black seams like the ones pictured below. They show up 3dsMax viewport, UDK, and Marmoset engine. The only exception is when I actually render my image in 3dsMax.
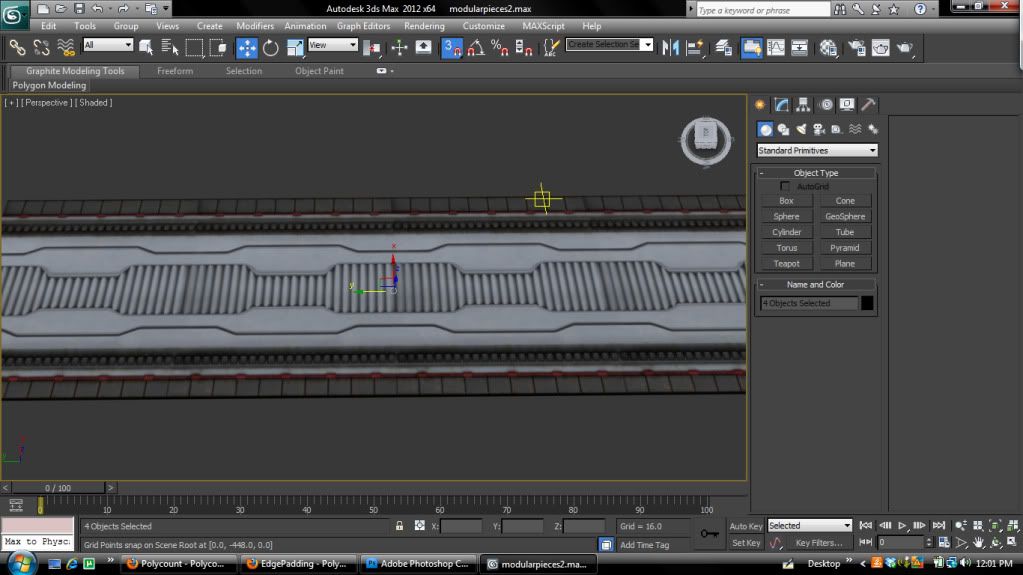
So I then try and separate the textures and the seams disappears.
1024x1024
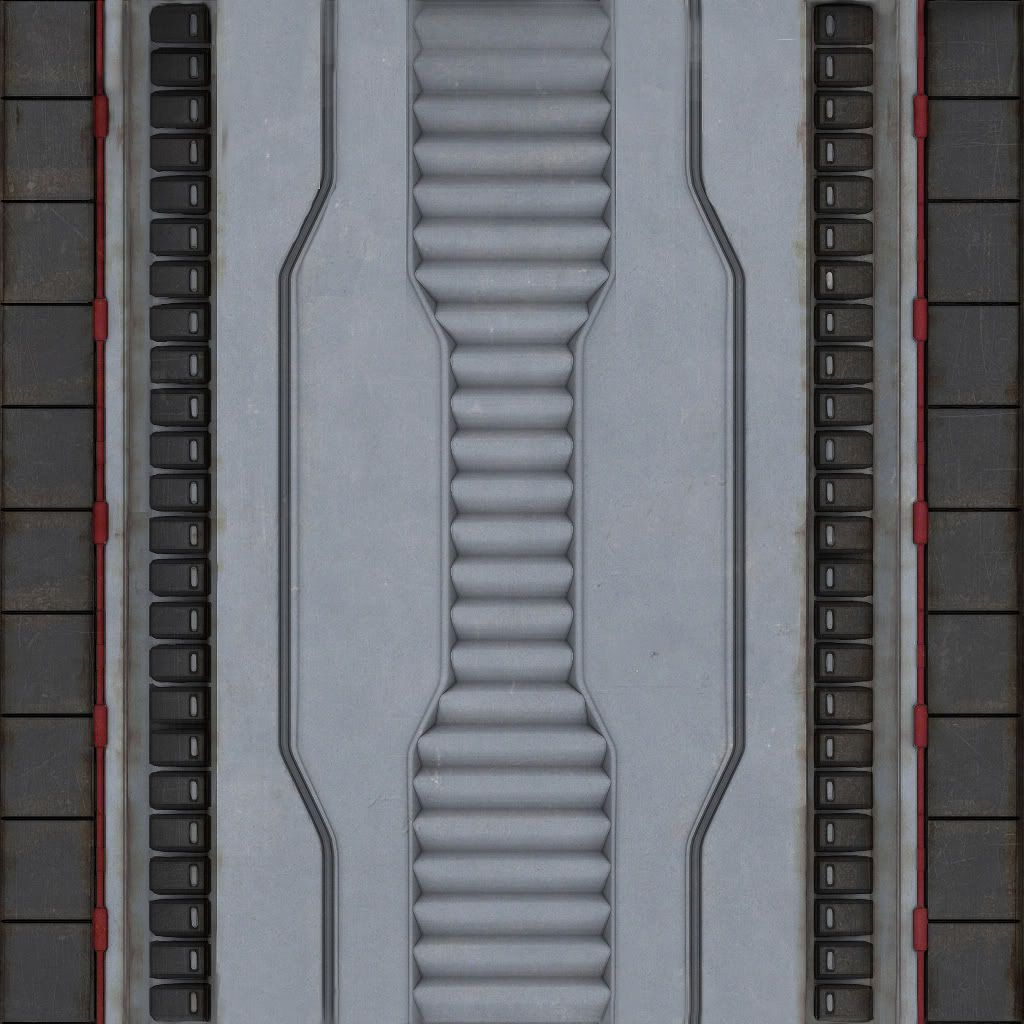
No Seams!
I know for a fact everything is lining up on the grid. I don't know much about mipmapping, but could it be that? I can actually make the seams disappear if I go into the UVW Unwrap editor and scale down the edges a little. This doesn't seem ideal as I did not have to do it with the 3dmotive modular tutorial and when I scale out I can still see small parts of the seam.
Just let me know if you need more pictures or have any questions that could help me solve my problem. Thanks guys.
I currently have a 2048x2048 modular texture.
I have made sure all individual pieces tile with themselves(edit I submitted the wrong file and this one might not but I have to correct one on my computer), but when put them together I get tiny black seams like the ones pictured below. They show up 3dsMax viewport, UDK, and Marmoset engine. The only exception is when I actually render my image in 3dsMax.
So I then try and separate the textures and the seams disappears.
1024x1024
No Seams!
I know for a fact everything is lining up on the grid. I don't know much about mipmapping, but could it be that? I can actually make the seams disappear if I go into the UVW Unwrap editor and scale down the edges a little. This doesn't seem ideal as I did not have to do it with the 3dmotive modular tutorial and when I scale out I can still see small parts of the seam.
Just let me know if you need more pictures or have any questions that could help me solve my problem. Thanks guys.
Replies
I usually just add some padding in my textures, even then though the seams still show up at a distance, maybe something could be done in the material editor.
It helps to not have high contrast stuff along the edges of each section. Also grouping textures by similar color/brightness helps too.
reason is your border will get washed out as the texture gets scaled down in each mip level. 8 px in 1024 get shrinked down to 4px in 512, to 2 px in 256 1 px in 128 etc.
so what you see is the downscaled blended pixels around your borders, its more obvious when neighbouring islands have strong contrast, eg. the dark part of the floortile hitting the gray part of the panel in the atlas.
you can add padding in photoshop with the xnormal filters.
Huh?
So, like everybody else already said, mipping is the problem. Kio was explaining why.
So lets say you UVs are laid out, and the border (where the black line happens) is perfectly on the last pixel for the texture. When the texture mips, you are cutting 50 percent of those pixels. So what can happen is that, instead of still being on the last pixel for the section its supposed to be on, it can pop over onto the next section, because its not perfectly on a pixel anymore.
People pad their textures to alleviate this. This is very common both for modular assets, and textures that have transparency. So if you have a small border...maybe 4 or 5 pixels..around your section of texture that is roughly the same color, then when the uvs shift onto that section, you don't notice a seam.
Your not seeing this when the section of texture is on its own instead of the atlas because when your texture mips, your uvs are either staying put or shifting off of the uv space (in which case your still picking up the correct color of the texture because it would just tile.)
So do what everybody is saying, pad your texture...give some space between the parts and have a border that has similar colors, and that will most likely fix your problem.
I hope that makes sense.