Home Digital Sketchbooks

Sketchbook: Digitalchef

Hi All,

I have been lurking in these forums for a few months and finally decided to get some projects going. I was really inspired to do some work and get it into UDK after seeing the Tristram Tunnels post from Darkusader. I want to get familiar with the workflow between zbrush and UDK while making an environment and get some detailed modular set pices with normal mapping. I need to focus on a speedy workflow. Feel free to post any comments or suggestions as I progress!

Reference image:
platform_01.jpg

Steps:
1. Block in the stage to get a good feel of how everything is going to be laid out.
2. Determine what pieces need to be modularized so I can copy and paste in UDK.
3. Even out the geometry in the selected pieces to get better results when taken to zbrush for detailing.
4. More to come as i work though......

Here are is my first attempt at blocking out the scene. I think it went a bit overboard on damaging all the smaller pieces, but proportions for the larger pieces are looking where I want them.
scene-render.jpg
scene-render_02.jpg
scene-render_03.jpg

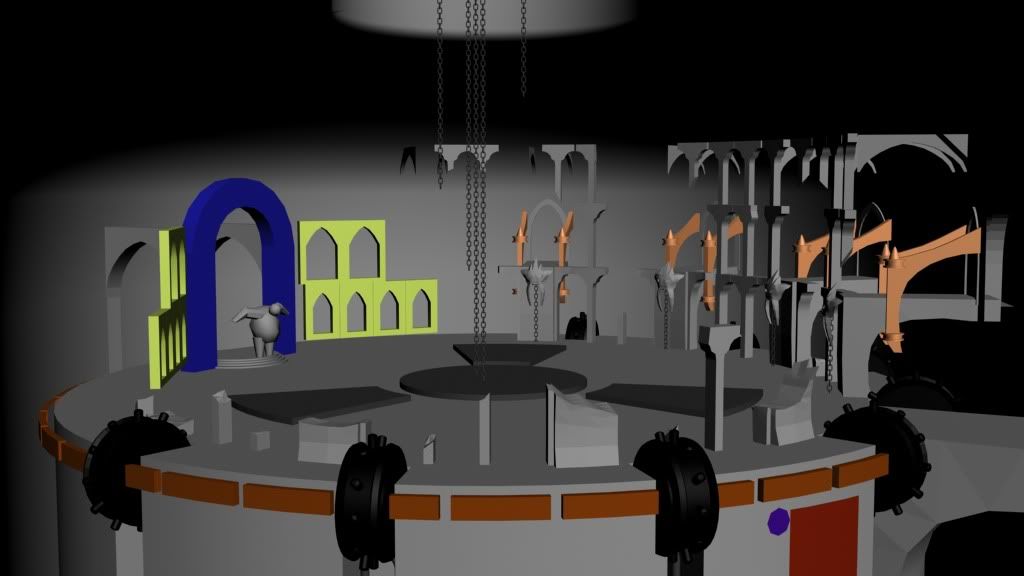
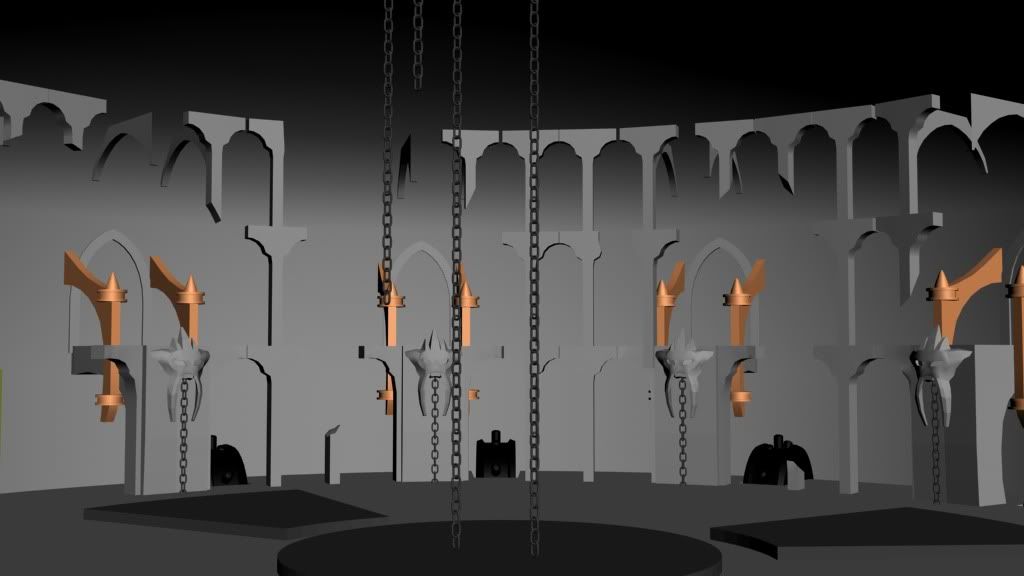
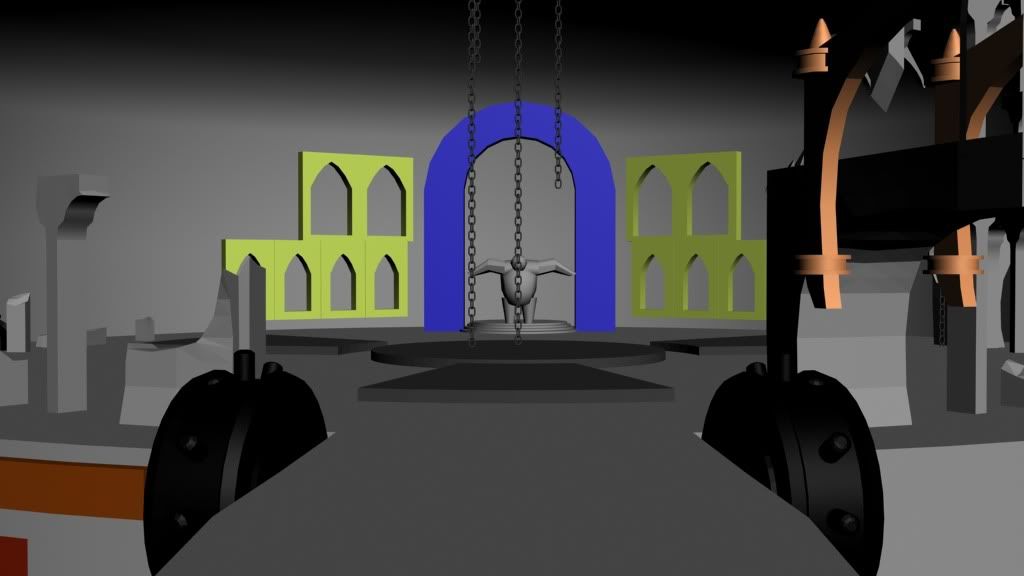
Next thing I am going to work on is getting all the polys evenly spaced for the pieces I want to bring to zbrush.

Replies

  • Digitalchef
    Options
    Offline / Send Message
    This is my first prop which went through the process. The results came out well, but I deffinately need to work on the speed. One thing I realize now is that I need more polys on the zbrush mesh around the cylindrical shape. The diffuse texture needs some more work as its only poly paint at this moment.
    arch_progress.jpg
  • Digitalchef
    Options
    Offline / Send Message
    Here are a few more pieces. I am getting the hang of creating a nice stone texture going.

    update.jpg
  • Digitalchef
    Options
    Offline / Send Message
    Here is my initial setup in UDK. I have some rough lighting going on but it still needs a lot of work. All the modular pieces are 512x512 or less with the diffuse and normals. I still need to set up the light maps and spec maps for the pieces. I have almost all of the pieces ready to go.

    udk_03.jpg
    udk_02.jpg
    udk_01.jpg
  • achillesian
    Options
    Offline / Send Message
    good progress!
  • Digitalchef
    Options
    Offline / Send Message
    One thing I think I am doing wrong is making each piece a unique texture. I probably should have made a tile-able stone and brick texture that I can layout on each mesh in certain areas. Creating each stone texture for each piece seems to be taking too much time.

    One thing I have come across is that sometimes, if I use xNormal with a low poly not created from Decimation master I get hard "cracks" in my texture bake on some edges. I am not sure if this is due the the cage being too small or what. I have used the tool in xnormal to determine the cage amount. Posting a screen shot soon.
  • theStoff
    Options
    Offline / Send Message
    theStoff greentooth
    Nice environment! You definitely should have tileable textures though, haha. As for the mapping issue I can't say for sure because I use Maya but if it is similar in any way maybe you have to soften the edges of your geometry first.
  • Digitalchef
    Options
    Offline / Send Message
    Thanks kosh and achil, I'm slowly working my way through each item and i see a light near the end of the tunnel!

    So this is the trouble I was having with the normal bake. I would get these nasty lines at the corners of the geometry. I photoshoped them out mostly and it seems to look. I might try beveling the edges and see if that helps next.

    stairs_wire.jpg
    stairs_bad_normals_normals.jpg
  • Digitalchef
    Options
    Offline / Send Message
    I'm working on a new environment using a different modular technique. Everything is going to be lined up on the grid so I can easily copy and paste the modular sections and create a building in UDK.

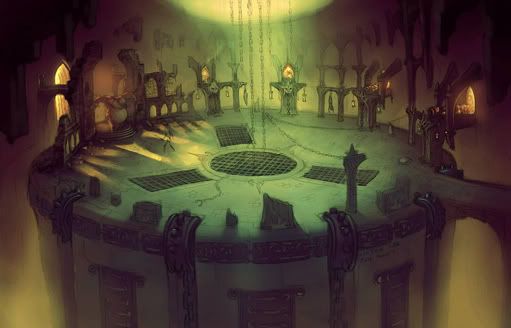
    This is the reference image I'm going to be working off of:
    complex_reference.jpg

    For the texture I aligned each modular part to the grid as in order to make sure each piece will snap together easily.

    Modular_Blgd_Diffuse.jpg
  • Digitalchef
    Options
    Offline / Send Message
    Here comes some modular parts!! Now to refine the diffuse texture and get some normals going on. I want to make some basic hi-poly meshes that will give me some nice depth to the main parts of the texture, like the bars on the windows and the indentations from the various pieces.
    parts.jpg


    wire.jpg
  • Digitalchef
    Options
    Offline / Send Message
    so for the normal texture i made some basic high poly shapes that would capture the main changes in the texture and overlayed some of the normals generated in photoshop. I wanted to keep the color dull, dirty, and old. Next step is to get all these pieces into UDK.

    Modular_Blgd_UDK_Normals.jpg
    Modular_Blgd_Diffuse.jpg
  • arun nagar
    Options
    Offline / Send Message
    arun nagar polycounter lvl 8
    nice progress, keep it up.:)
  • Digitalchef
    Options
    Offline / Send Message
    got all the pieces loaded into UDk and started stacking everything up. Seems to be looking ok and everything is snapping nicely to the grid!! I dont know if the normals are popping enough though and the lighting still needs work.

    complex.jpg
  • Digitalchef
    Options
    Offline / Send Message
    Messing around with the materials. Its a bit tricky with all the different nodes, but was able to get the normal, spec, and diffuse going as well as a nice reflection in the windows. I also added a moss texture that pokes through in the masked areas. Any comments on how to make this material pop a bit more? Next step I want to do is make some decals that will break up the textures a bit.

    material.jpg
  • Digitalchef
    Options
    Offline / Send Message
    Final layout for now. I added a bunch of texture decals to break up the look a bit and rough it up.

    complex_1.jpg
  • Eoq
    Options
    Offline / Send Message
    Eoq polycounter lvl 8
    That fog gave it a nice touch :) I think you could tone down the saturation on the brick decal (the one on the left) - somehow it feels out of place. Could be the lightning tho, duno - just putting my thoughts out there. Keep it up dude *fightooo*
  • Zeldrak
    Options
    Offline / Send Message
    Zeldrak polycounter lvl 8
    i like the way you show your step by step workflow, really helps me out on how i should also try to setup my workspace, since i am just starting to get into this and don't really know the steps properly (self teaching, uni is still a year away since i didn't get to go this year.) I like the high poly you did looks with the final layout, the setup looks cool, maybe add some more atmosphere? The fog gives it a nice touch, but i dunno if UDK has light shafts (correct term?)

    Anyway, awesome work :)
  • Digitalchef
    Options
    Offline / Send Message
    Thanks for your feed back guys. This is hardly a complete step by step, but I was just trying to get the jist of the process since I am pretty new to UDK my self. My advice is to read and view as much tutorials as possible. The only way to really know a software package is to get your hands dirty. I learned a lot about the work flow inbetween max and udk while doing this project and it has helped me greatly understand the "grid" and what it means to be "on the grid" I am sure there are a few steps I could have done a bit better when planning this layout, but I was taking notes on how long things took and how I could better improve the workflow.

    Now for my next project I am trying to produce a next-gen character for UCK, namely my holmboy Krang for TMNT!@!!!1!

    I found this sick concept of Krang by Teratophile and am going to start modeling like crazy in the next few days.

    My goals for this project is to:
    1. Efficiently model high poly sculp in zbrush (organic and hard surface)
    2. Export high poly and poly paint to an optimized low res mesh in 3ds max.
    3. Clean low poly mesh for animation and texturing.
    4. Attempt to get super sick model into UDK with textures and normals maps!!
    4c. Hopefuly everything goes to plan!!.


    Krang Reference:
    name_Teratophile.jpg
Sign In or Register to comment.