WIP Hand Painted Texturing...Crits please
I just graduated recently and I would really like to be an environment/texture artist for a game company. I usually lean more towards next gen modular assets using zbrush to sculpt and polypaint a lot of the texture. However i have always loved and been a fan of hand painted texturing and have always been jealous at the fact I wasn't very good at it.
Having said that I read through a couple tutorials floating around here and here is my first stab at it. I will be posting updates as well as multiple textures so please check back as this thread hopefully will be updated regularly.
First attempt at a hand painted texture
Rough blocking out
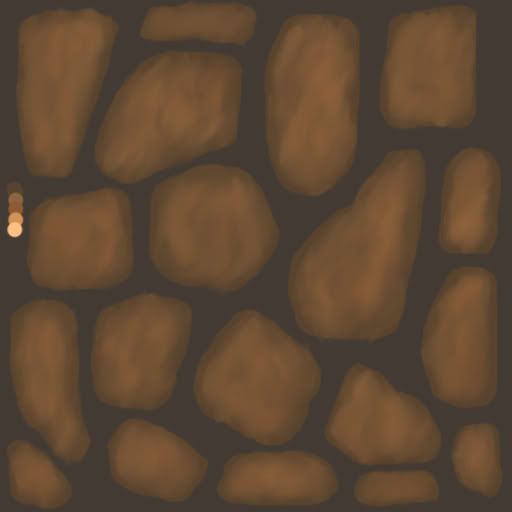
Refining with some shadows
Where I am currently at
any comments or critiques would be greatly appreciated I am really excited to start refining my hand painting texturing skills.")
Having said that I read through a couple tutorials floating around here and here is my first stab at it. I will be posting updates as well as multiple textures so please check back as this thread hopefully will be updated regularly.
First attempt at a hand painted texture
Rough blocking out
Refining with some shadows
Where I am currently at
any comments or critiques would be greatly appreciated I am really excited to start refining my hand painting texturing skills.
Replies
(nordahl154 is not too fond of gravy)
I think you could also desaturate it a tiny bit.
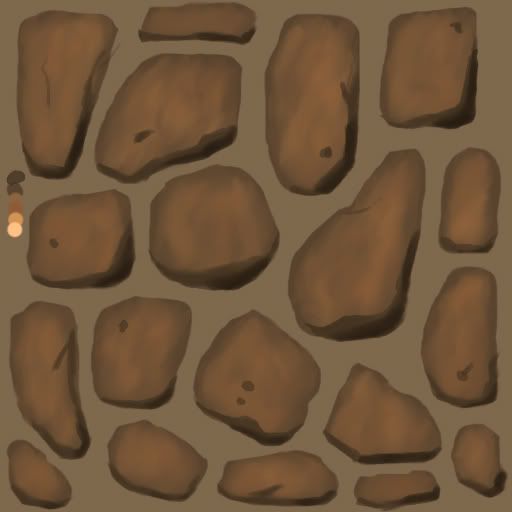
The rocks you are going should look a bit more like this I think:
I realize this image uses really diffuse lighting and thus has no real shadows and/or highlights, but it does get the point across. Rocks and stones are a rough surface and will never have such strong and sharp speculars.
I also think your rocks miss some texture at the moment, they are really just one color with with some dark mixed in and a few random holes.
Something that might help too is to give them a tiny bit of ambient occlusion to make it look like they are interacting with the cement/sand/dirt under them.
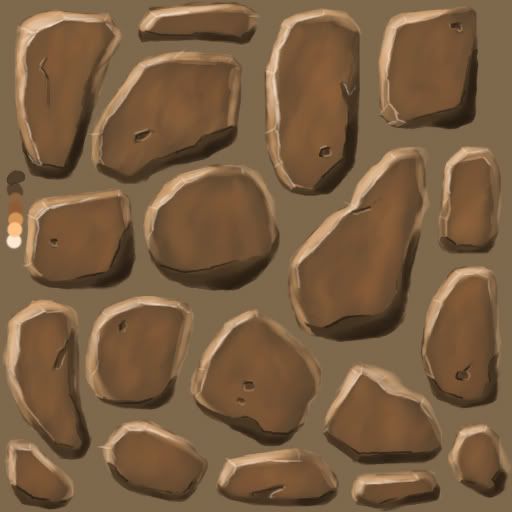
Your 4th image is a huge improvement from the first image, but it's not there yet. Keep it up!
It's all a little too brown at the moment, try put some very subtle cooler shades (such as purple, blue, green..) into the shadowed area's, this wil help it pop a little better.
im not using normal maps for it keres but thats good advice that ill take into consideration next time i do use them.
next update i will try and make them more evenly lit with a not so polished highlight as well as try to break up and texture the surface of the rocks. I will also add a little something to the background/grout.
I wasn't planning on making it tileable just wanted to practice painting but i might as well practice that too so I'm going to move some stuff around and hopefully it will be somewhat tileable on the next update.
next update will have more occlusion between the rocks and the ground in which they lay, as well as repositioning some things so i can tile it.
and the tiled version
Although one question, is this for a floor or wall? Because I dont know if I've seen any real places/refs that look like this.
I mean is it man made or natural made. I dont think I've seen or head of any natural processes that make something like this.
If it was man made then they would be placed more deliberately, closer together, for walking on or to enhance the adhesive properties. The rocks would have more variations in colour, even bricks have lots of variations in colour(you dont get pure rocks very easily). The ground needs some details, like moss dirt and other aspects.
The rocks also look like they are floating on a brown background.
in the last picture you can see where i got the main sizing and spacing from...I know most stones are layed out a lot closer as in the first two pictures.
the next update will hopefully have the stones more layed into the ground and not floating on it.
Surely if the are on the ground they would have very few shadows anyway, unless its really early morning or evening?
the last three are the same just playing with different levels of saturation and contrast. hopefully by the end of this thread i will be able to create decent hand painted textures of the basic materials stone, wood, metal, cloth, etc etc with my own personal style to them
there will most likely be an update of the stone path texture tomorrow