WIP: Military Charcter
polycounter lvl 17
Hey guys,
I'm not usually one for showing my work, but if I'm ever going to progress i need to get some constructive criticism.
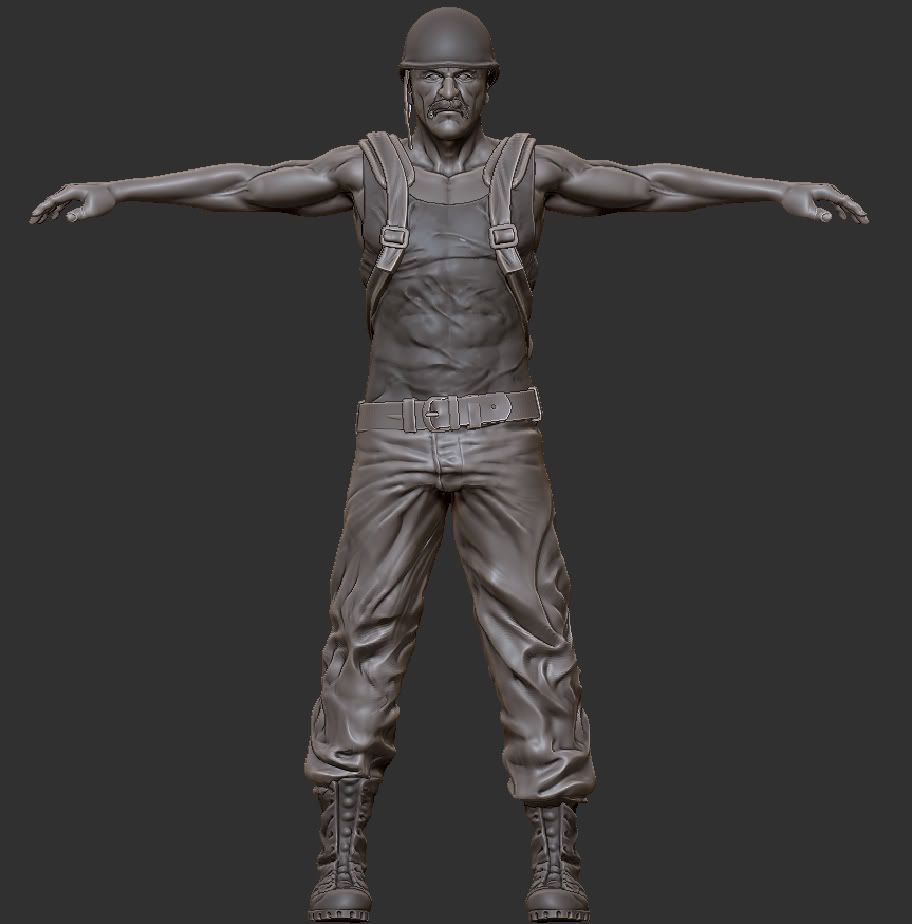
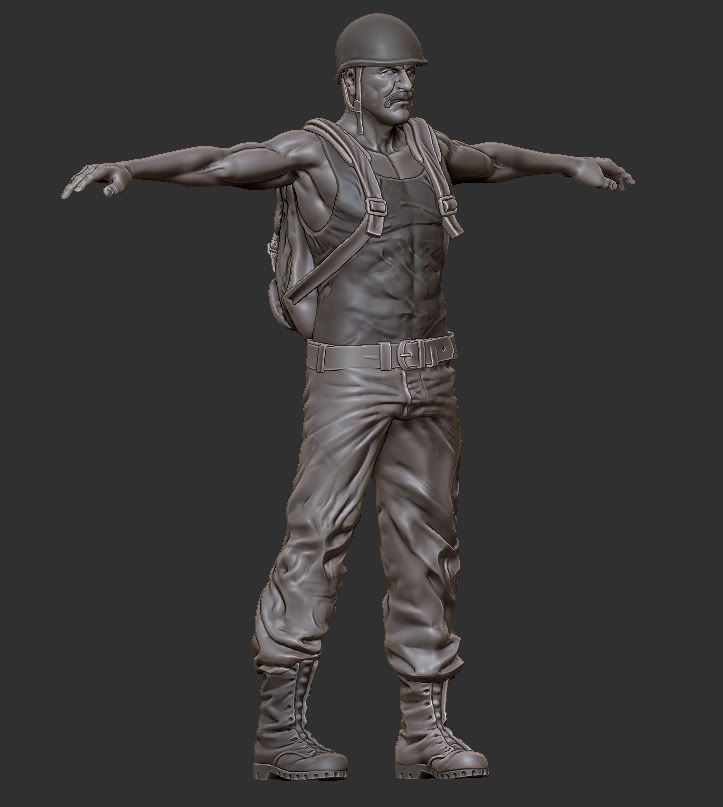
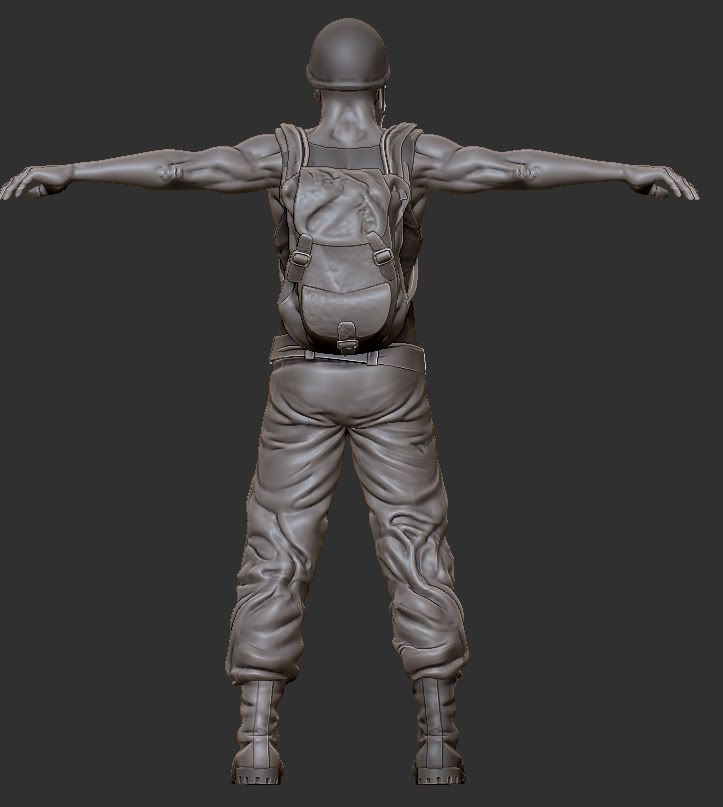
Below are a couple of images of a character that i am currently working on for a related UDK project. I am currently in the Zbrush stage of the designing but it would be great to get an outside perspective if theres anyone out there willing to do so before i continue on any more.
I'm not usually one for showing my work, but if I'm ever going to progress i need to get some constructive criticism.
Below are a couple of images of a character that i am currently working on for a related UDK project. I am currently in the Zbrush stage of the designing but it would be great to get an outside perspective if theres anyone out there willing to do so before i continue on any more.
Replies
neck muscles going from behind the jaw to the clavicle seem a little too inclined, they go down and fan out instead of turning like you have it.
Atm it's lookin a little messy, could do with a solid smoothing over pass and refining some larger/longer folds across the pants, just so it's a little easier to read.
Laces on the boots and a seam running downt he sides of the pants might help tie it all together too.
Other thing that stands out is the shoulder straps on the bag should be alot further apart towards the shoulders considering how loose the pack is (hope that makes sense).
Would also try pulling the belt and top of the pants up a bit too if you can. Torso is looking a little on the long side and the pelvis isn't reading as being long enough.
Helmet's a bit of an odd shape and seems a bit small. I always have massive probs with trying to do military type helmets tho, pain in the ass to get the shapes right ^^
Anyways, hope that helps. Good effort so far, some cleaning and touching up areas could really help fancy it up
What you and frell said about the pants is something ill crack on with straight away as well as all the other comments which are very fair.
Cheers for the help so far very much appreciated.
His skin in this way too vacuum sealed, its not normal to get the type of muscle definition on the bicep /shoulder where it folds back in on itself. Skin typically stretches over gaps and slides around ontop of the muscles. It's important to remember that skin doesn't follow muscle down into the bone, its stretched over the surface.
Now granted, you want to exaggerate some of the details so they aren't lost when you bake but what you're baking you want to be accurate to human physiology.
Remember that wrinkles occur for a reason, areas from the waist to knee are usually fairly wrinkle free, sure they have a crease or two but just barely, not full on wrinkle, then the kneww usually gets a lot in the back of the leg since that's where pants are stressed the most, and then it's pretty straight until the ankle where of course it's wrinkled due to the boots. Some of the shapes you have in the wrinkles overall seem random and not the way pants bend on a typical basis.
The backpack looks nice, you seem to have gotten the wrinkles a lot better on that in all the right places.
For what I think is the mustache it looks like a slug on his face, I know this could just be a placeholder though, but you might want to just plain consider taking it off and doing that part in maya/max with fur.
The helmet strap, i'm guessing you either plan to mirror or it's supposed to be broken off on one side? If it's a one strap helmet then it looks too short to reach to the other side.
Hope that helps you get a look from an outsiders perspective, keep it up, this piece has plenty of room to grow ^_^
The pants seem to be the main areas that everyone feels needs the most improvement, and to be fair more reference should have been used in the first place.
@DDuckworth: The mustache is something that i want to keep on the character but i am uncertain of the best approach for its creation as its going to be used in UDK (max fur work in UDK?). I could better whats already there or use alpha plains (which seems to be the unreal method).
Again i appreciate everyone taking the time to reply.
http://wiki.polycount.com/HairTechnique?action=show&redirect=Hair+Techniques
Overall it really comes down to two choices, poly hair or alpha planes, either can look fine but poly hair often fits a more cartoony/stylized character more than a realistic one like this one. When it comes to alpha planes it's all the same idea just different techniques on how to achieve it for different looks, take your pick!
The model consists of four layers, clothing, skin, muscles and bones, with the idea being to demonstrate the character being damaged through material transitions using Unreal.
The model with the clothing, helmet, bag is 16k tris, with the addition of the muscles and skeleton the total is 29k tris.
Hopefully the images below will better illustrate what i am talking about.
The following images are the result of some fun time in UDK.
and also a video: [ame="
[ame]
Heres a good video i found on ytube on the subject, (even though you might not revisit the already textured version, would be good to keep handy for future reference)
[ame="
Looks good though for your first human character! Keep it up.
[ame]
I am going to go back and adjust the speed at that the clothing disintegrates, at the moment its really past compared to this skin damage.