The BRAWL² Tournament Challenge has been announced!
It starts May 12, and ends Oct 17. Let's see what you got!
https://polycount.com/discussion/237047/the-brawl²-tournament
It starts May 12, and ends Oct 17. Let's see what you got!
https://polycount.com/discussion/237047/the-brawl²-tournament
Trying to learn 'Next Gen' texturing
Hello everyone!
First of all I'm new here. I browsed the forums past few months and decided to register Past week I've been watching some tutorials on next gen texturing, which I found very interesting. I tried to create a basic floor tile texture with mainly only photoshop. I think I'm going in the right direction for now, but maybe you guys have some crits or tips what could make it a little better.
So enough talking, here are the images:
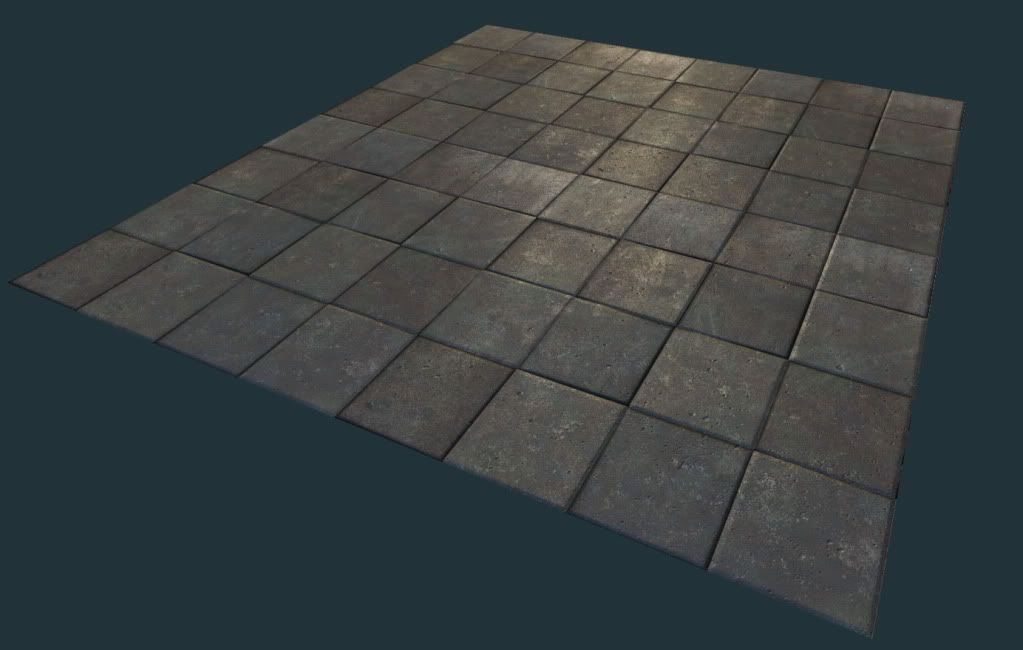
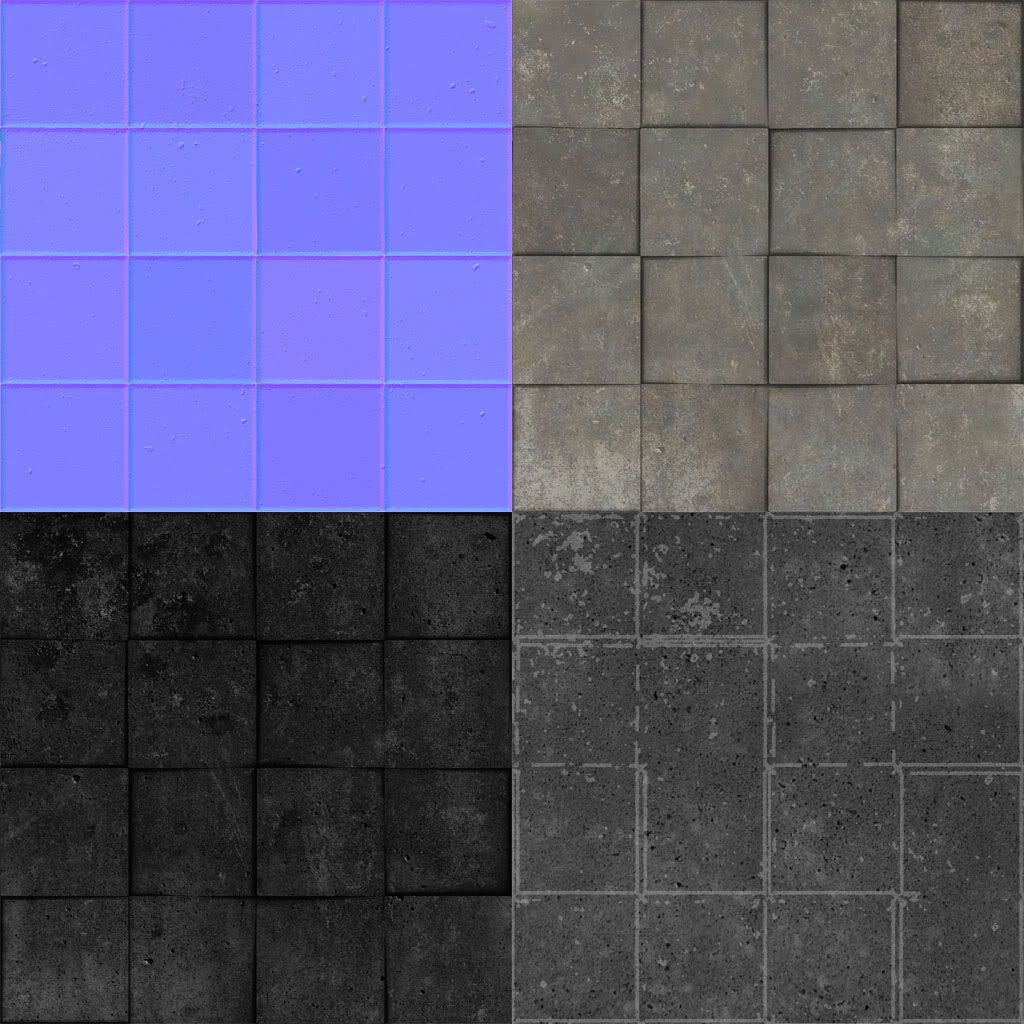
I'm not so sure what the 'glossiness' map does, so I haven't put that much effort in that map. I assume it has something to do with the 'scale' or 'size' of the specular highlight or something? The only thing I tried was to highlight the edges a bit more, felt like they were getting a sharper highlight that way. But I'm not sure about this. I also think my diffuse is lacking something.
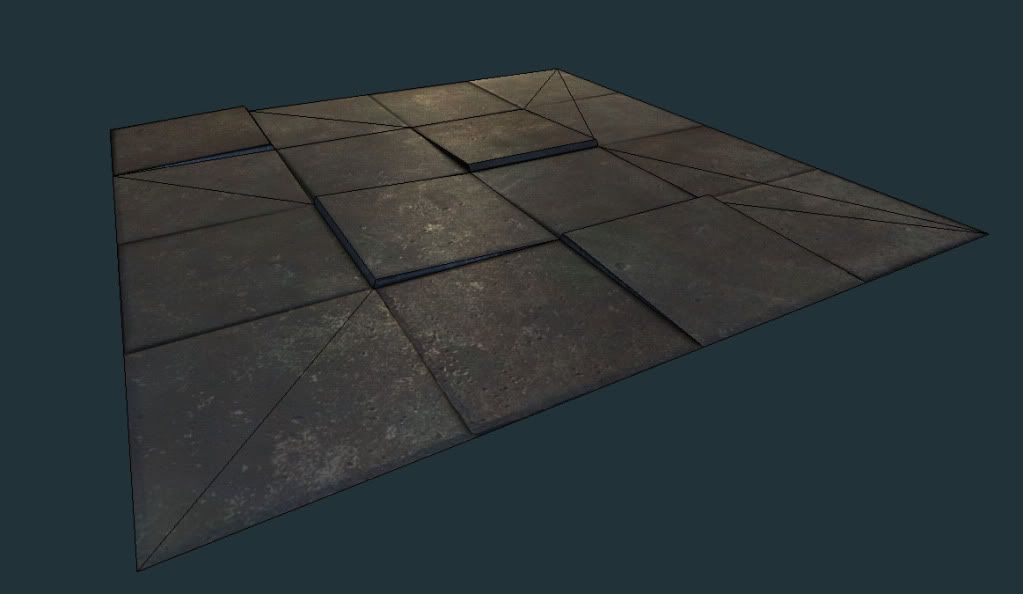
Then I looked at some floor meshes from other people and some things in UDK. I noticed many make some stones/tiles pop out using some simple geometry. This is my attempt:
Very fast and very fun to do in my opinion !
!
Thanks for reading!
-Fiz
First of all I'm new here. I browsed the forums past few months and decided to register
So enough talking, here are the images:


I'm not so sure what the 'glossiness' map does, so I haven't put that much effort in that map. I assume it has something to do with the 'scale' or 'size' of the specular highlight or something? The only thing I tried was to highlight the edges a bit more, felt like they were getting a sharper highlight that way. But I'm not sure about this. I also think my diffuse is lacking something.
Then I looked at some floor meshes from other people and some things in UDK. I noticed many make some stones/tiles pop out using some simple geometry. This is my attempt:

Very fast and very fun to do in my opinion
Thanks for reading!
-Fiz
Replies
Yep, that's exactly what it is. Gloss maps determine the speculars rate of falloff. White = sharp, black = gradual.
Gloss map.
For tutorials, maybe try the ones PhilipK did: http://www.philipk.net/tutorials.html
When you want a white highlight you use the inverse color there is on the diffuse map. When you want a burning/additive highlight you use a color you want to burn it with.
I decided not to use color in my spec map for the tile texture I made, just to keep it a bit more simple for now to learn
What you've got there is a pretty solid texture already, though.
Changed it just slightly.. Made it a little bit less 'clean'. Next I want to try some metalish kind of texture.. Let's see how that turns out
You are also correct about colour speculars needing inverse to create white, to counteract the diffuse colour. This is because the specular is usually added to the diffuse rather than multiplied, overlaid or whatever.
Check out this tutorial:
http://www.manufato.com/?p=902
I want to create something with a bit of geo for 'metal bars'. Just uhh some concrete block reinforced by metal bars in front of it or something. What would you guys suggest on how to create the normals for the metal bars? Creating the normals entirely in photoshop? ..Or using some highpoly surfaces to get the basic, or 'clean' normal information from?
I mainly want to practice the texturing part. Baking the normals is not the issue, have done that before, but never got into the texturing part that much..
take a look at that method in action here:
http://www.chrisalbeluhn.com/UT3_Add_variation_to_repeating_textures_Tutorial.html
I tried to make some metal bars. Which was harder than I thought it would be. I tried to get some 'welds' in by painting on the normal map. It didn't work out that well.. hmm..
Feel free to crit and comment
Thanks,
Fiz
And nice job on the floor tile i'm gonna try making a floor piece using this method.
@LMP.. Oh yeah... forgot about that.. When I was making the texture I thought about adding welds in the normal map. I was curious what it was going to look like, instead of keeping my eye on the subject itself.
@Almighty, Added a very quick gloss map. Difference is hard to spot, but I think the edges do pop a bit more and the paint is a bit duller now.
But it seems to lack some detail now. Maybe I should add some dirt, or some more (sharp) scratches?
-Fiz