Research Vehicle and Environment
Hey I just finished my Sophmore year as a Game Art Major at LCAD. This was a class assignment for Autodesk.
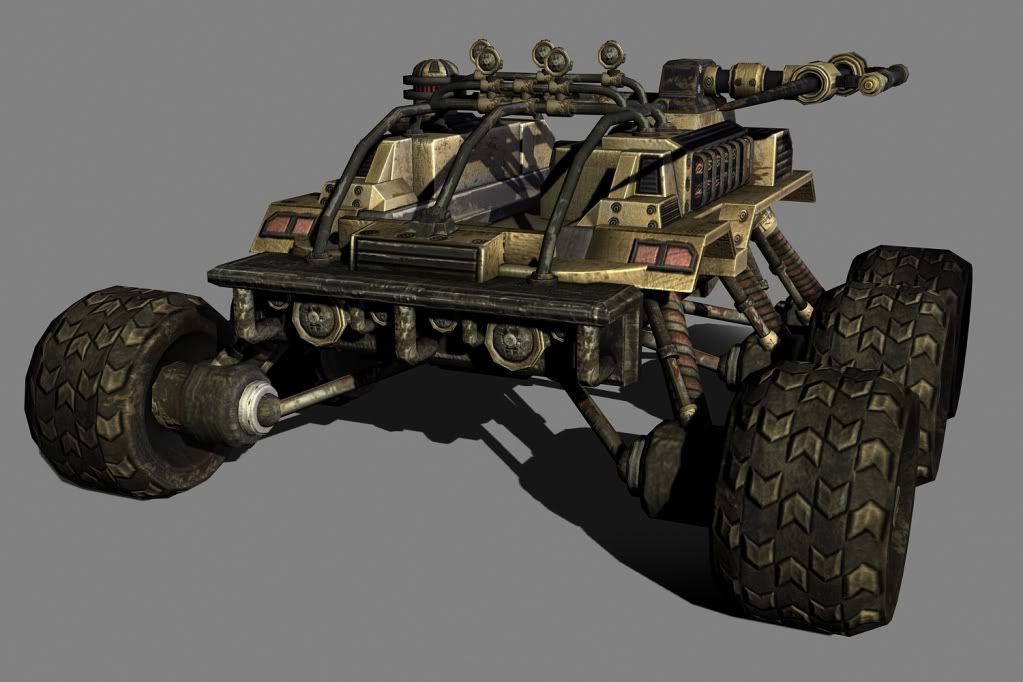
The theme was a post-apocalyptic world where mankind lived underground due to a nuclear fallout. Scientists created a science-research vehicle (The Arch II) to send back up to collect vapor and ground samples.
I chose an abandoned New York for my scene.
The project is already over, so I'll post up the final scene and w/e I have for the vehicle and street scene.
Everything was modeled, textured, and placed by me using 3dsmax, Photoshop, and the Unreal Development Kit (UDK).
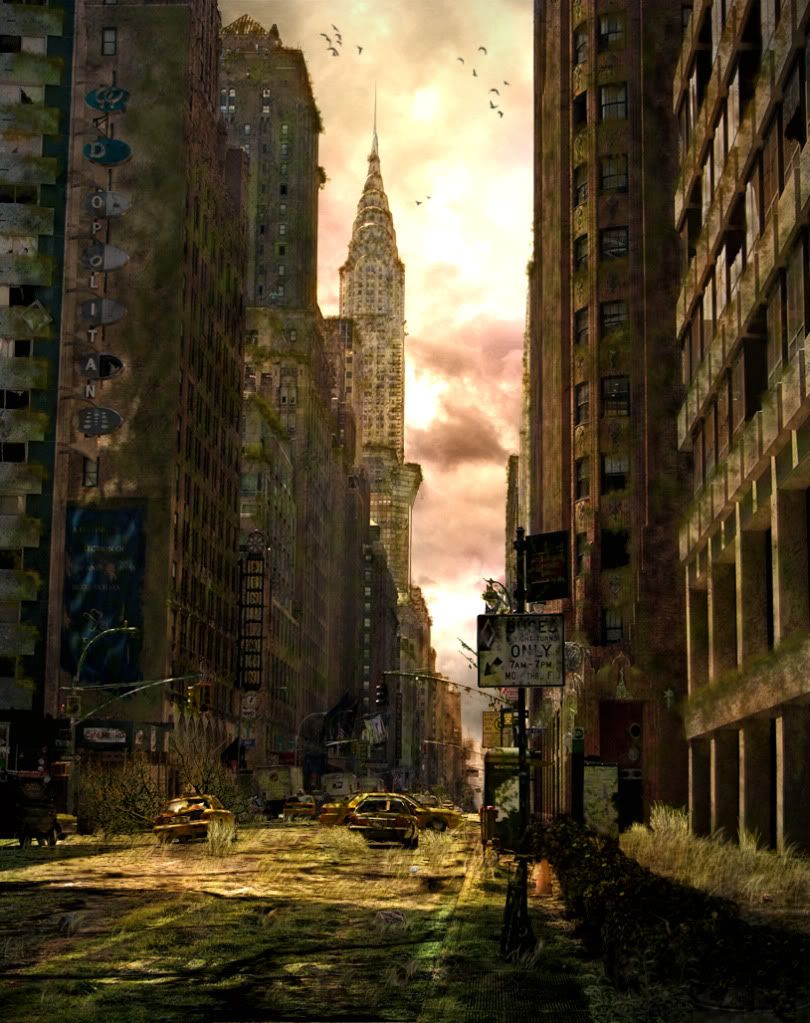
Here is the reference that I used for my scene. It was done by Mikolaj Dobrucki for a public photoshop tutorial :
Here is my final scene Rendered in UDK:
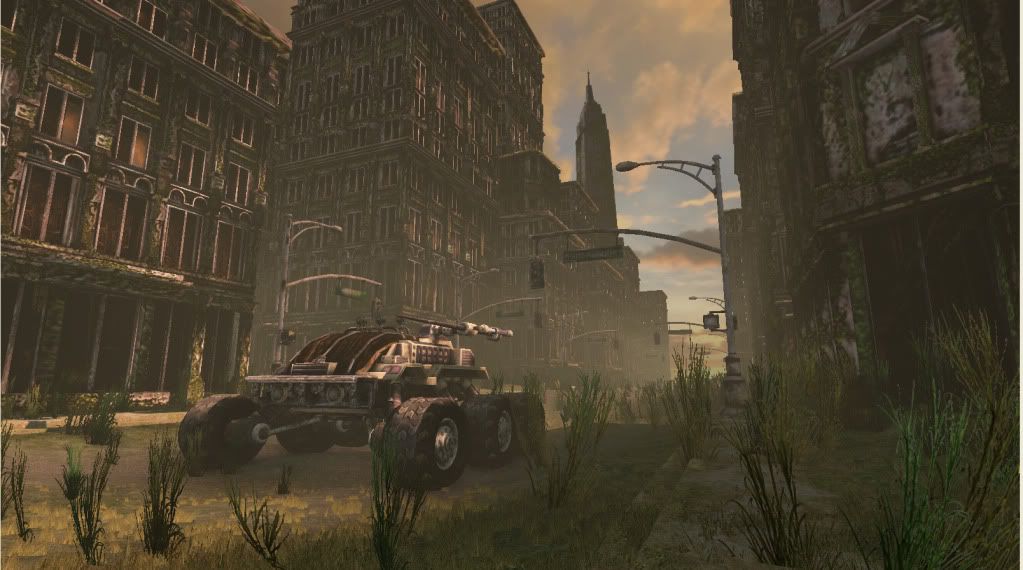
I kinda want to crop my render so that it is similar to the reference, but since it was just a screenshot, I don't really know how to do so. If anyone knows, I'd appreciate it if you let me know.
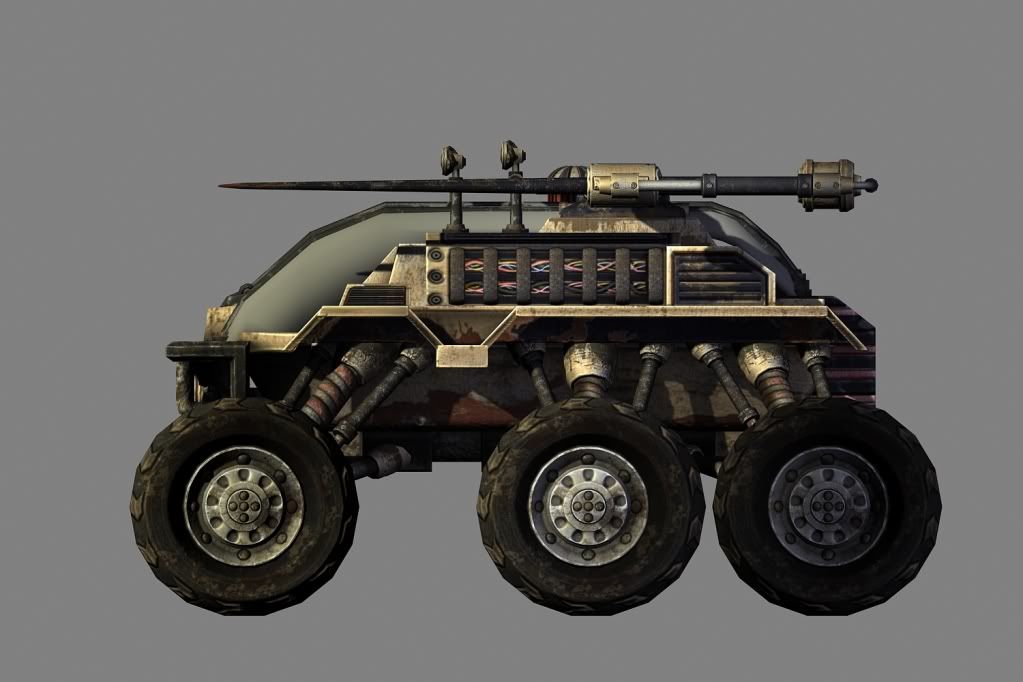
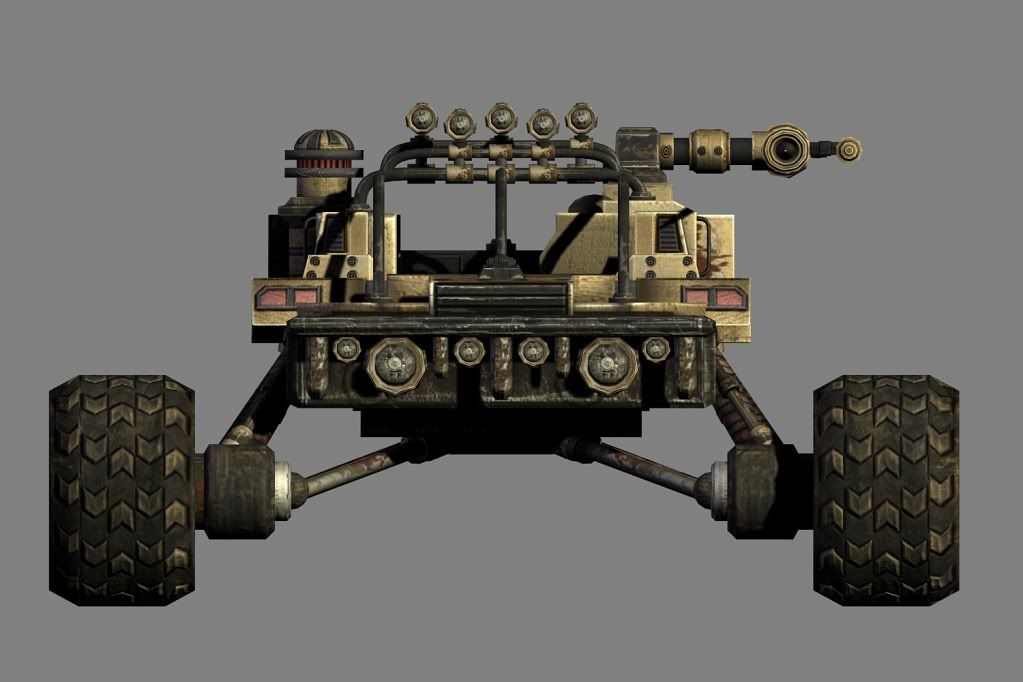
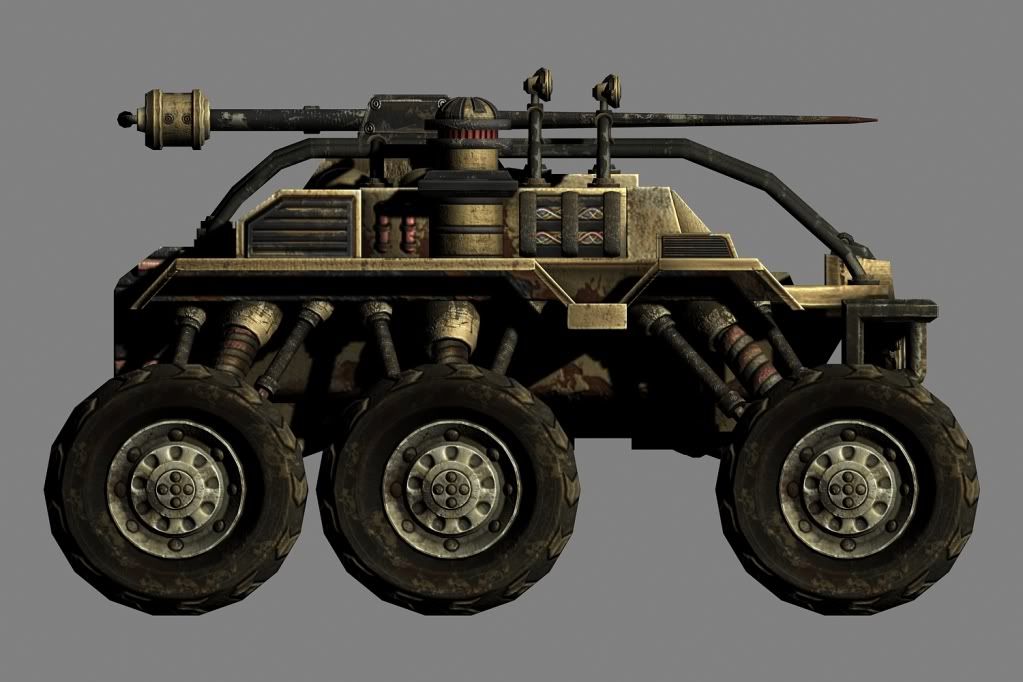
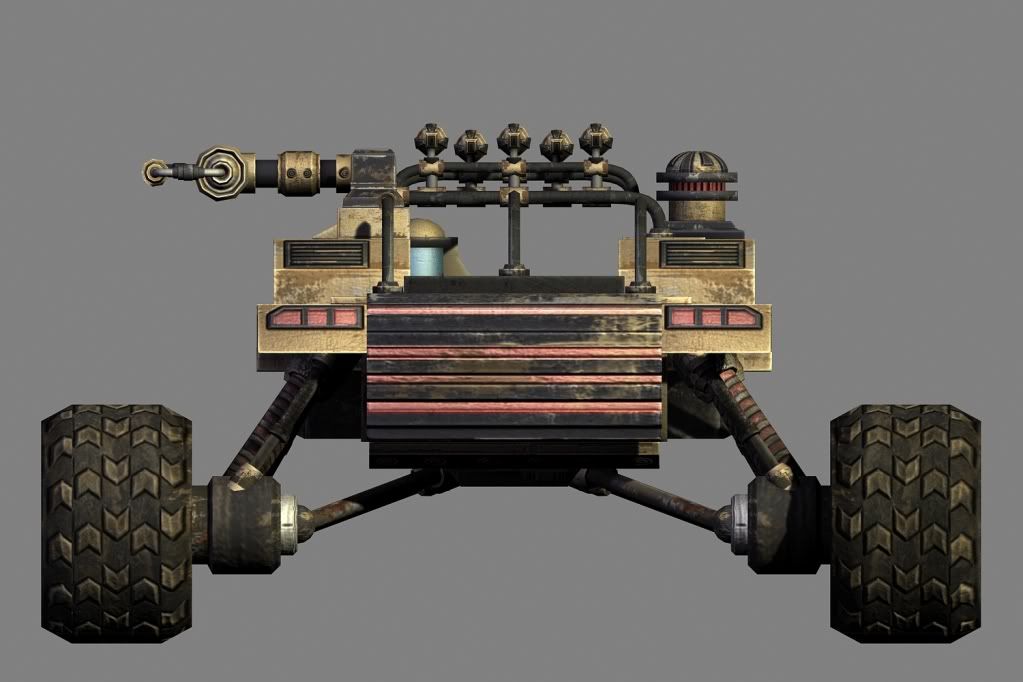
Here is my vehicle rendered in 3dsmax - some with and without its windows.
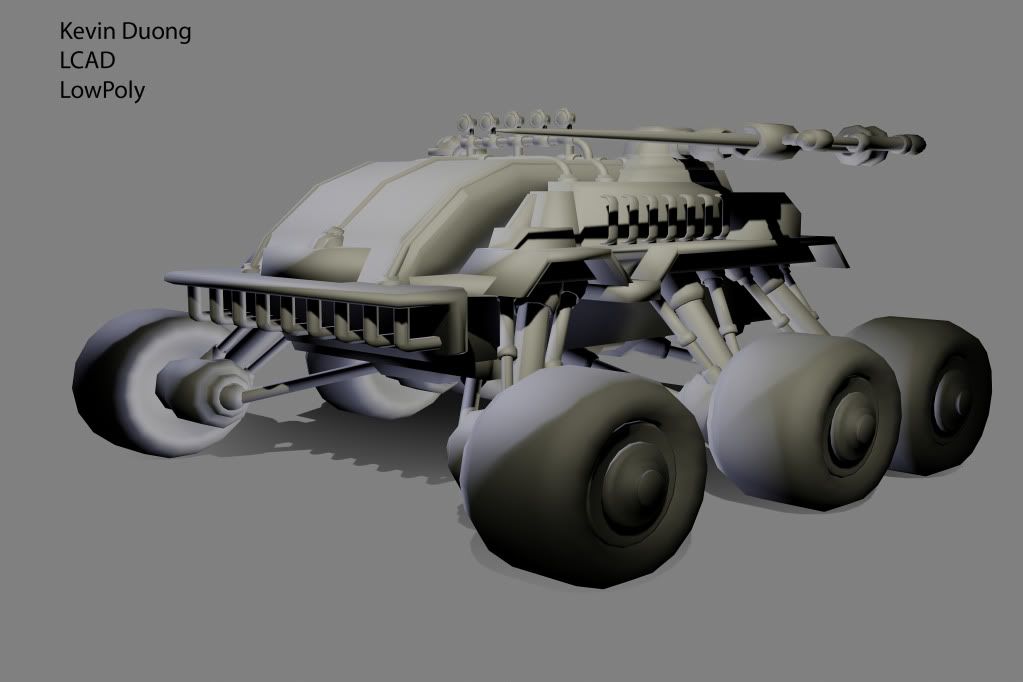
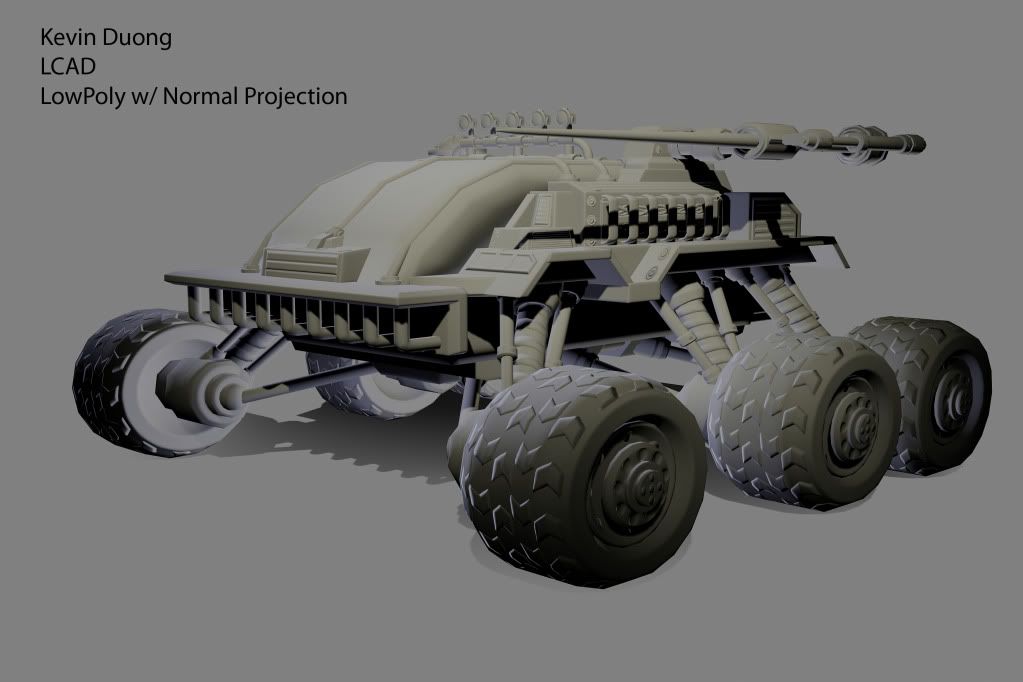
Here is the lowpoly model of the Arch II
and the lowpoly model with normal information projected
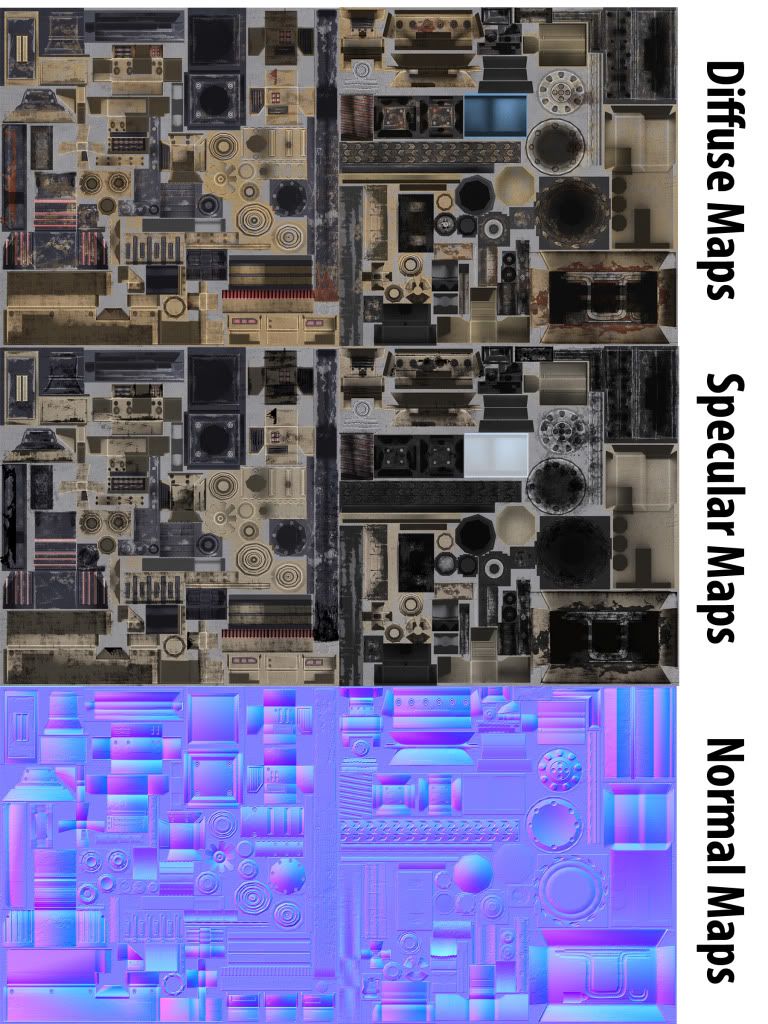
Here are the maps for the Arch II (used multi-sub object):
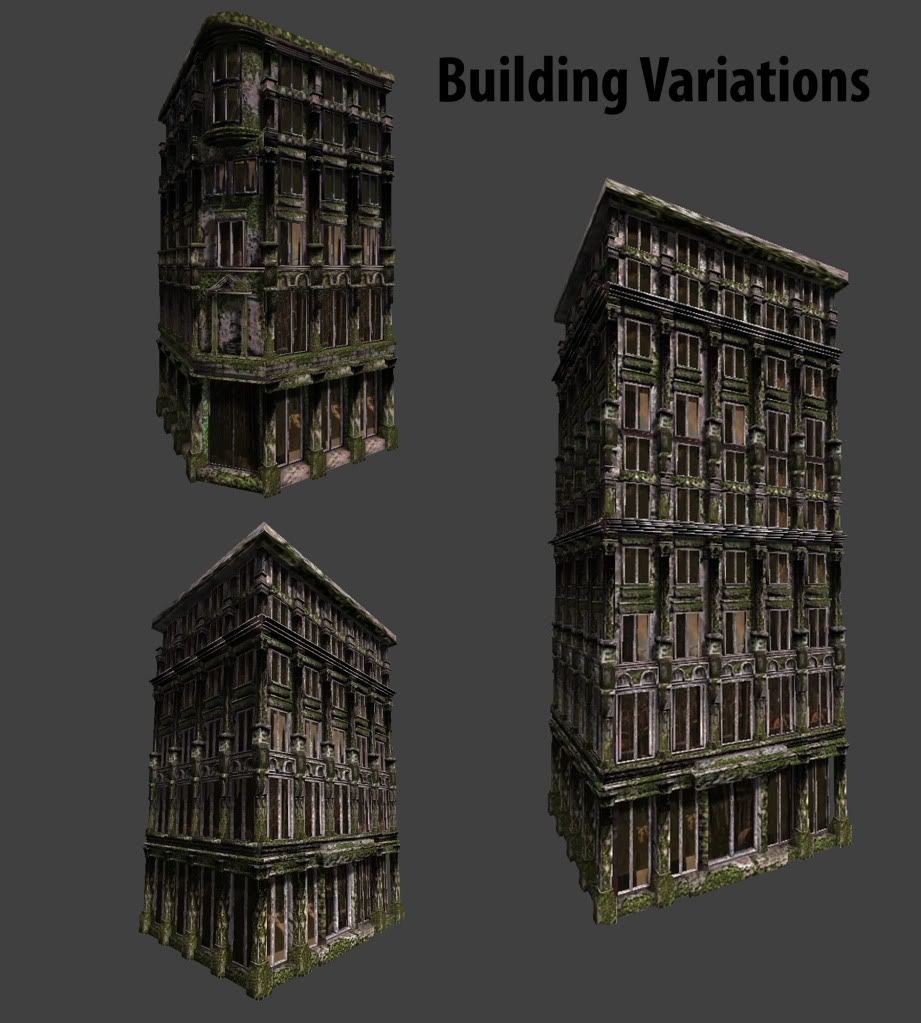
These are the buildings that I made for the scene:
I'm going to take some screen shots of my individual buildings, props, and terrain textures and will update soon.
It's finally been a year since I was introduced to 3D, so I still have a lot to learn. Any feedback would be awesome.
Kevin Duong
The theme was a post-apocalyptic world where mankind lived underground due to a nuclear fallout. Scientists created a science-research vehicle (The Arch II) to send back up to collect vapor and ground samples.
I chose an abandoned New York for my scene.
The project is already over, so I'll post up the final scene and w/e I have for the vehicle and street scene.
Everything was modeled, textured, and placed by me using 3dsmax, Photoshop, and the Unreal Development Kit (UDK).
Here is the reference that I used for my scene. It was done by Mikolaj Dobrucki for a public photoshop tutorial :
Here is my final scene Rendered in UDK:
I kinda want to crop my render so that it is similar to the reference, but since it was just a screenshot, I don't really know how to do so. If anyone knows, I'd appreciate it if you let me know.
Here is my vehicle rendered in 3dsmax - some with and without its windows.
Here is the lowpoly model of the Arch II
and the lowpoly model with normal information projected
Here are the maps for the Arch II (used multi-sub object):
These are the buildings that I made for the scene:
I'm going to take some screen shots of my individual buildings, props, and terrain textures and will update soon.
It's finally been a year since I was introduced to 3D, so I still have a lot to learn. Any feedback would be awesome.
Kevin Duong
Replies
SouthpawSid - this project wasn't for Don's class. I was in his class last semester, but am really hoping to take it again as independent studies. None of this would have happened if it wasn't for him!
PredatorGSR - I will definitely take that into consideration. Everything in UDK was done in 1 night as I was teaching myself the program haha... Now I have all summer to really polish it up.
-Nick
Snader - The needle is a hydraulic based ground sampler. If the vehicle was rigged, it would ideally extend the arm out where it wouldn't harm the wheels, rotate it towards the ground and slam it through the surface, thus taking the samples. On the other side is a pretty simple vapor sampler which just let's w/e is in the air float in, then it closes. Probably will update the jpgs with descriptions of each part. Hope that clarifies things for anyone wondering.
SouthpawSid - couldn't agree with you more, I take it as a big compliment
I think you'd gain a ton from finding a way to pose and rest the needle such that it doesn't point forward, but instead looks "stowed," making it kind of evocative of a tied-down whip antenna or something.
Now, onto the asshole tearing:
The grass and green shit all along the buildings are far too uniform to make sense. It would generally be heavier near the bottom and work it's way up if it were this thick. I know you are doing this modularly, but even some of the exact same building panels near the top with NO green shit all over it would give the illusion of growth.
You should also have foliage cards or geometry you can place to help improve the transition, as well as vertex painting would make a huge difference over the exact same building piece with the exact same amount of green.
The streets need more debris. Where did the trash, plastic bottles, aluminum cans, etc. go? That sort of stuff lasts a really long time and would still be around. The sheer physics of what happens to buildings after 20-100 years of decay is that eventually they will simply break down and fall apart upon themselves. LOTS of trash and debris would still be around even still after this time period.
I highly suggest you add http://www.opacity.us/ to your library of references. This site is a goldmine when it comes to urban decay. At the very bottom make sure you look at "Archived Sites".
I really, really don't like those tires. A tire is an object that could be used for other purposes or vehicles, so there is no reason you could't simply make a badass tire as a separate object and texture and use those. Check out this tutorial over at 3dtotal.com and use it as a reference for some ideas of a good looking tire:
http://3dtotal.com/team/Tutorials_3/tyre_modelling/tyre_modelling_01.php
Your textures feel very first pass. I see some AO, some Crazybump-age in there, some edge scratching here and there, but that's about it. Needs another pass at rust and dirt buildup in the cracks and corners, a better yellow metal base texture, paint chipped away revealing the bare metal underneath, getting a nice glass shader to actually work (snicker) etc.
Now that the demands of that class are out of the way, you could either take this even further or take what you have learned for your next scene / vehicle. Don't go 16 weeks next time before putting it up on polycount either :poly118:
Kevin