Forest Lake Cabin Environment WIP

Hey everyone, I'm about to get started on my next portfolio piece.
Following some advice from a few companies I've been in touch with through LinkedIn, one thing my portfolio lacks massively is any kind of organic/natural environment; trees/water/grass etc.
So I've decided to attempt an environment which includes all of those elements.
Not only am I going to 'borrow' heavily from some of the techniques in Adam's thread of awesomeness, I'm taking a similar approach in how I go about creating it, working on sections at a time, getting them looking pretty good, moving on and then fixing anything later.
Progress will indeed be very slow since I've got a fair bit of work on right now, but I'm looking forward to it.
Intended Goal:
Create a natural environment making use of trees, terrain, foliage, water, rocks and assembled/rendered in UDK.
Intended Experience Gains:
I'll be using Maya, since a couple of the companies I might be applying to in the future explicitly state they use Maya. I used to work exclusively in Maya about 2 years ago so it'll be more like a refresher than a whole new learning curve. I've been using Max for all my game art over the last year or so though so some aspects of the workflow will be new to me.
I want to explore texture blending on terrain in UDK and also water, both of which I've never tried out yet.
I'd like to explore Speedtree too, although I may create trees in Maya depending on how that goes.
Explore the effects of lighting on atmosphere. I would like to do a day/night version of the finished piece and try to make each look equally impressive, of course lighting will be a key factor here.
Explore particle effects in UDK to create decent smoke/fire and ideally those sparks/embers that fly around near fire.
I'd also like to use Mudbox projection painting and then texture baking too and see if/how it benefits my workflow.
I've sketched out a rough concept, I pretty much suck at drawing environments and yes I might have taken a pic of my sketchbook using my phone since I haven't got a scanner handy.
I won't list the intended props as you get an idea of what I wanna do in the concept, although please feel free to suggest anything you think would look good in the scene or any considerations you think I should make.
Concept:

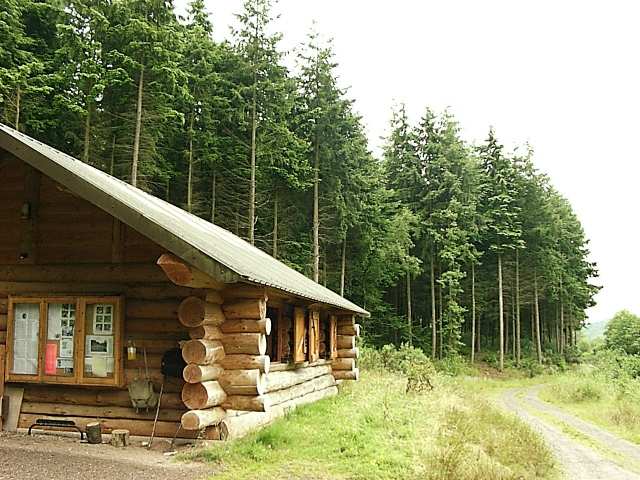
Some Reference:


Following some advice from a few companies I've been in touch with through LinkedIn, one thing my portfolio lacks massively is any kind of organic/natural environment; trees/water/grass etc.
So I've decided to attempt an environment which includes all of those elements.
Not only am I going to 'borrow' heavily from some of the techniques in Adam's thread of awesomeness, I'm taking a similar approach in how I go about creating it, working on sections at a time, getting them looking pretty good, moving on and then fixing anything later.
Progress will indeed be very slow since I've got a fair bit of work on right now, but I'm looking forward to it.
Intended Goal:
Create a natural environment making use of trees, terrain, foliage, water, rocks and assembled/rendered in UDK.
Intended Experience Gains:
I'll be using Maya, since a couple of the companies I might be applying to in the future explicitly state they use Maya. I used to work exclusively in Maya about 2 years ago so it'll be more like a refresher than a whole new learning curve. I've been using Max for all my game art over the last year or so though so some aspects of the workflow will be new to me.
I want to explore texture blending on terrain in UDK and also water, both of which I've never tried out yet.
I'd like to explore Speedtree too, although I may create trees in Maya depending on how that goes.
Explore the effects of lighting on atmosphere. I would like to do a day/night version of the finished piece and try to make each look equally impressive, of course lighting will be a key factor here.
Explore particle effects in UDK to create decent smoke/fire and ideally those sparks/embers that fly around near fire.
I'd also like to use Mudbox projection painting and then texture baking too and see if/how it benefits my workflow.
I've sketched out a rough concept, I pretty much suck at drawing environments and yes I might have taken a pic of my sketchbook using my phone since I haven't got a scanner handy.
I won't list the intended props as you get an idea of what I wanna do in the concept, although please feel free to suggest anything you think would look good in the scene or any considerations you think I should make.
Concept:
Some Reference:
Replies
Concept looks cool. Are you going to do a darker scene, or something just like your references?
I think I'm just gonna stick with the style of the ref, kinda realism really without any dark side to the theme. I considered coming up with a decent storyline behind it but in all honesty... I couldn't. Again, suggestions are welcome
This was partly to get an idea of what I wanted the rocks to look like, and partly to figure out a good way of doing them. I'm considering trying a different approach where rather than just sculpt one big 'block' in ZBrush, I might make several (10 or so) smaller rocks and jam them together in Max, then retopo over that and bake so there's better definition in the crevices.
I wanna get this environment right as it is intended to be a decent portfolio piece so if it takes me 6 months to get a single decent rock then so be it.
This is one of the rock sections that will line the shore of the lake, I've sculpted both sides so it can be reused/rotated where necessary.
So if anyones got any suggestions as to how to improve that'd be awesome. I'm kinda using this as a 'base' on which to improve.
In regards to the rocks i think they lack any real depth inbetween them.
I think maybe the making smaller rocks idea would work alot better.
Having said that the texture is beautiful
I agree I think the lack of depth is too noticeable, they look too much like a sinlge piece of rock which isn't necessarily a bad thing since some ref I've looked at of shoreline rock is indeed 'one piece' but then it wouldn't have the definition that I've sculpted in. So it's kind of a mismatch as it stands.
Your rock piece is not nearly as jagged as the references..but you could just make a couple little rock pieces to break it up and pop out of this shape to give more depth. The piece you have could serve as a good base for that area.
If you make 10 different individual rocks then you can make a couple rock formations out of them.
I'm just not sure how to go about the separate rocks way. Would it be better to do multiple rocks each with a highpoly/lowpoly and their own texture, or make multiple high polys, put them together then retopo over that and texture it as one piece.
Both ways have their benefits. Obviously keeping them separate will then allow me to use them singularly around the scene later, although that will mean a lot of assembling in UDK. Having a single baked/retopo'd piece would be much easier to place and manipulate in UDK, but probably wouldn't look as good.
Of course I could attach the multiple low polys before exporting them but then I've got to plan ahead with the UV space and make sure they're all fitting in the same texture. I suppose if I did it that way then I could have 10 or so rocks all referencing the same texture as separates or combinations which would be efficient and useful.
EDIT: Thinking about it, if I did keep them separate, I wouldn't be able to texture them as nicely where there is moss in crevices since the crevices would be in different places dependent on how the rocks were placed.
Hmm I think I will model multiple high polys, assemble them in Max and retopo a single piece over the top, then keep the separate rocks to retopo individually later to reuse as smaller rock piles or singular rocks.
To be honest i dont really know how to do such things as rocks and trees etc so ill watch this thread
i know about Adams thread but i dont have the time to read through it atm but uni finshes in a couple of weeks so the i can have a read trhough!
but yeah great thinking ob the rocks
This ^
That's how I would do. I like the theme for this piece, will watch this thread for sure.
I've been thinking about the best way to do this multiple rock thing and I'm having a hard time figuring out a good workflow. I wanna plan it right to maximize effiency later on.
Basically, I want to have multiple rock pieces, both high and low poly which can be used individually, and then a retopo'd version of a bunch of them together.
That in itself is fine, and simple enough to do. However, I want to polypaint the textures in Mudbox, and I ideally wanna use the same texture sheet for all (or maybe 5 on each or something) the individual rock pieces (not the combined one, just the separates).
So I'm thinking it's a complex workflow but the way I've planned is:
Create multiple high poly rocks, basic unwrap on them all. Jam a bunch together and export to Mud for painting, then back into Max, retopo and bake. That's the combined rock piece done.
For the separates, paint each in Mud and export separately, retopo each then get them all into a scene and UV them, making sure they each have unique space but all fit on one sheet. Then export them out separately, bake each one and have them all reference the same texture sheet.
That seems complex, but I cant think of a better way to do it... if anyones got any better ideas I'd appreciate it!
That was very efficient to create rock cliffs with enough variation and modularity for UE3.
And when I needed it, I created smaller rocks formations from those three assets picking some polys groups in those and creating 10 small rock variations more for the map.
I think now it was a pretty efficient technique texture wise because it minimizes the texture fetches in the scene since all the rocks use the same shader/single texture.
That's my workflow, maybe not the best, but it is for a large scale map where repetition is needed and too much texture space cannot be afforded.
In all honesty progress is non-existent right now!
I've spent the last day or so playing around with the rocks to come up with the best solution.
It looks like multiple rocks aren't gonna work, at least not how I want them to. My plan was to create about 10 individual rocks, all base meshed, UV'd and then sculpted. Import all of those into Maya (although I tested it in Max) and create a kind of 'rock pile / shoreline' thing. Make sure the UV's are not overlapping, combine all the rocks into one OBJ and then paint in Mudbox. After that, retopo and bake the normals and diffuse.
I'm having a few problems with that workflow though. To get a decent looking rock sculpt, the minimum polycount in ZBrush needs to be like 100k or so. You can get a decent rock 'shape' for much less obviously but I'd like the count to be high enough to use alpha'd cracks, and edge detail etc and this is non-existent dropped below like 100k polys.
I could use decimation master, but then I lose my UV's and UV'ing 10 or so rocks which have been decimated would be a horrible job and one I'm not willing to do before I've explored alternatives at least.
So this results in a huuuuge poly count inside Max, because each rock is different and even with instancing, that becomes irrelevant once the meshes are combined.
So I'm gonna attempt it another way, build a much closer base mesh initially, one that already has deep crevices and protruding rocks and retains this form when SubD'd. Take it into ZBrush and sculpt it out a little, then send it to Mudbox for painting, and retopo bake as originally planned. This should solve the problem I was originally having where I couldn't get decent rock protrusions from my first basemesh which resulted in the blobby rock I did.
I'll create 3 or 4 using this method and then some smaller individual ones which will be scattered around the scene.
The problem with that method though is that if I want to create something similar to my first ref photo, it's not only gonna take a looooong time to place all those rocks, it would also be difficult to reposition if I made any terrain changes. Whereas with a few large meshes, I could reposition/rescale them as necessary without too much problem.
The other reason is that I want to be able to get the texture definition. Like the moss growing in the cracks and crevices and the highlights on the exposed edges. If I used the singular rocks, the highlights would probably be incorrect in parts and the moss would just be patched around.
I do intend to 'pile' some of the individual rocks a bit though, just not in such a large scale for the shore.
That should make placing rocks very easy :P
And ParoXum has the solution for your moss
Edit: I can't get it to jump to that post, just go to the top and find the advanced mesh placement link. It's under the September 2009 posts.
The mesh placement tool looks like a possible solution and combined with mesh painting I would indeed be able to get the same end result as I'm planning.
Just to clarify though, can you adjust or randomize the scale/rotation (I know they align to the surface) of static meshes when using the tool? I had a look at the documentation but other than explain what it does, there didn't seem to be a lot of info unless I'm missing something.
Yeah
I'll give it a go!
I tried the mesh placement tool with smaller rocks (just some basic shapes for the sake of trying it out) and I don't think it's gonna work out. It's definitely quick to scatter the rocks and pile them up but it needs too much work to adjust each one afterwards to get a decent scale/rotation varation. Also further adjustment is necessary if I change up the terrain or need to reposition large groups of them.
So I'm going back to the sculpted rock sections, I'd like some crit on this update. It's definitely an improvement on the first attempt, the silhouette is a bit sharper which my original was lacking for sure.
The plan is to create 3 or 4 of these larger pieces and rotate/rescale to give a variation.
I haven't finalized the texture yet so I've included some different stone textures.
as far as the texture goes i like the last one, its kind of a mixture of the first two
the first one looks a bit too much like clay and the second one looks too washed out.
Yeah it looks better. But to me it still doesn't look like rocks that you find untouched in nature/forests.
The texturing is well done, with good highlights, good grain, the moss in the crevices is well placed I think, but some crevices may be too dark, I'm not sure due to the -maybe- lighting in your presentation.
The problem imho now is how to make those rocks look like they were there for hundreds of years, untouched by men's hands. Here it looks like good man-sculpted ones.
But you're on a good way since your skills are there, now it's just a matter of shapes.
I'm kinda undecided on the textures, the first one is definitely too dark though.
As you say ParoXum, it's just gonna be a case of nailing the shapes, I see what you mean, they still lack a totally 'natural' look.
I've just tried these in UDK too see how they looked with Lightmass. Fortunately, the crevices get a nice all-over shadowing which a) helps spread the AO a bit, and b)helps sell the 'separate rocks' look.
Well I've got the workflow down to an art now