Workshop #1 - indian_boy
polycounter lvl 18
k this is definately a good idea by the polycount boards
i'd gone into 'hiding' of sorts due to my over-critical self not letting me be confident enough to show anything, though i have been arting... sort of.
and learning C++
[rant rant rant bla bla bla]
anyway:
art!
so far, i'm just still trying to get back into the groove.
understanding the reference images, and just tryna get a hang of doing things like proper floating geometry, screws etc.
now i'm really terrible at high poly modelling, imho. meshflow, and even basic 'how to do ___' eludes me at times, and so i figure this would be a nice workshop for me.
also, this is just before exam week, which starts on monday.
chances are i'm not going to finish it 'on time'
but whatever help i can get is definately worth a lot for future reference
cheers
Replies
As for being self-critical, I know the feeling too well, but as do we all. Best way to learn new skills is by doing, though, and sometimes that's the hardest step - to simply set aside notions of confidence and just dig into it.
the only way to get better is to just go for it
and the render is a skylight and 2 omnis, one orange and one light blue, and light tracer
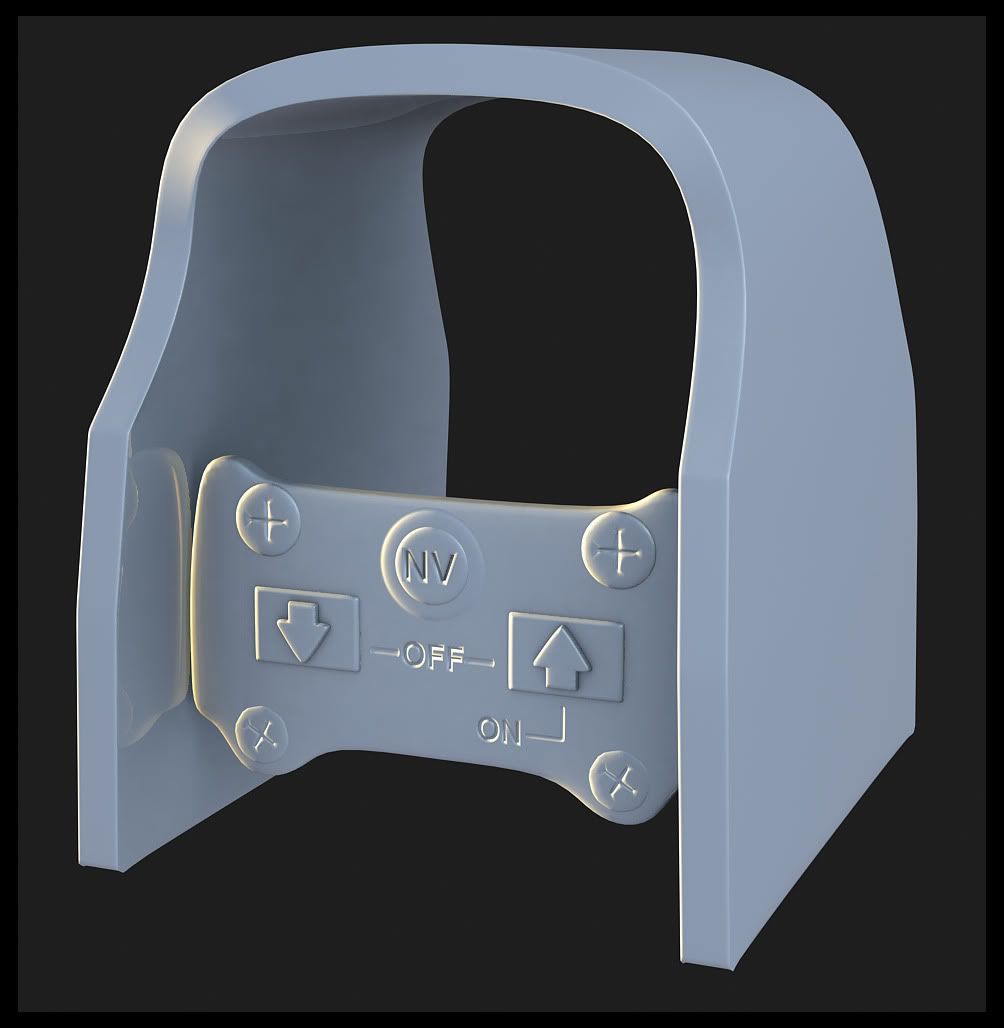
here's some more work, done sporadically between chemistry-study-sessions:
and here's how i do my floating bits etc that make it less of a pain to maintain a good looking topology:
however, a problem i have is that the normals have a horrible seam where the floating piece starts. rather than a smooth gradient.
i was just wondering how you guys go about making geometry like this?
anyway, off to chem again
thanks for help, in advance
cheers!
See upper right window here - flat shaded mode is a good test to see if things are planar to each other.
thanks for that vrav.
i'll see to it today. are there any softwares/plugins to help match surfaces that way?
and OBlastradiusO:
its a 'text' with a '+' and then i applied 2 appropriate bend modifiers. one of the modifiers will need to have its gizmo turned 90 degrees in some direction or another
cheers
either way, once more, between study sessions, i got this done:
cheers
Next time i would suggest you spend more time blocking out and getting all of these proportions and shapes correct before you go in and start detailing, as it can be a bit of a pain to go back and overhaul to make some of these changes.