Starcraft 2 Door
dun dun dunnnnn...
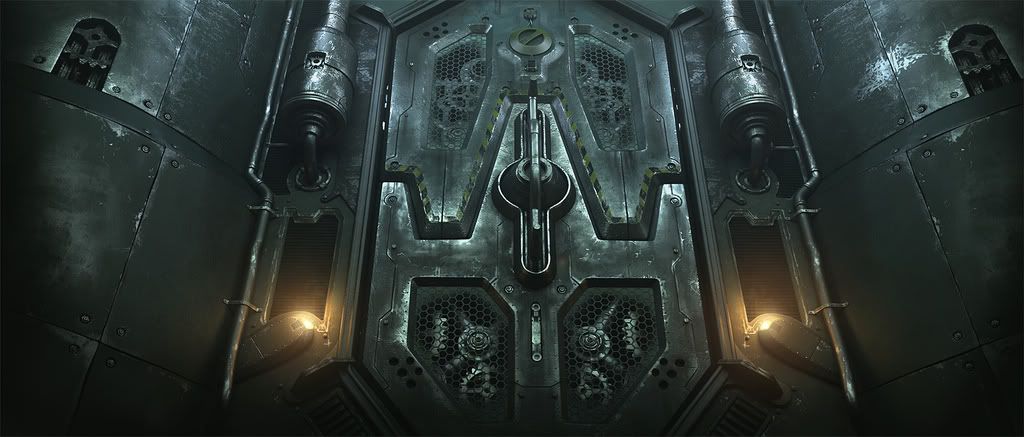
Yo. heres a work i did a few months ago. Its my recreation of that one shot from the starcraft 2 cinematic with the space marine dude getting hooked up into his armor.
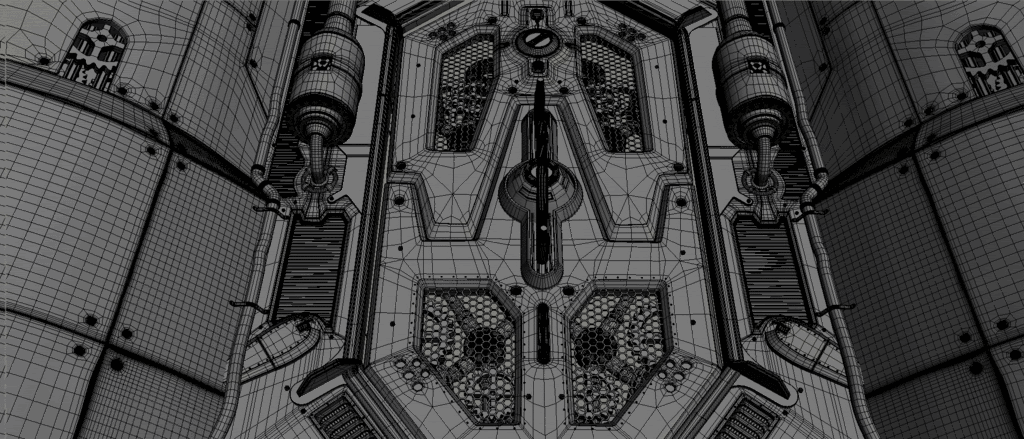
its definitely not game res. and it was rendered in max using vray. but i was tinking of making lowpoly version in the future.
only post effects were slight overall color shift and glow ( i didnt know how to do them in the render at the time).
anyway. what do you guys think?
btw kelvin, give me the ball. let me poke it.
EDIT: AWWWW damn you photobucket.


Replies
Would be cool to see this in game res though. Full House it lol but more then this shot. You know you want to.
You are banned from the ball sorry
Adam:Just unwrap your pre-subd model. It helps sometimes to render your UV template using the smoothed version too.
material consisted of a diffuse, spec and bump.
i put a few pieces of geo on the same unwrap to keep the number of maps lower. but yea, since everything is rather flat, i used mostly a planar map to get it started.
oh yea, since i modelled in sub-d using NURMS smoothing, i applied the unwrap on top of the smoothing . if i did unwrap the low version , then smoothed it, it would look kinda weird, the seams would get stretched around and stuff. so, in the end because of the unwrap on the models, the tesselation was kinda high.
kelvin: ill kill you so hard until you give me the ball.
good textures as well!
this please
Never worry about how fugly your high poly UV's are, they don't need to be pretty, just pretty functional =P
As for everyone wondering how to unwrap high poly, you already know... Just do whatever works best, and don't worry about making it all real time and fit on one tiny sheet. SHEESH!
I think you handled the glow the right way. You could have easily wasted a few hours/days trying to get the same look with half a dozen other systems inside of 3dsmax. But if your interested here are some ideas to get started.
Rendering > Effects > Add... > Lens Effect > Glow
This can work kind of like a pixel shader so only certain materials or objects glow or it can be plugged into a light. Adding it to a light is probably the easist and quickest.
If you plan on using the material know that what effects call Material ID's aren't the same as material ID's you use for multi-subobject materials. Its actually referring to the Material ID Channel (blue number next to the preview in viewport button in the material editor).
The only draw back to doing the glow effect on a material ID is that where it finds a pixel in the final render it adds the same glow radius to it. So if you have some object moving toward the camera the glow halo will be the same radius. So far off objects look like they are really glowing, then hardly glow when they move up to the camera. Unless you animate the parameters in the Effects tab, which can be tricky and time consuming. So I suggest only using the Glow Effects on lights or static 1 frame renders.
MentalRay, MentalRay ProMaterials, VRay, ShaderFX and to a limited degree regular vanilla Scanline all have glow materials you can use also. These glowing materials are different then the Effects Glow and most actually emit light. ShaderFX is pretty nice I suggest checking it out for more then just the glow shader.
So... sorry for the thread high jack but I thought it would be useful info...
Awesome stuff! Do more! Do more!
Ya... ok, I'm done.
That's hardly the only draw back. There's really no benefit at all, actually. Just add them in post. It's a headache and not worth the trouble to get it done in the render.
i think i attempted to do the glow using a vray material. but it didnt work out. post so much easier. its not like its "cheating". haha.
anyway, heres my lighting setup and textures
hope it shows what i did. see what i mean about the textures...very simple. actually i dont think i put a bump on the actual door. haha. eeeeh...