The BRAWL² Tournament Challenge has been announced!
It starts May 12, and ends Oct 17. Let's see what you got!
https://polycount.com/discussion/237047/the-brawl²-tournament
It starts May 12, and ends Oct 17. Let's see what you got!
https://polycount.com/discussion/237047/the-brawl²-tournament
leCop
Hi there,
So I thought I'd rather stop hijacking the WAYWON since I am near halfway throught that model now. Basically I'd like to have this one done rather quickly, sticking to a daily pace of updates. I see this mostly as an exercise in both hardsurface sculpting and UT3 implementation.
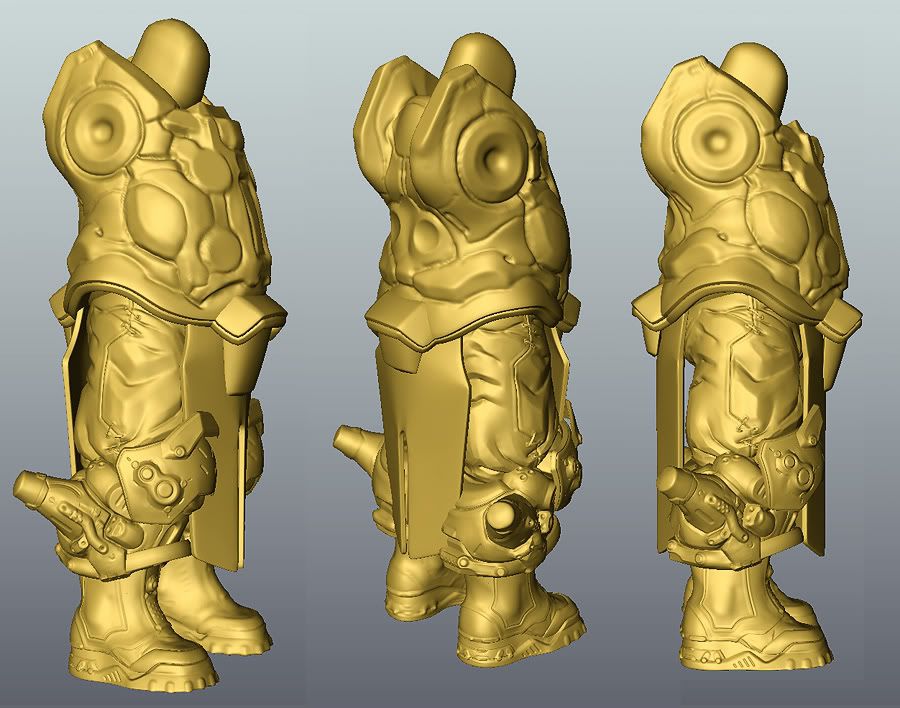
Not much new today, just transferring pics from the other thread mostly. Started on the torso tho. Same thing - quick poly bases + sculpt fun.
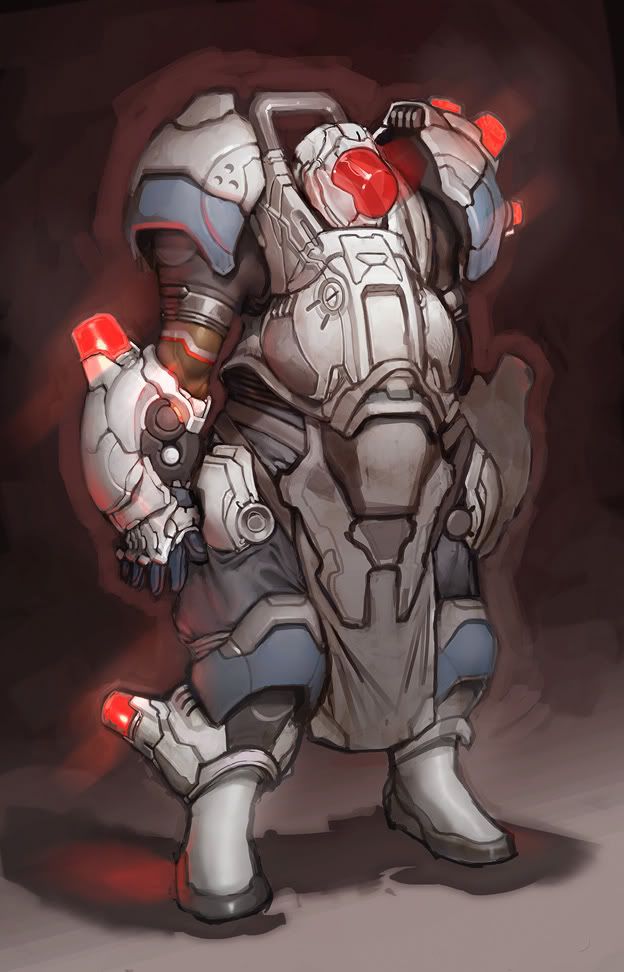
It's basically an old idea I had for years, doing some goofy overbulky Cop ... Concept :

heads
I want to use UT3s swappable heads and bodyparts on him hence the multiple helmet variants and the asymetric shoulder pads. I built it around the proportions of the Epic base model - but want to make it blukier! Must admit not a huge fan of the stock pose that came with the reference model, it's kinda straight? but once rigged I guess it will be all fine.
Progress pics...
#,
@
And where I am so far.

I really dislike what I have on the boot giro. Since its an important part of the chars graphic design that I want to use througout the model I think I'll end up redoing that in classic modelling.
And thats him compared to the default UT3 guy. $
The default guy is in white, there is not much that of a bulk difference in the end, weird!
Feel free to shred it to pieces!
So I thought I'd rather stop hijacking the WAYWON since I am near halfway throught that model now. Basically I'd like to have this one done rather quickly, sticking to a daily pace of updates. I see this mostly as an exercise in both hardsurface sculpting and UT3 implementation.
Not much new today, just transferring pics from the other thread mostly. Started on the torso tho. Same thing - quick poly bases + sculpt fun.
It's basically an old idea I had for years, doing some goofy overbulky Cop ... Concept :

heads
I want to use UT3s swappable heads and bodyparts on him hence the multiple helmet variants and the asymetric shoulder pads. I built it around the proportions of the Epic base model - but want to make it blukier! Must admit not a huge fan of the stock pose that came with the reference model, it's kinda straight? but once rigged I guess it will be all fine.
Progress pics...
#,
@
And where I am so far.

I really dislike what I have on the boot giro. Since its an important part of the chars graphic design that I want to use througout the model I think I'll end up redoing that in classic modelling.
And thats him compared to the default UT3 guy. $
The default guy is in white, there is not much that of a bulk difference in the end, weird!
Feel free to shred it to pieces!

Replies
Very nice work Pior!
Do you have one wireframe shoot? I'd like to see, I think it could be interresting... If possible.. steupl
Anyway, keep at it you crazy frenchie. =D
As for Gears ... well that was kinda the aim here hehe
My overall suggestion would be to go for minimal detail over the large white surfaces you have in your concept, and just push the forms to make them flow nicely. UE3 has a pretty nice cubemapped reflection for character surfaces (Necris have it on their armor), and an edited and toned down application of that with spec and diffuse work would really make this guy pop.
hot stuff Pior.
This actually proved to be very helpful for me to get a better idea of what I want to do in terms of material contrast and shape contrast. Usually I like to limit myself to a maximum of 3 material contrasts (like, flesh/armor material#1/armor mat#2, or cloth#1/cloth#2/armor), here I have a bit more but it might work. I want to go for :
>body,
>>basic round armor shapes,
>>>batmobile shapes conecting the giro lights to the main basic armor,
>>>>giro light
>>>>>protective layer made out of round shaped pads (not shown here).
Will try to repeat that pattern for each bodypart. I am also thinking about having the old boots as a custom bodypart the player can chose if desired... Will see!
Thanks for the awesome feedback so far! It helped a ton.
Regarding the mech details being sculpted instead of modeled : I think the trick is to use a shape language that works with sculpting app. I find myself much more comfortable when I let things happen instead of sticking close to a concept... And obviously the circles/bolt shapes are a big part of this since it comes naturally with the Z/Mud brush shape. I avoid pinch as much as I can since it creates changes in density, I rather use flatten with 'update plane' turned off most of the time.
edit: I'm guessing it means the revolving lights? but what's the actual definition of the word?
http://www.autoschrott.ro/magazin/images/products/prod_icon_AUT7633_big.jpg
MAAAAAAAAAARDEUH !!! MORTE COUILLE !
what's a "giro"?
[/ QUOTE ]
Another question?
Ptin les gars vous
http://en.wikipedia.org/wiki/Douche
"but i am le tired..."
"we'll have a napp.....then fire le missles.."
awesome stuff pior, though i'm interested with what you will do with the klaxon lights - just emmissive maps i guess.
http://static.explore64.com/images/items/large/TNF/TNF1377/EDBFG.jpg
The image on the right shows the little crank on the back that tightens the "laces" so there is no tying or whatevs.
how the hell do you sculpt hard surfaces in such a precise way? i always seem to break my hand trying this. is there an easy and fast way to explain how?
its probably one of those, 'that looks like hard work whats the secret' questions, where the answer is 'hard work'
http://www.rareairshoes.com/images/Reebok_Pump_Omni_Zone_II_1.jpg
C-Keen its funny you mention that. At some point in the past I started messing with the idea of building a small library of alpha/shapes but I soon enough gave up as it turned out to be not flexible enough...
ThatDon, basemeshes were on page1 :P http://img.photobucket.com/albums/v242/pior_ubb/pior_cop_wip_006.jpg Not much to say about it, I just make sure I have a precise enough border (ie using the shell modifier in max along a funky spline) to not have to bother with this detail during the sculpting phase.
As for the sculpt workflow well there is not much to it besides that one little 'update plane' tickbox - I can try to do a vid but I don't think my computer can handle that... As a matter of fact I cannot really do the backside of the torso now, Mud crashes everytime it reaches 2 gigs of ram usage, ah! Better be better in v2.