Maya - (Need Help!!) Cloth Rig, Cape/Shawl
Hi! This is my first post, so apologies if it is not formatted ideally.
TLDR; I need help finding a method to rig a character's shawl/cape that follows their arms beyond basic skinning. Any suggestions, tips or explanations on a driven joint-based shawl set up would be very appreciated! I cannot use nCloth or nHair Dynamics for this. I am looking to extend my knowledge on this even outside of this specific instance, but would love any help for this now. Thank you!
To preface, I'm familiar with some advanced rigging concepts but I don't have a lot of experience yet!
I am working on a project where a character is wearing a shawl/cape over their shoulders. Skinning it to the prexisting skeleton and body was okay, but the team is looking into having another joint system driven by the arms. I understand how to do this- at least in theory- with skirts. However, the arms have more refined movement, and I am having trouble ideating on where to take this to get the simplest but most accurate result. Because this is for animators to visualize the shawl prior to applying simulation outside of Maya, its meant to be quick. I do not want to employ any nCloth or nHair dynamics, as the time to see these in-action can be extensive for some of the animator's devices.
I've tried using some joint chains connected with a multiplyDivide node, but found that I got lost trying to fine-tune the connection and was unsure how to get to a desirable result. If you want further information on what I was doing here, let me know and I can provide it.
It sort of functions, but also there are issues where the arm sticks out at an angle and the joints don't follow the preffered direction. Bringing the arm down also makes it cave in too much. This also takes us to the elbows, which is where a lot of my confusion lies. I'm not sure how to connect these to follow how I want them to.
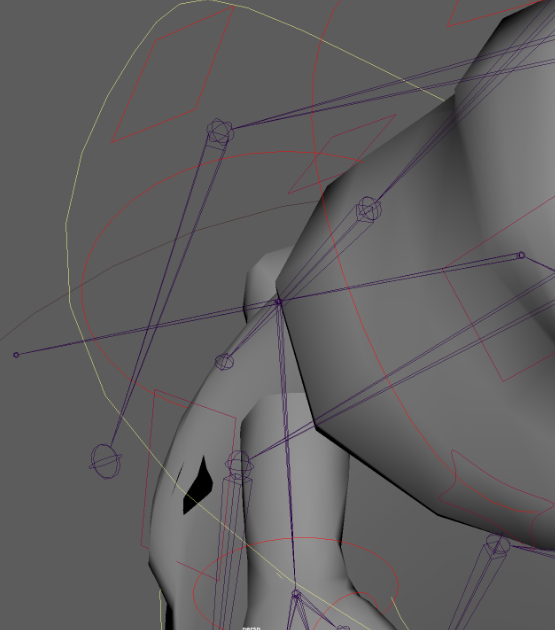
Another attempt was using NURBS and clusters with MuscleKeepOut, as seen in this tutorial.
My thought process is that the shawl needs to be moved at several different points, so that it follows with the elbow bend. So, I set up several NURBS and clusters that all have MuscleKeepOuts. The Muscle/Bone is the mesh seen in the following gif. I copied the skin weights from the character to the collision mesh shown.
TLDR; I need help finding a method to rig a character's shawl/cape that follows their arms beyond basic skinning. Any suggestions, tips or explanations on a driven joint-based shawl set up would be very appreciated! I cannot use nCloth or nHair Dynamics for this. I am looking to extend my knowledge on this even outside of this specific instance, but would love any help for this now. Thank you!
To preface, I'm familiar with some advanced rigging concepts but I don't have a lot of experience yet!
I am working on a project where a character is wearing a shawl/cape over their shoulders. Skinning it to the prexisting skeleton and body was okay, but the team is looking into having another joint system driven by the arms. I understand how to do this- at least in theory- with skirts. However, the arms have more refined movement, and I am having trouble ideating on where to take this to get the simplest but most accurate result. Because this is for animators to visualize the shawl prior to applying simulation outside of Maya, its meant to be quick. I do not want to employ any nCloth or nHair dynamics, as the time to see these in-action can be extensive for some of the animator's devices.
I've tried using some joint chains connected with a multiplyDivide node, but found that I got lost trying to fine-tune the connection and was unsure how to get to a desirable result. If you want further information on what I was doing here, let me know and I can provide it.

It sort of functions, but also there are issues where the arm sticks out at an angle and the joints don't follow the preffered direction. Bringing the arm down also makes it cave in too much. This also takes us to the elbows, which is where a lot of my confusion lies. I'm not sure how to connect these to follow how I want them to.

Another attempt was using NURBS and clusters with MuscleKeepOut, as seen in this tutorial.
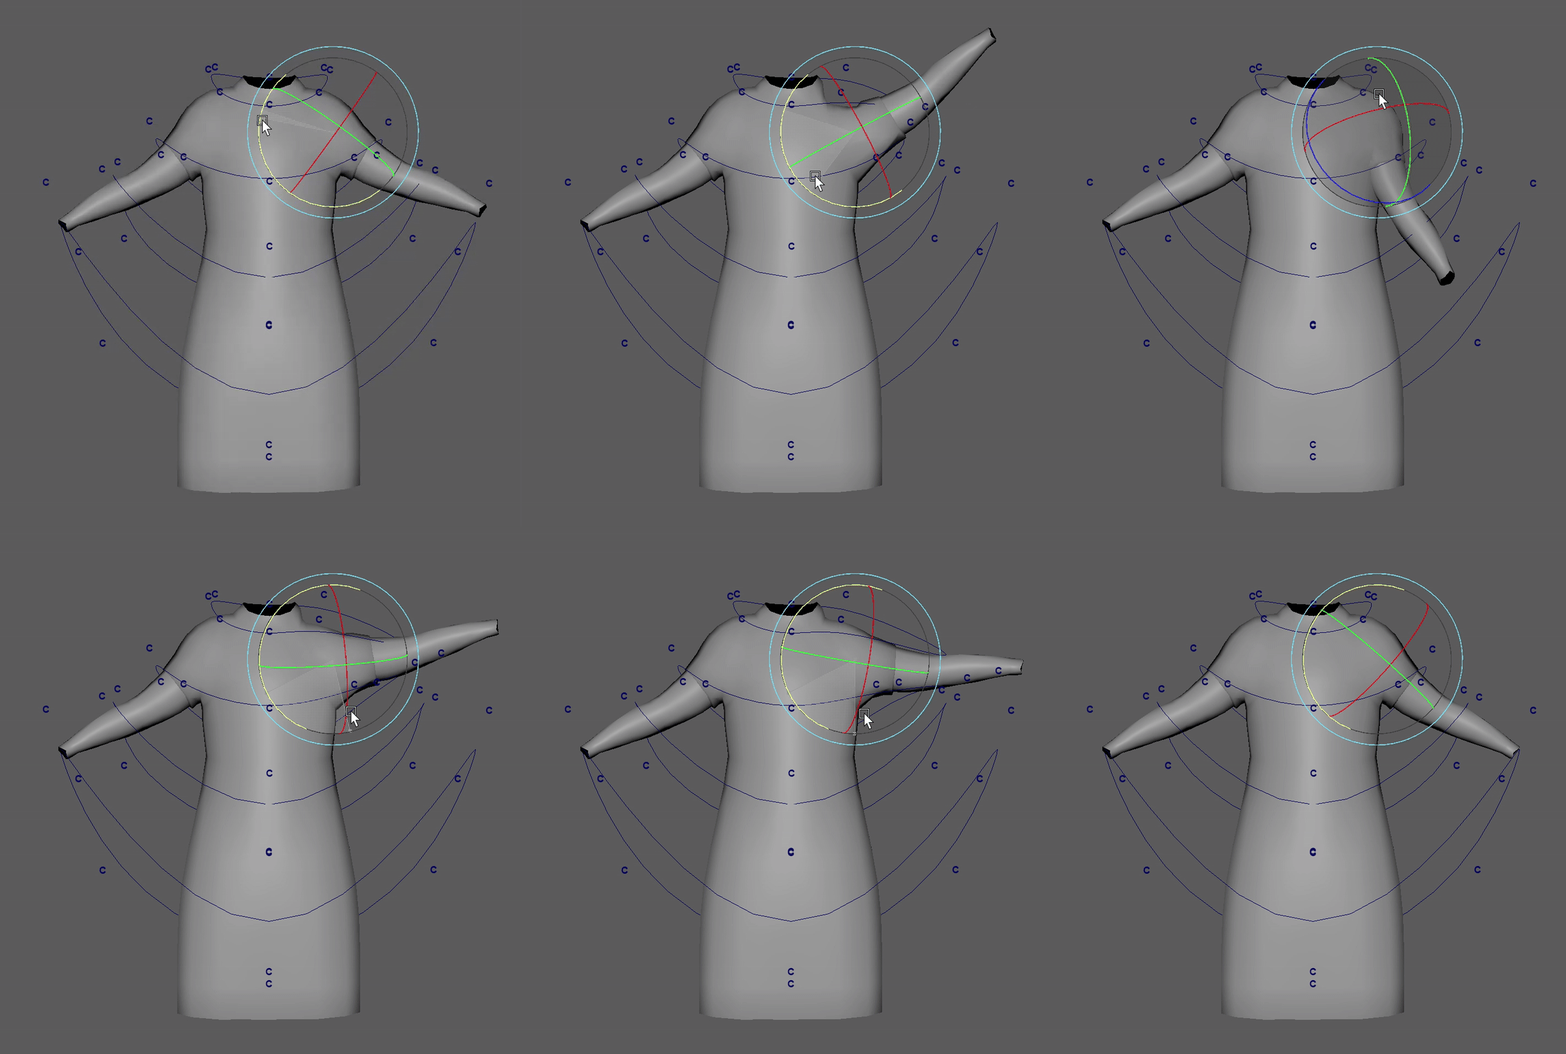
My thought process is that the shawl needs to be moved at several different points, so that it follows with the elbow bend. So, I set up several NURBS and clusters that all have MuscleKeepOuts. The Muscle/Bone is the mesh seen in the following gif. I copied the skin weights from the character to the collision mesh shown.

The MuscleKeepOut clusters are 'reacting' but obviously not in a desirable way. I can guess that messing with the "In Direction X/Y/Z" values in the channel box or attribute editor could help, but as this is my first time dealing with this system in Maya I am inexperienced in how to fine-tune it.
Even if you don't know exactly how to set this up, I'd be extremely grateful for any direction for where to look or where there are some rigging artists I can learn from.
Thank you for reading!
Replies
To make the arm joint drive the shawl joints, I created a Connection holding group inside the Offset group, and that is where the connection is housed, to keep the actual controller clean. I used a multiplyDivide node and tested some values to get as close as possible to the arms, but this ended up being very touchy and where I got a bit lost.
It is skinned originally, and that works okay, but my team wanted the option of a driven set up and I wanted to ensure I could find everything I could for them.
Thank you so much! I appreciate your reply!