Feedback on Darius model
Hello,
I'm new to 3D character modeling and gave myself the assignment to remake an already existing character. In this case it is Darius which look like this:


Character art made by Hicham Habchi
This character is quite bulky and that is my main priority to give that feeling in my recreation.


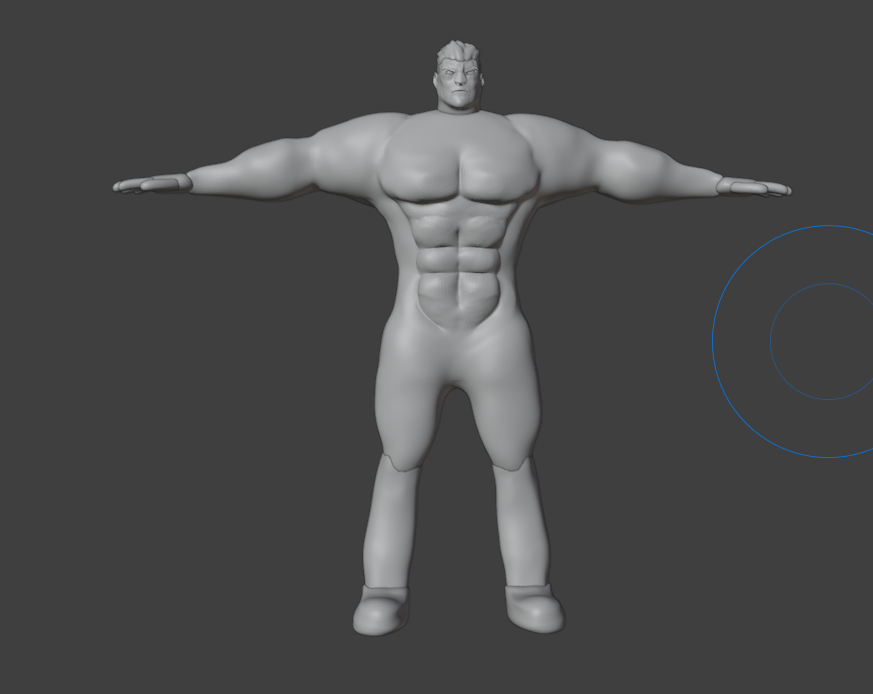
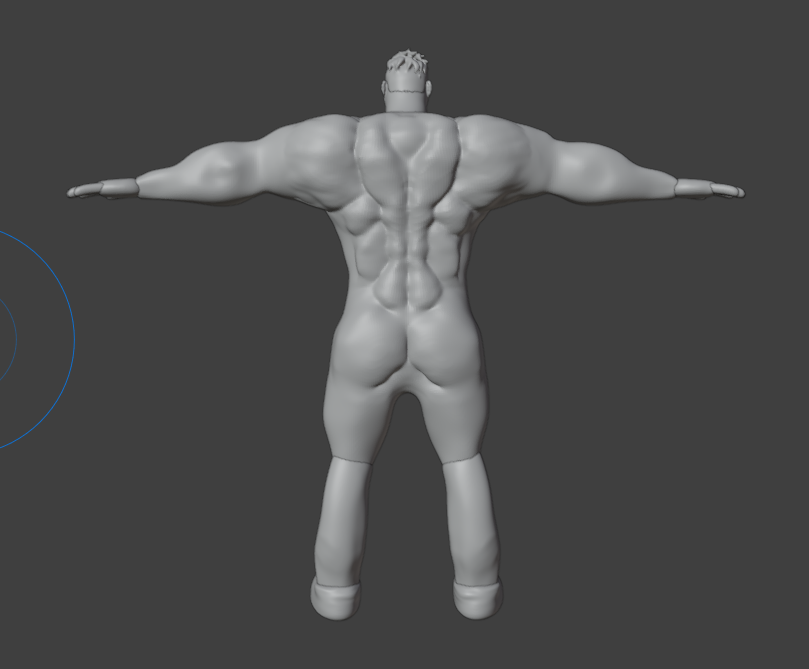
This is what I have so far, I still have to do a lot of details for like the head, arms, legs etc. But tried my best to have a pretty bulky body already.
I would love some feedback on the body part with stuff like what is missing and how I can recreate them (still experimenting a lot with the Blender Tools, so that sort of information means also a lot to me!).
I'm also open for feedback on other parts of the body, but can imagine that it's harder to give feedback about it.
Thanks!
Thomas

I'm new to 3D character modeling and gave myself the assignment to remake an already existing character. In this case it is Darius which look like this:


Character art made by Hicham Habchi
This character is quite bulky and that is my main priority to give that feeling in my recreation.


This is what I have so far, I still have to do a lot of details for like the head, arms, legs etc. But tried my best to have a pretty bulky body already.
I would love some feedback on the body part with stuff like what is missing and how I can recreate them (still experimenting a lot with the Blender Tools, so that sort of information means also a lot to me!).
I'm also open for feedback on other parts of the body, but can imagine that it's harder to give feedback about it.
Thanks!
Thomas


Replies
Most obvious problem at the moment is the much too wide waist compared to the concept and the anatomy. Seems a bit like a blend between a naked body and the armor already applied in places. Obviously, much of that will be covered later, so in my opinion, it would make more sense to keep things more simple, here, and do separate anatomy studies with normal proportions first to get your bearings. Probably not as fun, though.
Thank you very much!
Edit: I indeed use Blender for this.
I will do that the next time, this is the link to the reference I was using: https://www.artstation.com/artwork/LRlka0
It has been a few weeks and I made quite some changes. Besides that I also switched from Blender to Zbrush as my teacher recommended this to me. (And I am happy that I switched once I got somewhat used to the program)
This is currently how my character looks like
I mostly focused on the first layer of armour and not on the details on it. I am probably going to start with the extra layers on the legs today.
I am also not satisfied with the head, I really struggle with it but I just give it a try every now and then after I feel like I learned more about 3D sculpting. But I am probably going to completely redo the head. If there is some feedback in general I would love to receive it!
Something I have questions about is the topology of some things. I tried to get as good as possible topology for like that knee cap and the boots. I tried to make the perfect topology in my eyes (I know that this probably isn't the perfect topology for professionals :eyes:)
Low poly boots
I kinda know this isnt perfect because I couldnt insert an extra line along the side but I didn't really know how to fix it. Neither do I know if this is a good or bad topology.
So if someone has some feedback on this topology I would highly appreciated!
Thank you very much!
This should remove those two ugly poles deforming the edge, i think.
I think having poles on along edges (in most cases) is not good for keeping them nice and clean.
*Note* I think you may want to consider drastically reducing the subDivs and build the shape up from a much simpler base
You can control edge tightness as in the Orange and Purple examples (compare matching results when sub Divided)
It's not finished and I'm still working on getting the crease details looking best possible, but I hope it helps.
I don't know if there is 'best' approach, but maybe this will help.
1. Keep polys as low as possible to start figuring out the shape.
2. When you feel it is close to what you want, you can slowly start sub dividing and building in the details as you go along.
3. When satisfied, you can extrude the faces to give it the thickness you want (in or out).
*note* I always keep a copy of the lowest base mesh as a separate object [step 1] (call it something like 'boot_base'), just in case the detailing part gets too messy.
That way i can use it to project all the detail from my high poly back onto a nice clean mesh if necessary.
As you your boot is quite square and stylized, i'm guessing you'll want to keep certain edges sharper,
in that case, it's all about strategically placing loops on your base mesh.
experiment putting loops where you wants sharpness, go back and forth until you are satisfied.
*keep in mind also how you work your edge loops (see my first couple of post examples)*
A quick and dirty example to show the difference in controlling edges and their sharpness.
Experiment with where to add loops and how they can be worked together to get the shape you want.
I'm still quite new to sculpting and especially to zbrush, did you make your example with like a cube and extruded it here and there? I feel like you made that in like 5mins and called it a day while I have been masking my "feet" extract it from there, taking a lot of time to remesh my shoe in some nice low poly shoe.
How can I have such a low poly? I am currently using the zremesher to lower my poly but the shoe I made was the lowest option. After that I make some seperate adjustments with the zmodeler, but I feel like I am sort of stuck with the amount of poly I am currently working in. But maybe it is me being lazy and I should spend more time with the zmodeler tool
Lastly, does it matter how many subdivions I the object give? Like if I give the object 5 subdivions I can still work in the 4 subdivions model right? Or is this a really bad way of thinking? I kinda felt like it is better to add one extra then 1 less because I can't change it after I applied it (at least that is what I think)
Thank you very much for your time! Sorry for the many question back!
There is no 'right' way exactly, but there are ways of doing things that are considered 'industry standard' or are proven to be better ways from experienced people. It takes practice, trial and error to see what works best for you. There's many youtube videos with great tutorials.
It might be best to first make something from a youtube tutorial. Then when you have gained experience from copying and making a tutorial model of something, you can apply that knowledge to what you want to make.
Just a quick example (not definitive, but enough to give an idea how I would approach your boot):
Steps 1 to 11 are all about experimenting with shapes and loops.
Try subdividing from level 1 to 2, see how it looks, but *IMPORTANT* I only add the sub division level to see what it looks like , then I undo 1 history back to level 1 to make adjustments. (if you keep the 2nd level and and just switch down back to 1, you will lose the original shape slightly as it becomes smoother)... try it and see what i mean.
*NOTE* It's not a problem if you do go ahead and keep the 2 division level and just switch back and forth, it's just something i prefer doing until I feel I have the absolute basic shape nailed down.
Anyway, this is how i go back and forth making adjustments to try and get the best basemesh possible before moving forward.
Make sure to pay attention to what is happening on other parts of the model as you go along (in this case, the bottom)
You can extrude here (in or out, depending on what you want), BUT I prefer to leave that until the end (I will explain...)
If you extrude too early, it makes things more complex and difficult to work with as you go along.
My preference is to wait until i'm pretty much done and happy with it, and then extrude it (You will need to delete all lower sub levels for Zbrush allows this) *note* there are ways to remake the lower sub division levels after this, or you can of course use zremesher... but i prefer my method as i think it keeps things cleaner.
Remember i mention in previous post about keeping a copy of the lowest sub division model handy? this is were I would use that copy:
I would sub divide the low poly copy (you will want to extrude it too if not already, to match the high poly shape) and project the original in stages onto the copy (add a sub D, then project, add next sub D, then project, so on until you're happy) to get all the details from my original model onto it .
*NOTE* This may not be necessary, it depends really on what you want from the model.
i.e. is it for a game ready character where you have a high and low poly version?
OR
if it just a high poly sculpt?
if it's for a high poly sculpt only, you don't really need to mess about with projecting details onto a basemesh. This would be entirely optional.
Finally i would say,
It's really about experimenting with what works best for you and what your goals are. I would highly recommend making a model from a Youtube tutorial, even just a small simple model, it will really help you improve.
As you progress, you will find it takes fewer steps and becomes quicker, as you get a better feel and understanding of things and what works best.
Again, this is not definitive, and different things require different approaches, but I hope it is a useful example.
Oh, and yes, you can use the Zmodeler tool to move individual points around.
By working from a low poly mesh, you can move points and areas around to give more organic shapes (softer, rounded, bumpy..)
Look up the difference between 'hard surface' modeling and 'organic sculpting' to see the difference and what you want to achieve.
However, I switched my attention to the face and struggled a lot to fix my already existing head
It looks awful and didn't really how to fix it. I decided that it is probably better to start over again
This is currently my block out of the head. I didnt focus on the neck yet. It is just there so it doesn't feel empty
I used guides like these to create this.
I also made a sketch for the character
I would love some feedback on how to fix the proportions. I really struggle with doing it myself so any feedback would be highly appreciated!
Thanks,
Thomas
Use Youtube for tutorials, try searching for; Digital Tutors, Gnomon Workshop, Eats3D. Michael Pavlovich's channel is good too.