3D model Baking practice
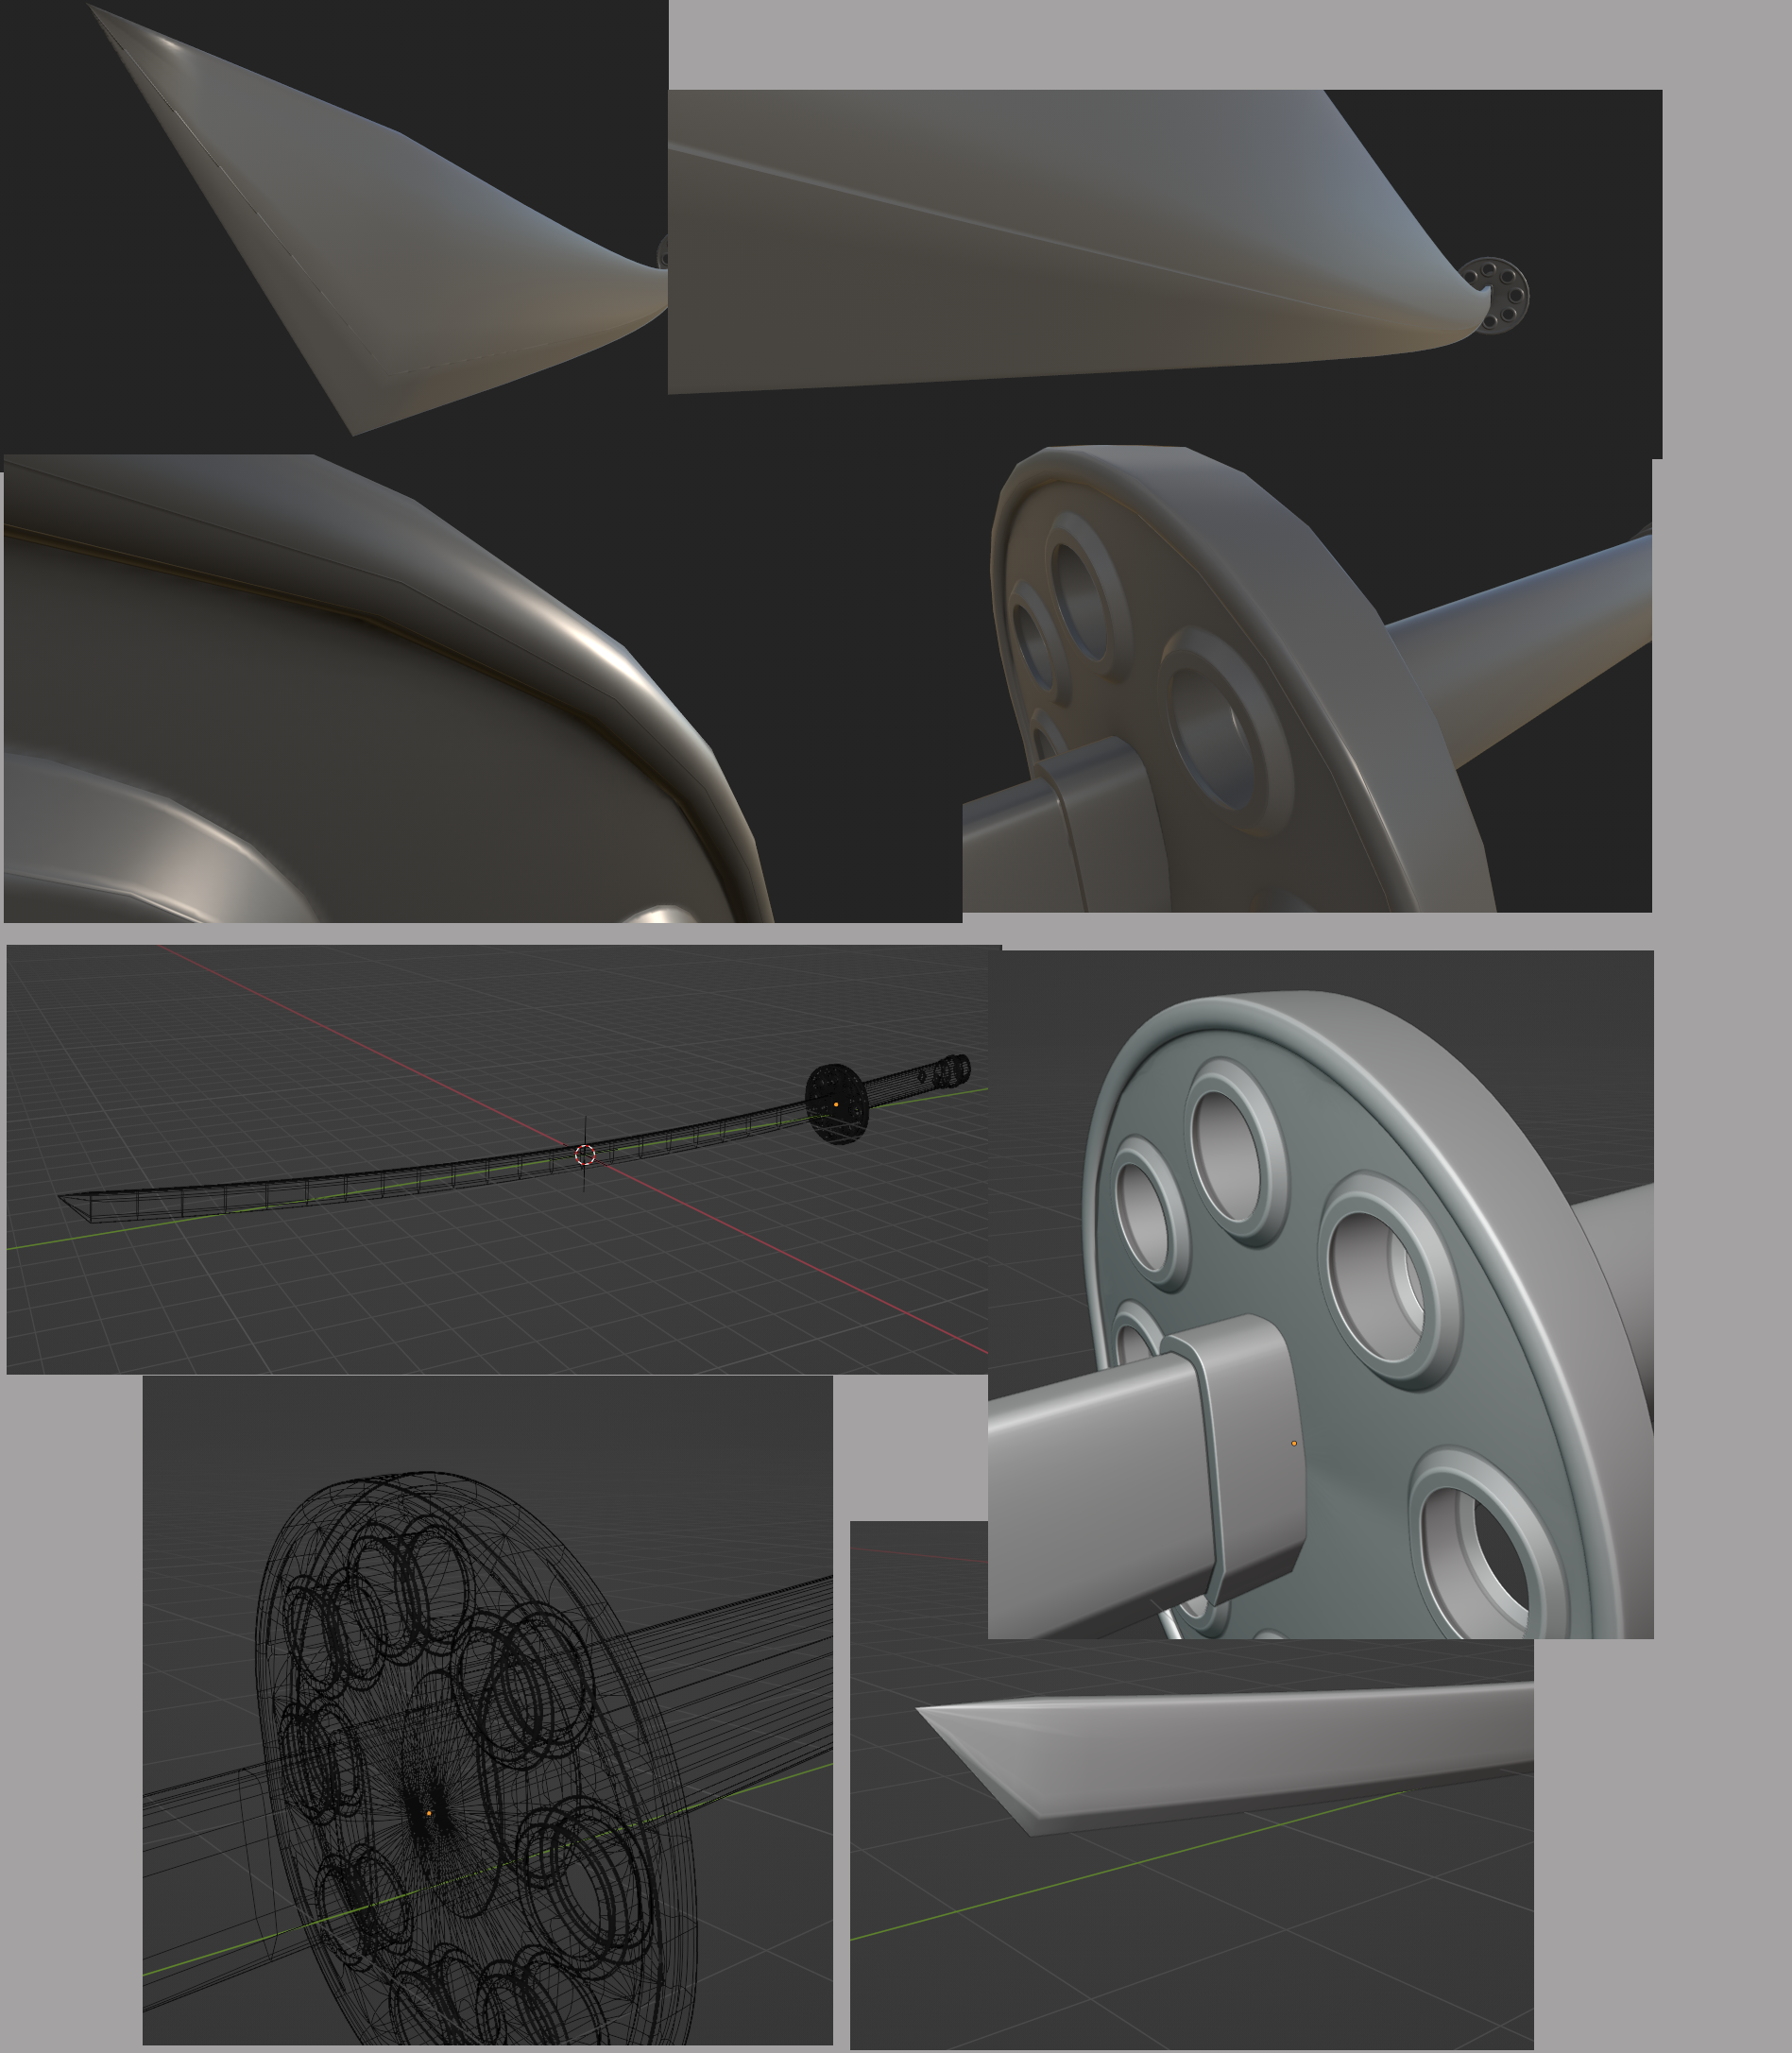
Hi so I"m sharing a model and just curious to see how this turned out. It just a katanna and just seeing i can get better with my modeling and getting the baking so want to see how it turned out. I'm including some screenshots to show and just wondering. Of course I can give the blender file or the fbx if that helps. This is just for practice to make sure i'm understanding things correctly. 

Replies
Additionally linking to the files (attaching zip directly to post if small) is the best way in my opinion, as it allows close inspection.
Lowpoly
- lowpoly has some hard edges with no splits UVs (for example along edge the blade) - this will result in artifacts when baking the normal map. Using the "Auto Smooth" modifier, which shades edges hard by angle can easily introduce such cases that go unnoticed. Personally, I like to set hard edges and UV seams manually.- spotted some small, unclean situations. This might not look like much at first, but might slow things down when selecting or unwrapping. An such small triangles just don't have any benefits. The "Merge By Distance" function can help you to spot such situations and potentially fix them. Often times, I have the UV editor open and use TexTools "Rectify" function to validate strips of geometry (it will fail with non quads). Around the holes in the guard, you also got some really thin triangles.
- Personally, I would resolve the pole at the middle of the guard differently, less thin triangles, in a way that the shading looks good with smooth edges, thus reducing the amount of UV islands required.
- I think it's good to add triangulate modifier to ensure triangulation is consistent across applications. And I would check the triangulated meshes shading in Blender, if anything needs tweaking.
- Diamond on the lowpoly is only present on one side. If you mirror it using the mirror modifier, make sure to use the UV offset parameter.
UVs
- UVs are very loosely packed leaving unused space Wiki article on padding- straighten strips/borders to avoid aliasing artifacts on seams
- to maximize space, either split the blade or consider using non-square texture for such objects (extending in one direction)
- prioritize resolution where it matters (e.g. parts viewed up close, parts having details, UV borders cutting pixels at an angle) over even density.
here is an adjusted UV layout, note that changes to geometry were made too (topology, hard edges)! See attached blend file.
Highpoly
- highpoly has shading issues, for example the guard (star topology) and blade (lacking definition). Obviously the baked result can only be as good as the mesh you bake from. You can check the surface with a reflective matcap material- blade fixture is rounded on one side, looks unintentional (missing crease)
- split elements where they are actually split (blade and blade fixture)
- make sure bevels are wide enough they actually show up in the texture
Attached you find a blend file containing a modified lowpoly, based on some of my notes. Did test bake at 1k res.
Good luck with the project
this has been very helpful. Like i said this was just practice to get better with 3d models and this has been helpful espically with having your file so i can see what mistakes i made or did not work right.