

Using AI to create hand-painted textures.
Texture projection method
The main method of creating texture using AI is to project the generated image onto the model from several angles.Important
This technique does not exclude a person from working on textures. AI is a tool that speeds up the process, not completely automated. Also, when working on textures, work in stages. If you're working on textures for a character or a large object, don't try to generate everything in one go.The quality of the texture depends on the parameters you give to the AI. These include the checkpoint, the way used by Lora, Textual Inversion, prompt, Sampling steps, Denoising strength, initial texture work, and so on.
Recommended denoise: 0.35 to 0.5.
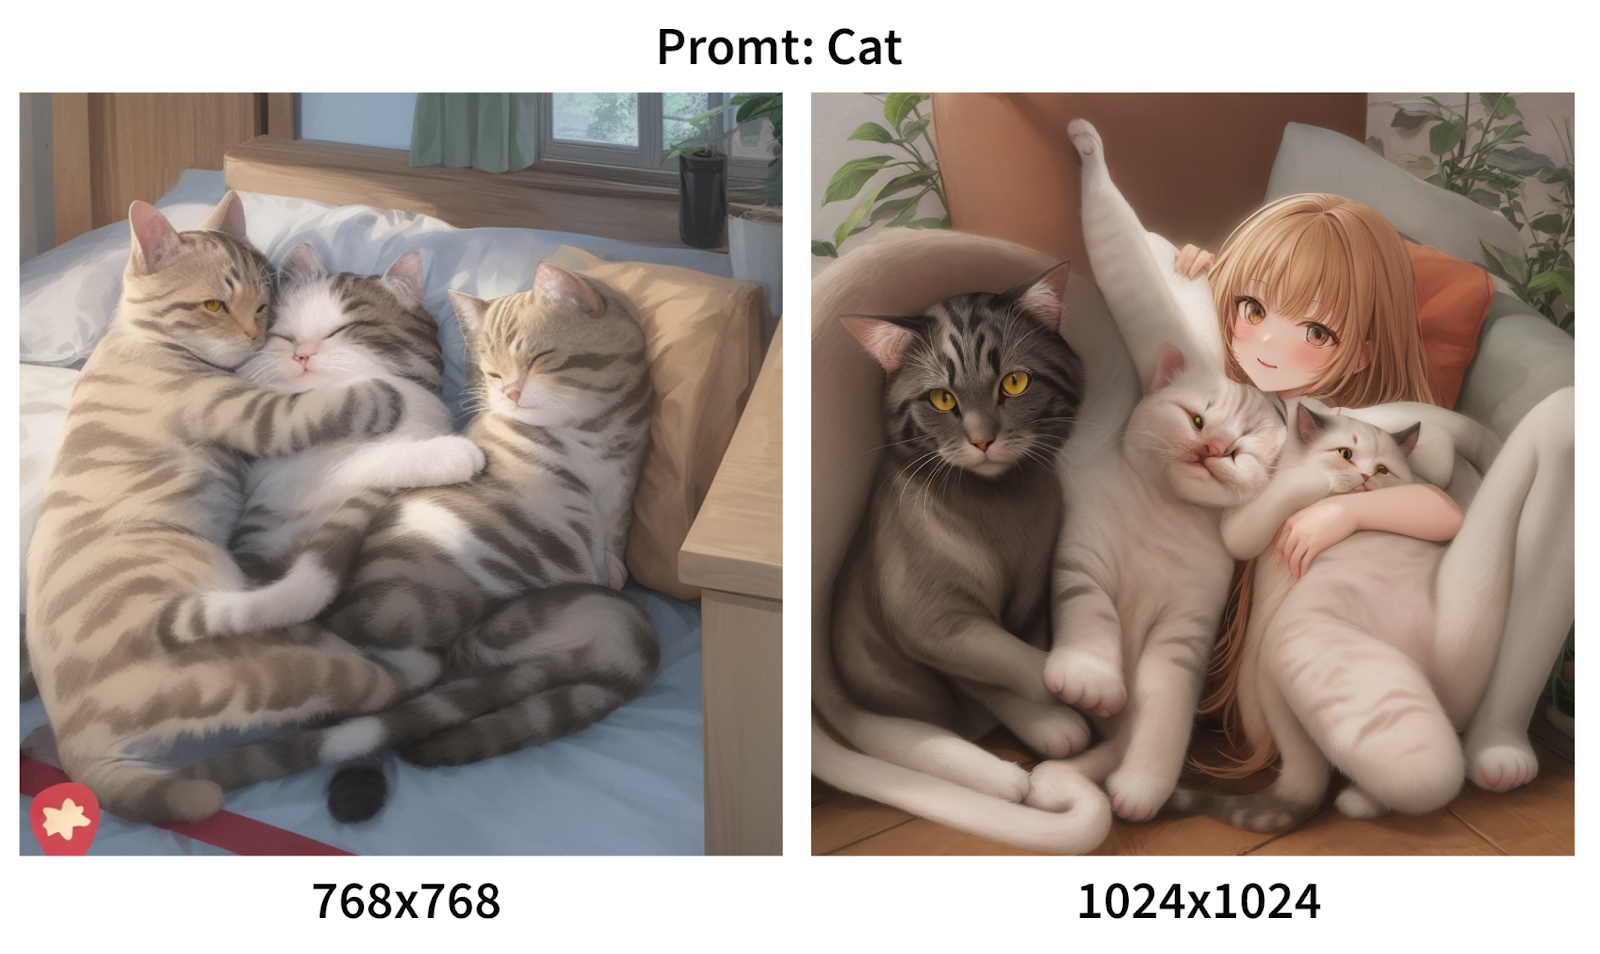
To avoid artifacts, the recommended resolution during generation is between 640 and 960. If you set a resolution of 1024 or more, artifacts are possible.
Model painting
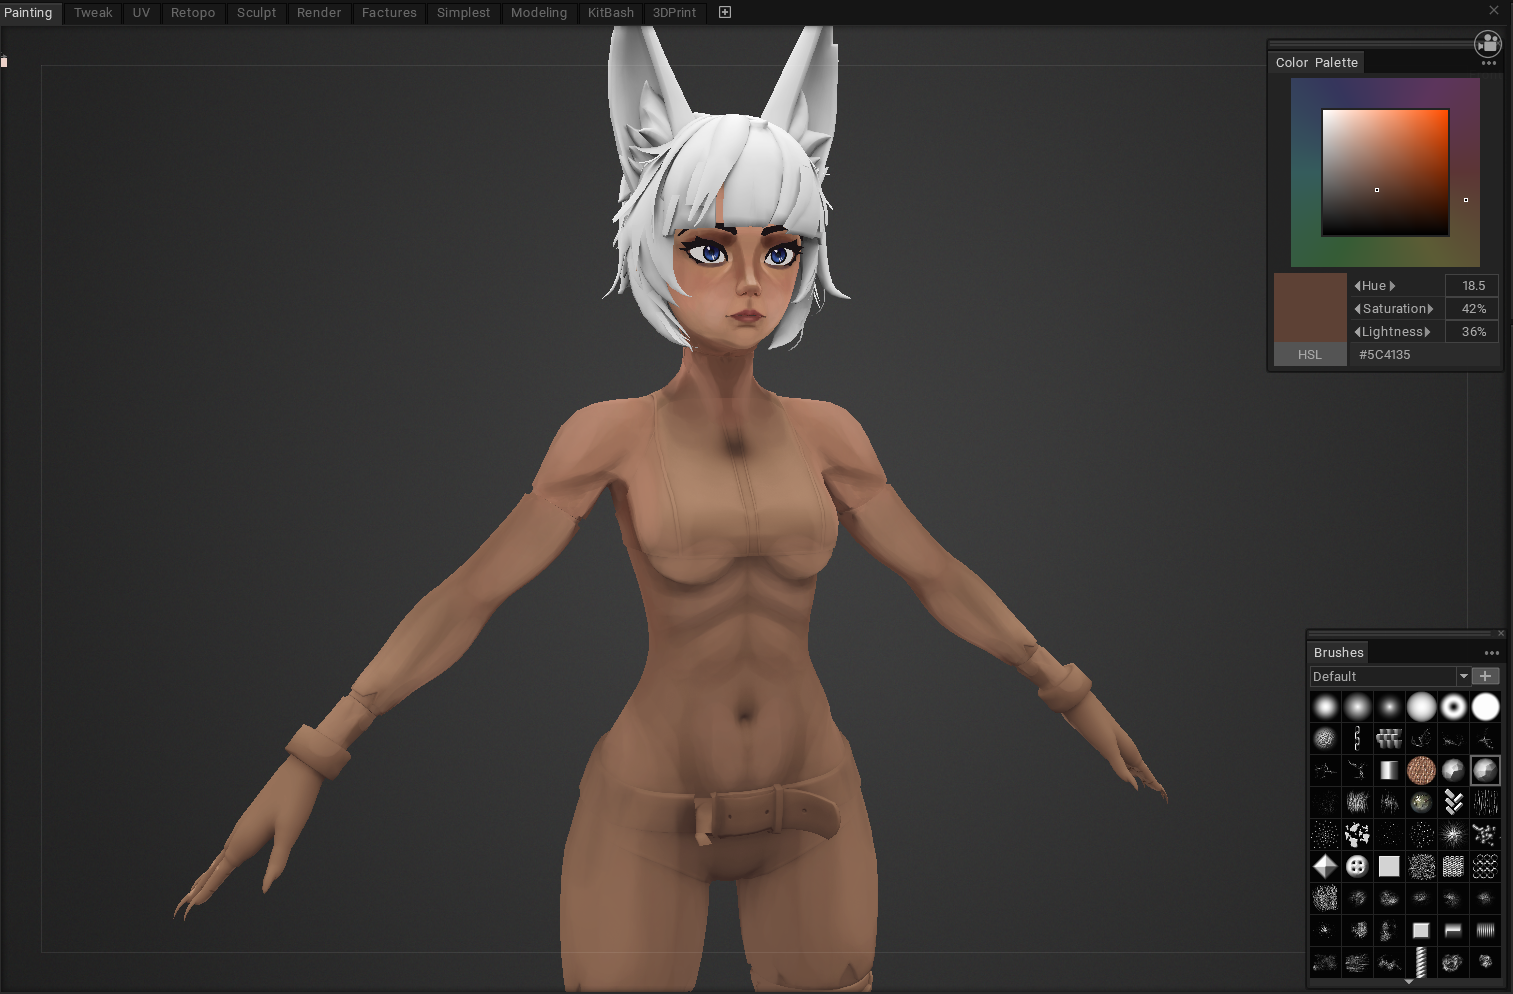
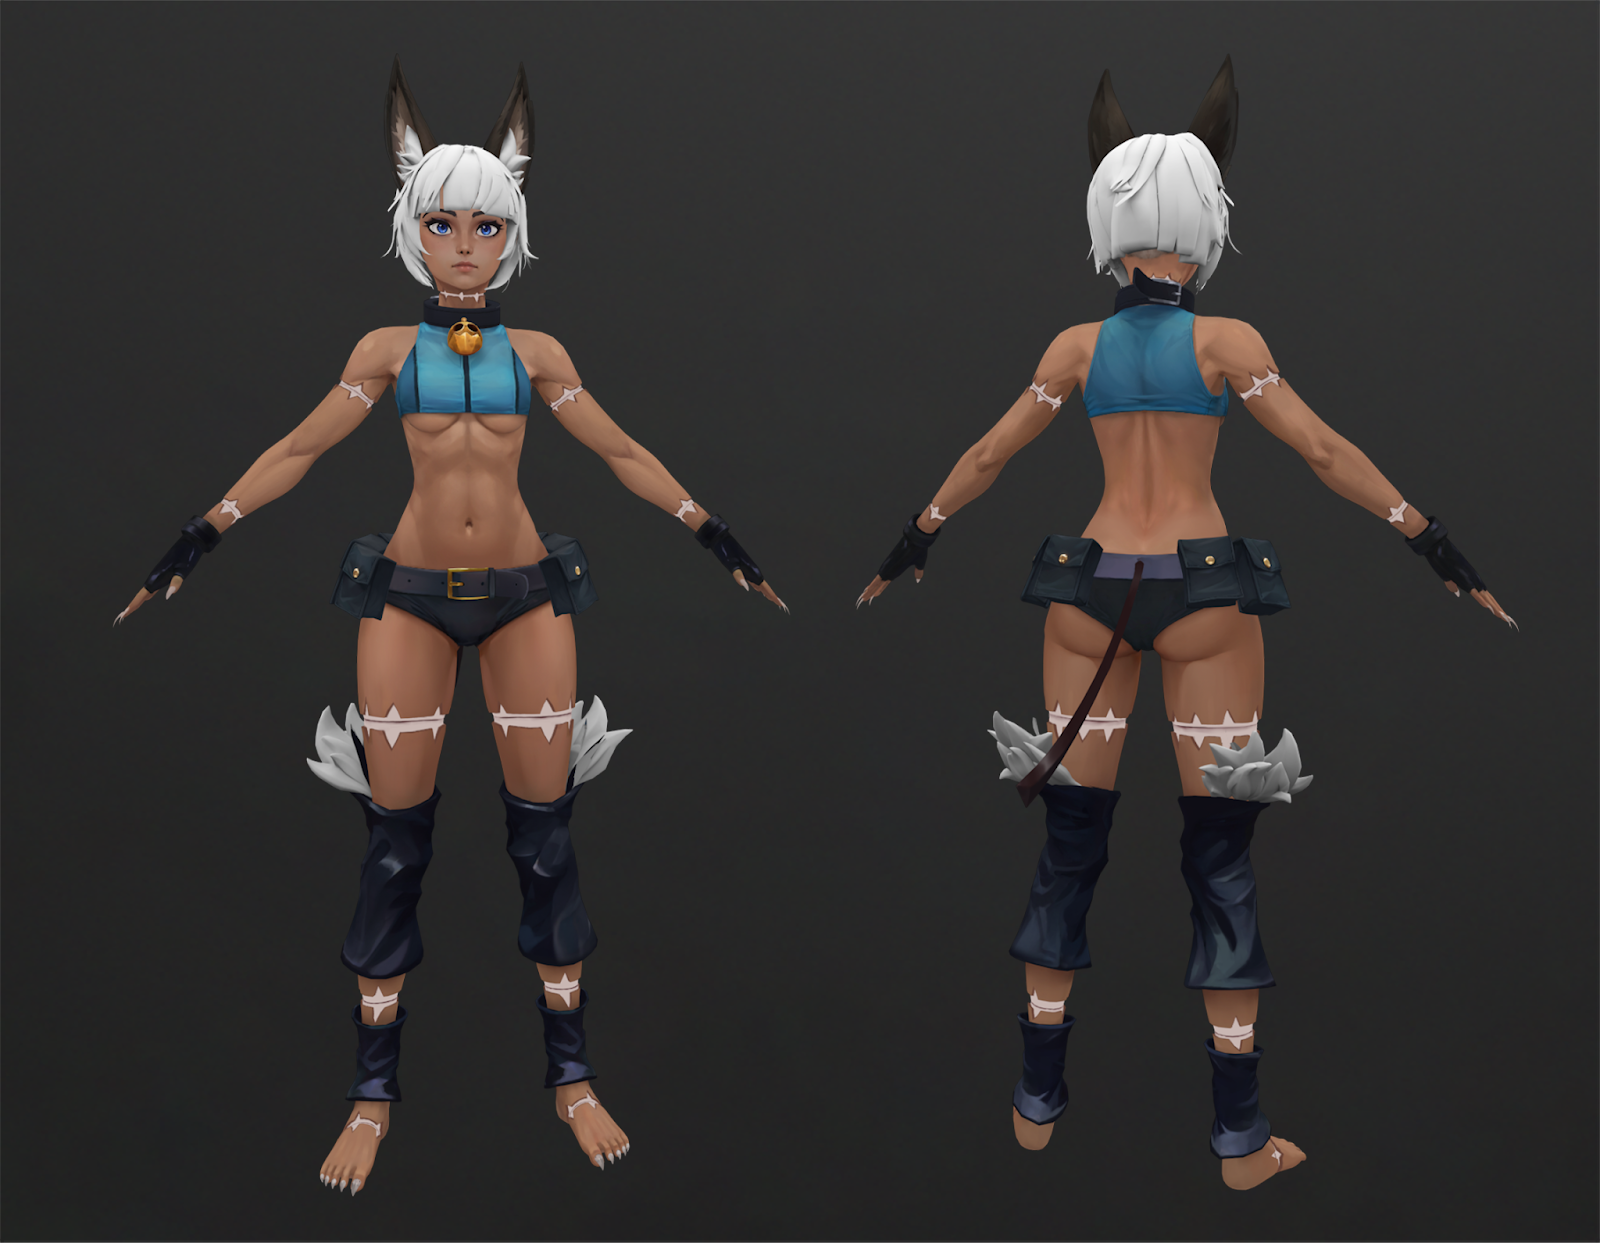
Now let's take a closer look at painting a model using the AI. Character Ms.Fortune from the Skullgirls 2D fighting game.
Model preparation
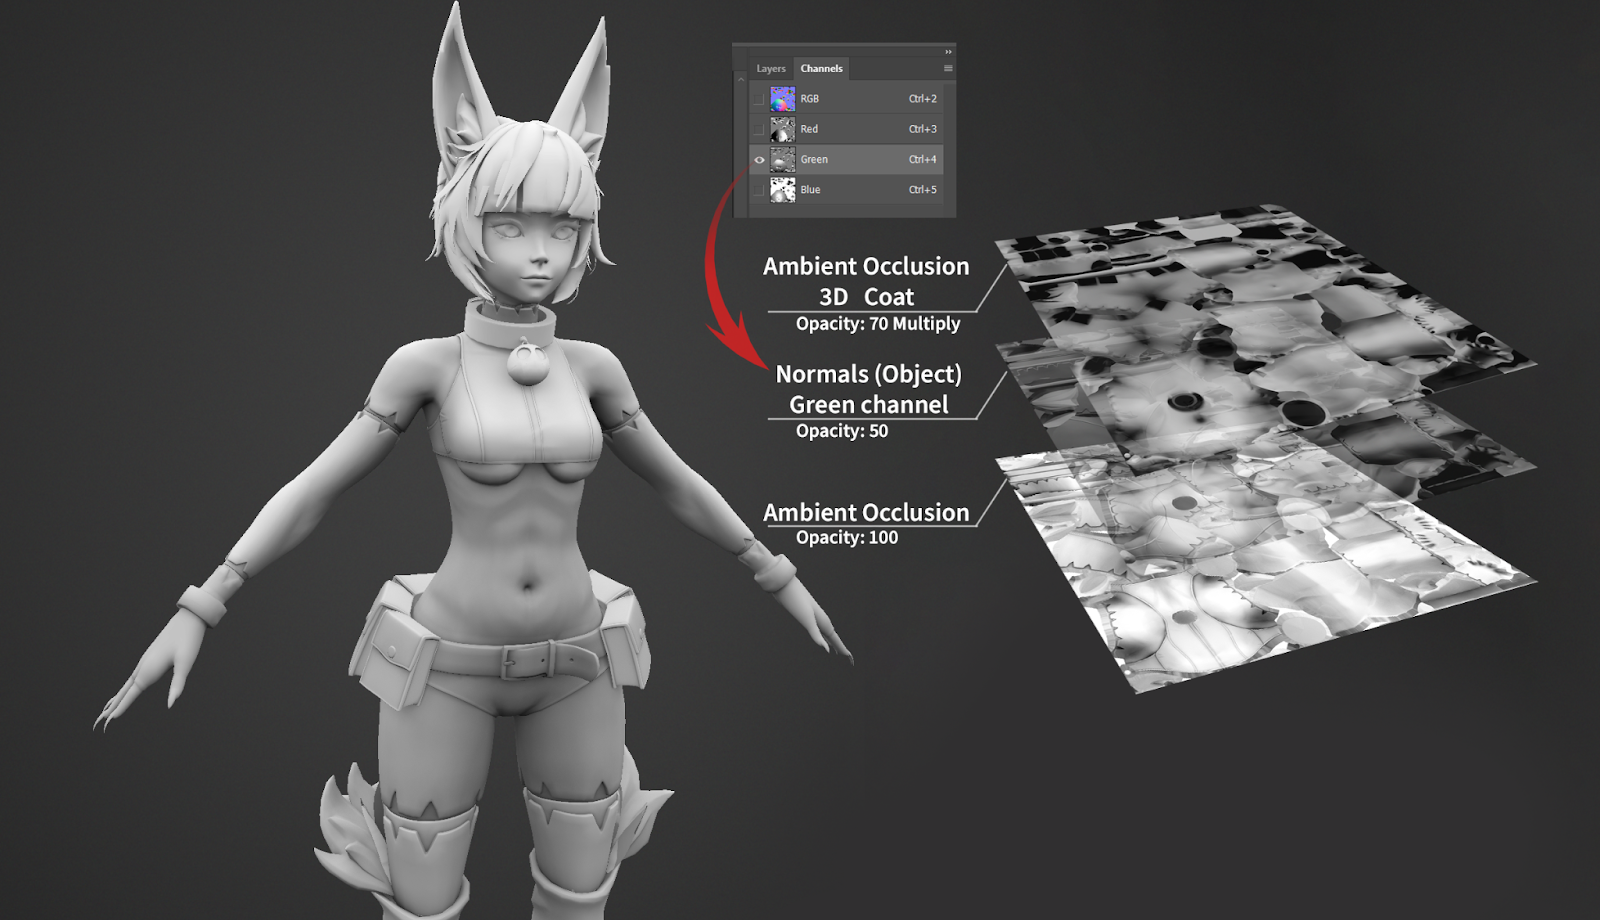
As already mentioned, to get a good result from AI, you need to try more than just fill the model with one color and add a couple of spots. The more gradients and noise on the original texture, the better the result will be given by AI.To make things easier, you can bake Ambient Occlusion, Normal Object and ID Map.
We will need ID Map for more convenient work with masks.
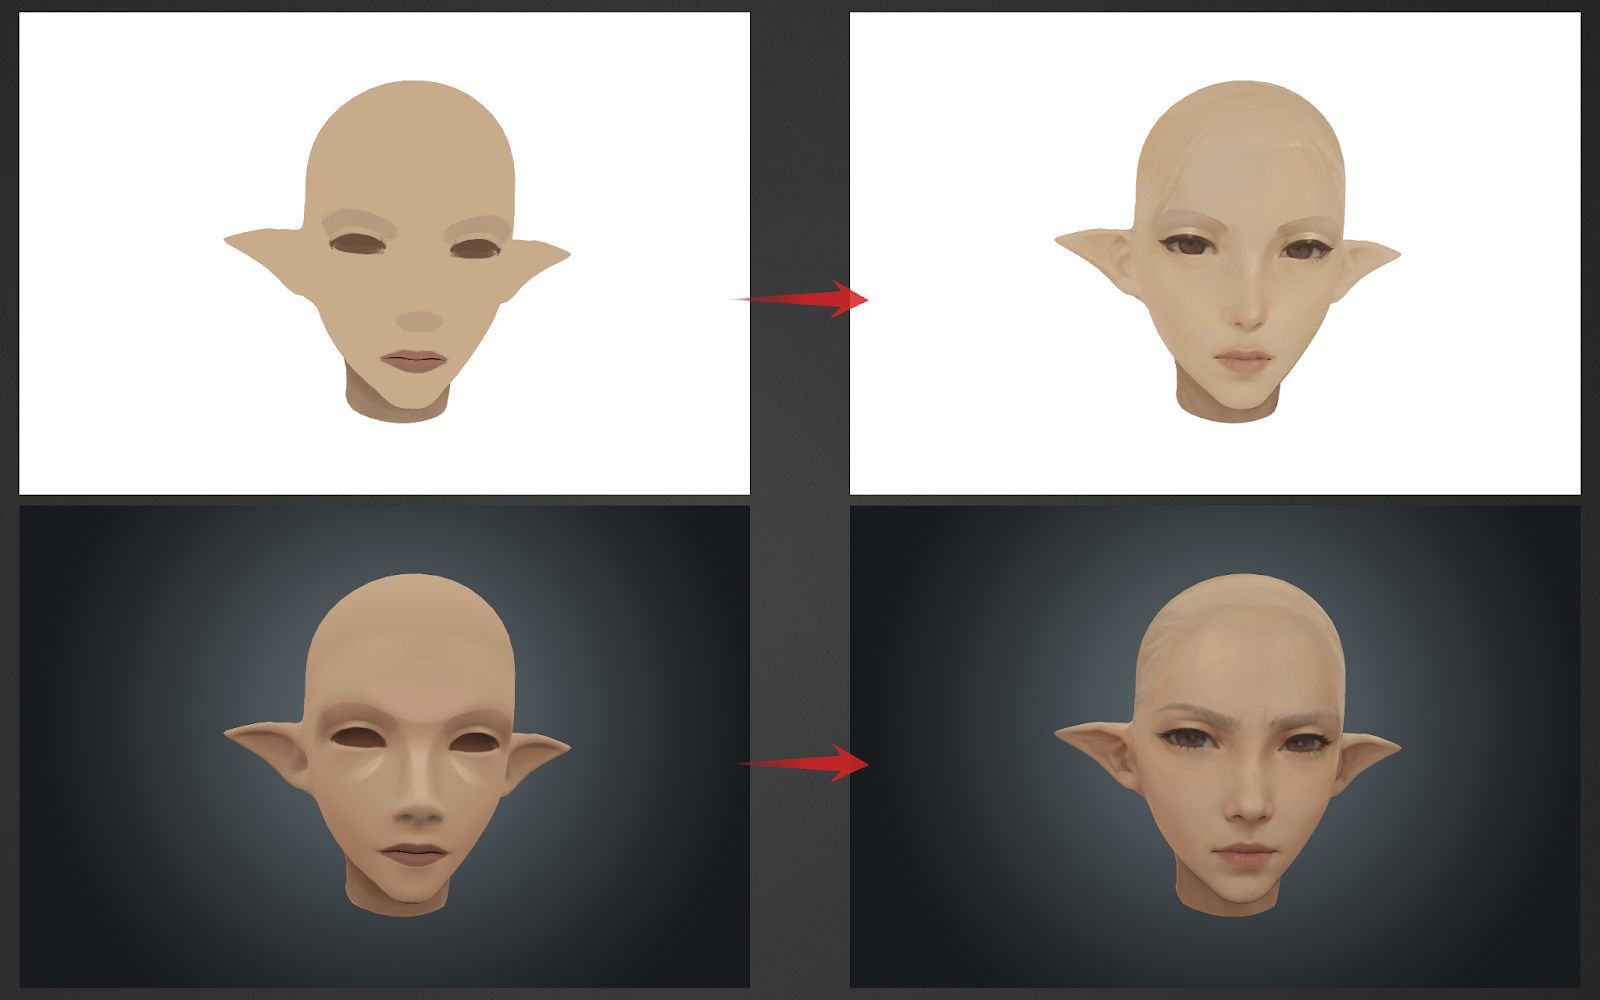
Thanks to Ambient Occlusion and Normal Object, textures can be easily drawn.


Skin
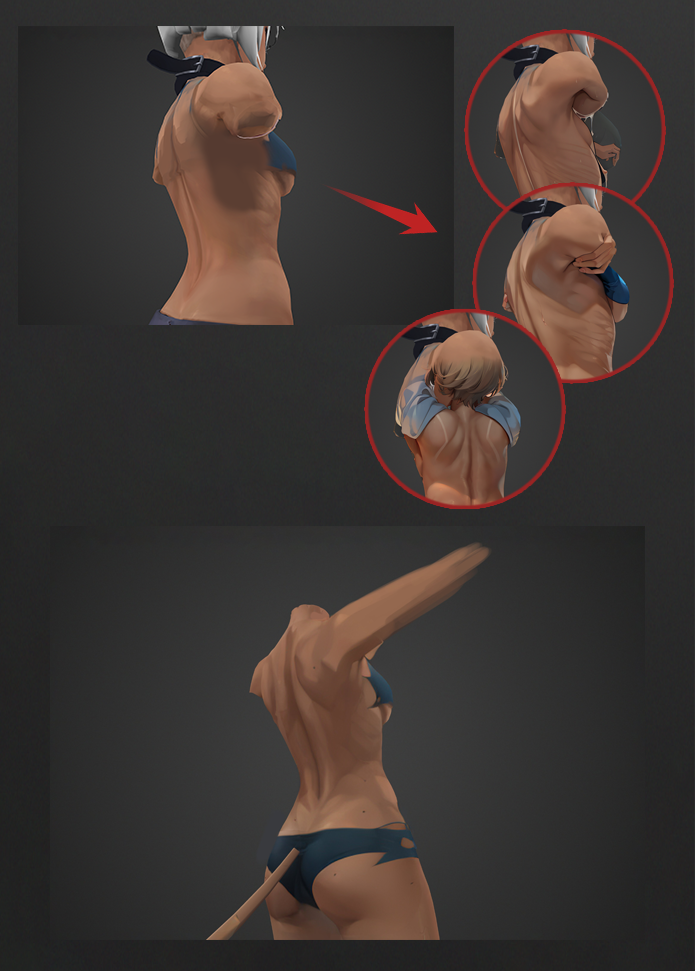
Stable Diffusion is able to work with different skin tones, even the most specific ones. That allows you to quickly work out the skin, if there is not much of it. For example, when the character's body is almost completely covered with clothes, except for the head.
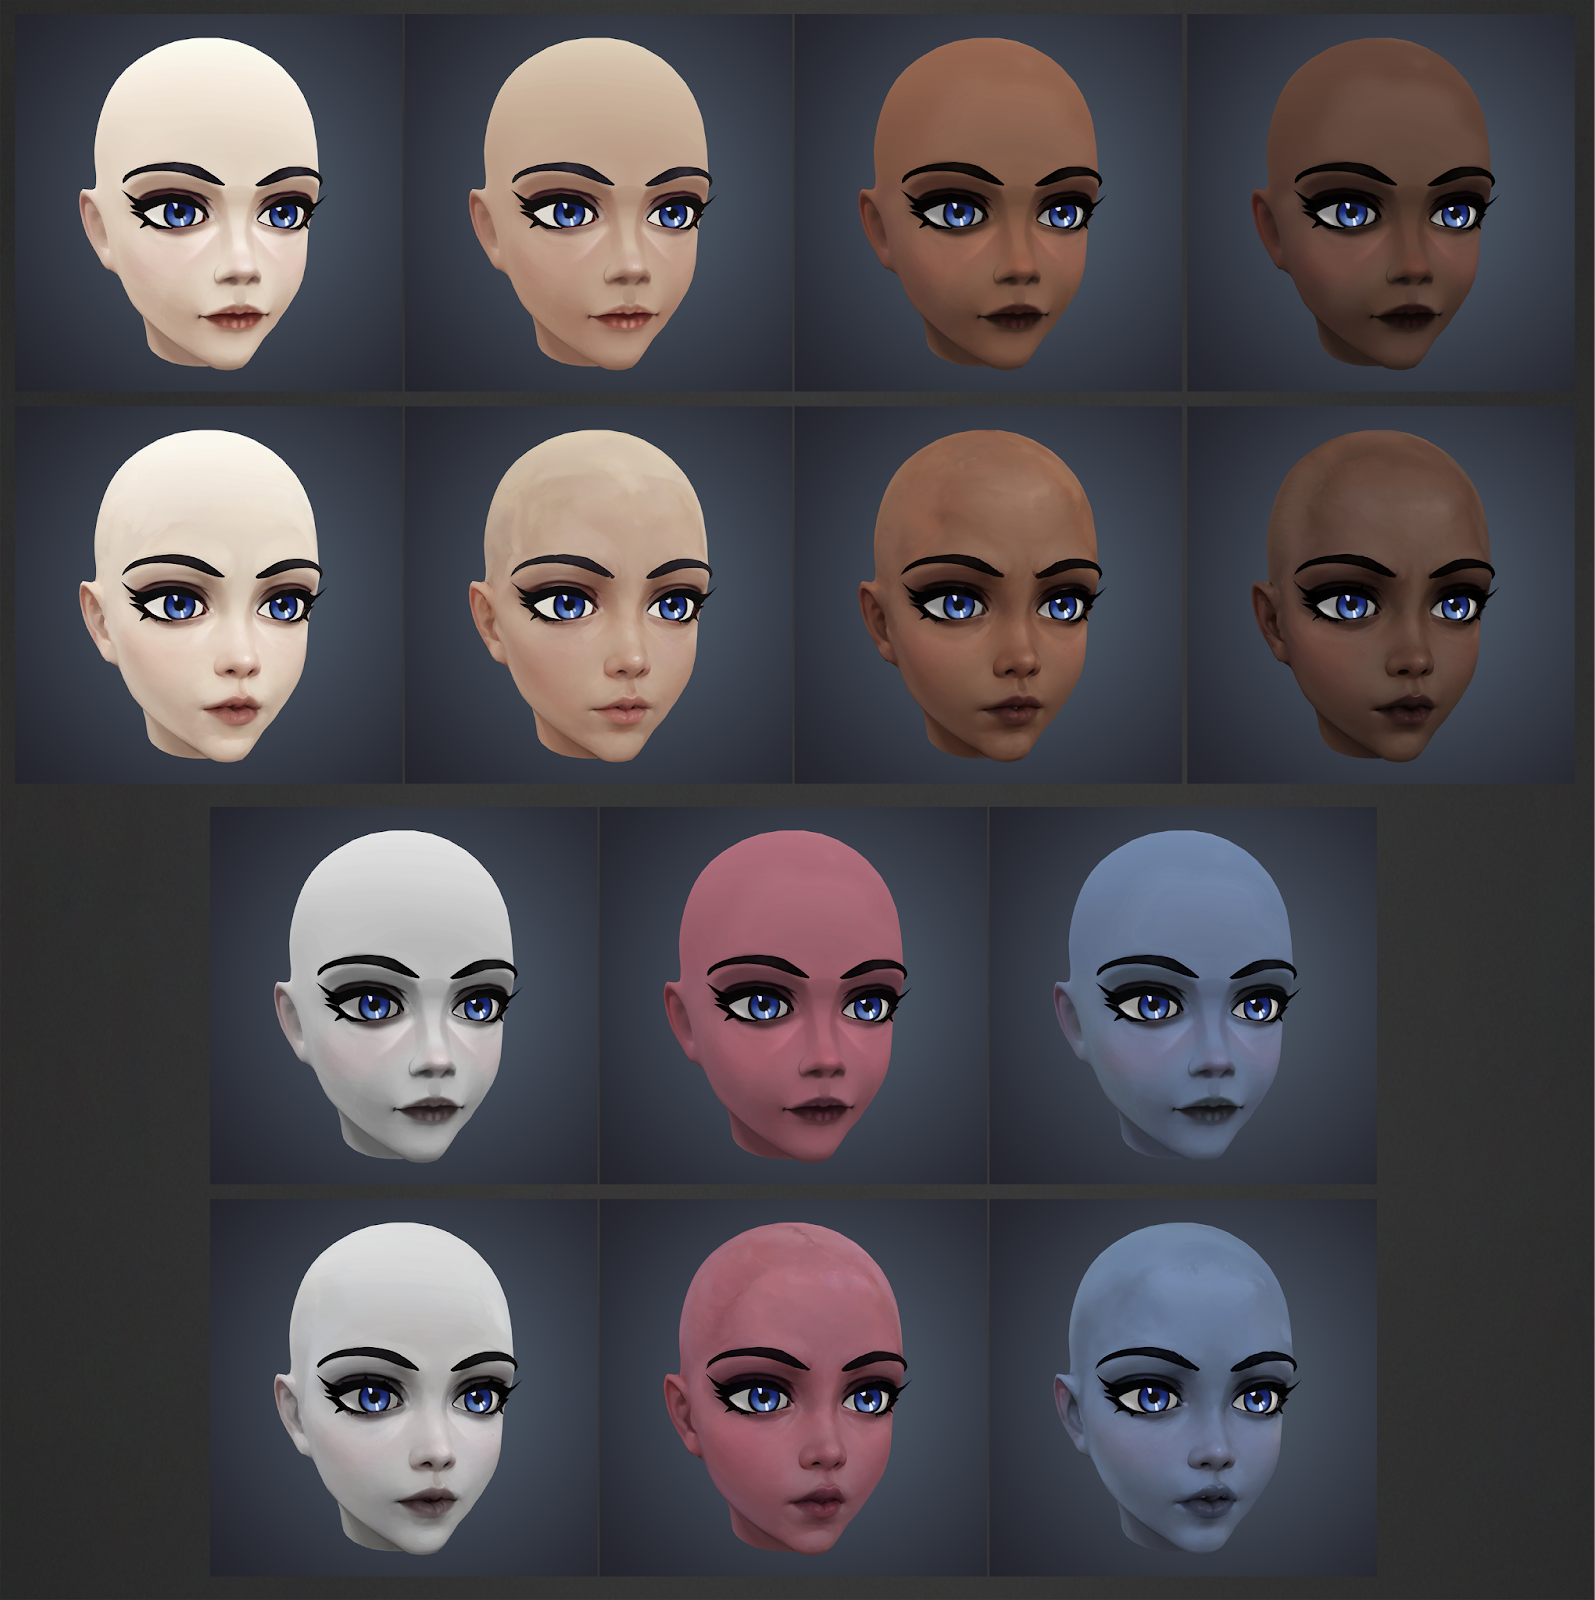
However, when more skin areas need to be rendered, there is a chance that the character will have multiple shades. For example, the face will be tanned, and the body, on the contrary, will be pale. Or shadows in one place are red and saturated, and in another yellow and faded.There are 3 options to fix this:1. If the power of your computer allows you to calculate large images, then you can generate large chunks. For example, affecting the face and upper abdomen, then the abdomen and knees, and so on. And when changing the angle, do not change the angle much so that the results of previous generations are clearly visible.However, artifacts may occur when working at higher resolutions.2. Creating skin in black and white. Paint the skin using only gray. Then add b&w to the prompt. You will get black and white skin, which you can then paint in any color using Blend mode.3. Paint as is, and edit bad places with Photoshop and 3D Coat tools.
In my work, I will use 3 method. If necessary, I can always convert it to black and white and work with the skin using the second method.
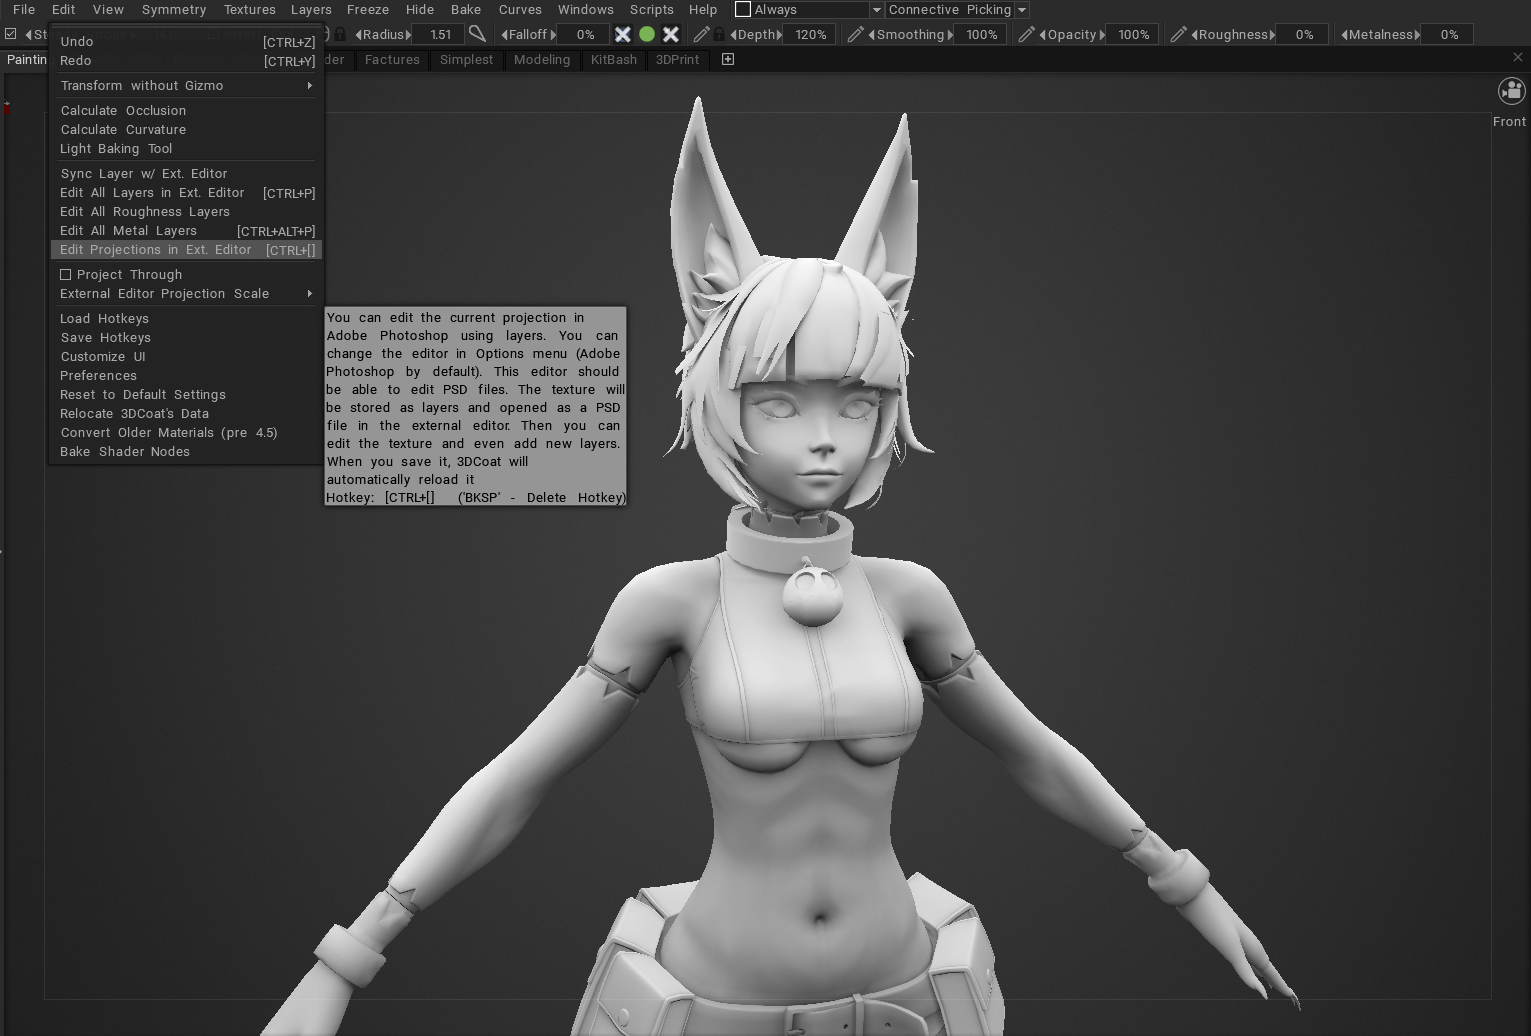
In 3D Coat I turn on Flat Shade (hotkey-2). Then Edit > Edit Projections in Ext. editor.
After, using fill and adjustment layers I set the main color to the skin.
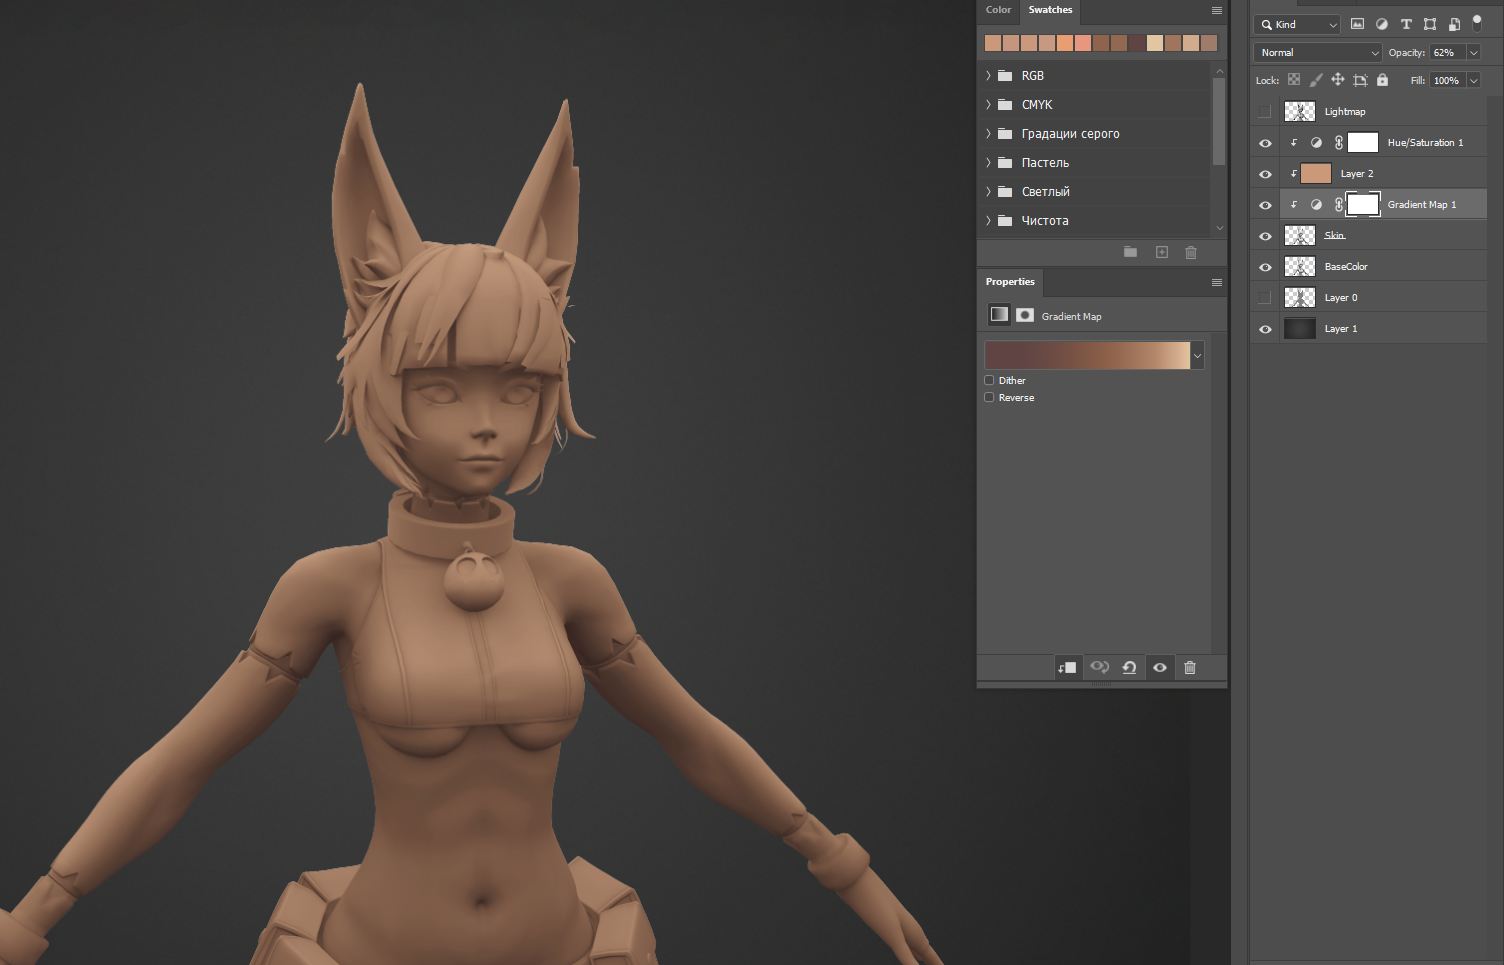
Now I bring the layers into Photoshop and then merge them. Such a result can already be transferred to Stable Diffusion, but what will come out as a result of generation will not suit me, so I will devote a little more time to the original texture. I will clean up the excess and add additional pigments on the cheeks, elbows, and so on.
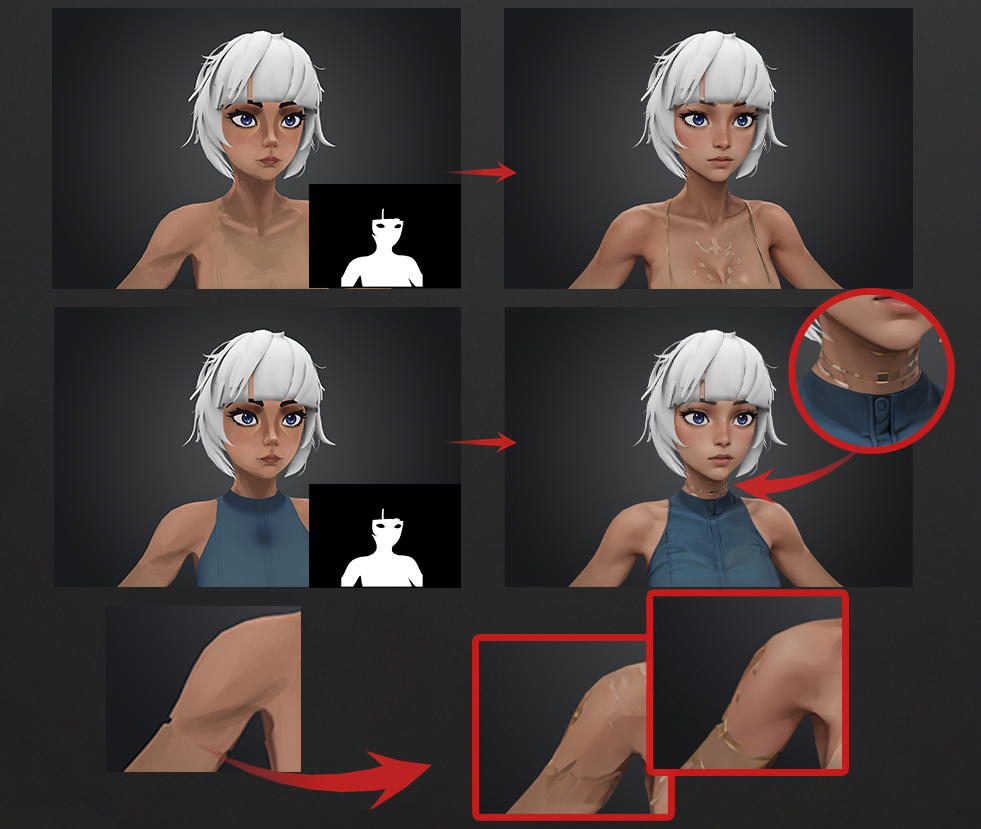
After some tweaks, I bring the projection of the model into Photoshop.I don’t draw scars at this stage, because AI may not understand what it is and draw it incorrectly. Therefore, all patterns, scars, tattoos should be done separately on another layer.The character has clothes that compress the body, so it's better to draw them, but in such a way that later you can cover them with layers of clothes.In places where the scars are located, there are depressions. In order for them not to give out anomalies, it is better to paint over them on the projection. The shadows from the hair and clothes will be drawn later.Also, for comfortable work with Stable Diffusion, we create a black and white mask.
Next, go to Stable Diffusion. Choose your Stable Diffusion checkpoint and SD Vae. In the img2img tab, enter promt and negative promt. Switch the mode to Inpaint upload and paste our image and mask.Next, be sure to set Only masked in the Inpaint area parameter. So that the miscalculation is only in the mask zone and the image size does not change. Only masked padding can be set to a small 4-16 pixels normally.Sampling method DPM++ 2M Karras or DPM++ SDE Karras. For a more artistic result.Sempling steps around 20-35 will suffice. Resize to is better set in the area up to 960x960 (If your video card allows you to quickly generate images of large sizes, then you can specify them. Due to the small denoise value, the chance of getting a broken image is not great, but not equal to 0. In addition, a higher resolution on generation will not add clarity to your texture). CFG Scale from 6 to 11 (7-8 is recommended). Denoising strenght from 0.35 to 0.5.Denoising strenght is responsible for how much the final result will differ from the original. Do a few test generations and find the right value for yourself. Then in the Batch count you can set the number of generations and then select the best ones from all the pictures. Next, transfer the images to Photoshop. Edit the new layer if necessary. Save and the texture will be transferred to 3D Coat.Then I do a symmetrical texture transfer in 3D Coat using the Topo Symm tool. I will add all the asymmetry later. The primary task for me is to get a nice skin texture.I tint all the shoals and, changing the angle, repeat the operation again and again. It is desirable that each new generation affects the previous one, in order to avoid sharp boundaries.
In the course of work, you may need to hide some elements so that you can see the place in need of painting. But when hiding some geometry, you may run into another problem. For example, to draw the side of the character's body, the hand interferes with us. But if you hide it, Stable Diffusion will try to draw the missing limb or something worse. Therefore, it is better to draw the missing elements, but in such a way that they do not interfere with the generation space.
Clothes and accessories
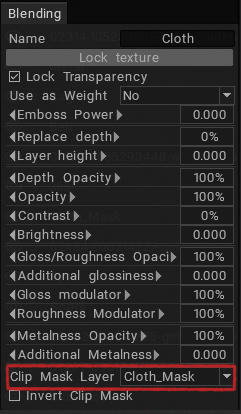
After drawing the skin, you can start working on the following details. With the help of the ID map we create masks and using the Clip Mask function we attach the layers painted through the gradient map in Photoshop to them.
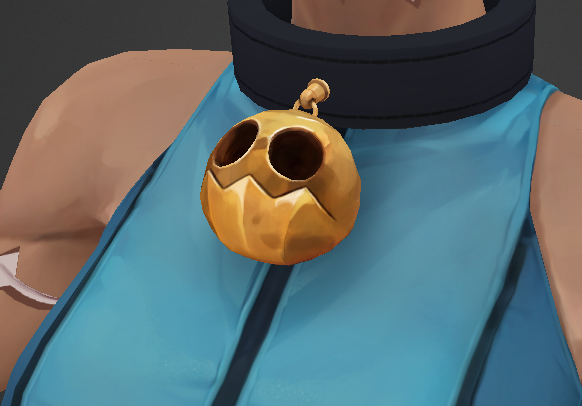
When drawing clothing elements, it is important to clearly understand which element the AI can handle, which it cannot, and where you can go for a trick.For example, to draw panties on a model, it is not necessary to spend a lot of effort explaining what it is. You just need to add some gradients and light where you want to add creases.In the case of parts with more complex elements or materials that have reflections (for example, metal, crystals, etc.), there will be a little more work.In my case, the character on the collar has a golden decoration that simply does not draw. Therefore, I draw some highlights myself. I do several generations and combine the results to make a beautiful decoration.

If necessary, I finish the missing.
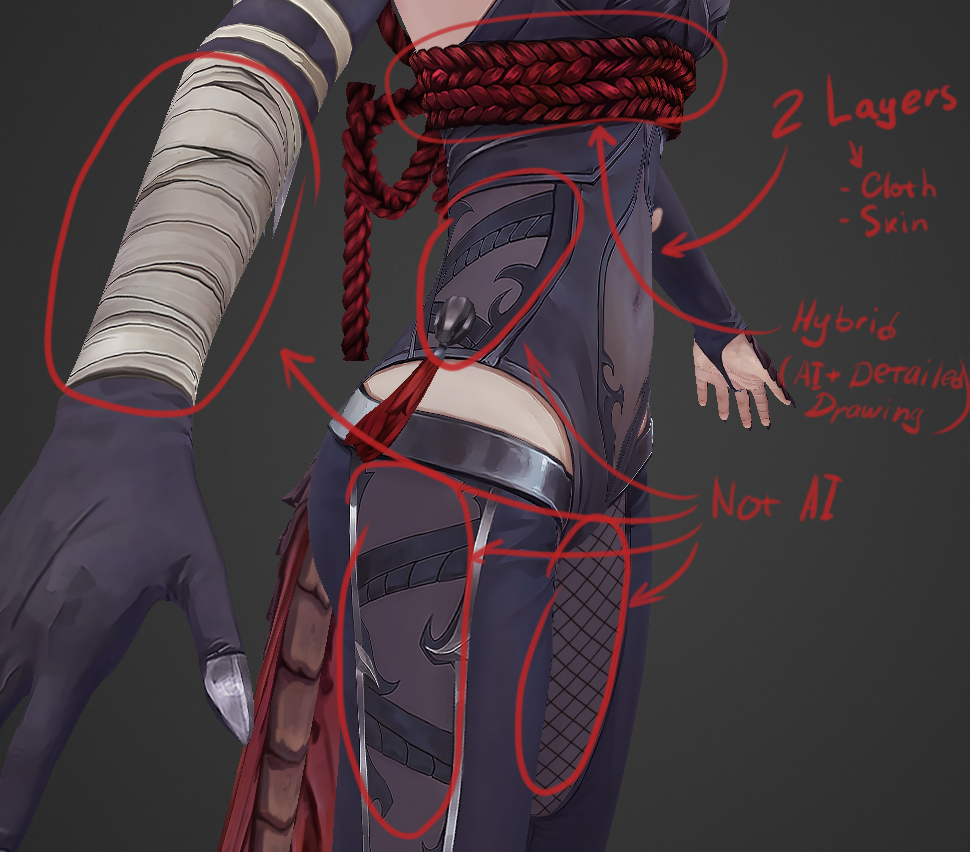
The more complex the structure and geometry of the element, the more manual work it requires. Therefore, in the case when you need to draw complex elements, you should not rely on artificial intelligence.
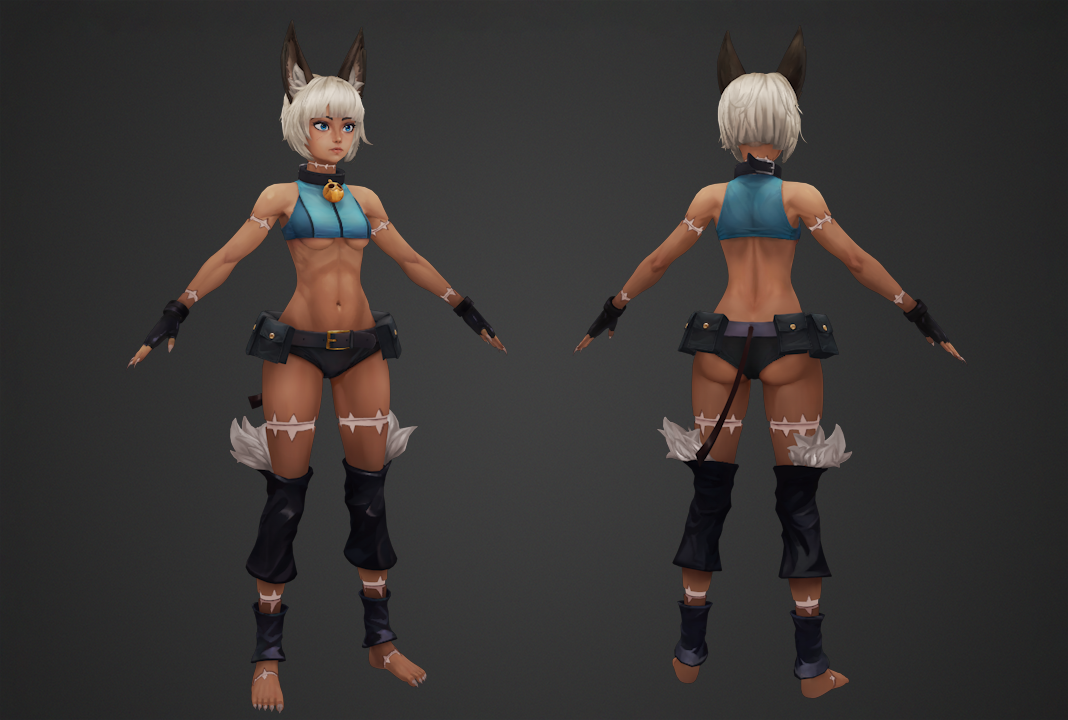
Final rendering of details
After the main work of Stable Diffusion is over, it's time to work with your hands. Due to the presence of planes, wool and hair, I will draw by hand.
Then, I touch up the imperfections, refine some details, adjust the color and add additional gradients.

You can see the model atArtstationSketchfab
My settings for Stable Diffusion:GumroadBoosty