Mid Poly Bevel Technique
polycounter lvl 8
Hello all, I've been trying to wrap my head around this technique and simply cannot find an answer for the issue I'm encountering. Do you unwrap the 1 segmented bevel on your mid poly mesh?
I'll use this lid mesh as an example of my problem. I unwrapped this small mesh, no bevel has been applied but I have it live in the stack.
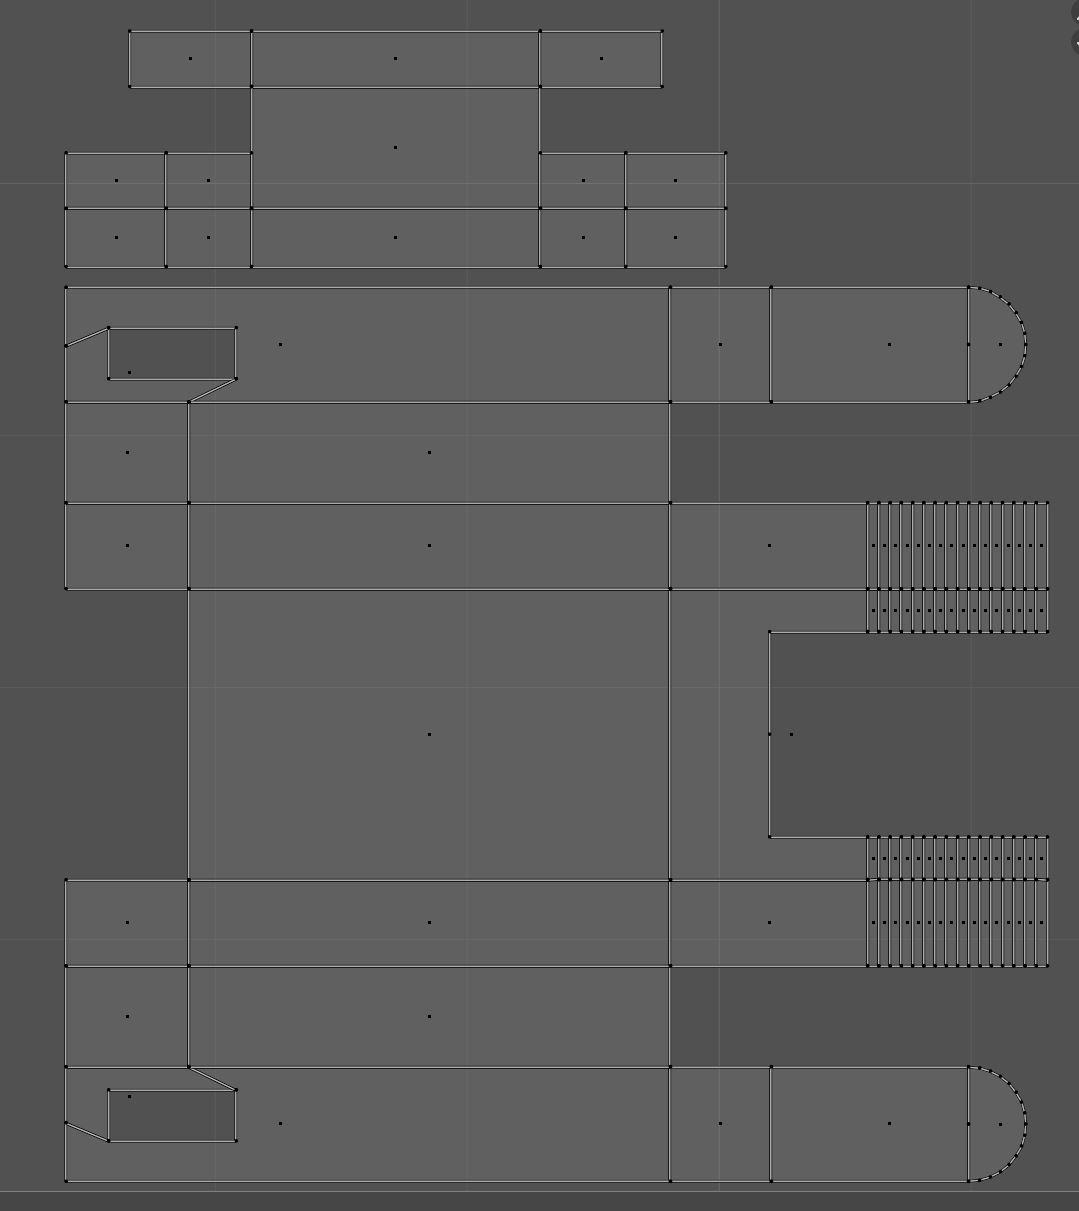
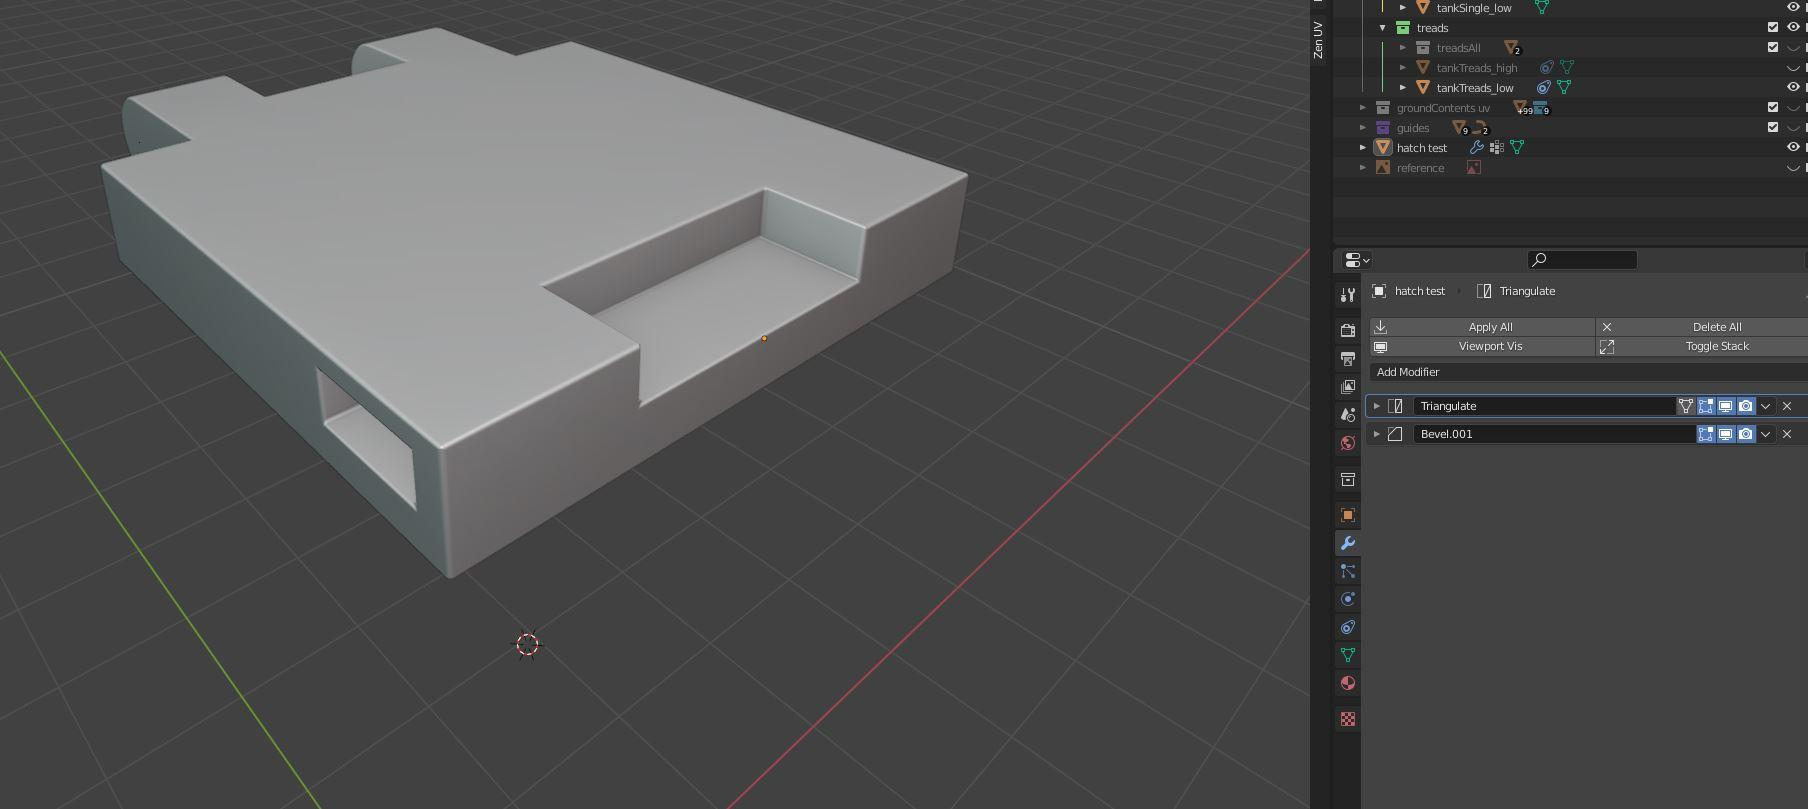
Smoothing looks good, weighted normals all correct. Now's here's what I can't wrap my head around. Many have told me to export the bevel live in the stack and NOT to unwrap it. But here's the thing, when exporting it's going to apply the bevels anyway and add geo to the UV's. When this happens many corners experience errors, some overlap with the mesh, some become detached and so on. Here are a couple of images showing modifiers applied in Blender vs exporting them live and viewing the UV's in Marmoset.
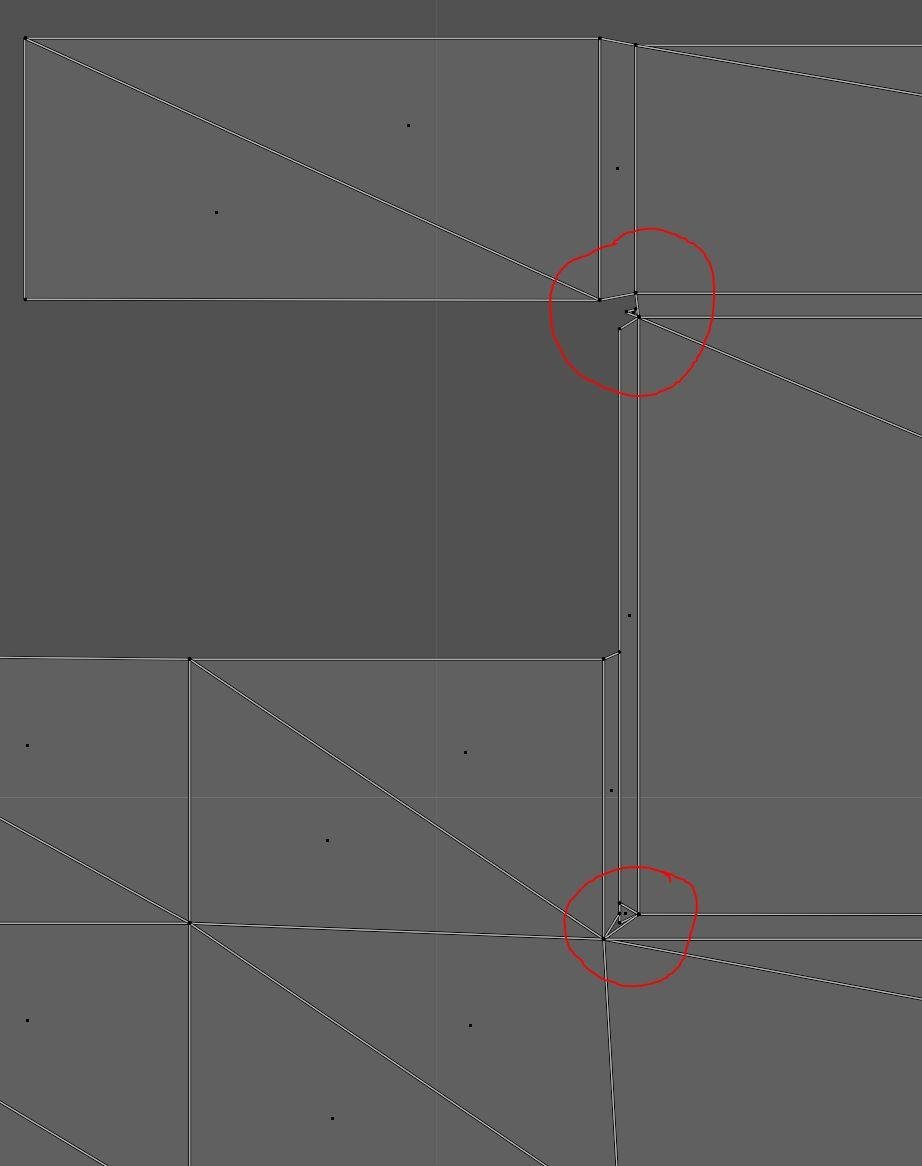
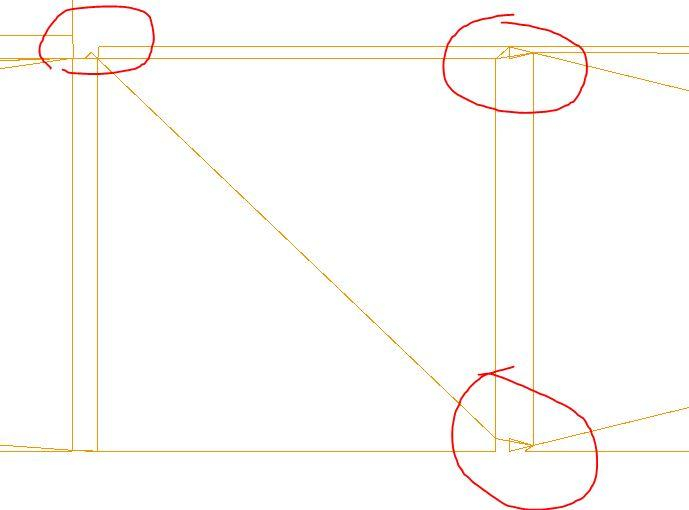
Now do these small errors matter in the UV's when texturing? I don't really no, maybe it's not an issue. I'm just trying to understand how this mid-poly technique works and what I should be doing. Am I missing something here? I greatly appreciate any feedback! Thank you!
I'll use this lid mesh as an example of my problem. I unwrapped this small mesh, no bevel has been applied but I have it live in the stack.
Smoothing looks good, weighted normals all correct. Now's here's what I can't wrap my head around. Many have told me to export the bevel live in the stack and NOT to unwrap it. But here's the thing, when exporting it's going to apply the bevels anyway and add geo to the UV's. When this happens many corners experience errors, some overlap with the mesh, some become detached and so on. Here are a couple of images showing modifiers applied in Blender vs exporting them live and viewing the UV's in Marmoset.
Now do these small errors matter in the UV's when texturing? I don't really no, maybe it's not an issue. I'm just trying to understand how this mid-poly technique works and what I should be doing. Am I missing something here? I greatly appreciate any feedback! Thank you!
Replies
Let's say I have a low poly 1 segmented chamfer box with a weighted normal, I also have a high poly 3 segmented chamfered box with weighted normal that may have other details such as bolts and such. I know everywhere there's a hard edge (90 degrees) I should have a UV seam on my low poly, but what about when that low poly box is chamfered with face weighted normals? Where should the seems go and better yet how do I handle the corners? Most examples I've found use cylinders and it splits the UV's even on a 45 degree.
I went through this post, was very helpful
https://polycount.com/discussion/154664/a-short-explanation-about-custom-vertex-normals-tutorial/p1
It didn't have a ton of unwrapping discussion other than it was slightly more tedious as you have to deal with the a bevel/chamfer. Does any artist ever add a 2 segment bevel and can split in the middle? Probably overkill and I'm not sure if that would even unwrap correctly.
Any idea if this method is preferred over the traditional baking of smooth edges? Maybe depends on the application I suppose...Thanks for the feedback, I greatly appreciate it.
From a distance it shouldn't matter too much, maybe I should go with a more traditional bake high poly smoothed bevels on to a low poly hard edge mesh.