Need help in modeling Mauser C96 trigger guard area

polygon
Hi, I'm learning 3D modeling and right now I'm following the tutorial of Simon Fuchs where he creates a game-ready asset of Mauser C96. In his tutorial he uses zBrush hardsurface polish workflow (or dynamesh hardsurface workflow, I don't actually know the right name for it).
This is the gun I want to model:

This is the part I have the trobles with:

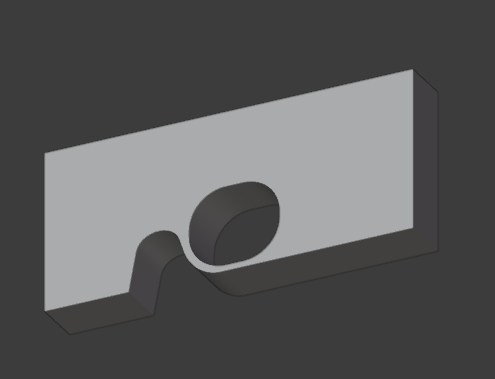
I have managed to roughly create the shape I want, but the topology is a mess, shading is bad and the whole process was rather tedious. AFAIK topology and shading are not super important for this workflow since we gonna dynamesh whole model later, but anyway I want to learn how to model it the proper way. I'm not using subdivision surface for this model cause I'm not sure that it's a good decision to use it with this part of the gun.
Overall Simon created a great tutorial (you can check out his end result here https://www.artstation.com/artwork/lVy0bV ), but I feel that a better job can be done in this particular part of the model.
I have a hard time modeling it and keeping the right bevel sizes and geometry of these parts:

First I have tried to boolean parts like this:

but then I found it very hard to bevel edges and maintain the shape of this part:

Then I did it Simon's way — modeling it from two separate pieces:

You can see my result of this approach in the second image in this post. It was very tedious to connect these two parts. Probably because I had more geometry than Simon did.
So my question is — how would you approach modeling this piece? What would you call the "right way" of modeling this (if the "right way" is a valid term at all)?
In attachment you can find a .blend (and FBX) file with all you need if you decide to model this part.
Any advice will be appreciated!
This is the gun I want to model:
This is the part I have the trobles with:
I have managed to roughly create the shape I want, but the topology is a mess, shading is bad and the whole process was rather tedious. AFAIK topology and shading are not super important for this workflow since we gonna dynamesh whole model later, but anyway I want to learn how to model it the proper way. I'm not using subdivision surface for this model cause I'm not sure that it's a good decision to use it with this part of the gun.
Overall Simon created a great tutorial (you can check out his end result here https://www.artstation.com/artwork/lVy0bV ), but I feel that a better job can be done in this particular part of the model.
I have a hard time modeling it and keeping the right bevel sizes and geometry of these parts:
First I have tried to boolean parts like this:

but then I found it very hard to bevel edges and maintain the shape of this part:
Then I did it Simon's way — modeling it from two separate pieces:
You can see my result of this approach in the second image in this post. It was very tedious to connect these two parts. Probably because I had more geometry than Simon did.
So my question is — how would you approach modeling this piece? What would you call the "right way" of modeling this (if the "right way" is a valid term at all)?
In attachment you can find a .blend (and FBX) file with all you need if you decide to model this part.
Any advice will be appreciated!
Replies
Since I'm learning I'm trying to not miss the opportunity to experiment and try different approaches just to get the experience. I think that's not bad even if I end up with a mismatch, I believe making more mistakes now will help me to avoid them in the future. If something will not work as expected I will step back and redo it to match the tutorial.
I like this advice, I will try it
Indeed I was aiming for high fidelity, so I added a lot of segments to my bevels and then had a tough time trying to merge the trigger guard part with the rest of the gun's body. I missed the option to make it low poly and then add a subdivision surface modifier.