Reducing Normal/Roughness Intensity
Hello,
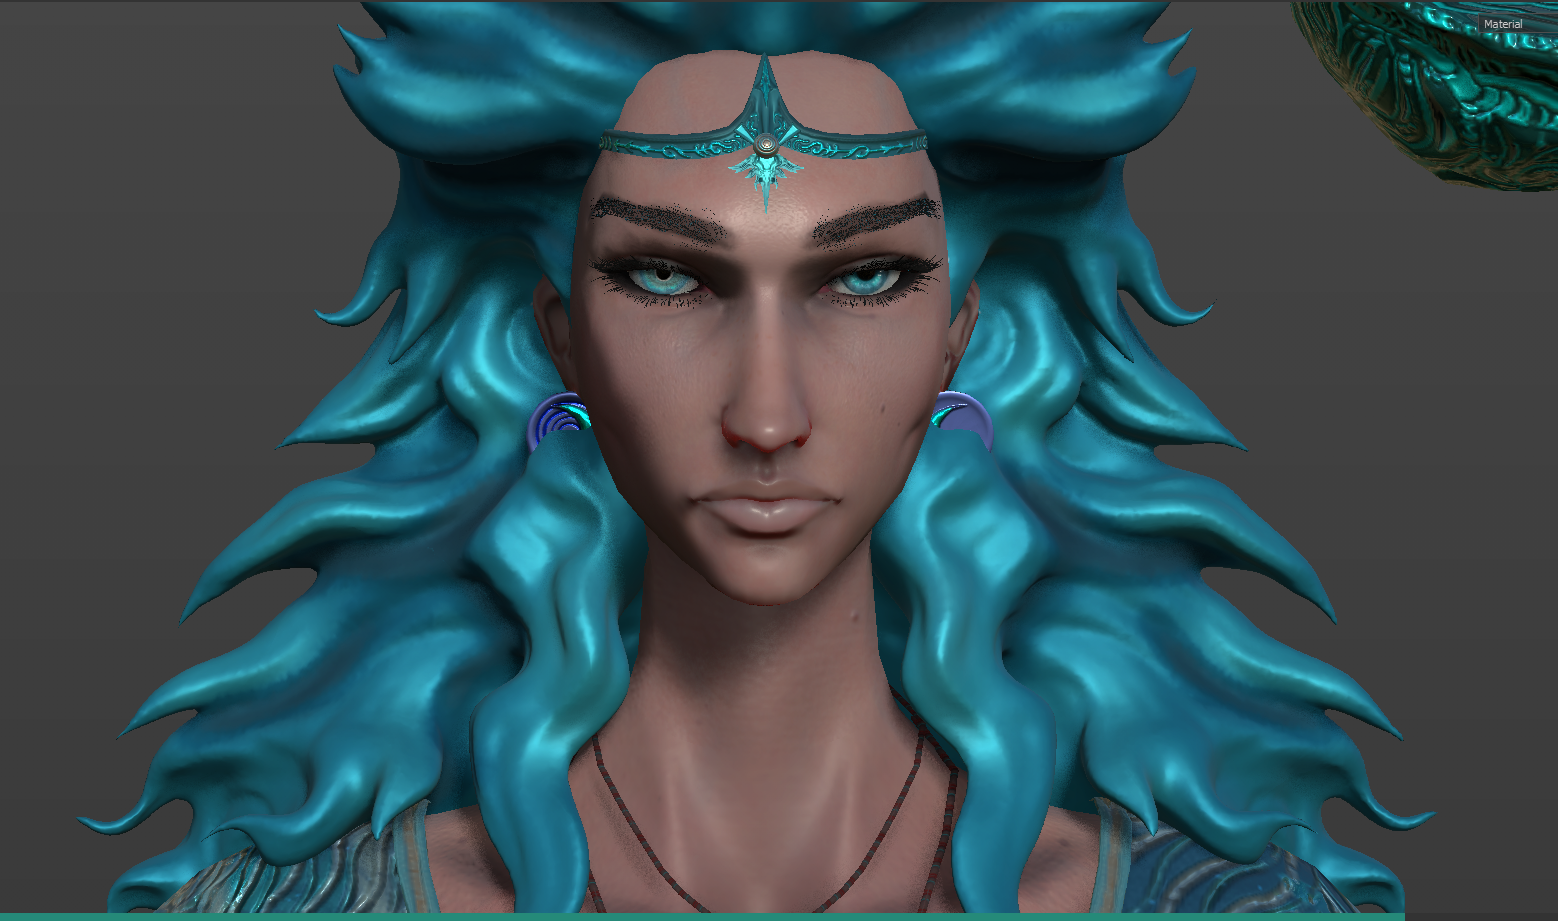
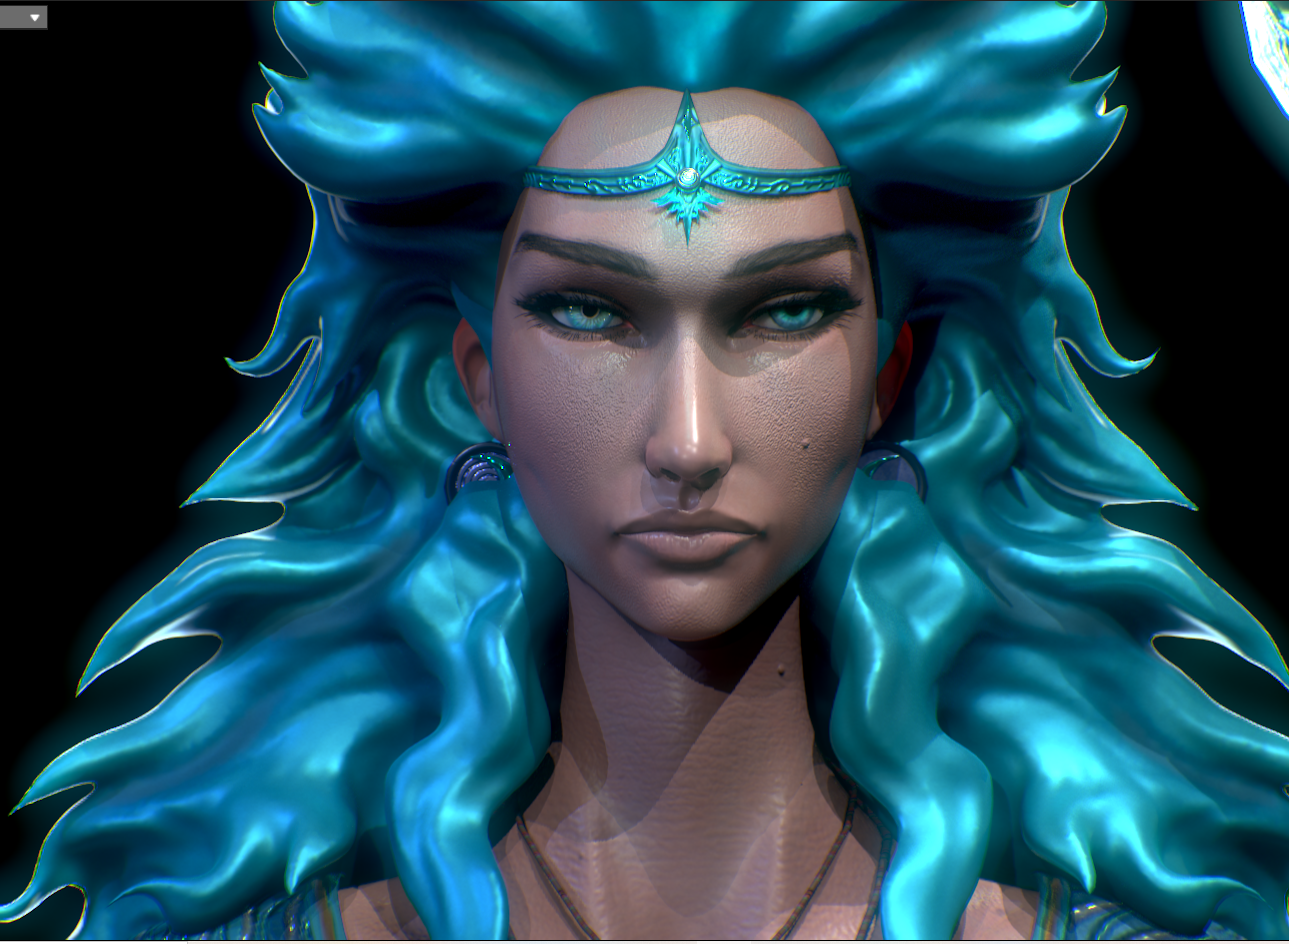
Is there anyway to reduce the Normal/Roughness Intensity on Marmoset other than having to do this externally? I've noticed the maps intensity levels is a lot stronger when imported into Toolbag i.e. a lot glossier or stronger normals, whereas they appear reasonably low on Substance Painter. The current Roughness slider only makes things more specular, and doesn't increase the Roughness on the Map. Whereas the Normal Map has no slider at all. It may be slightly hard to tell but here's an example of what I mean:
Substance Painter Viewport Render:

Marmoset Viewport Render:

The nose ridge is a clear pointer, but the Normals are definitely very strong, compared to Substance Painter. Anyway to reduce this in Marmoset than having me to do this in Substance Painter? Thanks.
Is there anyway to reduce the Normal/Roughness Intensity on Marmoset other than having to do this externally? I've noticed the maps intensity levels is a lot stronger when imported into Toolbag i.e. a lot glossier or stronger normals, whereas they appear reasonably low on Substance Painter. The current Roughness slider only makes things more specular, and doesn't increase the Roughness on the Map. Whereas the Normal Map has no slider at all. It may be slightly hard to tell but here's an example of what I mean:
Substance Painter Viewport Render:

Marmoset Viewport Render:

The nose ridge is a clear pointer, but the Normals are definitely very strong, compared to Substance Painter. Anyway to reduce this in Marmoset than having me to do this in Substance Painter? Thanks.

Replies
That said, it seems like the primary difference is the scattering intensity settings in both applications, with Painter appearing to have a stronger scattering effect. You can increase Scatter Depth in Toolbag, which will soften the normals more. It would be a good idea to double check that your scale is set up correctly in Toolbag, as Scatter Depth is set in real world units (a value of 1mm is usually a good starting point if your scale is set up correctly). You can adjust the imported units in the Scene object to correct any issues with scale. You can click the little gear button in the viewport and enable the scale reference guide to check your scale.
As to the difference in roughness, this looks to be primarily due to differences in lighting between the applications. In Toolbag, there are more lights, and they are more intense and sharper, creating brighter, more clearly defined specular highlights in more places. If you look at the area around the neck/clavicle region, you'll see that where there is similar lighting, the roughness is similar as well. I would suggest using the controls in the Area/Shape section, increasing the size of the light will give you softer, more diffuse specular reflections as well as softening the shadows.
It would be good to check what value reflectivity is set to as well. If using the metalness workflow, a metalness value of 0 = 4% reflectivity, which is a little too high for skin. Skin should be about 2.8%. Depending on what the final target for this character is (ie: if it's going to a game engine like Unreal), you could switch to the advanced metalness reflectivity model, which gives you a secondary specular map and allows you to use values less than 4%, or you could author a specular map and switch to the specular model instead.
Lastly, no there is not a way to reduce the intensity of the normal map. In many cases this will cause shading errors as the values in the baked normal map are essential to rendering the shading correctly. If the normal map intensity is reduced the baked normal data will no longer be correct. If you want to reduce the intensity of specific elements, for instance, skin pores or other fine detail that you've added in software like Painter, you would want to reduce the intensity of those layers and reexport the images. To reduce the overall intensity of the normal map you would need to edit the image in an image editing program and reduce the contrast, though as mentioned this is not recommended as it will likely introduce shading artifacts.
https://marmoset.co/posts/sss-in-toolbag-4/
https://marmoset.co/posts/creating-realistic-skin-toolbag-saurabh-jethani/
https://marmoset.co/posts/how-to-create-realistic-hair-peach-fuzz-and-eyes/
The last two were written for Toolbag 3, but the general concepts should apply.