Tutorial - Creating highpoly meshes for Nanite, using editor modeling tools and displacement (UE5)
I thought a lot of people would appreciate this so I made a mini tutorial about it. So there is a simple and fast way to bake displacement and subdivision into lowpoly meshes inside the editor, using the editor modeling tools. It goes like this:
1. Enable the editor modeling tools in the plugins settings. This will require you to restart the editor.
2. Put the mesh into the level, select it, and then select the modeling mode (located on the top panel where you can select create/landscape/mesh paint and other modes).
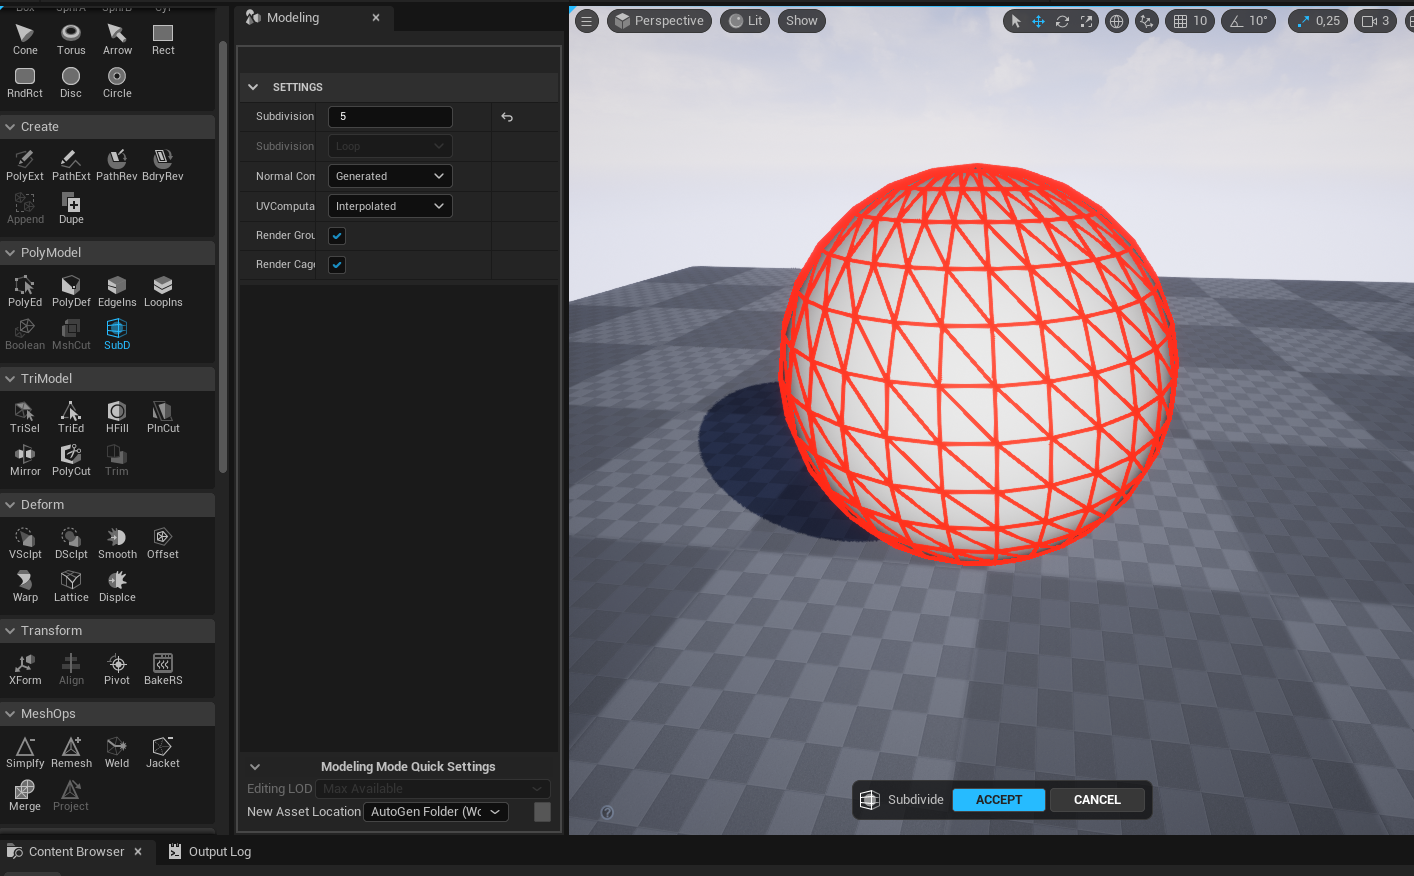
3. Optionally this step can be skipped, but doing it gives better result. Subdivide the mesh by clicking subdivide on the modeling panel. Press accept to apply the modification on the source mesh:

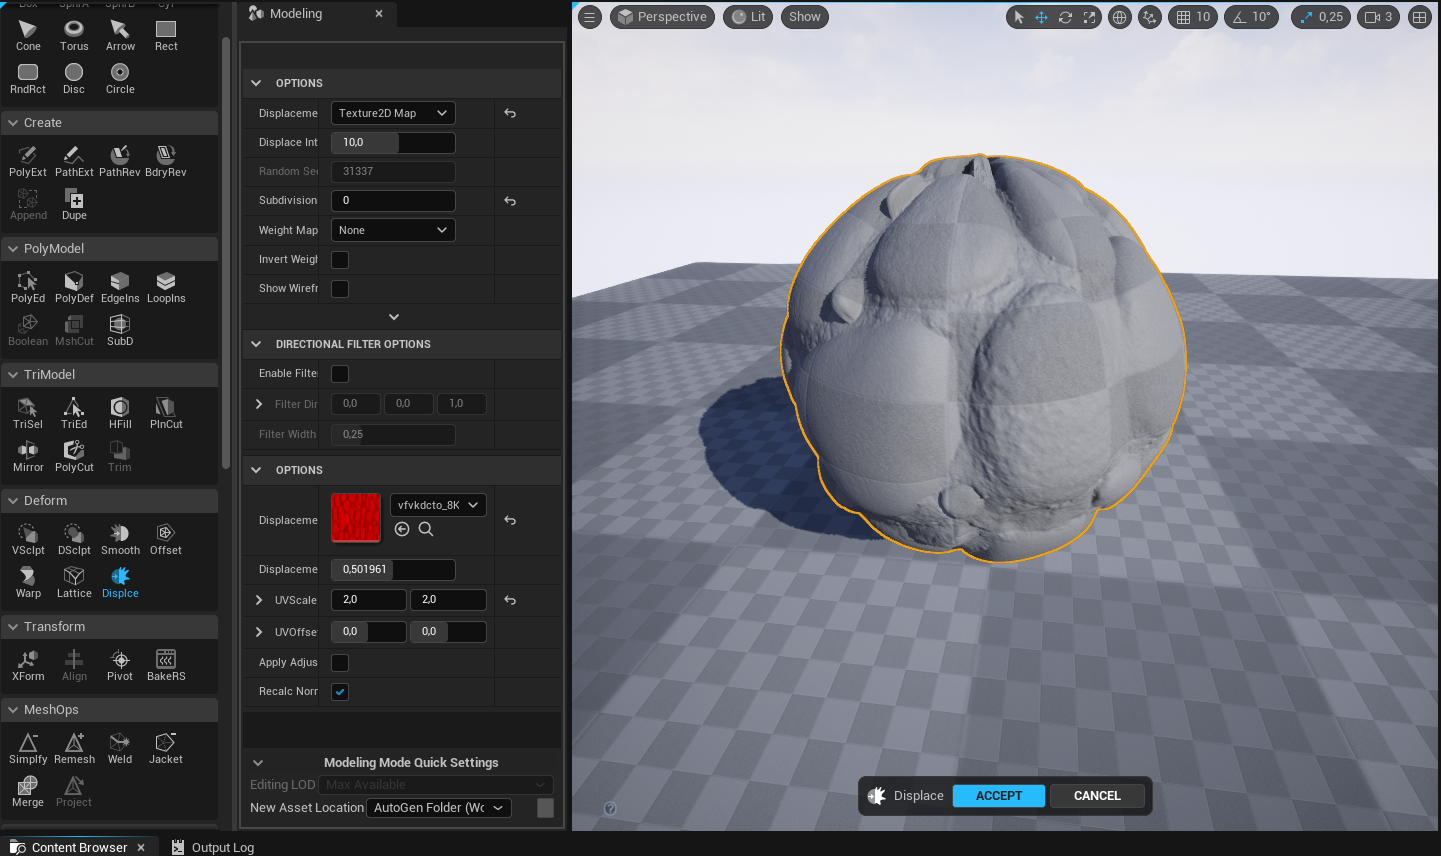
4. Select "displace" on the modeling panel, set the subdivision amount to 0 - If you skipped step 3, set it to some value but you will notice that this is flat tessellation, so the angular faces of the lowpoly is visible. I recommend subdividing it first, and then adding the displacement. Set the displacement texture, and press accept again:

5. At this point you are done and you can save the mesh.
Note - Megascans assets have highpoly source files too, so when working with those, I recommend simply importing the highpoly meshes and turning on Nanite on them.
Enjoy!
1. Enable the editor modeling tools in the plugins settings. This will require you to restart the editor.
2. Put the mesh into the level, select it, and then select the modeling mode (located on the top panel where you can select create/landscape/mesh paint and other modes).
3. Optionally this step can be skipped, but doing it gives better result. Subdivide the mesh by clicking subdivide on the modeling panel. Press accept to apply the modification on the source mesh:

4. Select "displace" on the modeling panel, set the subdivision amount to 0 - If you skipped step 3, set it to some value but you will notice that this is flat tessellation, so the angular faces of the lowpoly is visible. I recommend subdividing it first, and then adding the displacement. Set the displacement texture, and press accept again:

5. At this point you are done and you can save the mesh.
Note - Megascans assets have highpoly source files too, so when working with those, I recommend simply importing the highpoly meshes and turning on Nanite on them.
Enjoy!

Replies
I was expecting that with ue5, camera distance tessellation would now be possible with static meshes but we got nanite which is great but has its drawbacks especially as tessellation has been depreciated.
Looking forward to the full release.
So I am guessing there is a limit to how much polys is allowed per mesh.