Home 3D Art Showcase & Critiques

[WIP][UE4] Modular Sci Fi Corridor FC5

polycounter lvl 6
Offline / Send Message
Forest_Cat polycounter lvl 6

Hello everyone!
In this project, I’m going to use only Decalmachine Trim Workflow.
These are references:


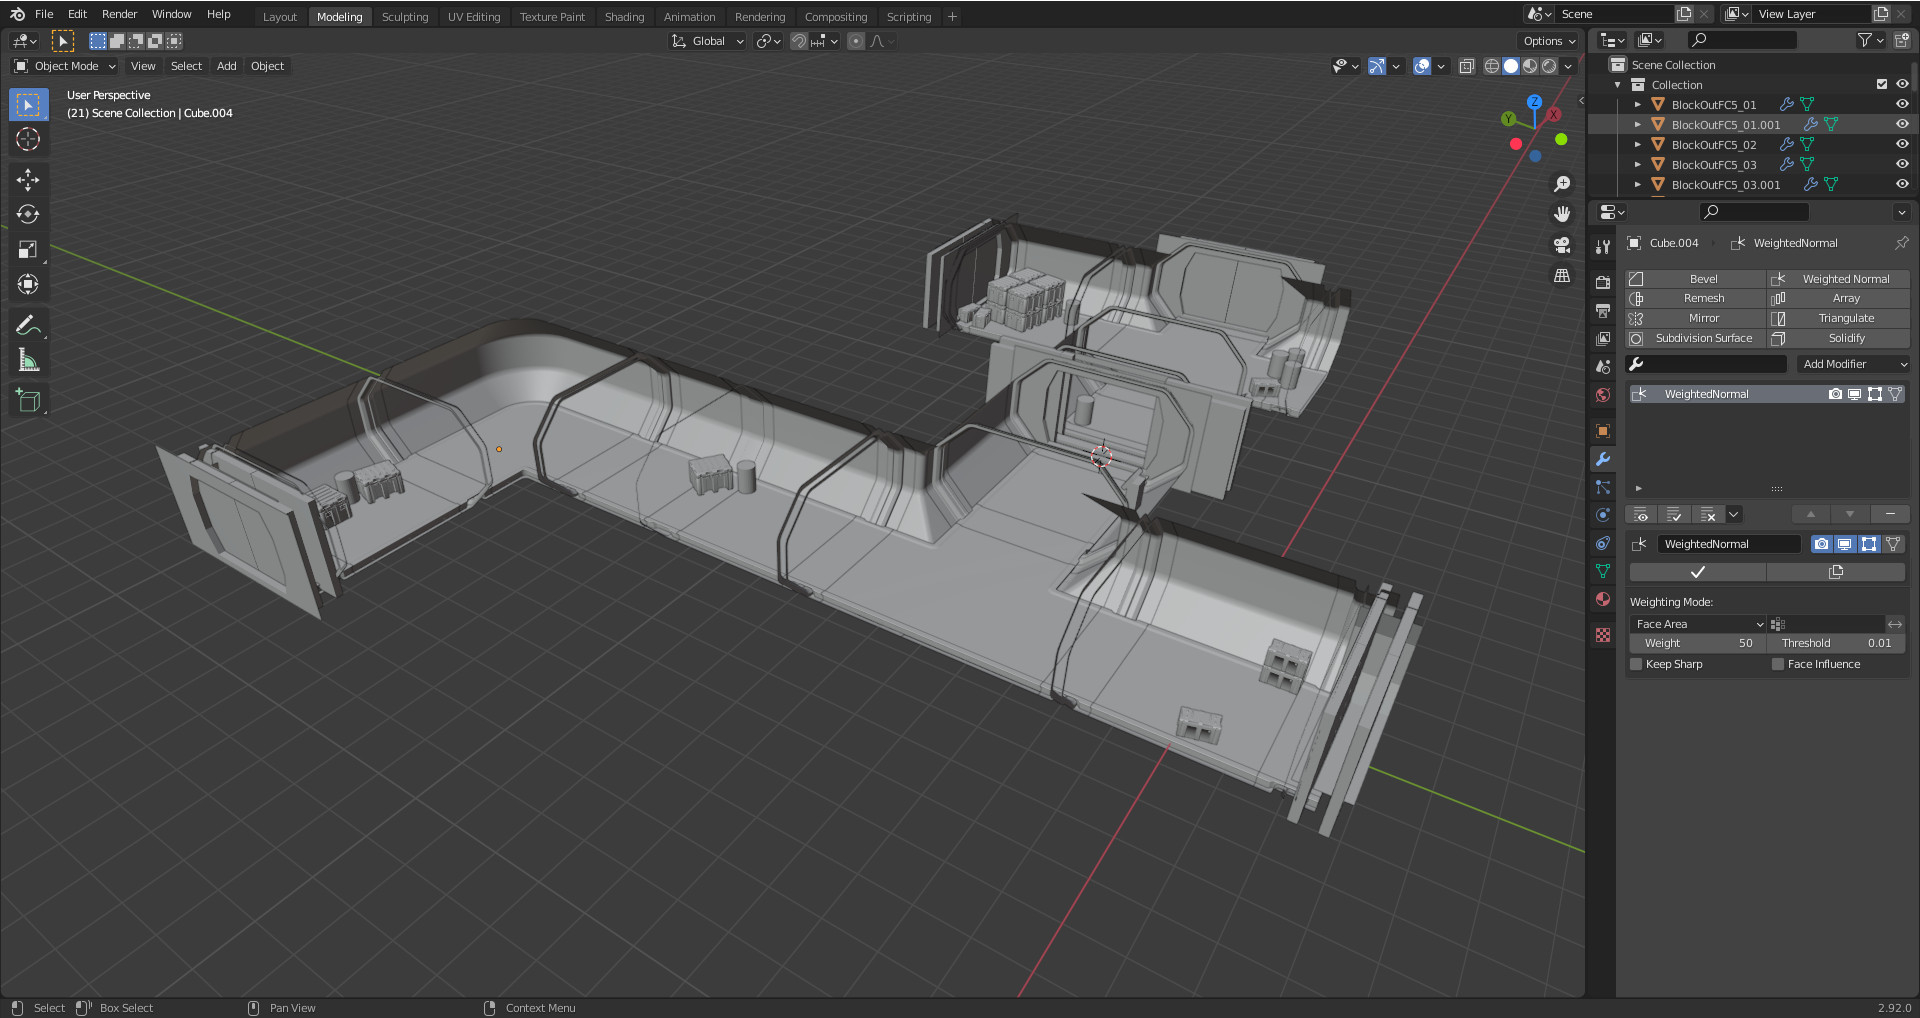
And this is the result of the first stage Blockout:


At the moment I have determined the number of objects, their baseline characteristics and an exemplary appearance. The standard section of the corridor has a length of 3 meters, a width of 4.6 meters and height from zero to z 2.6 meters. The thickness of the walls in the narrowest place should be 0.4 meters.

Replies

  • Forest_Cat
    Offline / Send Message
    Forest_Cat polycounter lvl 6
    Update 1:
    This is the final version of Blockout. I used the “Annotation” tool to designate future details.


  • CybranM
    Offline / Send Message
    CybranM interpolator
    Scene is looking good so far. Have you started work on the trim sheet yet?
    I'm looking to pick up DecalMachine, going to be interesting to see your results with it. Please post how you feel the addon is to work with, the videos make it seem very fast but theyre promotional so I take it with a grain of salt.

    Looking forward to seeing more :smile:
  • Forest_Cat
    Offline / Send Message
    Forest_Cat polycounter lvl 6
    @CybranM Yes, now I'm trying to understand what need to insert in Trim Sheet to get the desired result.

    Decalmachine as a whole works very well. There are some unpleasant limitations and bugs, but they are quite a bit. As for the speed of work, I can say that it all depends on what exactly needs to be done. The harder Mesh, the more problems may arise.
    In general, it is very cool, but a narrowly specialized tool.
  • Forest_Cat
    Offline / Send Message
    Forest_Cat polycounter lvl 6
    Update 2:
    Checked how models with standard Trim Sheet Decalmachine will look. And I liked the result.
    Now I work on creating my Trim Sheet. There will be two of them all. One for the environment, the second for cases and barrels.
  • Forest_Cat
    Offline / Send Message
    Forest_Cat polycounter lvl 6
    Update 3:
    Trim is almost ready. It remains only to add inscriptions and signs. Now I am trying to deal with how correctly blend Trim with the material on the second UV Channel.


  • Forest_Cat
    Offline / Send Message
    Forest_Cat polycounter lvl 6
    Update 4:

    In general, I really liked how new trim works. Almost all models turned out as I wanted. The only miscalculation of the angular sections of the wall. It turned out that on the round surfaces of the line of trim looks not as good as I would like.


  • Forest_Cat
    Offline / Send Message
    Forest_Cat polycounter lvl 6

    Update 5:

    Tested the level in the UE5. Workflow with the use of the second UV channel turned out to be compatible with Nanite, which allows me to significantly increase the level of detail. Now I look forward to the release of the UE5 to fully use new opportunities.


  • Forest_Cat
    Offline / Send Message
    Forest_Cat polycounter lvl 6

    Update 7:

    The end is already close. I finished with modeling and now fight with collisions. As a result, I decided to abandon the trim for the props. Because when I started planning it, I realized that it would largely duplicate the main trim.


  • CybranM
    Offline / Send Message
    CybranM interpolator
    Looks good :smile:
    I think you would benefit from adding a bit of "traditional" scifi elements such as a wire-trim and some grating on the floor to break up the "only white panels" look 
  • Forest_Cat
    Offline / Send Message
    Forest_Cat polycounter lvl 6
    @CybranM
    I limited myself with one trim and several tiles, so many ideas had to refuse. But in general, my goal is learning to do beautifully under any conditions and restrictions. While it is still far away, but I hope that with each next work the result will be better and better.

  • Lairelosse
    Offline / Send Message
    Lairelosse triangle
    Going along what CybranM said, you could also add some decals for a bit of dust and grime, even just a few would go a long way towards breaking up the uniformity of the scene a bit. Also adding some noise to the roughness value of the trimsheet would help break up the highlights and reflections, right now the surfaces seem a bit unrealistically smooth and reflective. Overall though the modular pieces and trim sheet are looking good.
  • Forest_Cat
    Offline / Send Message
    Forest_Cat polycounter lvl 6
    @Lairelosse
    The initial idea was in the creation of artificially sterile premises with small traces of rubbing. On tiles there is a custom Roughness and I want to show it fully at the stage of baking of light. In general, I'm still not completely understanding exactly how to set up materials, because what it looks good in the dynamics is much worse on the screenshots. And vice versa.
    Now I will try different options. I hope this will happen something interesting.

  • Forest_Cat
    Offline / Send Message
    Forest_Cat polycounter lvl 6
    Final update:
    Lighting gave me a lot of problems, but in the end everything turned out as I wanted. One trim, several tiles and face weighted normal. Trim is mixed with tiles through the second UV channel. One of the main advantages of such a workflow, I consider the opportunity to use Parallax Occlusion Mapping to impart the illusion of depth. Potentially, it opens up very interesting opportunities for creating very detailed premises like narrow compartments of a spacecraft or a futuristic vehicle cab. Despite the differences in the basic principles, the main example for me was Star Citizen. In the following projects, I plan to get closer to their workflow even more.
Sign In or Register to comment.