Home Technical Talk

Question about retopology for High Poly (after sketching)

polycounter lvl 3
Offline / Send Message
Stensword polycounter lvl 3
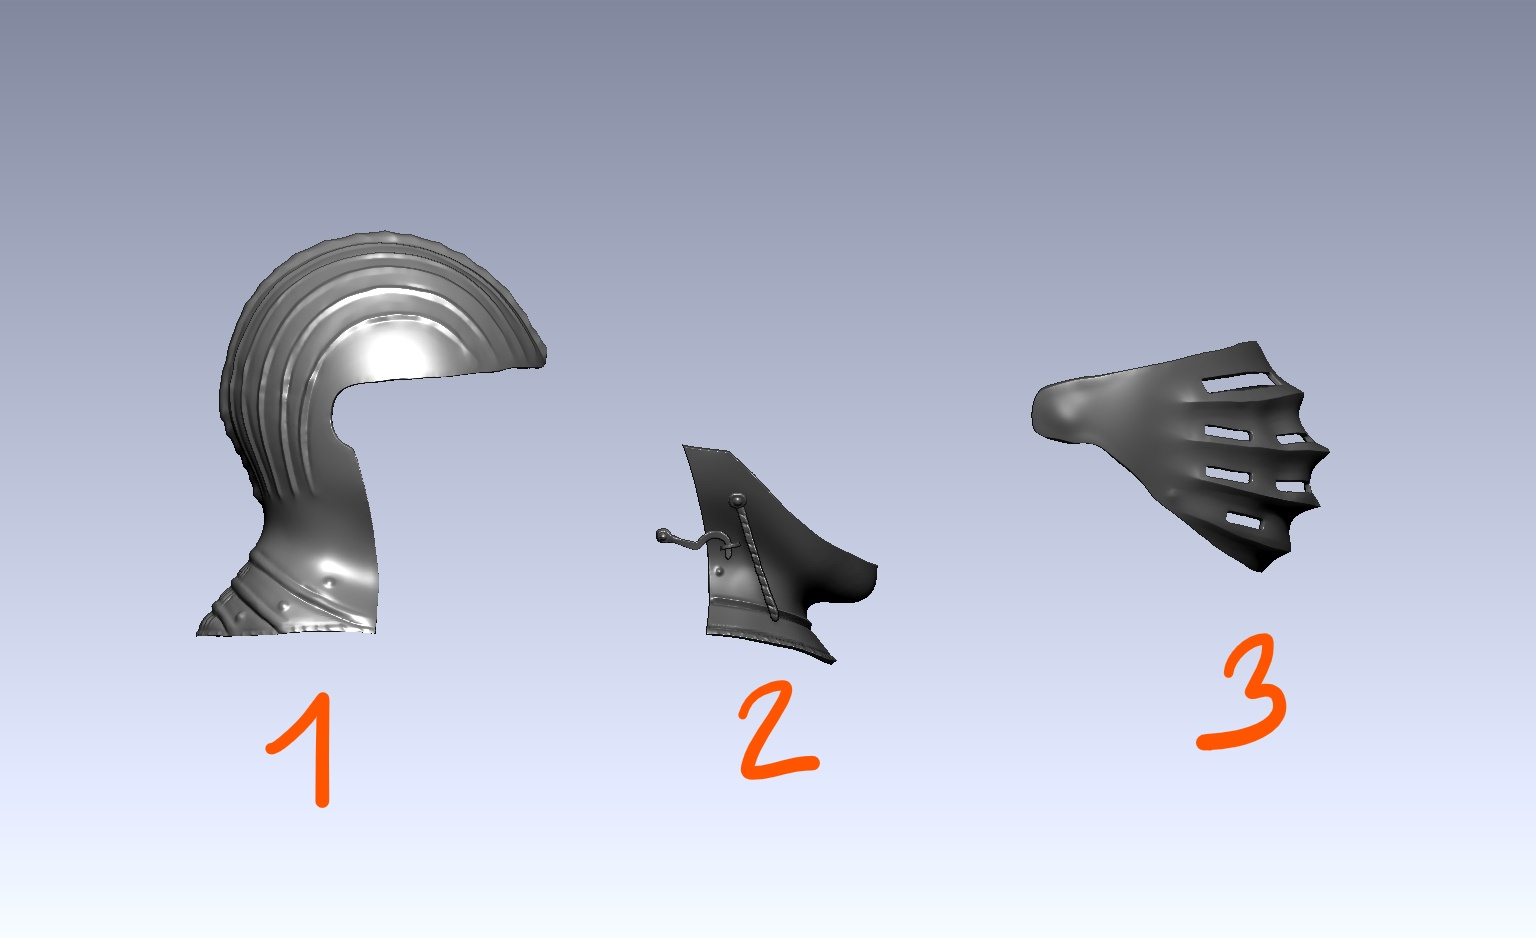
So I have just completed a sketch of an asset in Zbrush. And I want to retopologize it for the High Poly "refining" ,where I will be adding all the details on subdivision layers. (so I am NOT talking about retopologizing a finished high res model so a game engine can run it)

Here is the asset (quick and dirty):
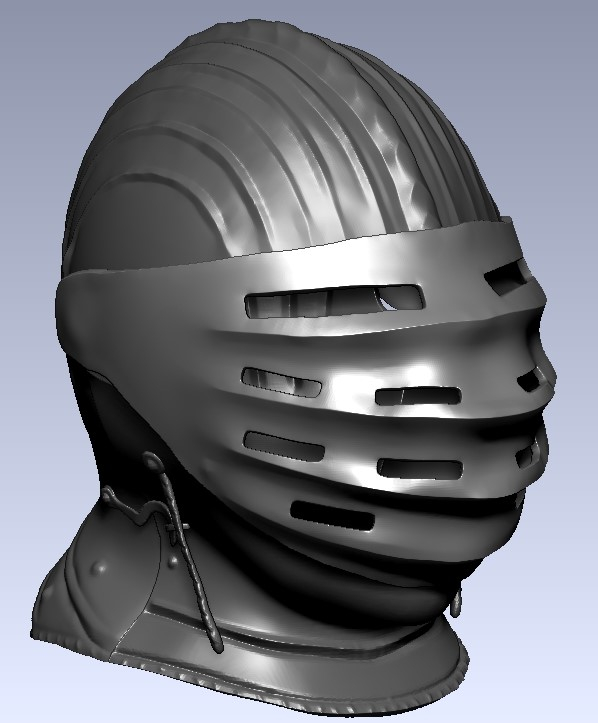


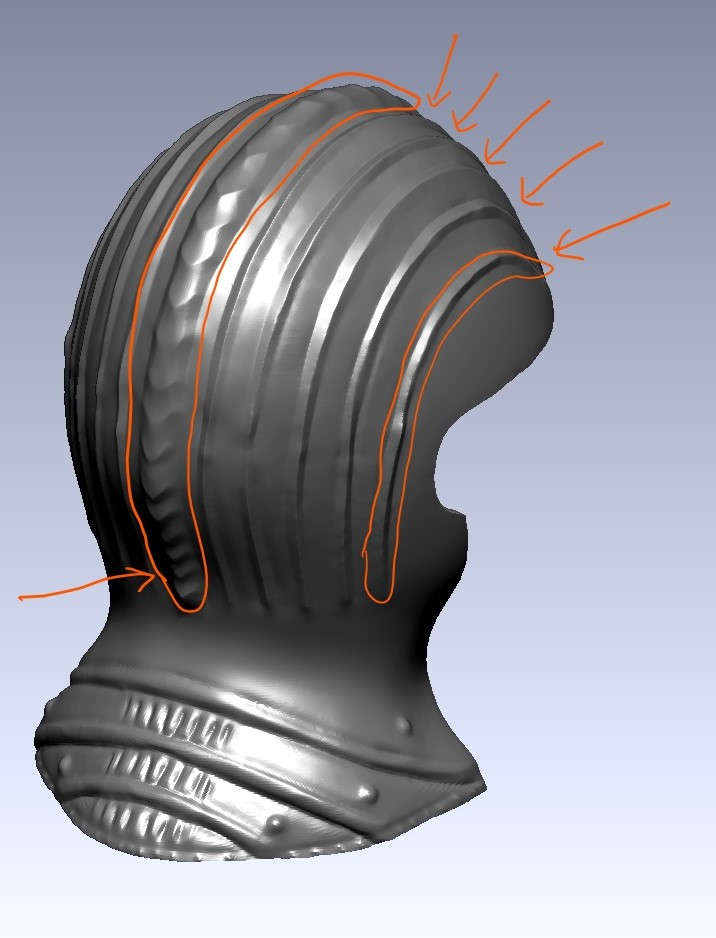
And so I encounter a couple issues on retopologizing the piece number one.. basically I don't know if I should weld the strips on the helmet or if I should retopo them separately as I also would like to clean them up a bit using molding tools (because.. it's looks dirty). This also could allow me to get a very clean rounded surface for the isolated helmet piece it self.


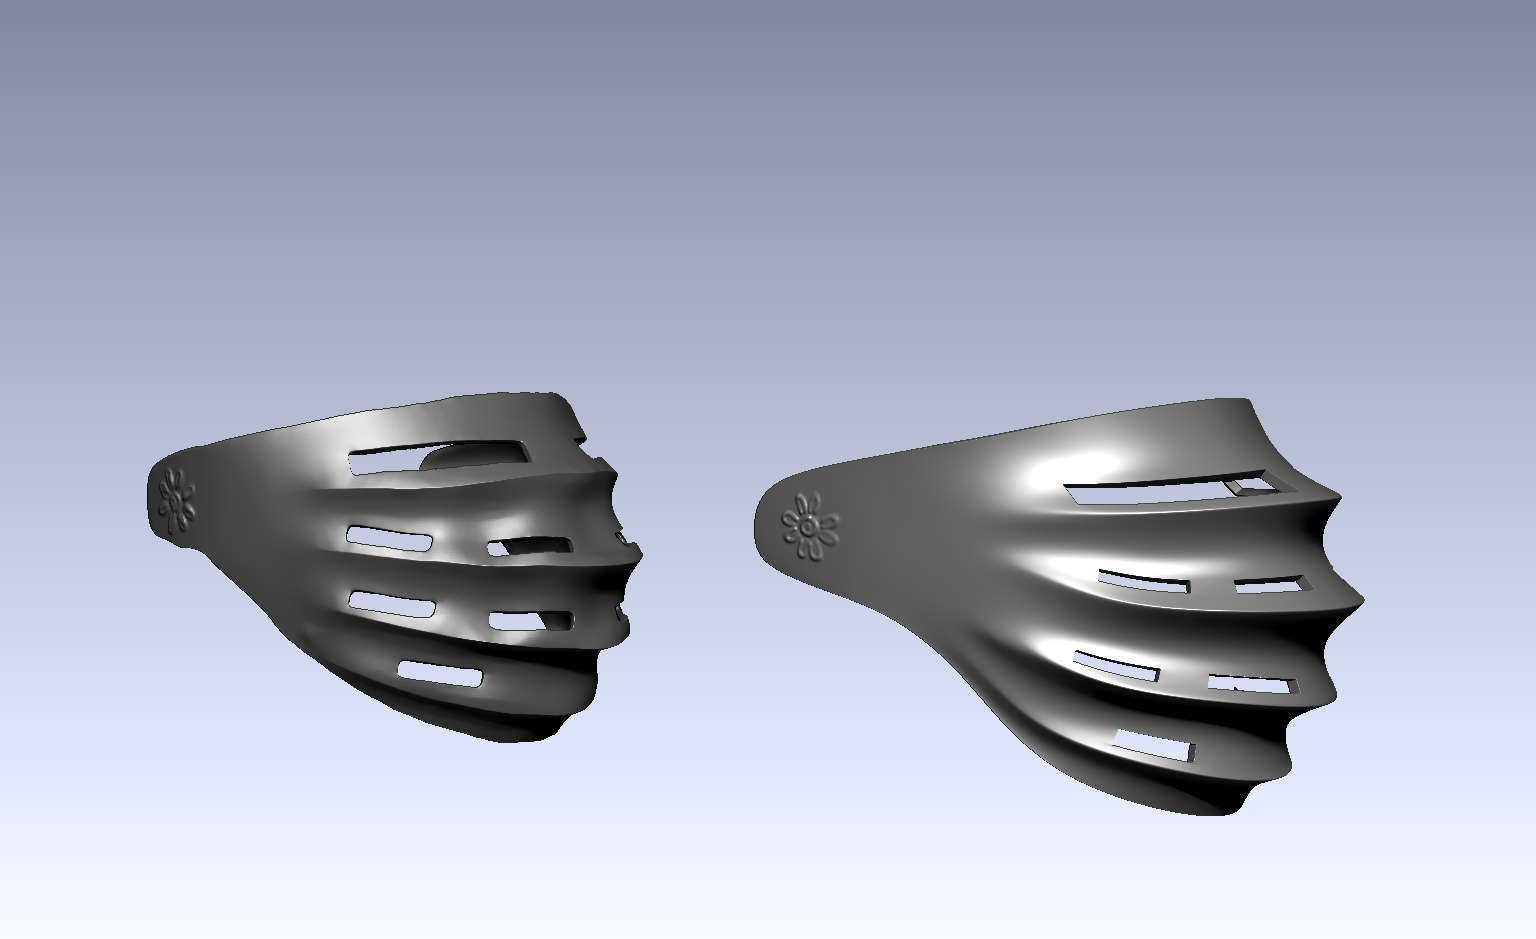
Another important question that I wanted to ask is.. once you've made a sketch, would you try to correct the overall shape using subd modeling while retopologizing ?

Because that's basically what I have made for the piece number 3 and I feel like I shouldn't had spent the time to refine the sketch apart from the overall shape. (I hope you can recognize which one is the retopologized one)


Replies

  • CheeseOnToast
    Offline / Send Message
    CheeseOnToast greentooth
    This kind of sketching is really useful. Spend a bit more time at the sketch stage making it less wobbly. Get really familiar with dynamesh and zremesher, and to some extent, the zmodeller brush. Same goes for the various curve functions - they'll help you create cleaner details than hand sculpting. Use booleans to punch out holes. Try to work on single sided polygons until the last minute, then add a thickness at the end using panel loops from the tool>geometry menu or qmesh or extrude from the zmodeller brush. Make sure you separate the parts that would be separate in real life, such as the overlapping plates at the neck.  If this is intended to be used as a mesh purely for baking down to a lowpoly you might be able to skip the highpoly retopo entirely, especially on a hand-made object that would naturally have a few imperfections.

    To answer your question about the ridges on the helmet, if they're all one piece in real life, they should be all one piece on your model too. That doesn't mean they can't start off separate during construction though.

    If I get some time later on, I'll try to post a video of some simple techniques for getting a cleaner mesh straight out of zbrush. I make a lot of use out of this plugin https://www.artstation.com/marketplace/p/elon/zbrush-plugin-extract?utm_source=artstation&utm_medium=referral&utm_campaign=homepage&utm_term=marketplace 
    which drastically speeds up the extract / remesh process in Zbrush. There's a newer version of it that I haven't used yet that has a few extras too.
  • CheeseOnToast
    Offline / Send Message
    CheeseOnToast greentooth
    Ok, spent a bit of time doing a video. Hopefully it's useful.


  • Stensword
    Offline / Send Message
    Stensword polycounter lvl 3
    This kind of sketching is really useful. Spend a bit more time at the sketch stage making it less wobbly. Get really familiar with dynamesh and zremesher, and to some extent, the zmodeller brush. Same goes for the various curve functions - they'll help you create cleaner details than hand sculpting. Use booleans to punch out holes. Try to work on single sided polygons until the last minute, then add a thickness at the end using panel loops from the tool>geometry menu or qmesh or extrude from the zmodeller brush. Make sure you separate the parts that would be separate in real life, such as the overlapping plates at the neck.  If this is intended to be used as a mesh purely for baking down to a lowpoly you might be able to skip the highpoly retopo entirely, especially on a hand-made object that would naturally have a few imperfections.

    To answer your question about the ridges on the helmet, if they're all one piece in real life, they should be all one piece on your model too. That doesn't mean they can't start off separate during construction though.

    If I get some time later on, I'll try to post a video of some simple techniques for getting a cleaner mesh straight out of zbrush. I make a lot of use out of this plugin https://www.artstation.com/marketplace/p/elon/zbrush-plugin-extract?utm_source=artstation&utm_medium=referral&utm_campaign=homepage&utm_term=marketplace 
    which drastically speeds up the extract / remesh process in Zbrush. There's a newer version of it that I haven't used yet that has a few extras too.

    Omg thanks for having taken so much of your time to respond. I wasn't expecting such a response ! Actually I thought no one would ever respond so I kinda stop watching after this thread lol.

    Yes this is just for baking the low poly... A world without high poly retopo... hum that sounds like an ideal world.

    So do you suggest creating the lines separately then dynameshing it all together ?

    And for the past few days I have been engaging a lot more on doing hard surface in Zbrush
    I used to use the technic you just presented for finishing the helmet's armor : https://www.reddit.com/r/ZBrush/comments/lixc5i/maximilian_armor_project_give_me_your_feedback/
    I used that technic for every pieces made in zbrush. Panel loop is also the tool I used to give thickness at the begining but I found an other technic : at highest sub d level, I masked borders, grow , then pull, this save a lot of polycount but the down side is that you don't end up with actual thickness  .
    For doing the straight lines of the helmet I simply masked and pulled them out. I masked with Zmodeler>mask> polyloop then grow then sharp.

    But currently I am in a big trouble... It's been 2 days that I am stuck on a single piece that I cannot achieve : 


    The way I try to tackle this is by using the technic shown here : https://youtu.be/6EKxeM57T7g?t=1261
    Also here : https://www.zbrushcentral.com/t/aquaman/208093/13
    But I get ugly deformations : 

    This is not the final alpha just a test to see if the lines keep their smoothness but as you can see, they don't... and I don't really know how to keep the alpha texture clean and un-deformed as they did in the clip I sent above. (I really am new to uv maps and all that stuff) I plan on trying using Maya's tool to get better uvs without deformations but I really don't know if this is the solution.

    I think I'll encounter the same kind of problem also on such pieces :

    Other wise, I did figured out a way to get clean edges for the past few days before jupping on the piece above (training on helmets) but it was by using a combination of hpolish, smooth, clip curve, polish by group and clay polish and it was on a dynameshed mesh : (here is a few of them)


  • CheeseOnToast
    Offline / Send Message
    CheeseOnToast greentooth
    Nice progress! That bunch of helmets is a lot more like it. I still think that some of them would benefit from a zremesh cleanup pass, but they're a much better starting point than the one you posted at the top of the thread. You've probably seen something like this already, but here's another technique for zremeshing :

    Your wobbly lines on the mask for the breastplate are almost certainly caused by distorted UVs. A better UV map will likely fix it. Sometimes UVs created on a very low poly model can become distorted by smoothing when you subdivide the mesh. This doesn't seem to be an issue for me anymore in the latest verion of Zbrush. Just in case, you can try enabling the smooth UV ("Suv") button then hitting reUV in the Geometry tab at your highest subD level.


  • Stensword
    Offline / Send Message
    Stensword polycounter lvl 3
    Nice progress! That bunch of helmets is a lot more like it. I still think that some of them would benefit from a zremesh cleanup pass, but they're a much better starting point than the one you posted at the top of the thread. You've probably seen something like this already, but here's another technique for zremeshing :

    Your wobbly lines on the mask for the breastplate are almost certainly caused by distorted UVs. A better UV map will likely fix it. Sometimes UVs created on a very low poly model can become distorted by smoothing when you subdivide the mesh. This doesn't seem to be an issue for me anymore in the latest verion of Zbrush. Just in case, you can try enabling the smooth UV ("Suv") button then hitting reUV in the Geometry tab at your highest subD level.


    OMG !!! Thank you ! This solved my issue entirely. I didn't knew this existed... Zbrush won't stop to surprise me with its magic ! I am talking about this silly neat SUV feature and now there is also that Reuv button that I discovered. Sorry if I seem a bit over enthusiastic but you cannot realize how much of a relief this is. I learned illustrator only for this specific technic.

    And no I didn't knew about this video, But I already saw that technic used on some hard surface course but it is greatly explained in this video and as this is strictly for high poly retopo I believe we could get away using Zremesher.
Sign In or Register to comment.