Toolbag 4 - normal map issues
Hi Polycount!
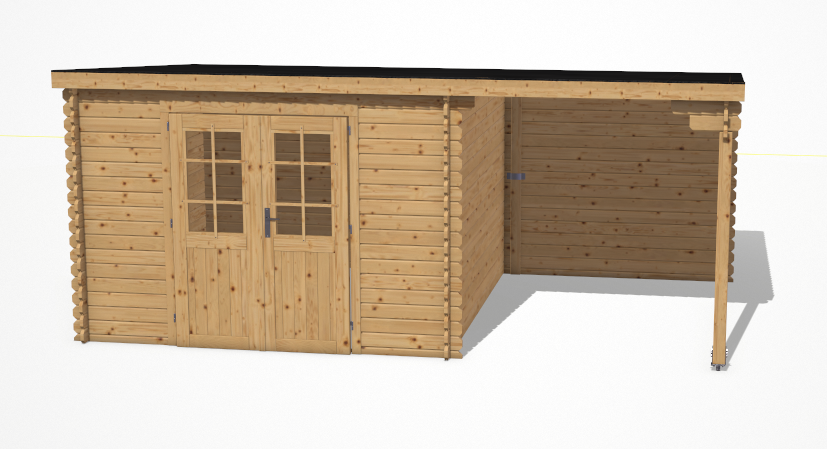
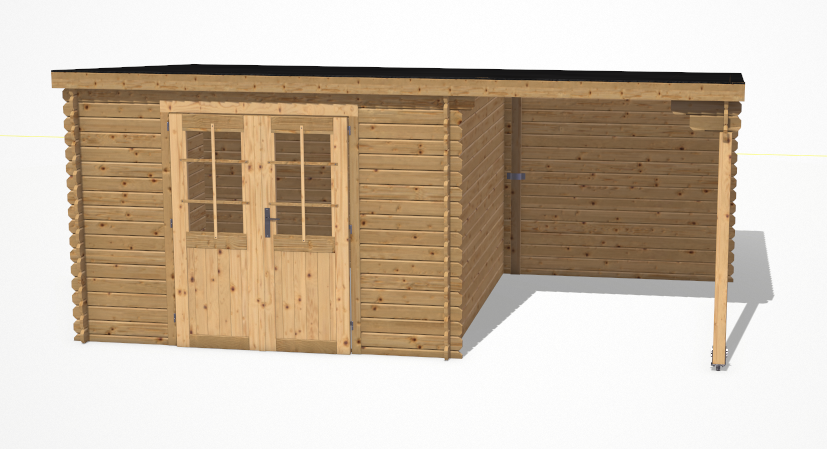
I have this model in Marmoset Toolbag 4 (fig 1), exported from 3ds Max, which gives me headaches, because once applying a normal map to the wood material, I get shading problems (fig 2).
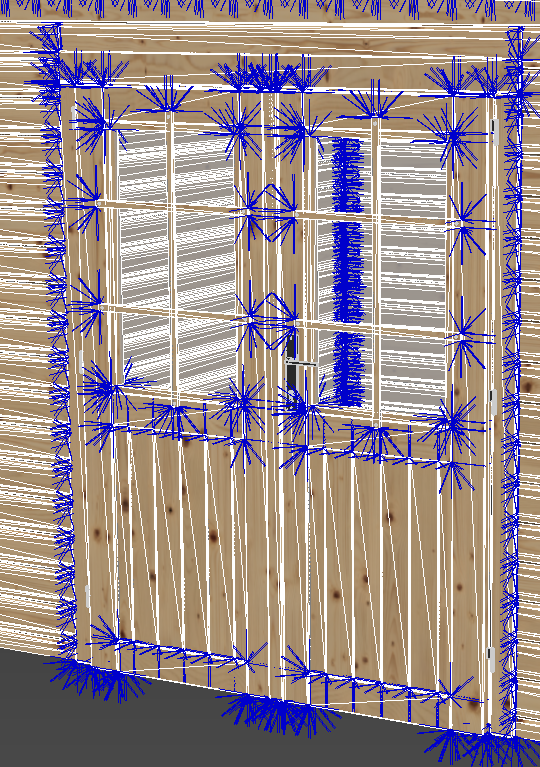
It almost looks as if some of the mesh's faces are inverted, but I assure you, that is not the case. (fig 3)
Things I tried out:
- triangulating the mesh (which gave me some other smaller shading issues around the top right corner)
- removing all smoothing groups
- adding an "edit normals" modifier in 3ds Max and then collapsing the mesh (sometimes this fixes shading errors within Max, especially when having imported STEP, DWG, or something alike)
- renormalizing the normal map with xNormals Photoshop filters (although this problem also occurs if I use other normal maps)
- checking the "export angents and binormals" checkbox when exporting the FBX
- change the tangent space to "3ds Max" (selecting the wood geometry, in the left pane, it does change the overall appearance, but doesnt fix it
edit:
Since writing this post I also analyzed the marmoset internal materials.
The normal maps seem to only have information in the red and green channels, so I went into PS, into the blue channel and made it black.
Then I ticked "Generate Z" on in Marmoset, unfortunately to no avail...
I am not trying to bake a normal map inside of Toolbag, just trying to use a tiling texture.
Does anybody else have any idea what I could do?
I have this model in Marmoset Toolbag 4 (fig 1), exported from 3ds Max, which gives me headaches, because once applying a normal map to the wood material, I get shading problems (fig 2).
It almost looks as if some of the mesh's faces are inverted, but I assure you, that is not the case. (fig 3)
Things I tried out:
- triangulating the mesh (which gave me some other smaller shading issues around the top right corner)
- removing all smoothing groups
- adding an "edit normals" modifier in 3ds Max and then collapsing the mesh (sometimes this fixes shading errors within Max, especially when having imported STEP, DWG, or something alike)
- renormalizing the normal map with xNormals Photoshop filters (although this problem also occurs if I use other normal maps)
- checking the "export angents and binormals" checkbox when exporting the FBX
- change the tangent space to "3ds Max" (selecting the wood geometry, in the left pane, it does change the overall appearance, but doesnt fix it
edit:
Since writing this post I also analyzed the marmoset internal materials.
The normal maps seem to only have information in the red and green channels, so I went into PS, into the blue channel and made it black.
Then I ticked "Generate Z" on in Marmoset, unfortunately to no avail...


I am not trying to bake a normal map inside of Toolbag, just trying to use a tiling texture.
Does anybody else have any idea what I could do?

Replies
It looks like rotated uv islands throw off the normal map direction.
(That is, I "cube" unwrapped the vertical boards and then rotated the result by 90° in the uv editor, to follow the wood grain of the texture along the mesh.)
However, on my second image, you can see two boards (one left and one right to the doors), that are rotated, but shaded the same way as the horizontal boards.
Putting a simple cube projection uv map modifier onto everything that is wood fixes the shading issue, however isnt usable in my case, as as some boards need to have a different direction.
My idea would be to seperate all the vertical boards from the horizontal ones and make a second shader with the identical maps, just rotated by 90°. But that cant be it, right? I feel like I am doing something obvious totally wrong, please help!
- Make sure the normal map is in linear space (click the gear icon next to the map and make sure sRGB is off)
- Make sure you're using a tangent space normal map rather than an object space map, and make sure you haven't clicked the object space checkbox
If neither of those suggestions resolve it, pleas post an image showing the normal map itself, and the material settingsObviously, I had not...
Everything is perfect now! Thank you so much!