[WIP Game Character] Hippo Warrior

I originally made the Hippo Warrior’s UDIM texture set 2048 x 2048, and I decided to upgrade to a 4096 x 4096 texture (because the Hippo Warrior’s ink symbols appeared too blurry). The image above shows the texture resolution increase from 2048 to 4096. I then ended the day by slightly cleaning up the topology flow on his chest, legs, feet, and arm pits.
November 19th
Although the ZBrush sculpt was completed prior to this
class, I decided to go back and smooth out some folds on the front and back loin
cloth to not make them as sharp. I also
used the move tool to flatten the individual sculpted folds that were present
to make the mesh easier for Unreal to read the mesh as a single cloth to
simulate instead of have so many separate sculpted folds that bump outward.


New (denser) cloth retopology

Here is the Front and Back view of the finalized Retopology that will be used for the in-game character model (68,344 Tri’s)

Close up of Retopology

Here are the Finalized UV’s (1 texture UDIM for the character).
I also began projecting zbrush Polypaint on to my retopology (and will finish tomorrow).
November 20th, 2020
Here are the finished textures from projecting the high poly ZBrush sculpt polypaint to the low poly retopology that was made in Maya.
 Hippo Warrior - Hand painted polypaint texture with AO map
& Normal Map (Textures exported from ZBrush polypaint)
Hippo Warrior Spear - Hand painted polypaint texture with AO map & Normal Map (exported from ZBrush polypaint)
November 21 – November 23 - Texturing in Substance Painter
The days November 21st through the 23rd were spent texturing the Hippo Warrior in substance Painter.

Here is my color ID texture I made in Photoshop for easily masking areas to paint in Substance Painter
A problem I encountered while texturing in Substance Painter was making the necklace have transparency where needed.
To accomplish transparency, I made an alpha texture for transparency, changed my substance project setting from “pbr metal rough” to “pbr metal rough with alpha blending”, and put the alpha into an opacity property.

Here is the opacity texture
November 23, 2020
Most of the texturing work was completed yesterday, however there was still some work to be done today. I textured the inside of the eyeballs, added roughness (0.2) for the eyeballs and the ink around each eye. This was done to make the eye and ink appear wet. I also revisited some other pieces to the character and rose some roughness values. These areas included the beads on the armband, and the black trim around the necklace.


Completed Textured Hippo Warrior - Front view (in Substance Painter)
Completed Textured Hippo Warrior - Back view (in Substance Painter)
Completed Textured Hippo Warrior – Left quarter view (in Substance Painter)
Completed Textured Hippo Warrior –Right quarter view (in Substance Painter)
Hippo Warrior – Close up (in Substance Painter)
Textures exported from Substance Painter –
Rigging - Week 2- (November 24th – November 29th)
November 24, 2020
Today I began rigging the Hippo Warrior. I got his leg joints in place, along with a custom hippo foot control made to look like his foot. The leg joints have IK handles to control the many movements of the foot, and the pole vector controls the knee.

Hippo Warrior Rig – Day 1 progress

Foot Control with different actions
November 25, 2020

Back Controls and Neck controls made

Started creating the controls for the FKIK Arm – having a problem with the elbow joint snapping when I switch from FKIK; I discovered this was from not having the joints in a perfect line. Will fix tomorrow
November 26, 2020

Functioning Left IK arm – problem with elbow joint placement fixed

Functioning Right IK arm

FK IK Switch – Hides and shows FK/IK arm controls
November 27, - November 29, 2020 Hand
Control with curl controls for each finger joint and controls to spread each
finger.

Showing the finger joints curl inward

Showing the finger joints curl outward

Armband rings and shells are rigged with orient constraints
 Showing
the orient constraints on the loop and shell
Tongue joints with tongue control. The tongue is broken up into different sections that can be individually controlled

Showing the tongue joints being moved individually

Eye Controller that controls eye joints with an aim constraint.

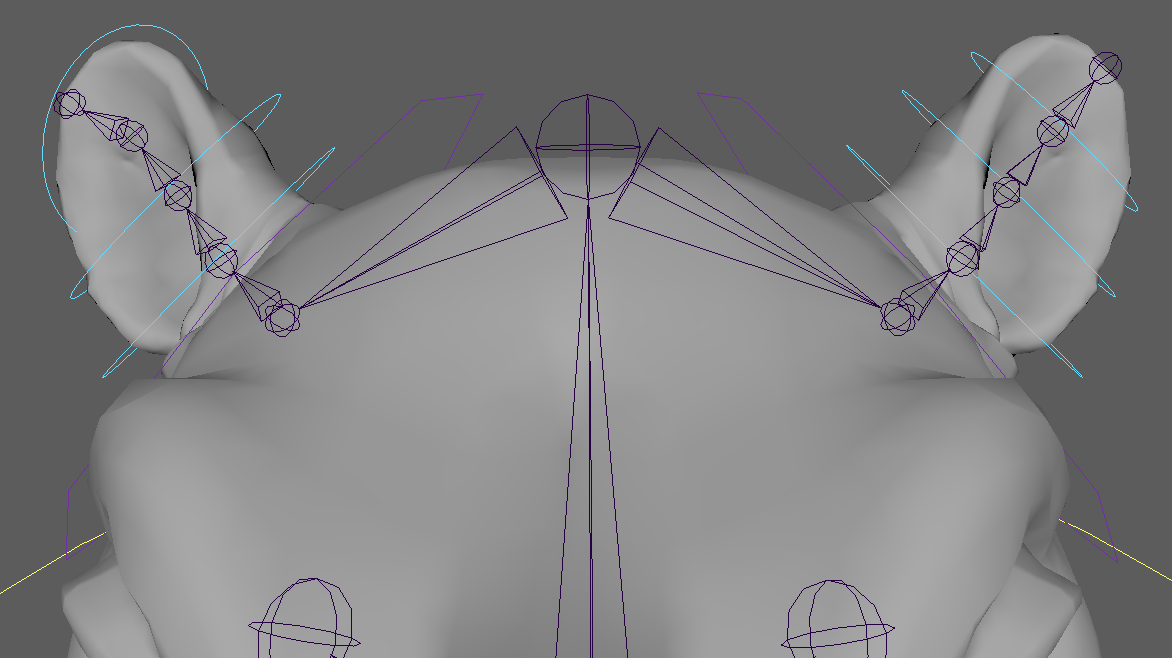
Ear Joints now in place with orient constraints to rotate the ears for animation

Used
clusters with a controller to manipulate the torso to allow for breathing
animation. I used these videos to learn
more about clusters – https://www.youtube.com/watch?v=GnLROAyqINY&t=311s  https://www.youtube.com/watch?v=GnLROAyqINY&t=311s

Weight painting for cluster on torso (white controls where the geometry is manipulated)