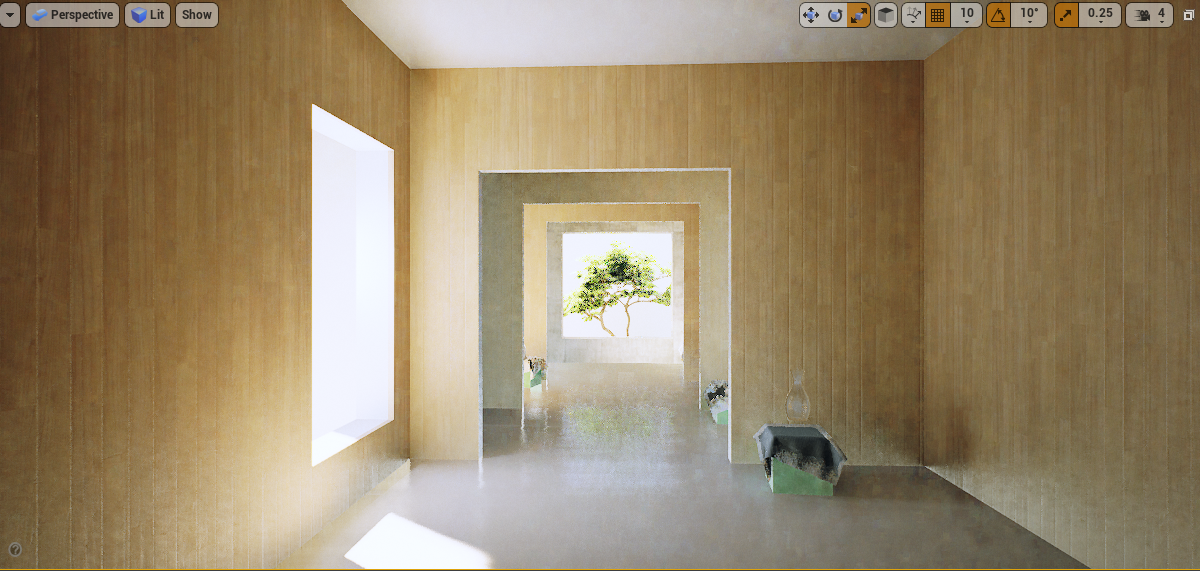
Experimenting with RTX lighting ??
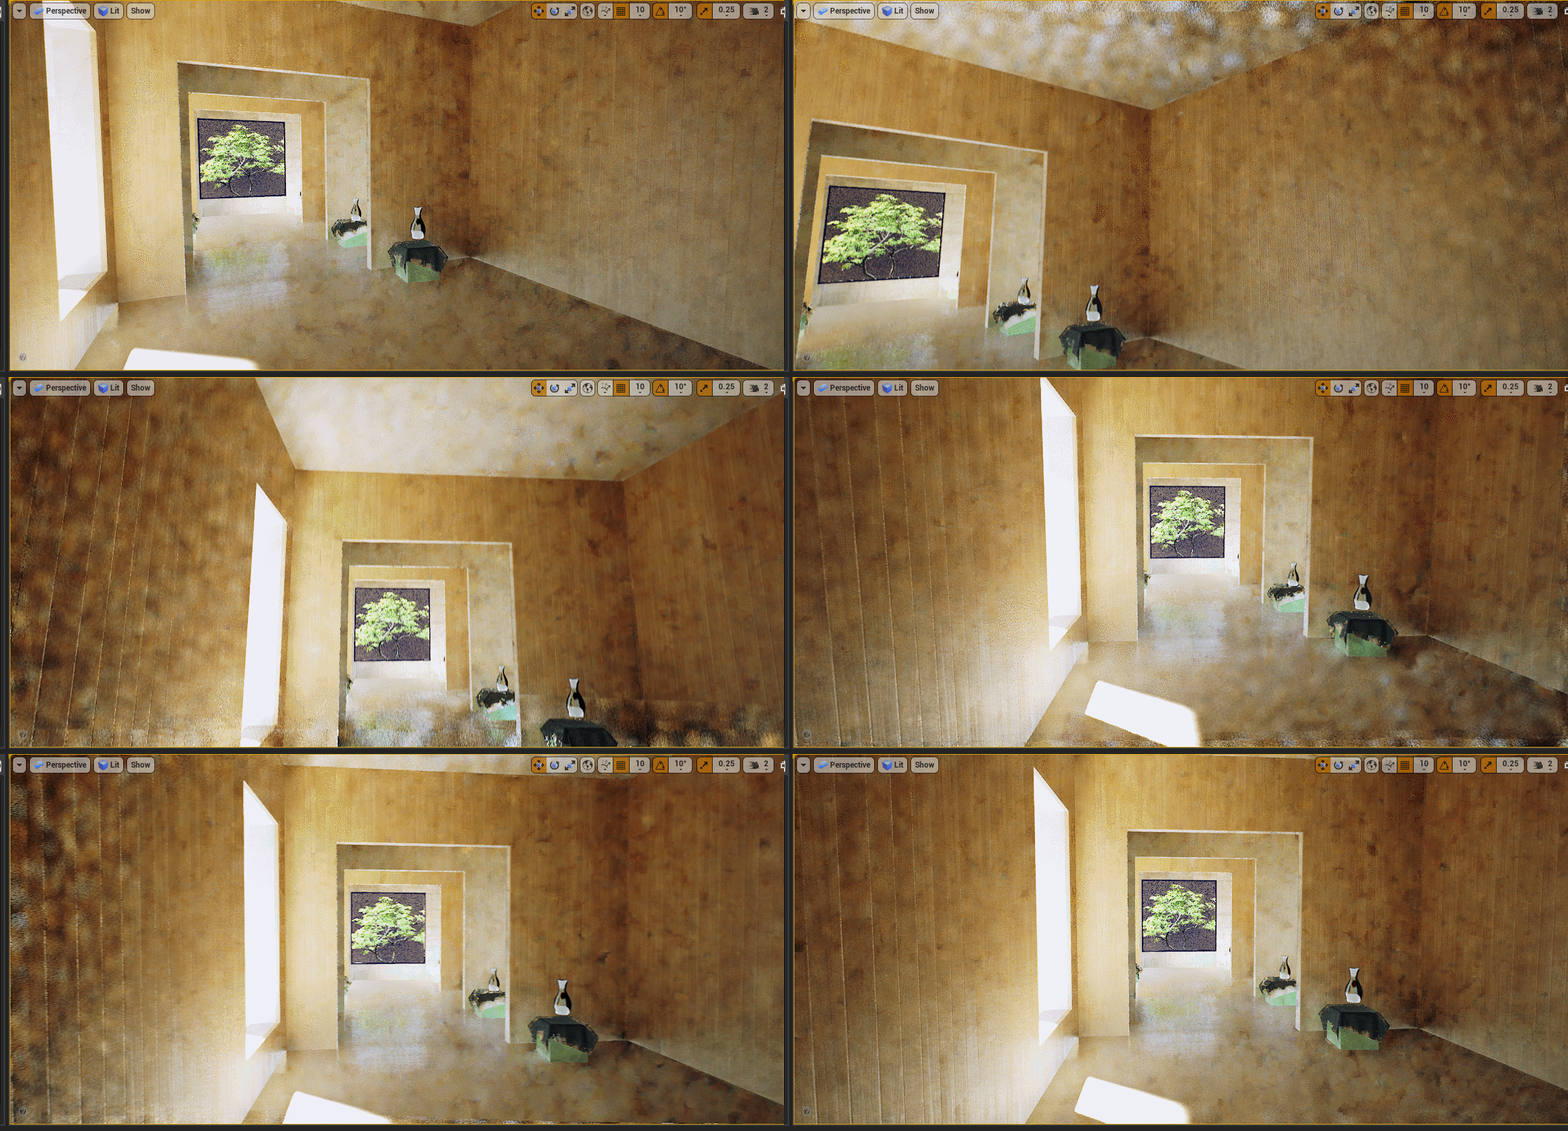
This is a simple scene from Koola which is free in the marketplace. I have completely disabled baked lighting in the World settings. This is what I am getting so far with it. I have an RTX 2080 8gb graphics card so I am not sure why it looks this bad:
Notice how the white cloth on green boxes are black but shows as white correctly in path tracing mode.
EDIT: Ok.increased the samples per pixel to 20 under Brute force but the viewport became very very sluggish, hardly responds to mouse movement:

i am posting a still image as the viewport has so much heavy lag, posting a gif is useless. Cloth on green boxes still appearing black. Vase is using screen space reflections abd transparency is raster. When I change transperency to raytacing, the glass vase looks like chrome rather than transparent glass.
It definitely looks better. Samples per pixel for Brute force at 21. If you can't move your viewport around for such a simple scene at 21 for samples. This tech might be useless because the performance is very bad. Samples per pixel for lights.. I am not sure what that is for, is it shadow resolution or how much GI the light is contributing to the scene?

Notice how the white cloth on green boxes are black but shows as white correctly in path tracing mode.
EDIT: Ok.increased the samples per pixel to 20 under Brute force but the viewport became very very sluggish, hardly responds to mouse movement:

i am posting a still image as the viewport has so much heavy lag, posting a gif is useless. Cloth on green boxes still appearing black. Vase is using screen space reflections abd transparency is raster. When I change transperency to raytacing, the glass vase looks like chrome rather than transparent glass.
It definitely looks better. Samples per pixel for Brute force at 21. If you can't move your viewport around for such a simple scene at 21 for samples. This tech might be useless because the performance is very bad. Samples per pixel for lights.. I am not sure what that is for, is it shadow resolution or how much GI the light is contributing to the scene?

Replies
- Ray tracing in realtime uses heavy denoising on some passes, because otherwise it would require hundreds of samples which would cause 1 fps or less instantly. Global illumination is the most critical one here. Cast shadows only needs a lot of samples when the penumbra is large, and refnections needs them when they are very blurry. But still, they won't look as noisy as gi.
- For your purpose (and mine where I work), the slow viewport does not matter as you are going for still images or pre rendered video, where you can crank up the settings. The render will be still magnitudes faster than a cpu ray tracing scene. While you are working doing layout and such, use lower setting.
- Some material types doesn't support ray tracing. I haven't tried the cloth shading model but its possible that it isn't supported. There is a list of supported and not supported features in the documentation. I also made a list of issues like a year ago. It changed a little bit since then, but someof them still persists:
https://www.artstation.com/kristoflovas/blog/Ko9e/what-nots-with-ray-tracing-in-its-current-state-in-unreal-engine
- Regarding the noisy gi - This is better in the newer versions.
- I haven't managed to get the ray traced translucency to work at all.
Its also important to understand that why some raytracing passes are so heavy compared to anothers. Ray tracing shadows don't need bounces and only need few samples , usually 1. So this will be the fastest, regardless of the scene complexity. There is a specific thing that all ray tracing features do in both cpu and gpu based methods, and its called BVH traversal. The user don't know about this unless it knows how the system works, as this happens under the hood. You can't start randomly shooting rays and asking the hardware to just test against every single triangle in the scene. So there is a massive acceleration structure behind every better raytracing implementation, which is called BVH (bounding volume hiererchy). It splits down a mesh into smaller and smaller parts in a tree hierarchy. Each node has exactly 2 children. This is what ray tracing accesses instead of the actual scene geometry, because reading this is more gpu friendly. Also note that since the hierarchy exist, it only takes a few steps to figure out which triangle its intersecting, instead of checking for all of them. This is still a heavy process though, but million times faster than if we wouldn't do it.
So when a ray is shot, first it figures out which object's bvh its in, and then starts moving down the triangle hierarchy tree. If there was a hit, shade the pixel. If it was a miss, move the ray until it gets into another object's bound, or if there is no other mesh, it was a full miss. Most traces starts from the surface of the meshes though, not from the camera (since visibility is already done via rasterization)
Now lets put this into some real examples:
---------------------------------------------------------------------------------------------
Ray tracing shadows:
- Given a mesh and a light close by
- Start tracing on every visible pixel (on the screen) of the mesh, move towards the light source. Use the bvh to figure out if there was a self hit, or we reached the light. If the light was reached, add the lighting value. If we have hit something on the way, we are in shadows.
- If the light has source radius, so the shadow would have penumbra, we either need to start multiple rays from each pixel, each would go towards a random point inside the light shape, or start one ray, but vary the direction slightly between frames, and rely on temporal accumulation to get smooth image.
------------------------------------------------------------------------------------------------------------
Ray tracing reflections:
-Given 2 meshes with materials on them, and a light source
- Start tracing from every visible pixel (on the screen) of the mesh. Take the reflection vector between the camera direction and the surface normal. This will be our initial reflection direction for the first bounce. Advance the ray, and use the BVH to figure out if we hit something.
- If we use roughness in the materials so they are not mirrors, either multiple reflection rays are need to be shot, or again, shoot one and vary the direction, besad on the roughness map, between frames
- If we hit something, we already need to do more things than what shadows did.
- Get the hit object's material properties
- Shade the reflection pixels on the starting objects, using the hit objects material properties. By shading, we don't only mean to put surface shading, but also to have cast shadows and other stuff in the scene. So, a shadow ray needs to be shot from the hit object, and the steps from above needs to be executed inside the reflections.
- If we allowed bounces, the whole thing restarts here and all things described needs to be executed as many times as the amount of bounces.
Conclusion: reflections can be expensive depending on the case and settings.
-----------------------------------------------------------------------------------------------------------
Ray tracing ao and skylight (because they actually use the exact same logic):
- Given a mesh and a hdr skydome
- Start tracing from every visible pixel (on the screen) of the mesh. Take a few directions on a hemisphere oriented to the normal direction of the pixel.
- Shoot 1 or multiple rays every frame depending on if we rely on temporal accumulation. Use the BVH to see which mesh and triangles are hit.
- If we don't hit anything within a certain radius (ao radius) , we sample the hdr value of the sky and add it to the lighting. If we hit something, don't do anything (pixel stays darker)
Conclusion: This is as cheap as rt shadows because we don't need to access other meshes material properties, or to do multiple bounces.
-----------------------------------------------------------------------------------------------------
Ray tracing global illumination:
- Given a light,and 2 differently colored meshes to better see the effect
- Start tracing from every visible pixel (on the screen) of the mesh.
- Before we move the ray, get the direction between the given pixel and the light source, so we can figure out the bounce direction. Just like with the skylight, we can use a normal oriented hemisphere, and random directions inside it to continue.
- Shoot a ray towards the previously calculated bounce direction, keep track of how far we went. Use the BVH to check and see if we are intersecting a triangle of a mesh.
- If we hit something, get the material properties, shade the pixel, get new direction, shoot a new ray
- Do this until we are out of allowed bounces.
Conclusion: This is roughly as heavy as rt reflections with multiple bounces.
-------------------------------------------------------------------------------------------------------
Now lets take a look at what "samples" means and how does it affect the image graininess... This is actually the same as in offline rendering.
Example image:
This is why heavy denoising is needed. Please note that this image shows the progression of full path tracing, which is a little bit different from regular ray tracing in a sense that it handles reflections, lights, and global illumination in a unified way, so the overall result is more accurate and realistic. Most offline renderers are path tracers. Since simple ray tracing allows us to use a bit more simplified shading rules, it converges(becoming less grainy) a little bit faster, for the price of not being fully accurate. You can disable denoising, but the result would look even worse and it would converge slower.
Now here are some spp(samples per pixel) guides:
shadows - 1 is usually enough, but very large area lights requires more sometimes (2-4).
reflections - 1 is usually enough but if you don't have varying roughness and the given material has relatively low but not 0 roughness, 2-4 can be needed
ao - 1-2
skylight, 4-8 usually gives good result
gi - depends on the overall lighting condition. Heavily indirectly lit areas can appear more noisy than directlylit ones. 4-8 usually works.
Also, please note that in 4.25, rtgi is way better than what you are showing so I'm guessing that you are on some older version. If you wan't to use ray tracing in Unreal, its a good idea to be on the newest versions all the time, because they are aware of the issues and fixing them and making the overall experience better and better with each version.
Closing note:
I tried to port some already existing scene to use rt, some of them were easy, some of them are less because:
-Scenes made for realtime rasterization usually uses a whole lot of hacks to get the desired result. These hacks are either not supported, or falls apart when used with raytracing, so making a scene with rt in mind from the ground up is much easier than to port an existing scene, and go through all the critical points to change it to work.
Hope this helps.
EDIT - I wanted to make an example for the gi for you and I noticed something strange in 4.25. Disabling the denoiser on GI does something else instead of disabling the denoiser, and it basically removes the flickers. With 8 samples and denoiser disabled on the GI, I get an almost fully smooth image that is very close to the path tracing one:
Path tracing:
RTGI 8 samples , denoiser disabled (4.25):