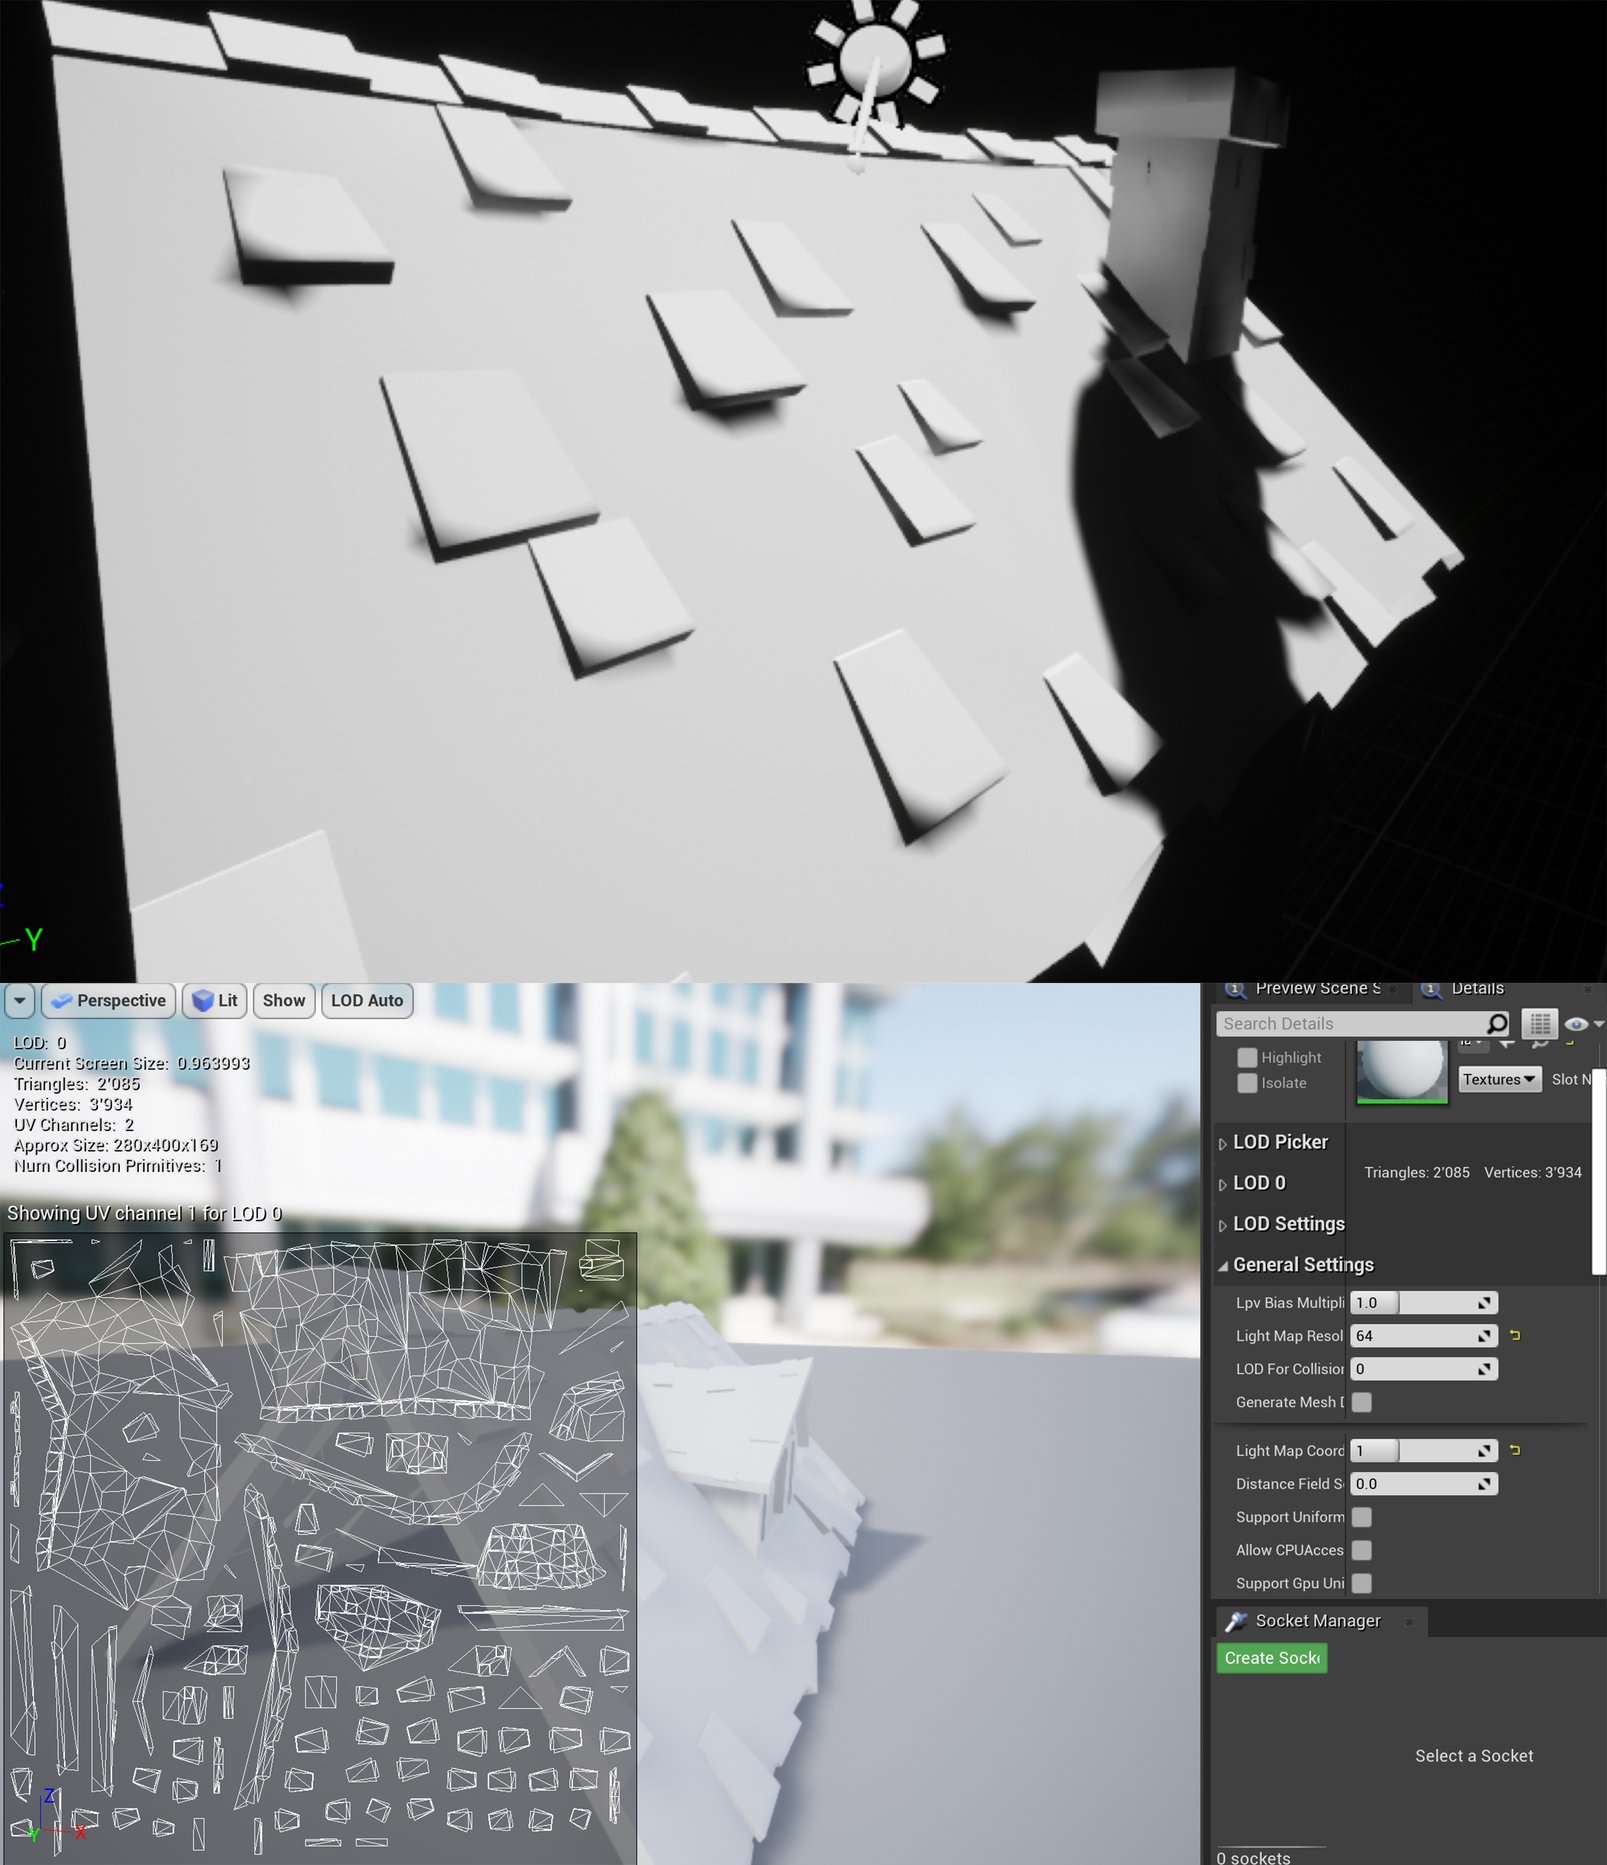
Maya to Unreal Engine 4 - Shadow issue - Shadows bleeding through mesh
Hi,
For the first time in UE4, but I've not experienced much (only a few scenes), I've got issues with the shadows.
- The mesh has no error neither in Maya or UE4 (on import).
- I've tried, after a suggestion, the "Recalculate normals" tick on UE4, it didn't solve the issue.
- You can see the UV on the bottom. I tried to separate each tile for this one but without cuting them on the UV I get the same result.
- You can see the general light settings of the mesh on the right. (Resolution map is set to 64, if I bump it up the issue is still there but more detailed)
- The coordinate is correct: It's set to the UV you see on the screencap.
- Lightning is built in high quality
Any idea?
Thanks a lot!
Replies
First, in the viewport in UE4 switch the view mode to "Optimization Viewmodes - Lightmap Density".
Then you need to set your meshes in a way that they would appear greenish-orange. To do that, adjust the "Light Map Resolution" in the General Settings of your static mesh.
Note that for UE4 specifically you don't have to stick to "power of 4" rule for lightmaps.
To optimize this further, you can take the number that you've put into "Light Map Resolution" and use your pre-made lightmaps as Source Lightmap Index to generate a new lightmap to Destination Lightmap Index in UE4.
In this example I used base UV layout for the door because it fits for lightmapping as well.
Overall your scene should look greenish-orange when in Lightmap Density view. More complex and important objects can be into shades of red, and less important or distant objecs - green or even blue.
Second, you need to setup your Lightmass in world settings:
A general rule of thumbs is - Static Lighting Level Scale multiplied by Indirect Lighting Quality should result in 1 or close to 1. I.e. in this example 0,3*3,5=1,05
Note that decreasing Static Lighting Level Scale and increasing Indirect Lighting Quality drastically increases build time. But it also increases the quality of the lighting that you'll get.
Finally, don't forget to put Lightmass Importance Volume on your scene.
Scale it up so that everything that Lightmass should prioritize when building the light would be inside of it. This volume tells the engine that everything inside of it is important and should have maximum baked lighting quality.
I hope some of it will be helpful!
I can't thank you enough for all these informations. I learned quite a lot just following your guide! Thank you for the time you took to help me, I'm really grateful. I wrote this while I was building my lightning, whether or not it works and solves my issues doesn't matter: I learned a lot thanks to you!
-- Now that my lightning is built (production): It is definitely better than before! There were areas where I didn't have any shadows and there should've been some and I had shadows in places there shouldn't be: This is now solved!
I now have 2 issues:
- There's some kind of emissive light around some edges. (see darker picture of tiles)
- In some parts, shadows are "darker dots" (see picture of tiles and door below) instead of filling the entire polygon.
Thanks again, have a wonderful weekend!
The "emissive" light is light bounces from directional light on nearby surfaces. Though I admit it looks a bit weird in your case.
You can also check this series of videos on youtube:
This guy explains in great detail how to work with lighting in UE4.
I sadly have a lot to do these days as I'm going to get back to work this week after long weeks of quarantine. I will take the time to look at this video and try to solve the problem in UE4 when I have time. For now I've done a render of my asset in Substance Painter where I don't get any issues.
I want to thank you once again for your precious help. I really appreciate that people with knowledge continue to come and try to help newbies like me! Do you have any project on the go, artstation to check out or anything? I'd gladly take a moment to check out your work or support you in a way
You can click on the blue link below my posts. Or right here: https://www.artstation.com/kligan
I have some more stuff in the works, but no ETA at the moment