How to achieve this "trim sheet" edge normal texture?
Hey all,
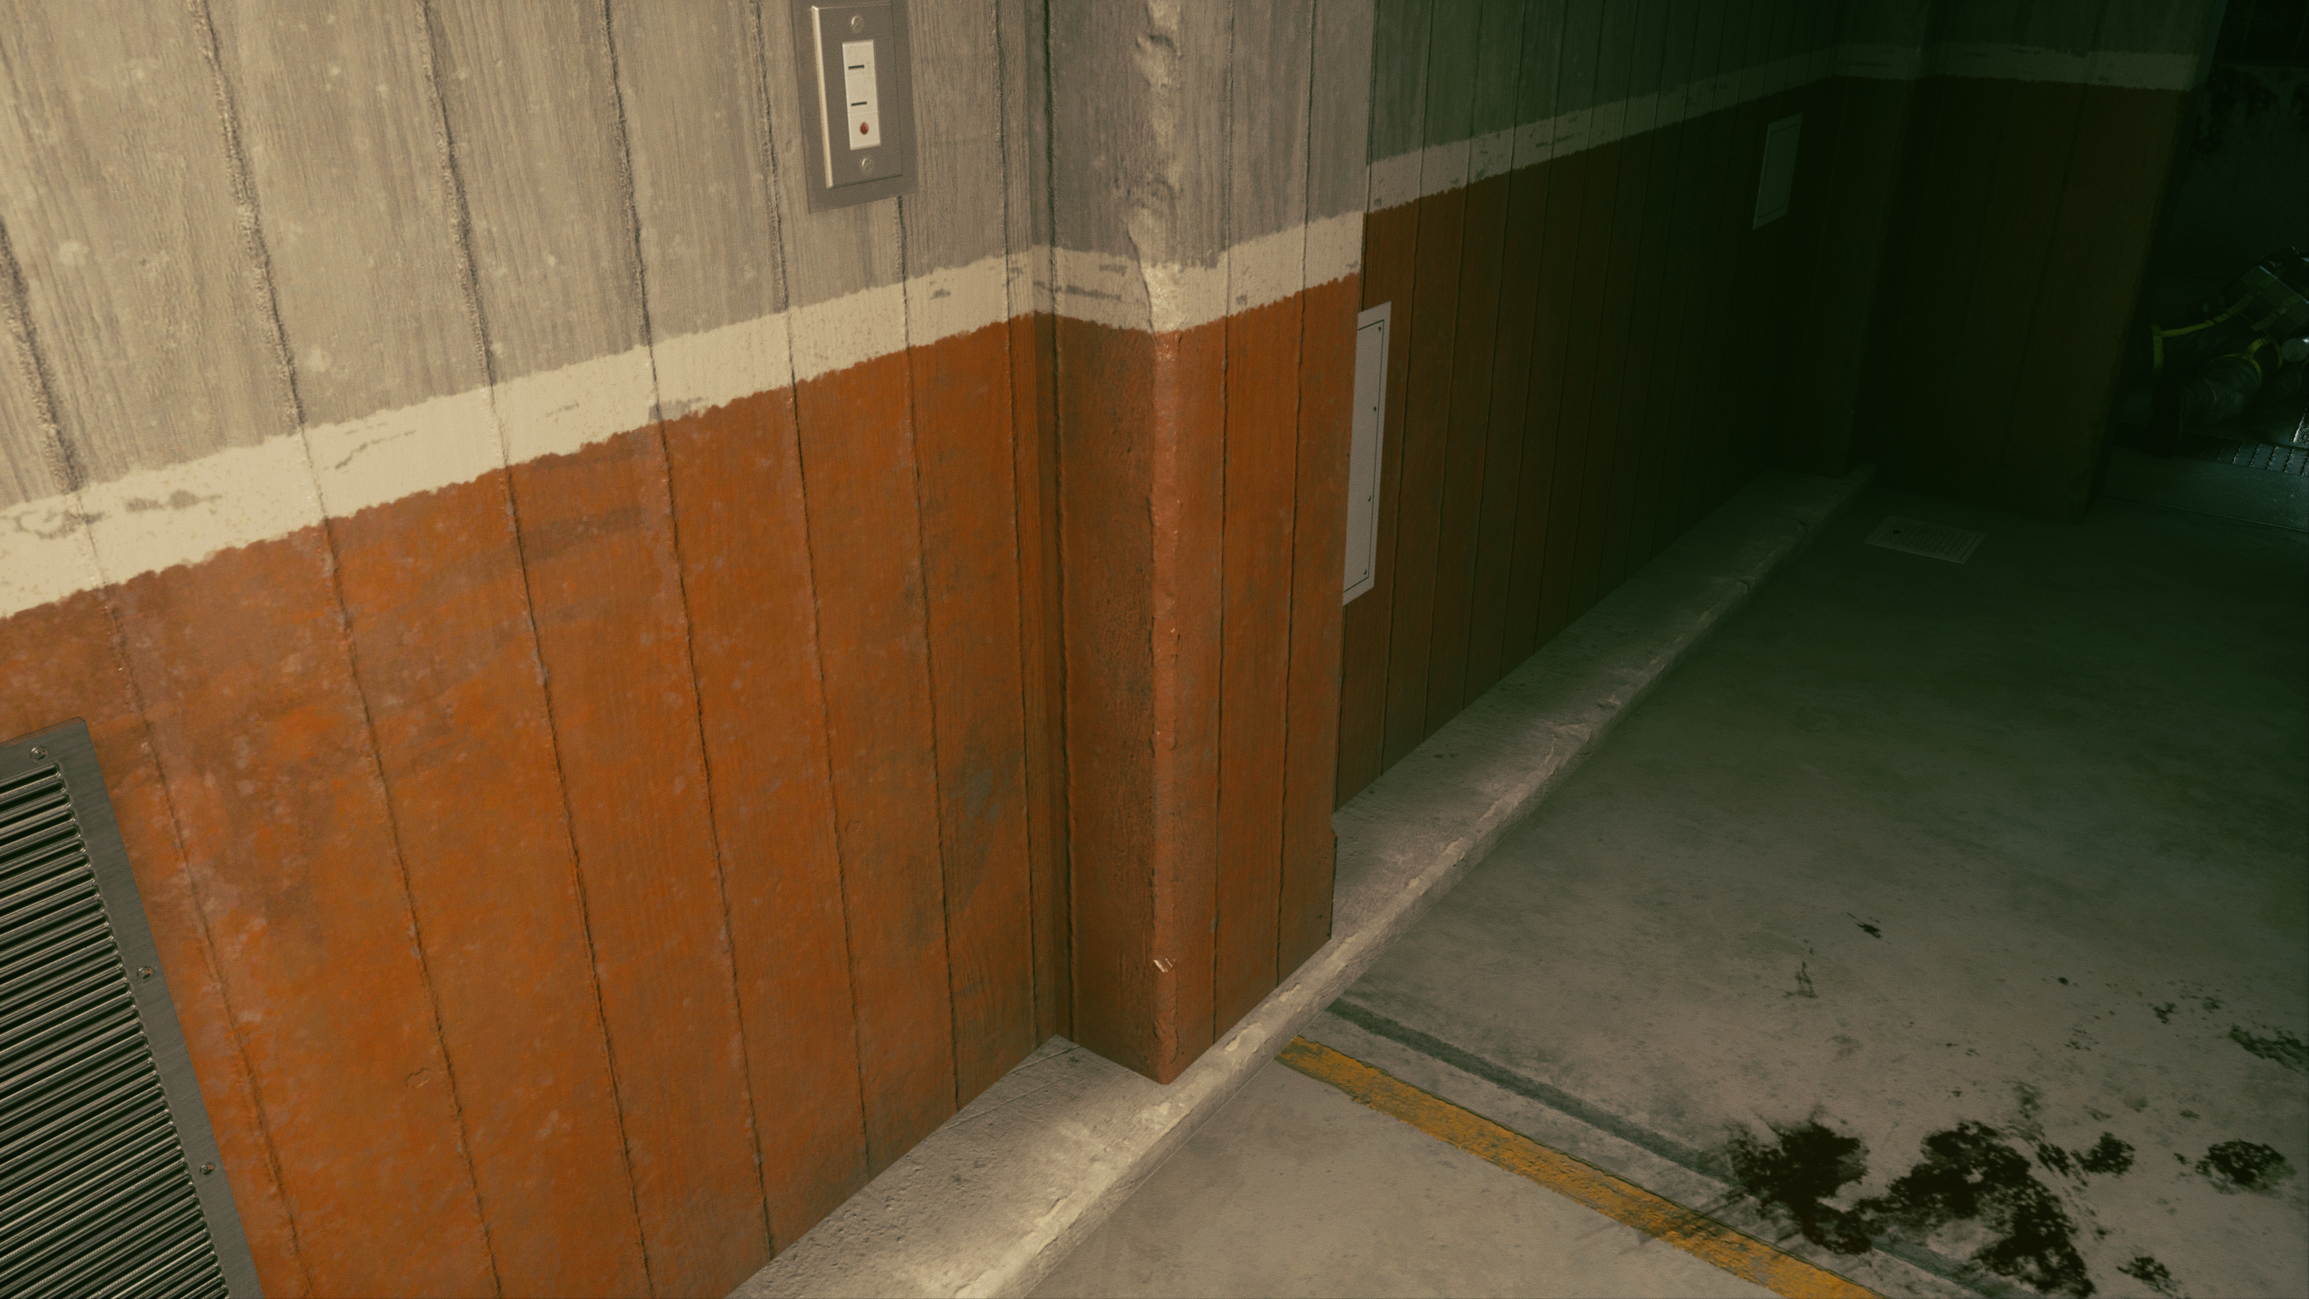
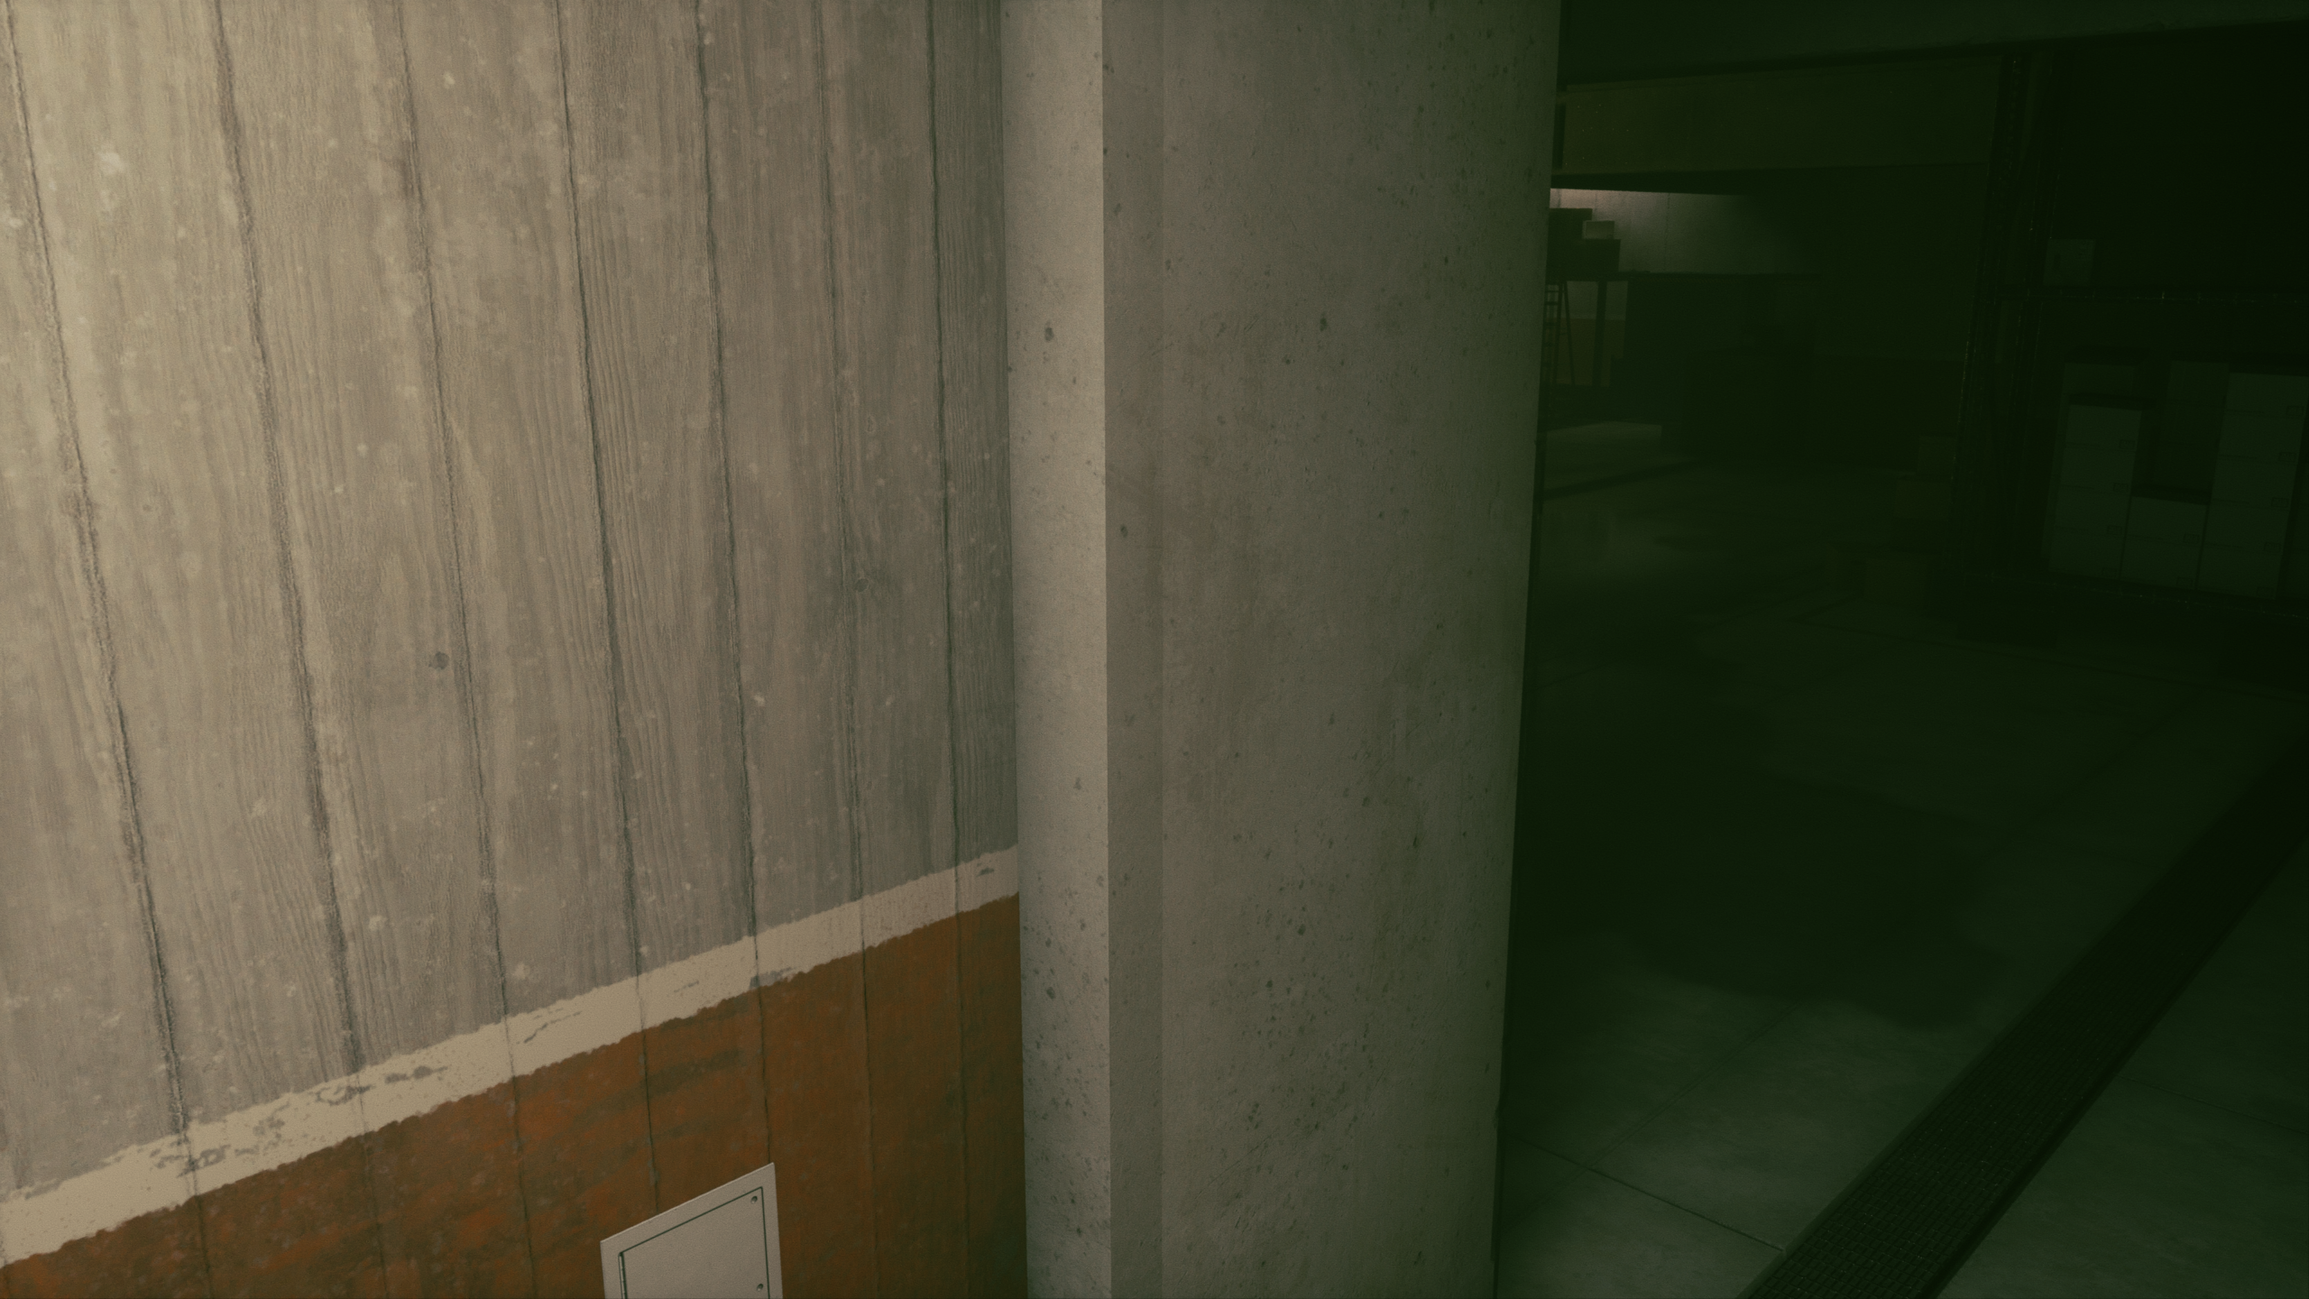
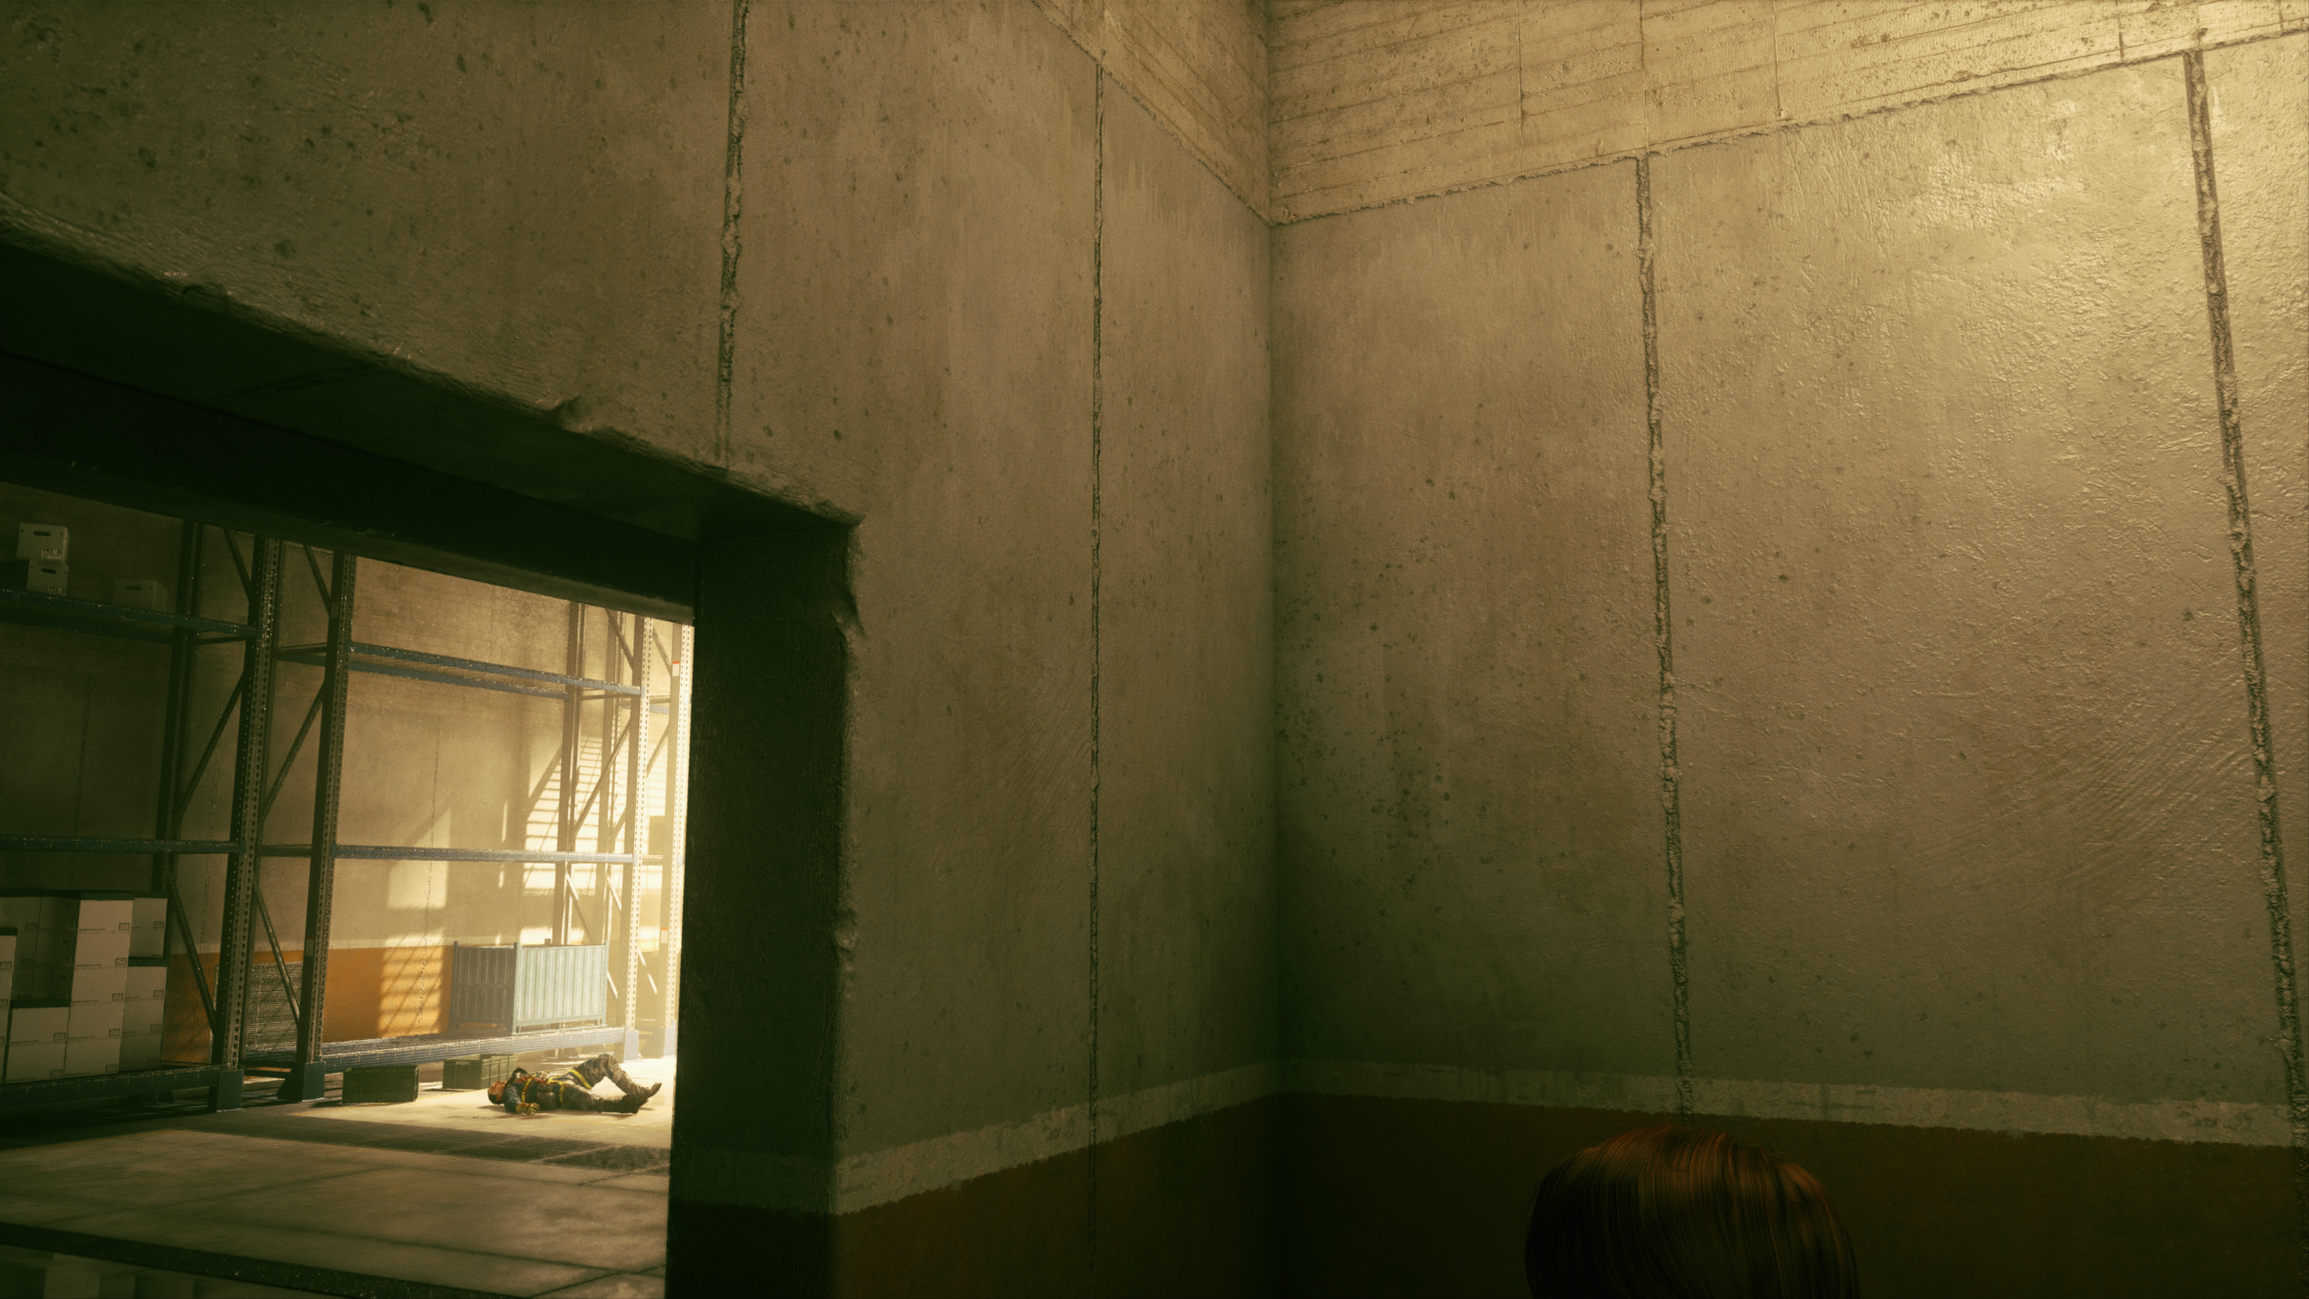
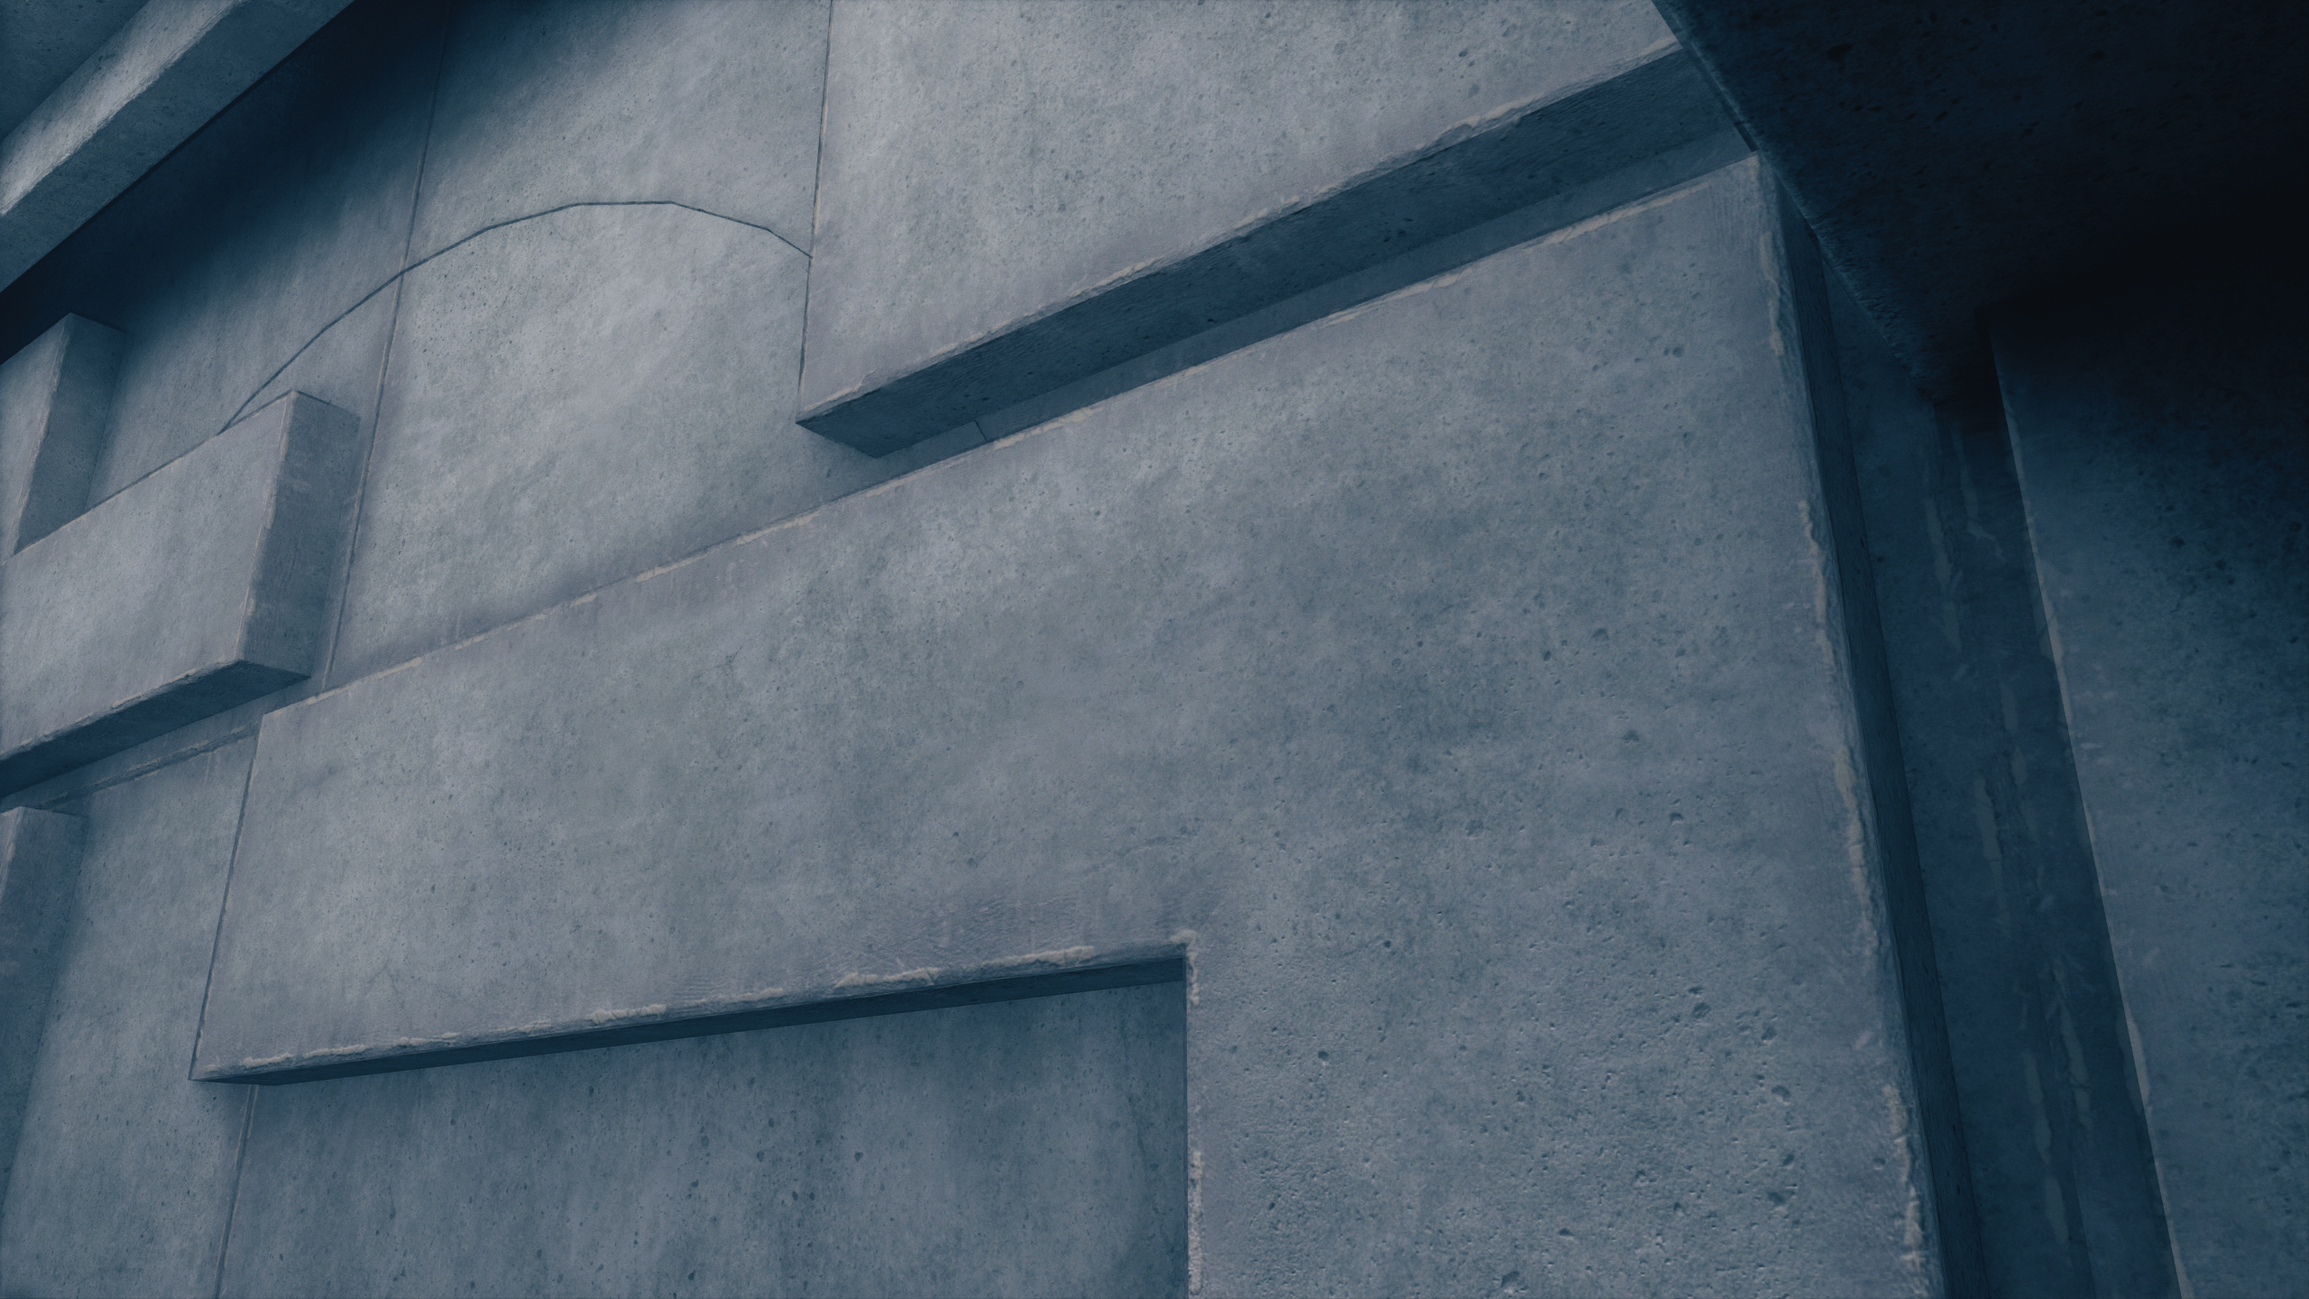
I've noticed in Control there are many concrete surfaces that all have different base albedo and normals, but around arches and corners they've used what I can only guess is some type or trim sheet. The trim normals repeat, but the underlying tiling materials are all unique and have an effect on the trim.
Is this a trim sheet? Is it achieved through another method? Anyone have any suggestions on how to re-create this edge effect?
Comparing to the other edge you can see the difference between a clean untreated edge between faces and the one with the trim applied.
(See images 1 & 2)


Often times it can be seen in an area of a material where there wouldn't be an edge in the tiling. Much like you would do where you simply create this detail in your texture near the edge. (See images 3 & 4)


If you all have any ideas it would be great to start a discussion how to achieve this here.
I've noticed in Control there are many concrete surfaces that all have different base albedo and normals, but around arches and corners they've used what I can only guess is some type or trim sheet. The trim normals repeat, but the underlying tiling materials are all unique and have an effect on the trim.
Is this a trim sheet? Is it achieved through another method? Anyone have any suggestions on how to re-create this edge effect?
Comparing to the other edge you can see the difference between a clean untreated edge between faces and the one with the trim applied.
(See images 1 & 2)


Often times it can be seen in an area of a material where there wouldn't be an edge in the tiling. Much like you would do where you simply create this detail in your texture near the edge. (See images 3 & 4)


If you all have any ideas it would be great to start a discussion how to achieve this here.

Replies
Must be deferred decals using a edge wear trim sheet, applied to angled decals with 2 faces you put on the edges
I imagine this type of workflow must be 10x faster with some sort of script than manual application
I was trying to find a thread about this, but no luck so far. Just knowing what to call it did help a lot! I managed to find an artstation breakdown by Leonardo Iezzi about edge decals.
Thanks Shrike!
Are people using some houdini stuff or is this really done manually?
Is there any trick aside of copying faces and then adjusting the UV?
Unless there's some in-house script/plugin that does it, I've always had to do it manually to modules that would be built into a kit. It isn't terribly bad, but is definitely a task on its own.
In my case, After midpoly modeling/FWN a piece of a kit, I would then grab a strip of the chamfered edges used to FWN, which is usually quick and easy as its perfect quad loops, duplicate them and float them a bit off the original surface, and finally UV them into strips.
From this point, I would then remove parts by adding edges and deleting polygons of that strip to break it up and target areas more.
Houdini would be the fastest way to be honest, just detecting all edges with nothing within a certain range and placing them there. However, placing a chamfer or a couple of edge loops on each corner and then duplicating/split would still be a good method even better if you could just script that in your DCC to take the selection and auto unwrap and straighten then you would just need to slide along either your U or V coordinate for the UVs.