[UE4] Altar of Kings (WoW fan art)
INTRODUCING
Hi Polycounters!
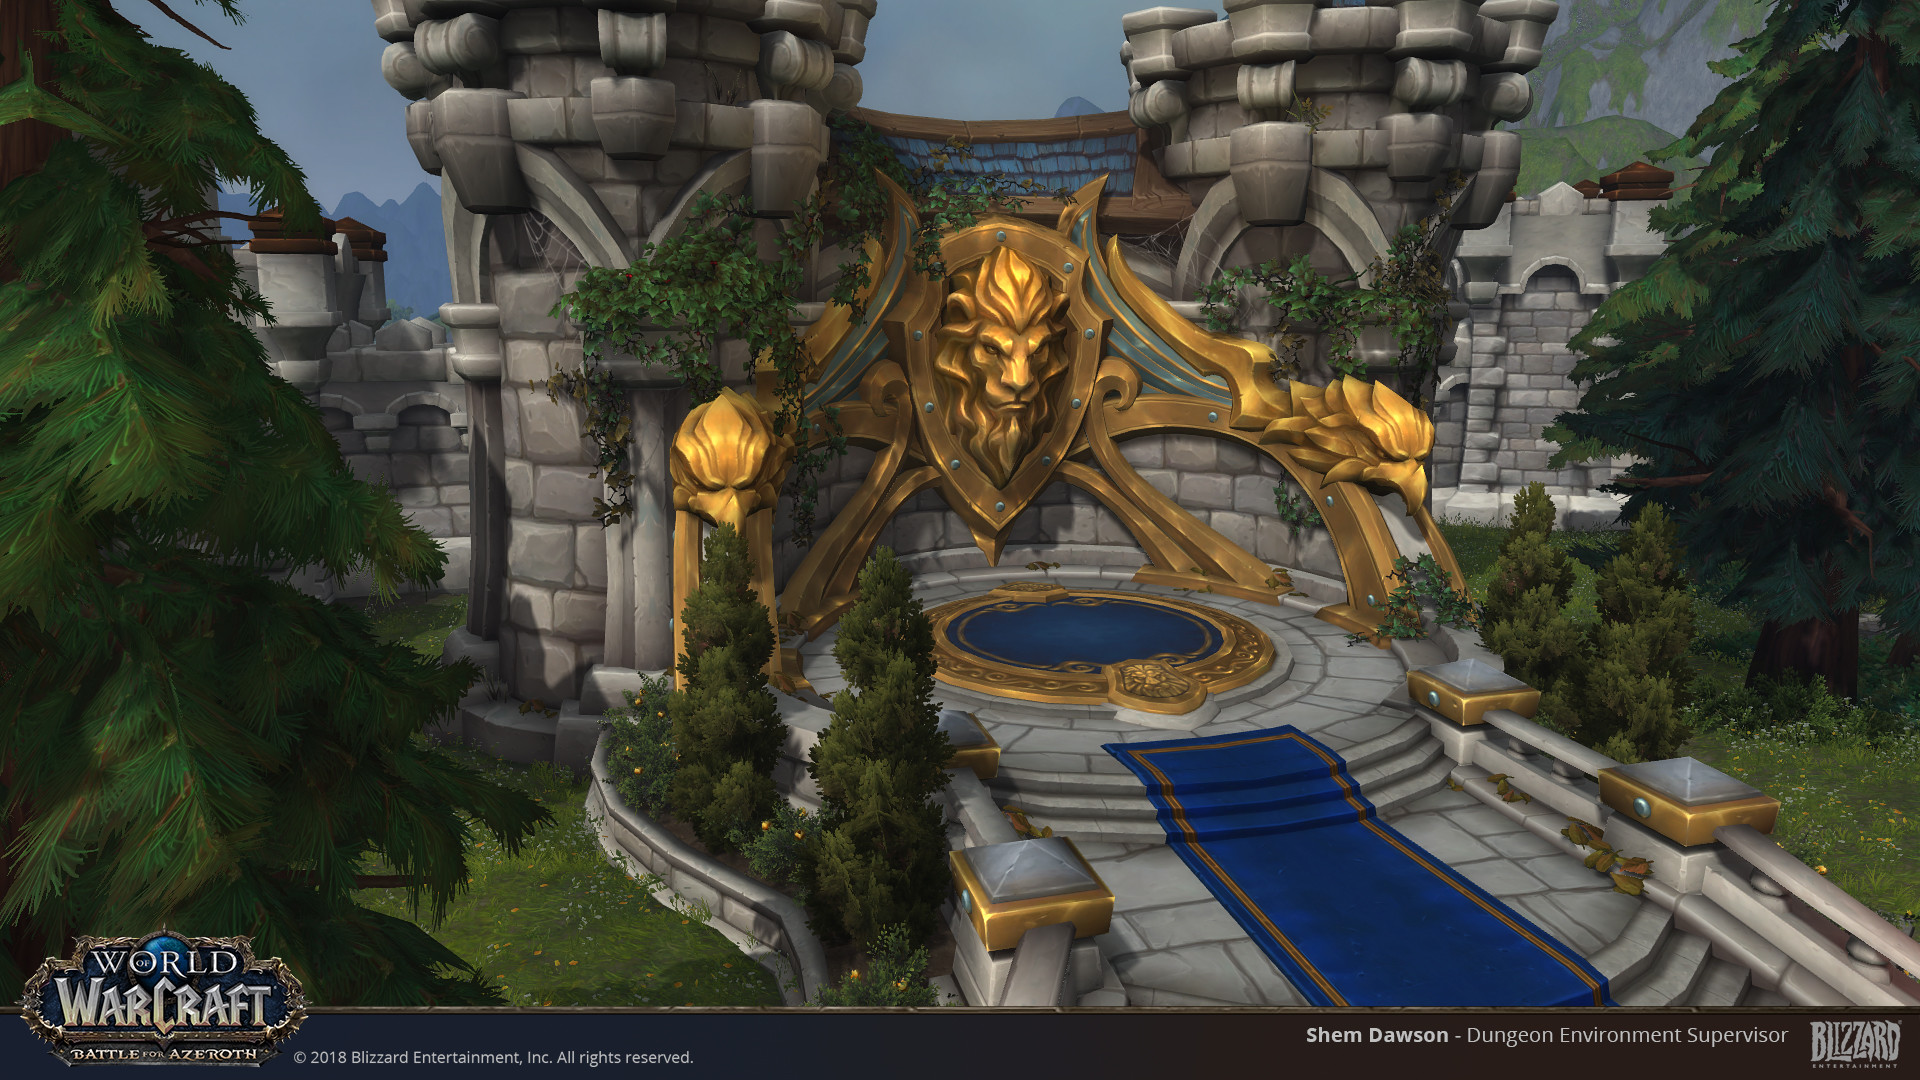
Not so long ago I participated in a small challenge dedicated to World of Warcraft - Classic. The goal was to make props or a small environment from World of Warcraft but using PBR materials. For myself I chose the altar of kings (not quite a classic, but I really liked it).
For the main reference I took the work of Shem Dawson for World of Warcraft - Battle for Azeroth

For the main reference I took the work of Shem Dawson for World of Warcraft - Battle for Azeroth

At first I wanted to make only an altar but over time I decided to fit it into a small environment. Therefore I did not have time to deliver the work on time and failed the challenge :С
But I have already done too much to leave the work unfinished. I hope with your help I can complete it! Lets start.

Replies
BASIC STONE MATERIALS
In my work I planned to use atlases, trims, decals and some unique texturing. Therefore after importing the model into the engine I started creating the first tile textures - stone bricks. In zbrush I made a basic sculpting then textured it in SP. This was my first experience creating tile textures in zbrush but I got invaluable experience from that. For texturing I used only generators with a little manual editing. First of all I wanted to make stylized textures. Here it is:
And in Unreal:
The next step is to create the first trim for stone elements. I had not worked with the environment before and knew all the nuances only in theory. I planned to trim for steps, side columns, and railings. The principle is the same - zbrush, SP (I already created smart material at that time to make my work easier), unwrap in the editor. It turned out like this:
On this work with the basic materials of stone I finished.
LION'S AND EAGLE'S HEAD SCULPTING, CENTRAL CIRCLE
It's time to make the altar recognizable. I never felt like a confident zbrush user, so I was afraid of starting to create sculptures of the head of a lion and the head of an eagle. I reviewed many articles and lessons before starting work. For sculptures I used standard brushes - Move, Flatten, Clay, Pinch, DamStandard and Orb brushes - Cracks, Extreme Polish. It took one day for each sclupture in zbrush. Result:
Without delay, I decided to make a sculpture of the central circle:
When I imported everything into the engine, I realized that the color of the albedo is too dark and patchy. And so far I have not corrected it.
Metal trim sheet is next...
THE ALTAR IS GROWING!
I didn’t take intermediate screenshots all the time, so I’ll tell you right away about this one:As you can see, I made a trim for metal objects. I used it for supports on the back of the altar, a shield under the lion’s head and an ornament around the central circle. For the upper parts of the side columns, rivets and bowls with coals, I used a different atlas. I made coals like other textures, I just added an emission map (with bloom the coals will look much cooler).
I also made grass and ground textures. I made grass in SD since the sculpture would have taken a lot of time, but I did the ground like all other textures. Then I made another version of the transition texture between the grass texture and the ground texture.
Added a tower and the transition between the towers. For them, I had to make three more sets of textures - an atlas for the stone elements of the tower, a trim for a wood and a roof tile:
And the towers themselves:
I made an extension to the altar from ready-made textures, everything is very simple there.
I NEED MORE PROPS!
And then the project began to grow even more. I fenced the territory of the altar with walls. For the walls, I also did not create new textures.The time has come for the plants. I had no idea how to make vegetation! I already thought to buy a ready-made pack with vegetation. But something stopped me and took from the largest - pines. I started with the texture of the bark. Here I had to significantly work with references, since I had not done anything like this before.
I decided to make the texture of the branches in the old fashioned way - draw them in Photoshop. It was very cool, I find myself able to draw with my hands
So here it is:
And complete pine:
To diversify the location and indicate to make it clear that this is an alliance building, I decided to add a banner with the image of a lion to the scene. Then I had to open zbrush again ...
After importing everything into the engine:
Fire by the way I took from the starting content
JUST A FEW SHOTS
And finally, a few shots of what is now: