The BRAWL² Tournament Challenge has been announced!
It starts May 12, and ends Oct 17. Let's see what you got!
https://polycount.com/discussion/237047/the-brawl²-tournament
It starts May 12, and ends Oct 17. Let's see what you got!
https://polycount.com/discussion/237047/the-brawl²-tournament
[Zbrush] Weld & Polygroups
Hello 
So i'm new to Zbrush and i try to follow a tutorial to get the global feeling - workflow of the software.
The thing is that i'm stuck at one point
Let me explain, i just created polygroups (arms+hands / Neck / Head+eyes+nose etc.) This works: i can select one group to work on it.
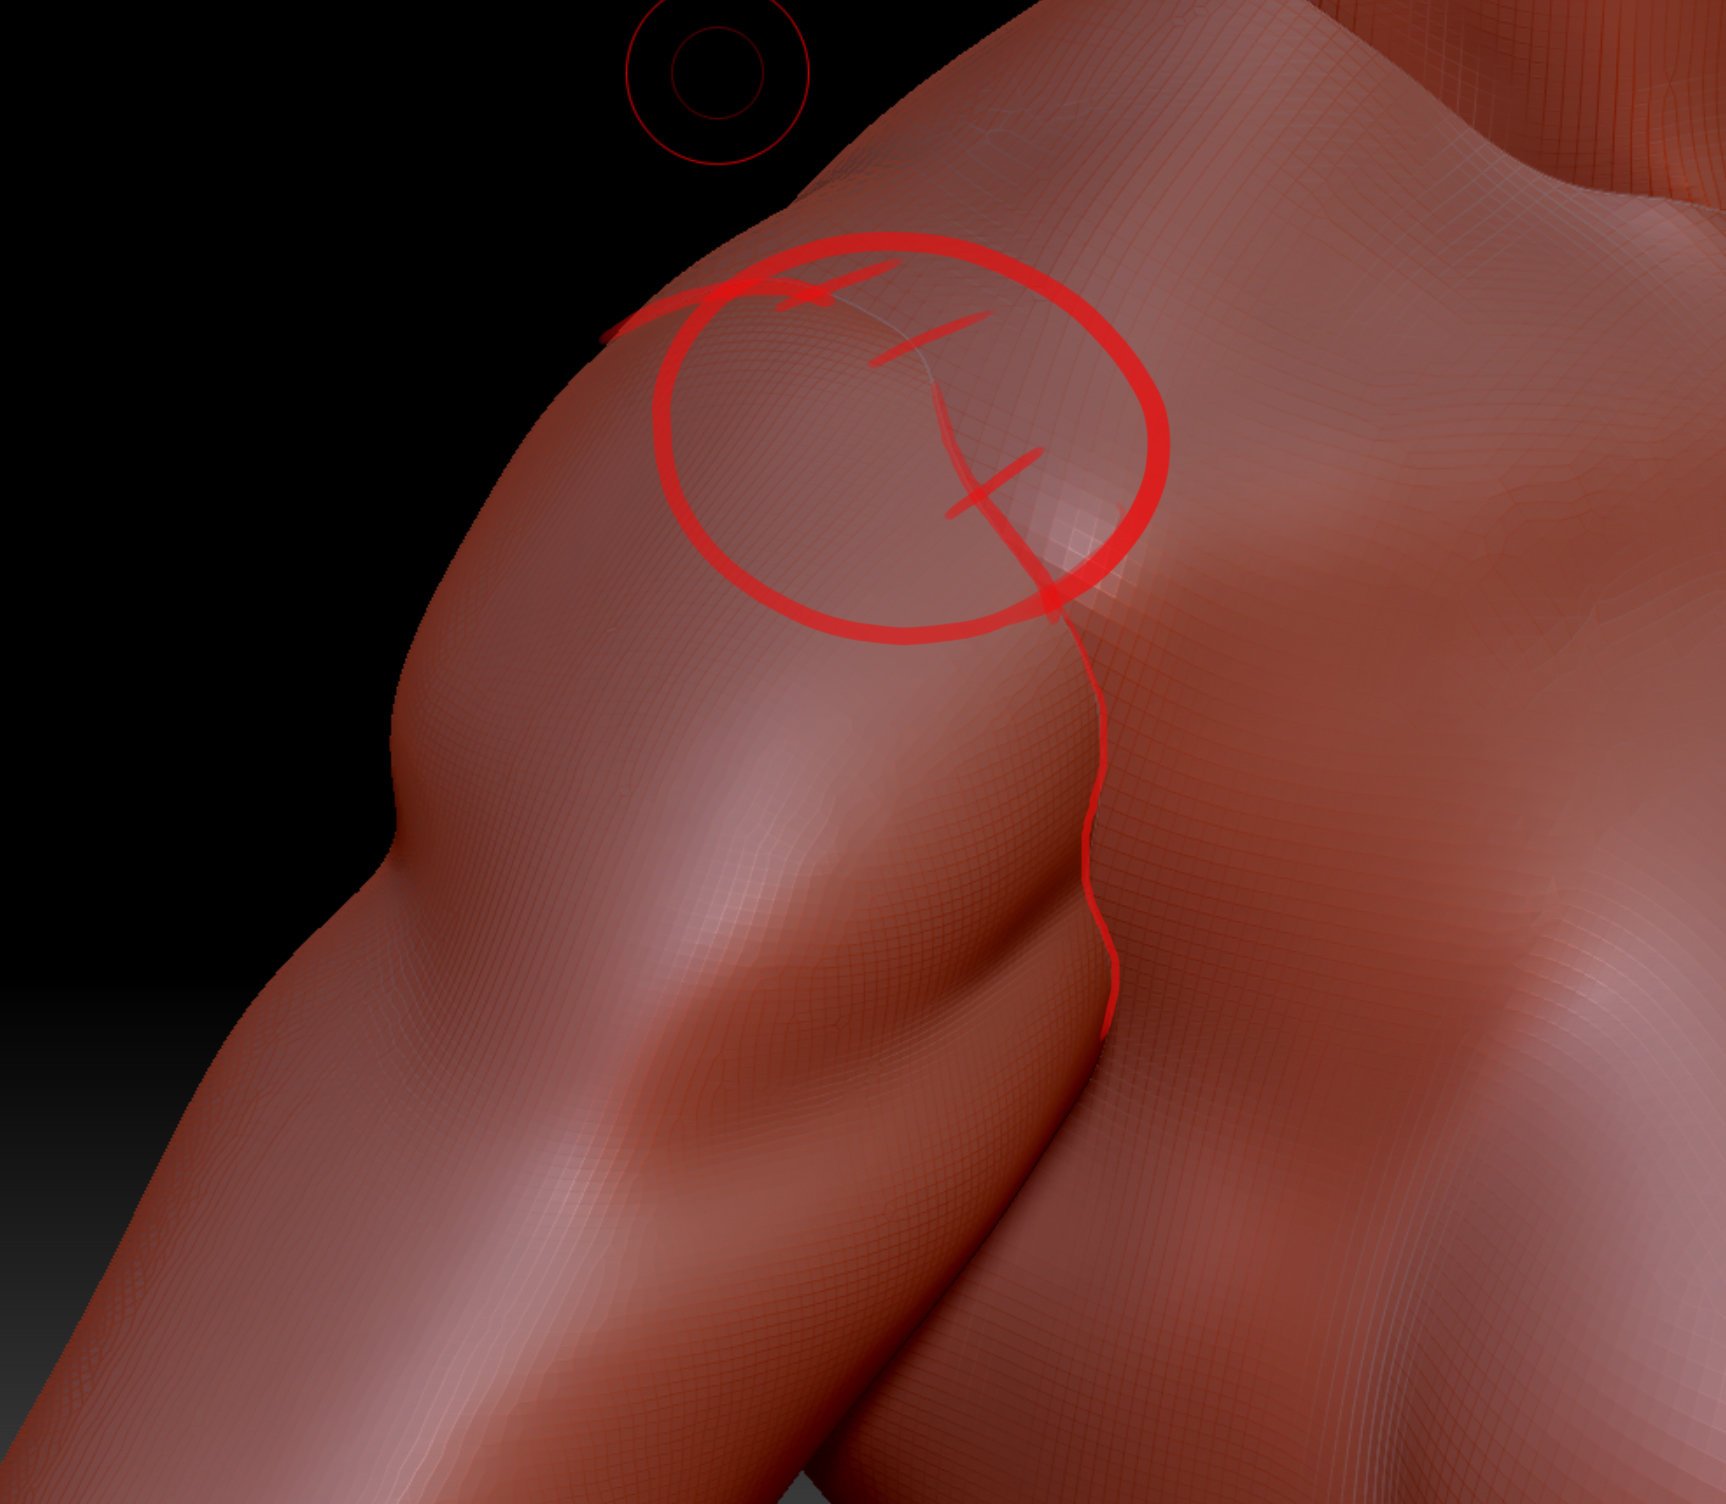
But normally when i click on dynamesh (with "group" button on to keep the polygroups) it should remember the polygroups and weld the whole thing into one subtool right? And here it's like all the groups are not "welding" between each others, see the screenshot to understand what i mean:

So my question is:
How can i get them welded seamlessly (without visible joint) so i can continue scultping, could you help me please? Thanks!
Have a good day,
How can i get them welded seamlessly (without visible joint) so i can continue scultping, could you help me please? Thanks!
Have a good day,

Replies
So i try what you told me, i didn't check the "groups" box before dynamesh and only click on "Dynamesh". (with a resolution of 96) And the result is fine all parts are welded, but at some areas it seems like Zbrush didn't make the difference between two polygroups, here a screen so you can see clearly what's going on:
Is there an option to move up the welding precision maybe?
Anyway thanks again have a great day,
It looks like they only used dynamesh to fuse the deltoids into the arm, rather than fuse the whole arm (triceps, biceps, deltoids, etc) into the torso. To do this you would first need to separate all the arm components into a different subtool (separate from the rest of the body) before doing any dynameshing. This way you can dynamesh just the arm and nothing else. Then you can visually isolate the arms using Solo mode, or by turning off the visibility of the body subtool.
As for the fingers:
First make sure they're not overlapping and touching each other (the ring finger and pinky look like they might be, though that could just be the angle of the screenshot). When you dynamesh, especially at lower resolutions like you're using, you'll want to try and space your digits out so that they won't get fused together. Try having them span out wide as if they're trying to palm a basketball. Once you're done with dynamesh and have it turned off for good then you can always go back and pose the fingers closer together again.
Alternatively you could use Live Booleans to fuse shapes together with a precision that doesn't rely on any resolution value. You could turn every polygroup into its own subtool and do it that way, or break it into more manageable pieces (maybe separate each finger into its own subtool, dynamesh the cylinders together, then live boolean those back into the hand). Once the pieces are booleaned together I'd use Zremesher to clean things up a bit, but if you plan on dynameshing it later on then you'll still run into the issue where the fingers are too close together.
Good day to you!
Your picture of the whole model looks fine. If they are separate subtools merge them run dynamesh (with groups off) and start sculpting.
What cryrid wrote about the fingers was right on. Either raise the resolution of your dynamesh or spread the fingers out for sculpting. It doesnt matter if the fingers are separate polygroups, if the resolution of the dynamesh is too low and the meshes are too close they will join.
Have fun!
Thanks have a nice day!
https://www.youtube.com/watch?v=OBnTUDXJhdc