______________________________________________________________________
original post below
______________________________________________________________________
Hello again! Jill Valentine Fanart - A Mod for Resident Evil 2 Remake
UPDATE 1-2-2020
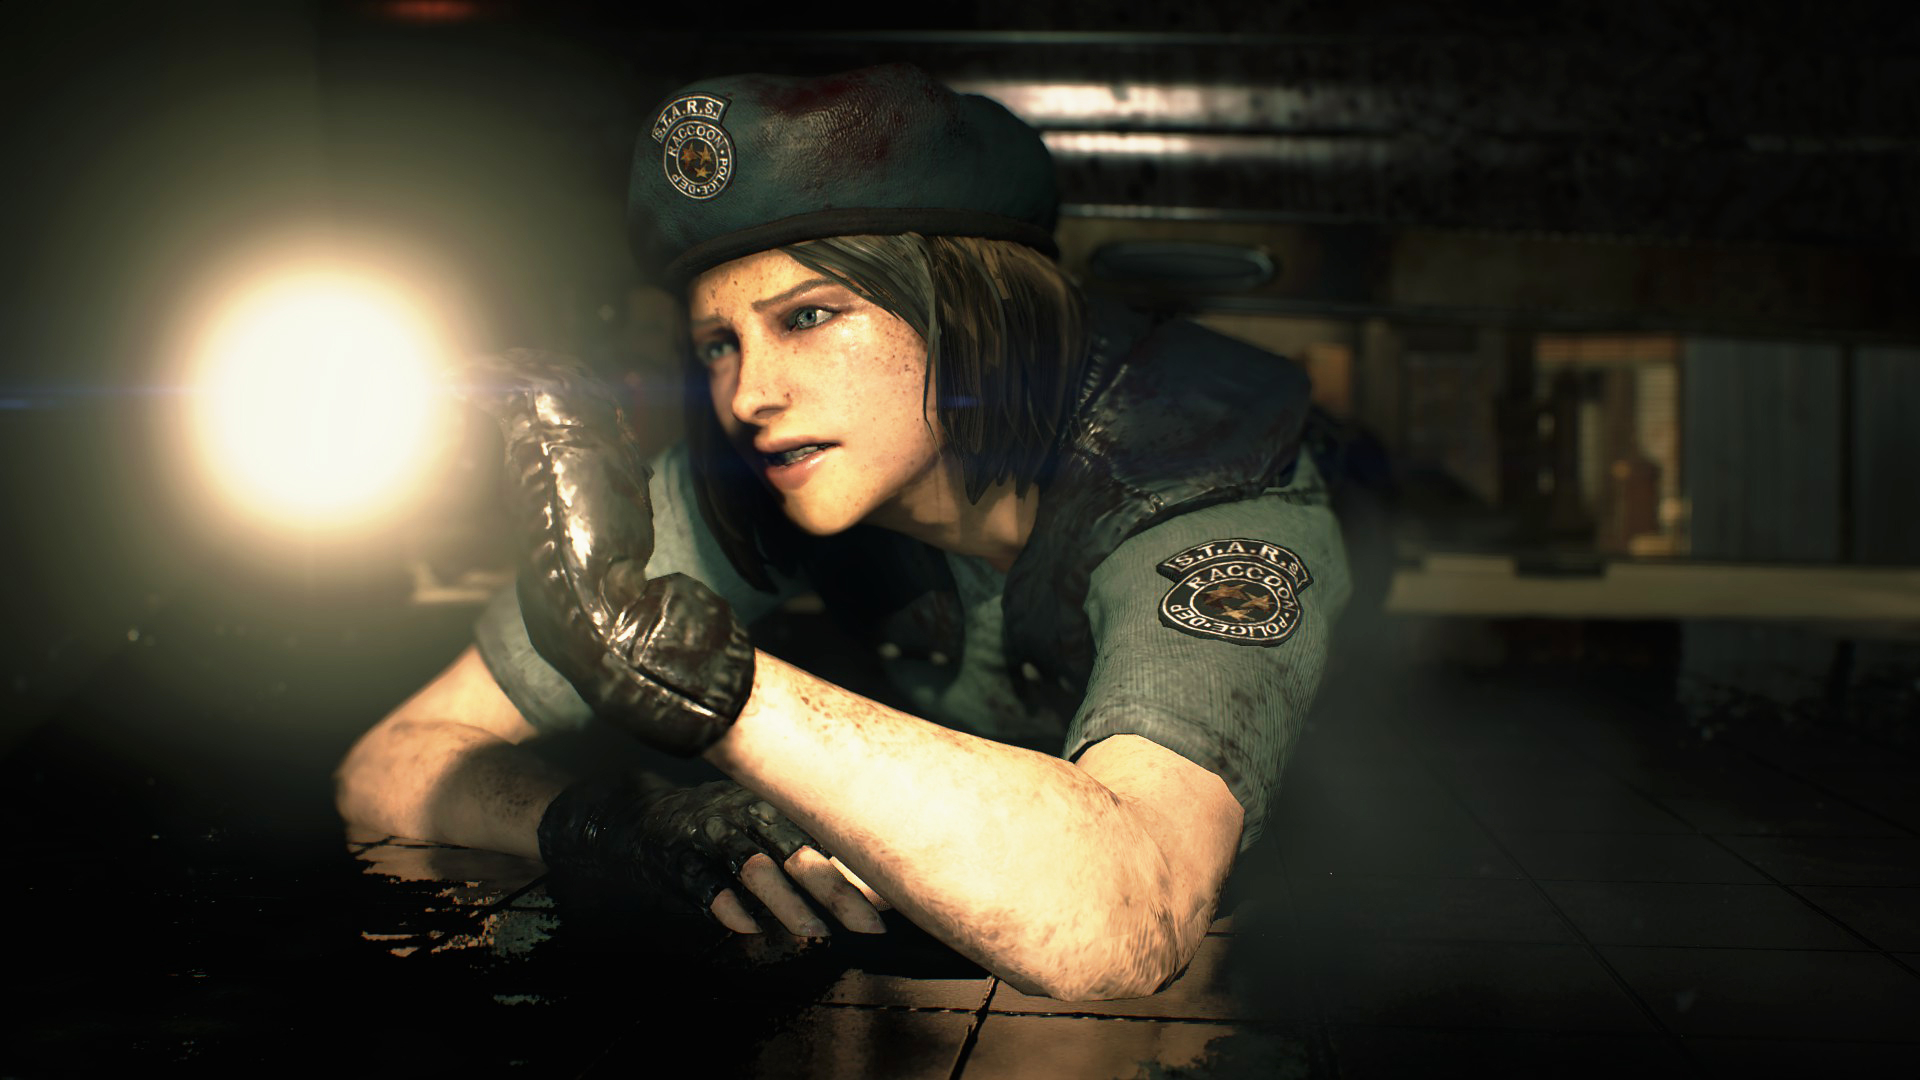
JEEEZ what a wild year! A lot had happened that prevented me from working on this character further during the middle of 2019, but I was able to return to Jill at the end of the year and took her all the way to completion! Which means she is now an unofficial costume mod for Claire (her military DLC costume).
https://www.nexusmods.com/residentevil22019/mods/428
To be clear I do not own the rights to this character or have any professional affiliation with Capcom or the Resident Evil franchise (I would like to be though haha!). This project was done because I love Resident Evil, the games (especially RE4 and the Gamecube remaster of RE1) shaped my childhood in a huge way and I really wanted to give back to the RE and survival horror community. Assets created by me are Jill's body, clothing, face, radio, holster, Samurai Edge Pistol (not shown in the mod), beret and hair. Her rig, animations, eyes, eyelashes, eyebrows and mouth are from the base game's Claire model and were not made by me. All other props, weapons, and environmental assets shown in the upcoming screenshots are also from the base game and were created by Capcom and their art teams.
I wont break down the entire mod process. Other's have explained it better so I will just post links to the free to use mod tools and tutorials showing how the import/export process works. What I will show is the character pipeline I had to follow in order to turn my fanart piece into a playable character!
So without further ado, lets get started!
Enter the survival horror that is Resident Evil modding!


This final image is Jill being presented in Marmoset Toolbag 3 - Eyes, eyelashes, eyebrows and mouth are all from RE2's Claire model, all other assets in the scene were created by me.
I'm starting on my next portfolio piece and it's gonna be Jill Valentine! I've been in love with the Resident Evil 2 remake and I'm itching to make a model of my favorite RE character with the hope of meeting that REmake quality bar.
WIP: 3/13/19


I'll be posting breakdowns and progress screenshots over the next few days!
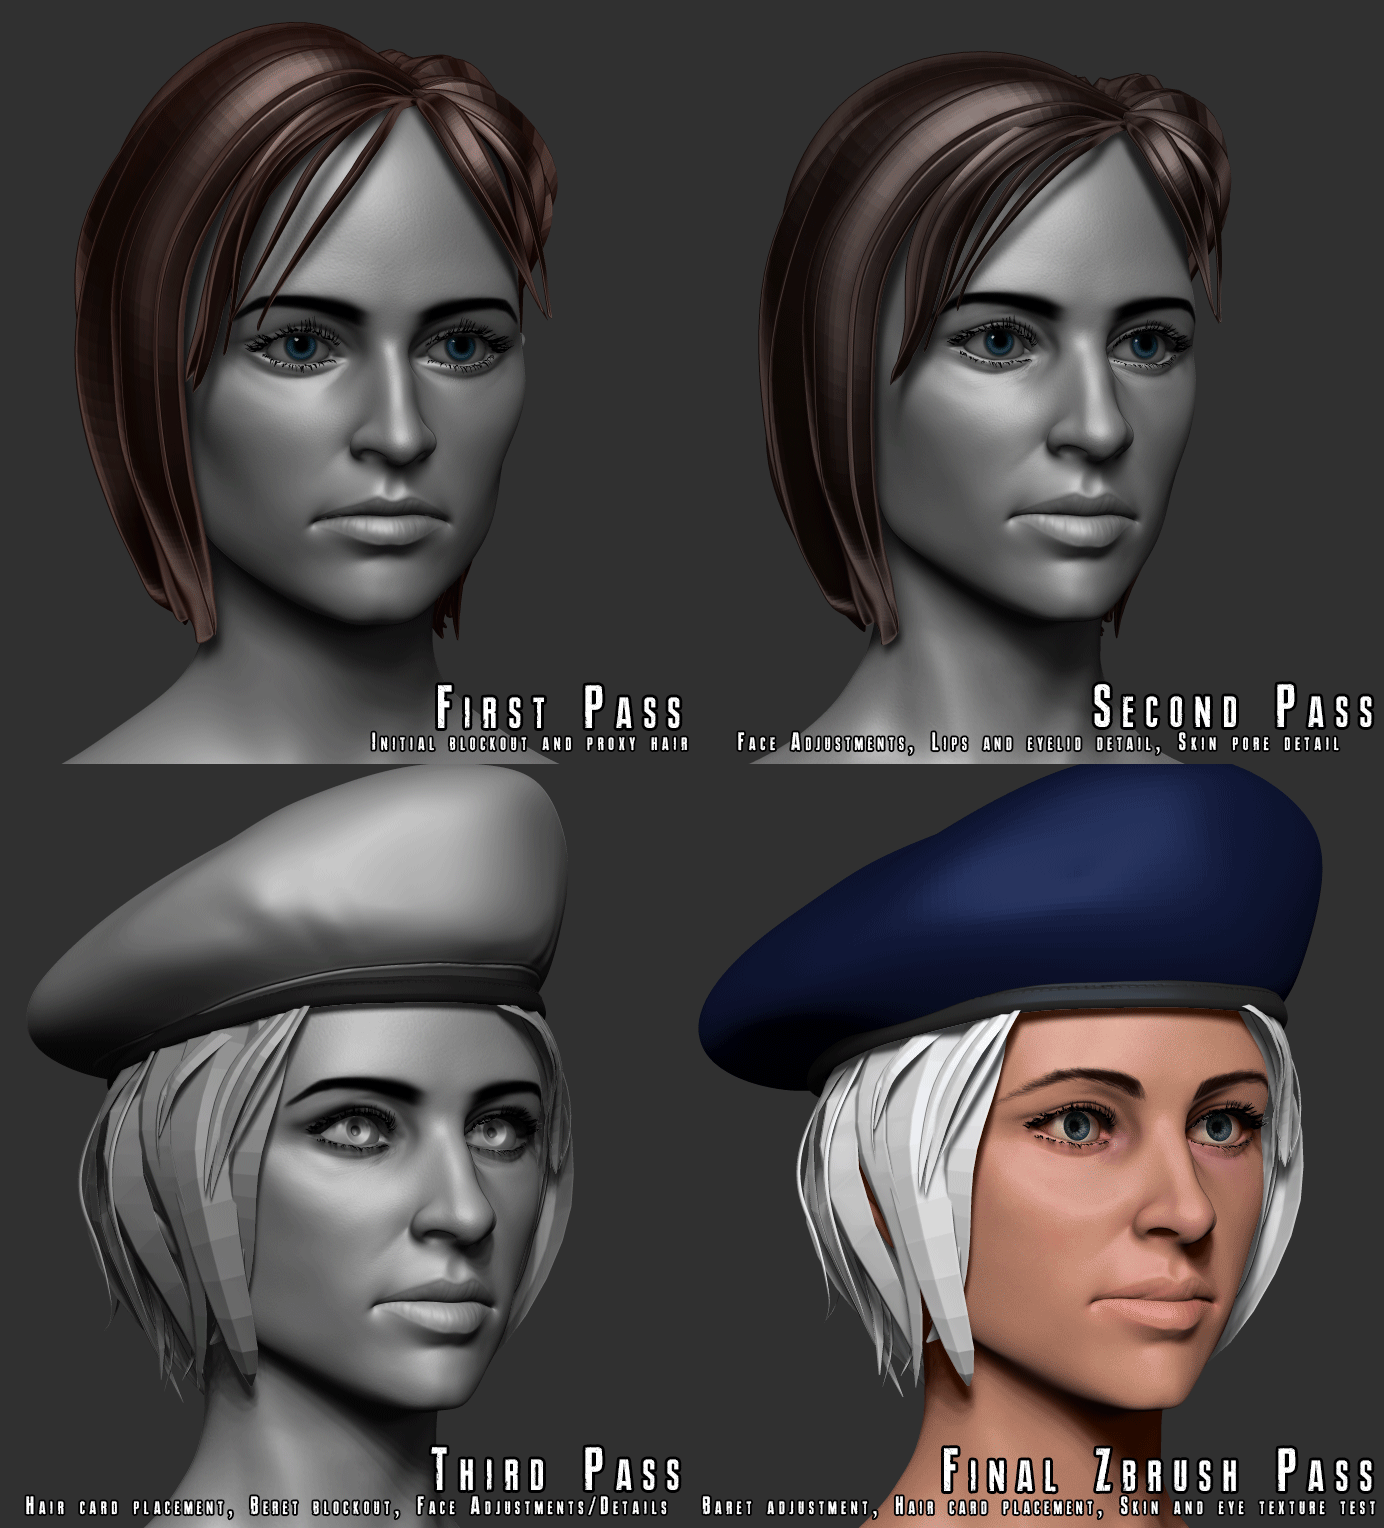
Zbrush progression:

Wireframe:

I still need to do an optimization pass on her topology. Some of her flyaway hair cards are way too dense. Otherwise though I'm pretty happy with her wireframe.
I'll be working on her upper body and clothing next!

Replies
Thank you so much for the feedback! I'll create a few more cards for more flyaways the next time I get back to her head. I'll tweak her eyebrows too and add in a few more cards to give them more depth/breakup.
I started blocking out her top today and this is the result so far!
I started working on her body and got the low poly of her top textured with both clean and bloody variations.
Next step will be getting her arms and gloves sculpted and creating a bloody/dirty variation of her skin material.
Hope you all like the progress!
I scanned an old boot I had for a base, then retopologized it and textured it in Substance. I had to place a water bottle in the boot to give it a "foot-like" object to conform around, and I covered the exposed bottle and top of the boot with masking tape so the HPZ could take a better scan. Simple but effective lol!
Next up will be her pants and arms.
And the raw scan!
Pants were blocked out in MD. I'm still learning this software but, even though I'm no sewing expert I was able to get a good base to sculpt off of:
I also have just finished her Radio and I've started on her Samurai Edge pistol.
I use a lot of floating geometry in my high-res to bake lots of bevel and seam details. I really like that technique and I think the results are pretty great. I will post a tutorial on how to use floaters for texture baking later for those that are unfamiliar with the process.
And Here's the current state of Jill!
I've tweaked some textures to make some of the grunge and blood look a bit less "generated" and more appropriately placed, especially around the boots, pants, and face.
The test rig I used on her broke some stuff (I just used mixamo) but I'm not too concerned as I will build a proper rig for her once I have all her props made and placed.
And I just finished texturing her pistol! I hope you guys like the results!
Here's the artstation submission with some more pics and a marmoset viewer - https://www.artstation.com/artwork/dOg2J3
Here are some of the materials and alphas I used:
https://www.artstation.com/sengdahl/store/1RjR/gun-smart-materials-pack-vol-3
https://www.artstation.com/jronn/store/Bn5/zbrush-sp-390-hardsurface-alphas-vol-2
and
https://www.artstation.com/jronn/store/kl/zbrush-sp-325-hardsurface-height-alpha-tutorials-vol-1
Initially when I made this Jill model, I had not planned on importing her into RE2. The project was started before the game came out as fanart and I had no idea how high poly the meshes were going to be in the actual game (especially in the face which will come to haunt me later lol). But once I saw the RE3 Remake trailer I decided to dive back into this project to finish what I started and take on the challenge of modding her into the game.
Resident Evil 2 Remake is not mod friendly. RE engine is proprietary and only Capcom devs have access to the tools required to make new skins. Instead I would need to replace the Claire (Military) DLC costume as it had the best base meshes to replace - A body mesh with pathing that allowed for cloth detail-normals to be masked on appropriate UV shells, (will get into later), A head mesh with DLC specific head textures, and a Hat/hair mesh.
In short - the only way to mod RE2 is to overwrite existing meshes and materials.
While researching the Claire (Military) mesh I encountered my first challenge - Materials and texture sets.
Imagine this scenario comes up during development. You are making your character/prop and you are allowed 3 materials to work with initially. Things go along fine until you're AD calls a meeting and tells you that the texture budget has changed from 3 materials to 1 per character. UHOH! This means you'll have to re-pack your UVS all over again into a tighter space. And what about your textures? will you need to redo them? will you need to go into photoshop and cut/transform EVERY shell to match the new UV shell arrangement? Nope! There is actually a very easy way to rebake your textures with little effort in Maya's rendering tools.
1) Arranging old textures for easy re-baking - For me I had 4 materials with 2K maps that I needed to condense into one material with 2K maps. EASY MATH! 1 4K map can accomodate 4 2Ks and so I was able to arrange each original map into a quadrant of a 4K canvas in Photoshop. The following example is how I arranged all the Diffuse maps. I did the same process for the normals, metalness, roughness, and AO maps
Technically I could've stopped here BUT the texel density is ALL wrong with things like the boots having just as much density as the pants, and more density than the shirt!
I also combined the arms, shirt, pants and boots into One single mesh (named in the below screenshot as "OldUVs") and arranged the UVs on my old Jill mesh to match this new texture arrangement. With snapping turned on, everything snapped into place perfectly.
And here is the now combined body mesh in maya after applying the new diffuse map
2) Create a duplicate of your model, apply a new base material and start re-packing UVs!
Both meshes are right on top of one another. The old original mesh is hidden for now. On this new mesh (named NewUVs here) I started repacking all the UVs while correcting texel density to get this:
3) Time to bake! A ) Unhide your original mesh, B ) switch to 'Rendering' menus, C ) Select Lighting/Shading>Baking>Transfer Maps
4) In the new window that opens up follow the fairly straight forward prompts: A ) Target Mesh section - select the mesh with new UVs in the viewport or outliner and then click "Add Selected" button. B ) Source Mesh section - Select your old mesh and click the Add Selected button. C ) Diffuse color map should be selected (even for transfering a normal/roughness/metal...etc map!), choose the output folder/filetype, UNCHECK Maya common settings (checking this will wash out the colors of your new textures), select the output resolution (my budget was 2K). Bake when ready!
And here were my results! Pretty much a perfect projection of the old diffuse texture onto a whole new UV arrangement! Redo the process again for every other map (Normal, Roughness...etc).
*** NOTE - Only apply the normal/roughness/AO...etc maps to the diffuse color channel on the material of the old mesh as shown below. I've only achieved good baking results this way. You'll also notice that your new textures do not have dilation/edge padding. This can easily be added using XNormal's Photoshop Plugins, or by importing these textures into Substance painter and exporting them out with shell dilation/padding.
Some of the new texture results:
With all the baking finished I needed to save out my texture sets in the format that the game requires (DDS) with alpha channels. The diffuse/albedo map required the metal map in it's alpha channel, and the Normal map required the roughness map to be in it's alpha.
Another shader labeled ATOS in the game files called on a few other textures. The ATOS file used the red channel for translucency (SSS I think), Green channel for Opacity (not important here but required when doing the hair textures) and the Blue channel was for AO.
There was also a Wetmask file which applied wetness to the character whenever you enter wet areas (rain/sewer). The wetmask was very simple, just white for maximum wetness and black for areas to stay dry. I just used my roughness map with a noise filter applied and levels boosted for the wetmask.
And that's all for now! I will update this post again to show the breakdown of the next big challenge - Rigging and Weight Painting! I hope some of you found this information helpful and interesting!